1. Step One
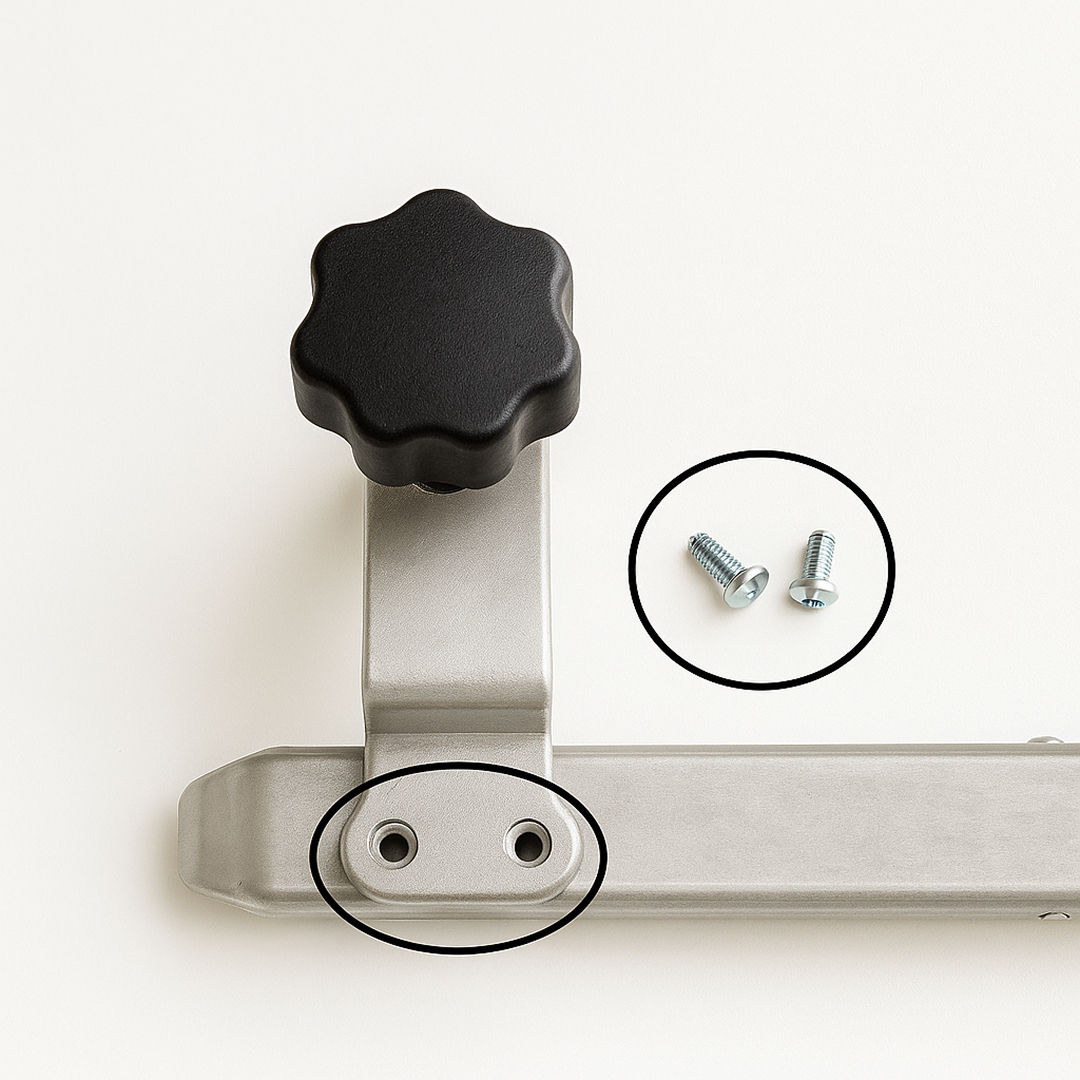
Remove the two tiny screws on each side of the main body and place the casters over the holes.
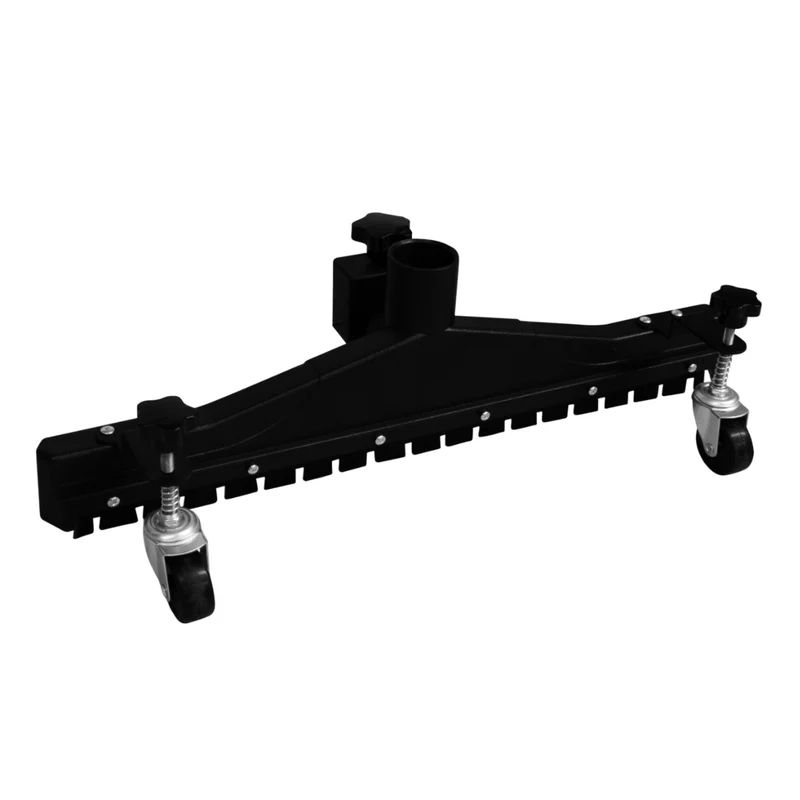 Instructions by monstershop 80L Industrial Vacuum Floor NozzleThe 80L Industrial Vacuum Floor Nozzle by MAXBLAST is designed for efficient wet cleaning of large areas like halls, shops, and stockrooms. It features adjustable casters for uneven floors, easy attachment and removal, and is a labor-saving device ideal for cleaning companies or individual use. Ensure to read the safety advice and assembly instructions before use. Product Information80L Vacuum Floor Nozzle AttachmentKeep your floors looking brand new with this industrial vacuum attachment which makes wet and dry vacuuming easy! Great for any professional cleaning company this vacuum lets you fight dirt on a commercial scale.
Simply attach the nozzle to the bottom of a MaxBlast 80L Vacuum and glide across all floor surfaces.
Don’t worry about back ache as this attachment means you can push the vacuum around by the handle bar saving you from arching your back!
View product (opens in new tab)
GPSR InformationUK
EU
Materials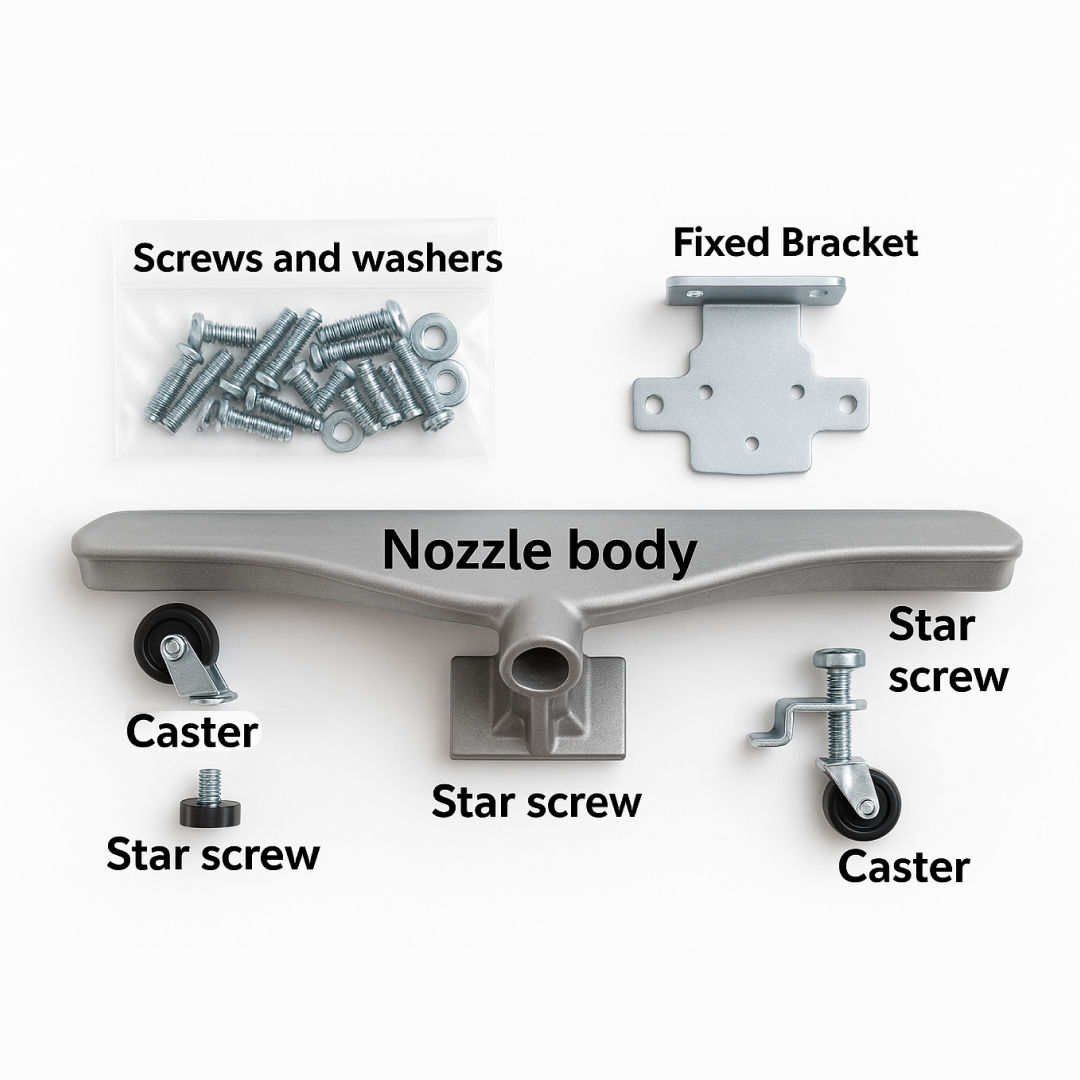 1Nozzle Body with Start Screw 2Casters 3Screws and Washers Bag 4Fixed Bracket 5Star Screws 1. Step OneRemove the two tiny screws on each side of the main body and place the casters over the holes. 2. Step Two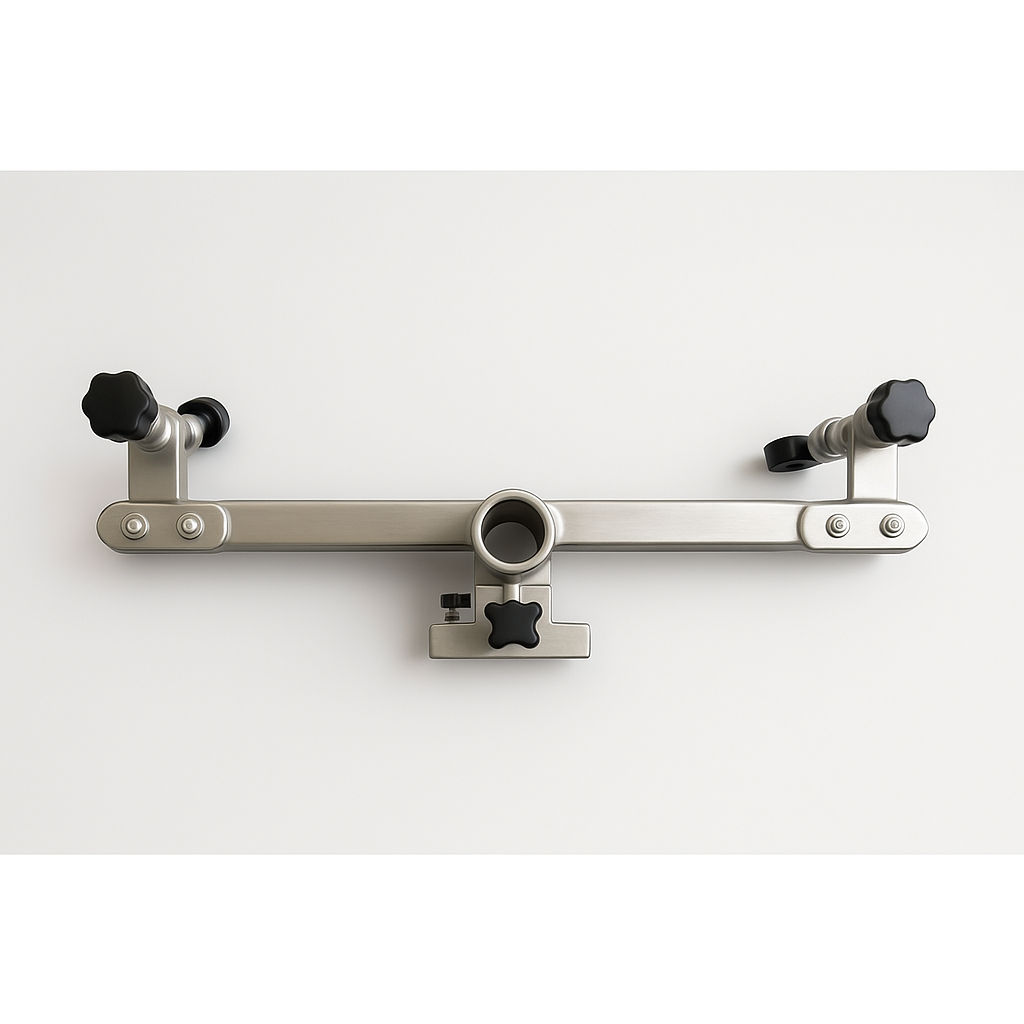 Replace the screws. Two on each side. The casters should 3. Step Three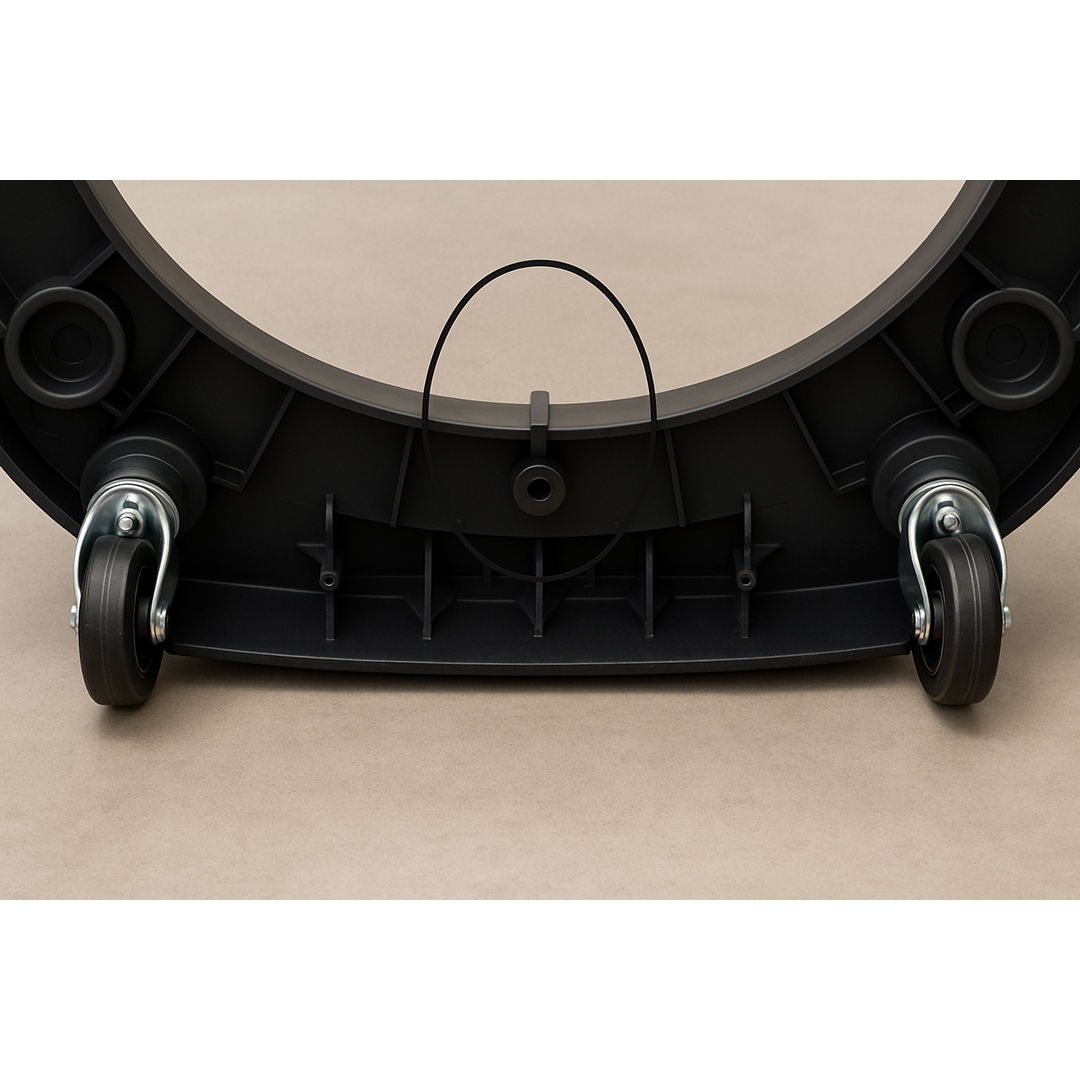 Remove the vacuum from it’s pedestal and turn over care- 4. Step Four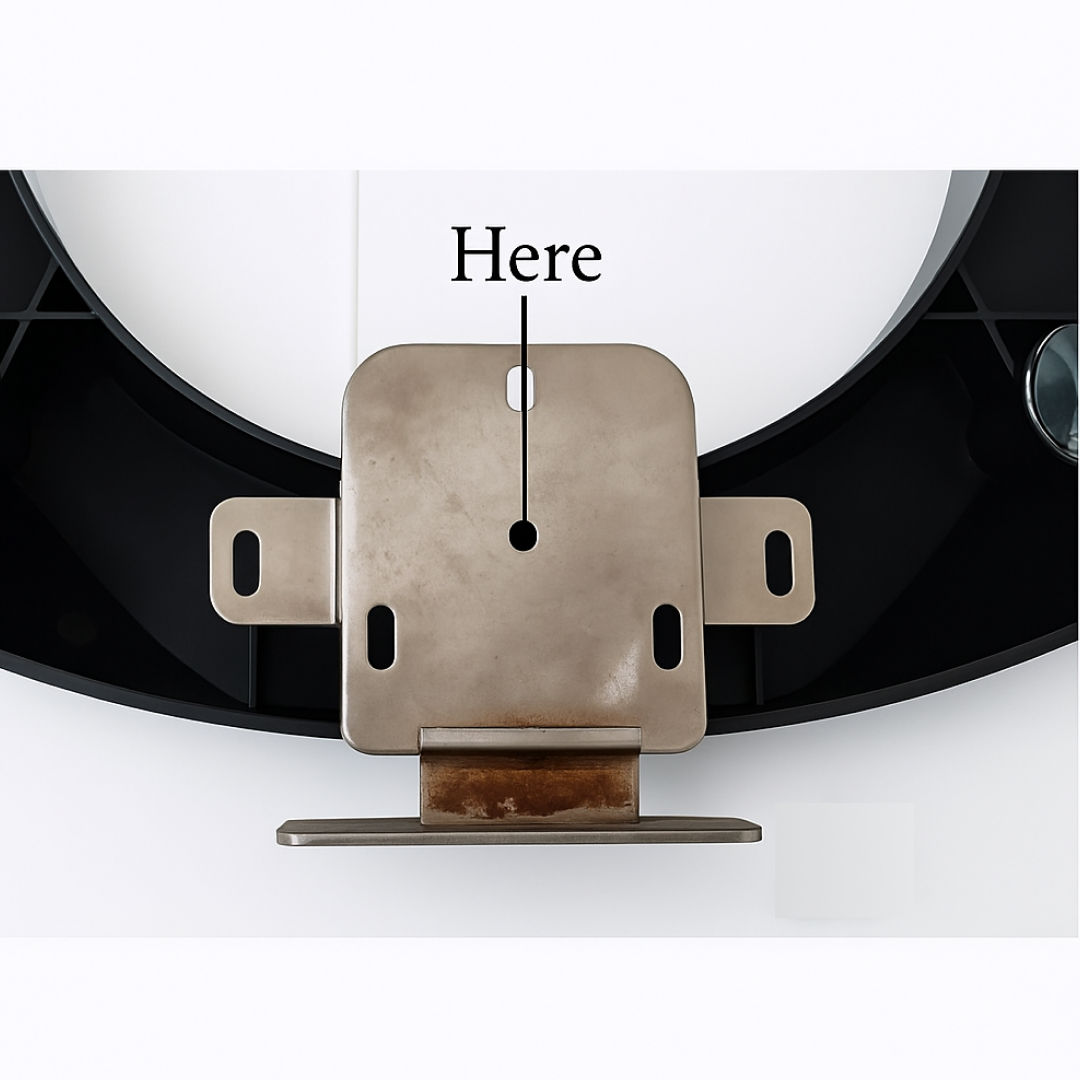 Place the Fixed Bracket over the hole in the very middle of 5. Step Five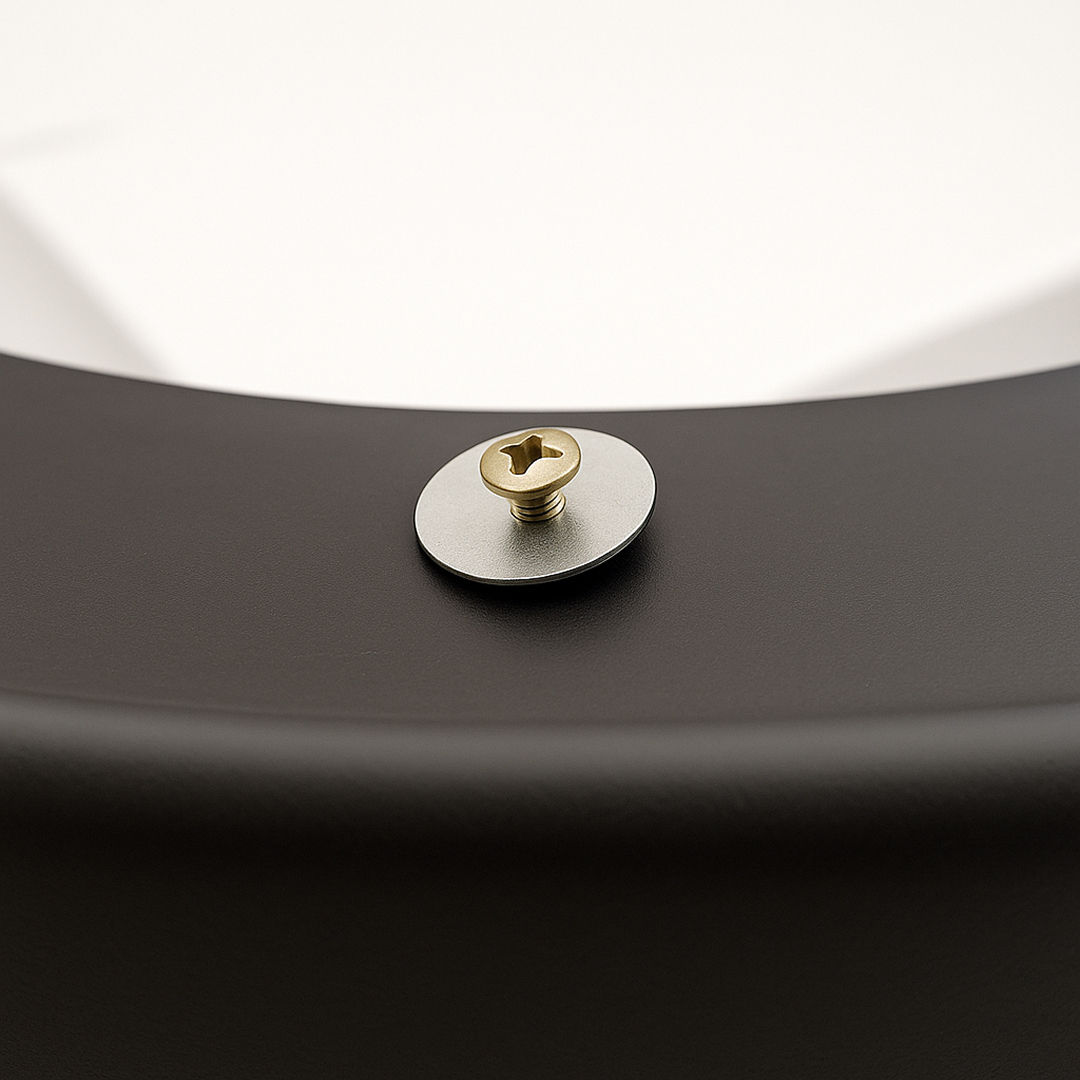 Take one of the included screws and a washer and place 6. Step Six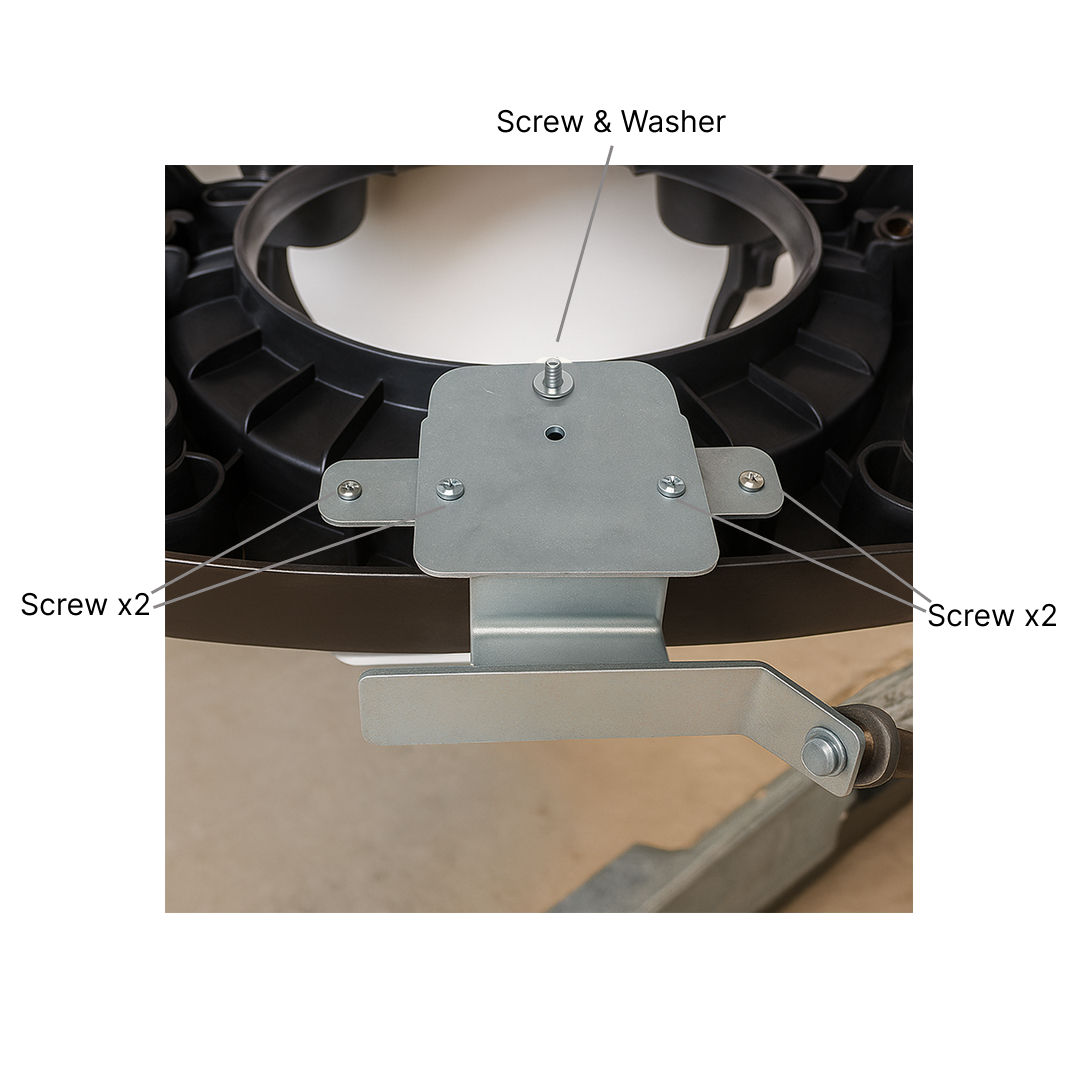 Secure the fixed bracket with four screws and one 7. Step Seven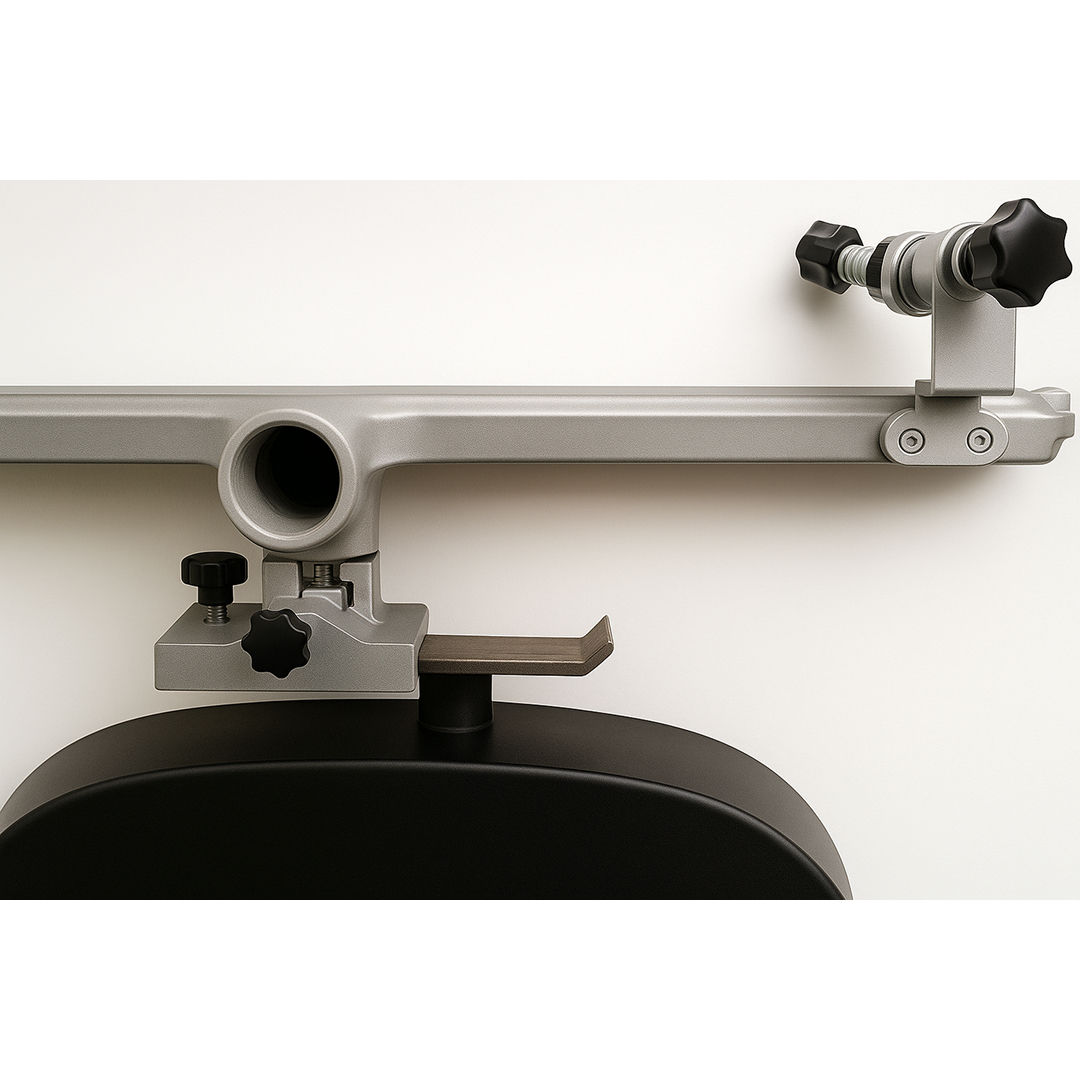 Slide the body of the nozzle onto the fixed bracket 8. Step Eight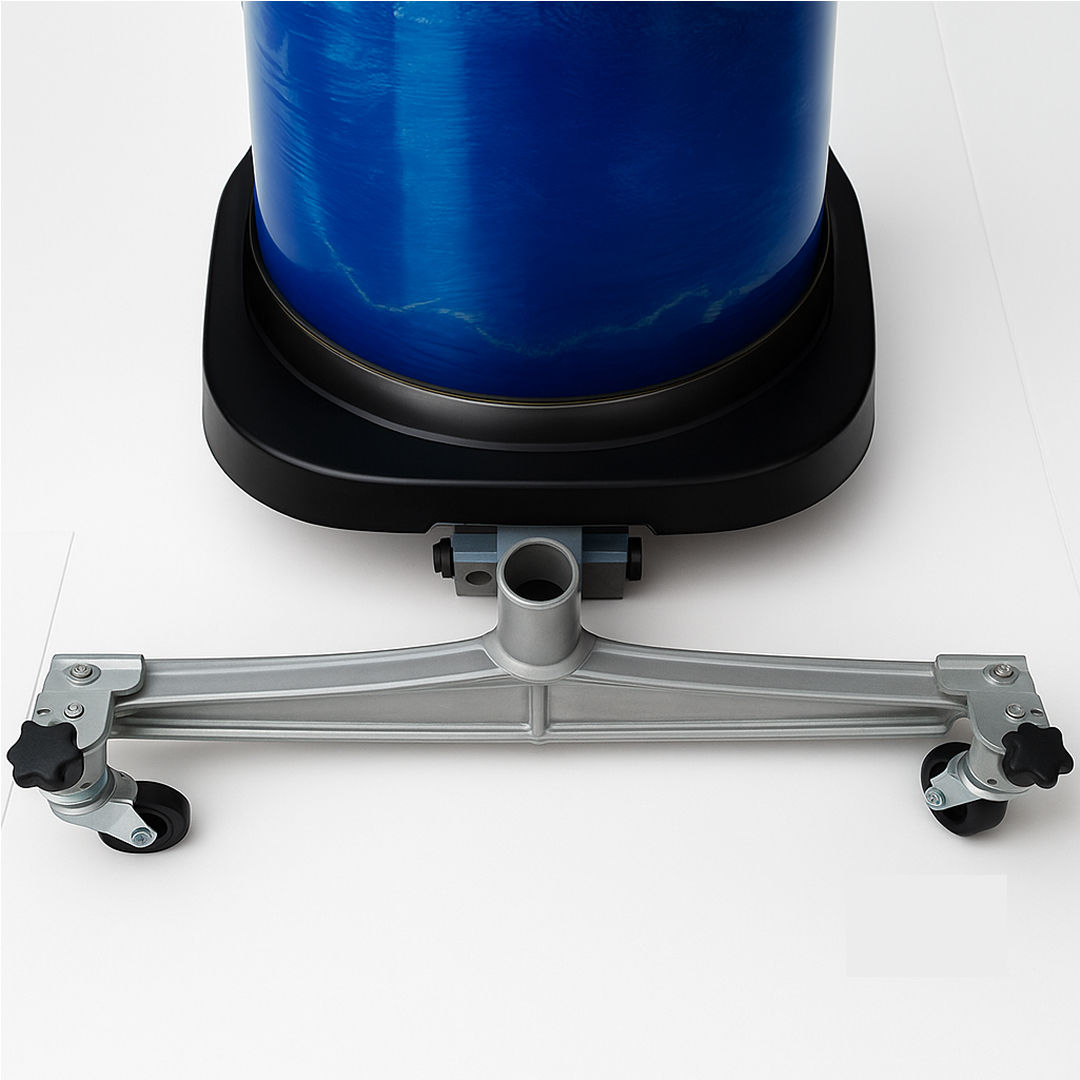 Adjust the star screws above the casters to 9. Resolution GuideQ: There are parts missing from my order. A: If there appears to be any part missing from your package contact our Q: The vacuum has lost suction. A: Ensure the vacuum is empty, the filter is clean and there are no Q: The caster wheels aren’t moving smoothly. A: Make sure the wheels are clean. Remove the nozzle attachment from Please read through the guide below if you have any issues or faults with For all other issues please contact our Customer Support department via |