1. Using Adhesive
(Please note – if using this method, some damage to wall and panel may incur if you wish to remove at a later date)
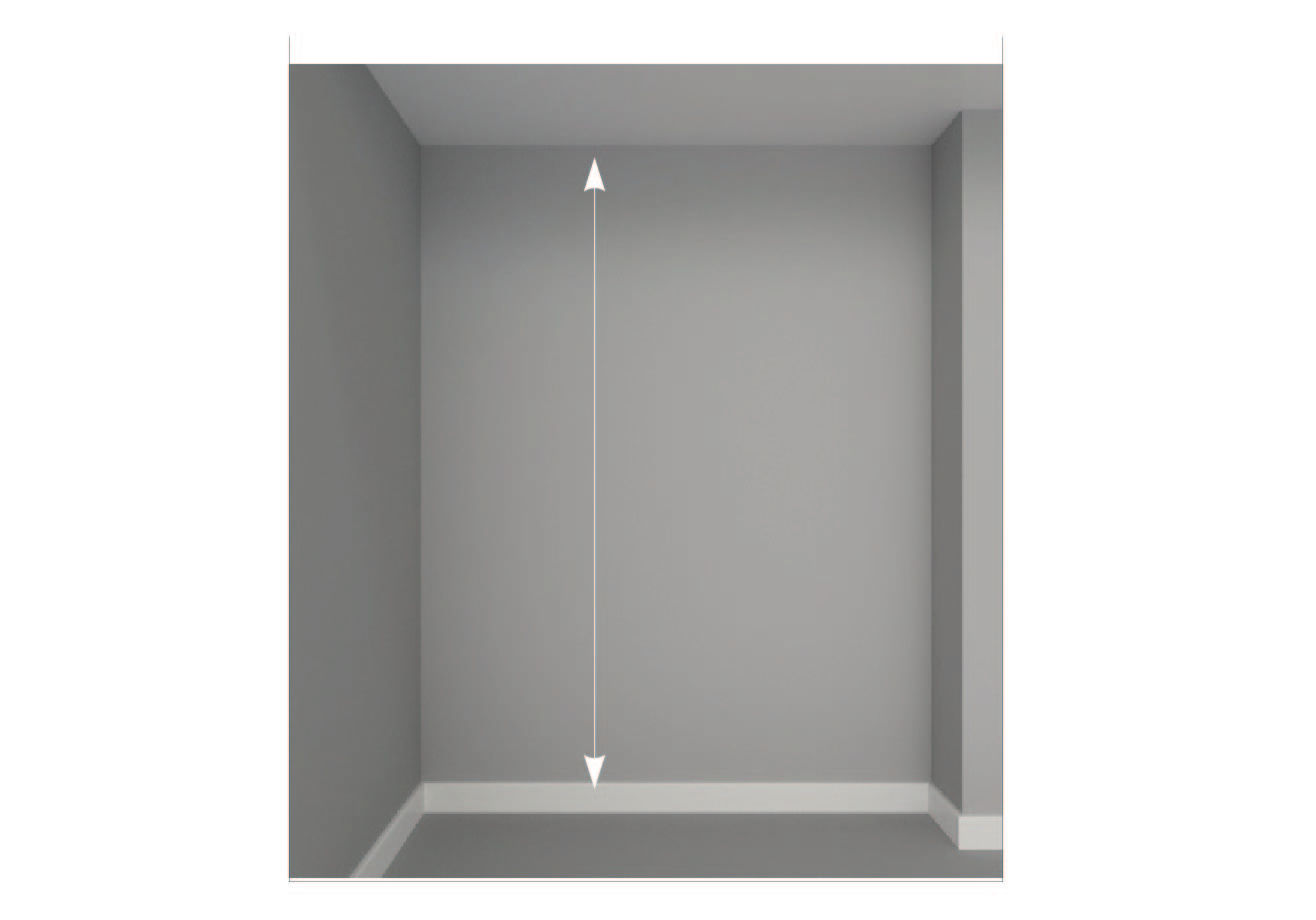
- Measure vertical distance of wall
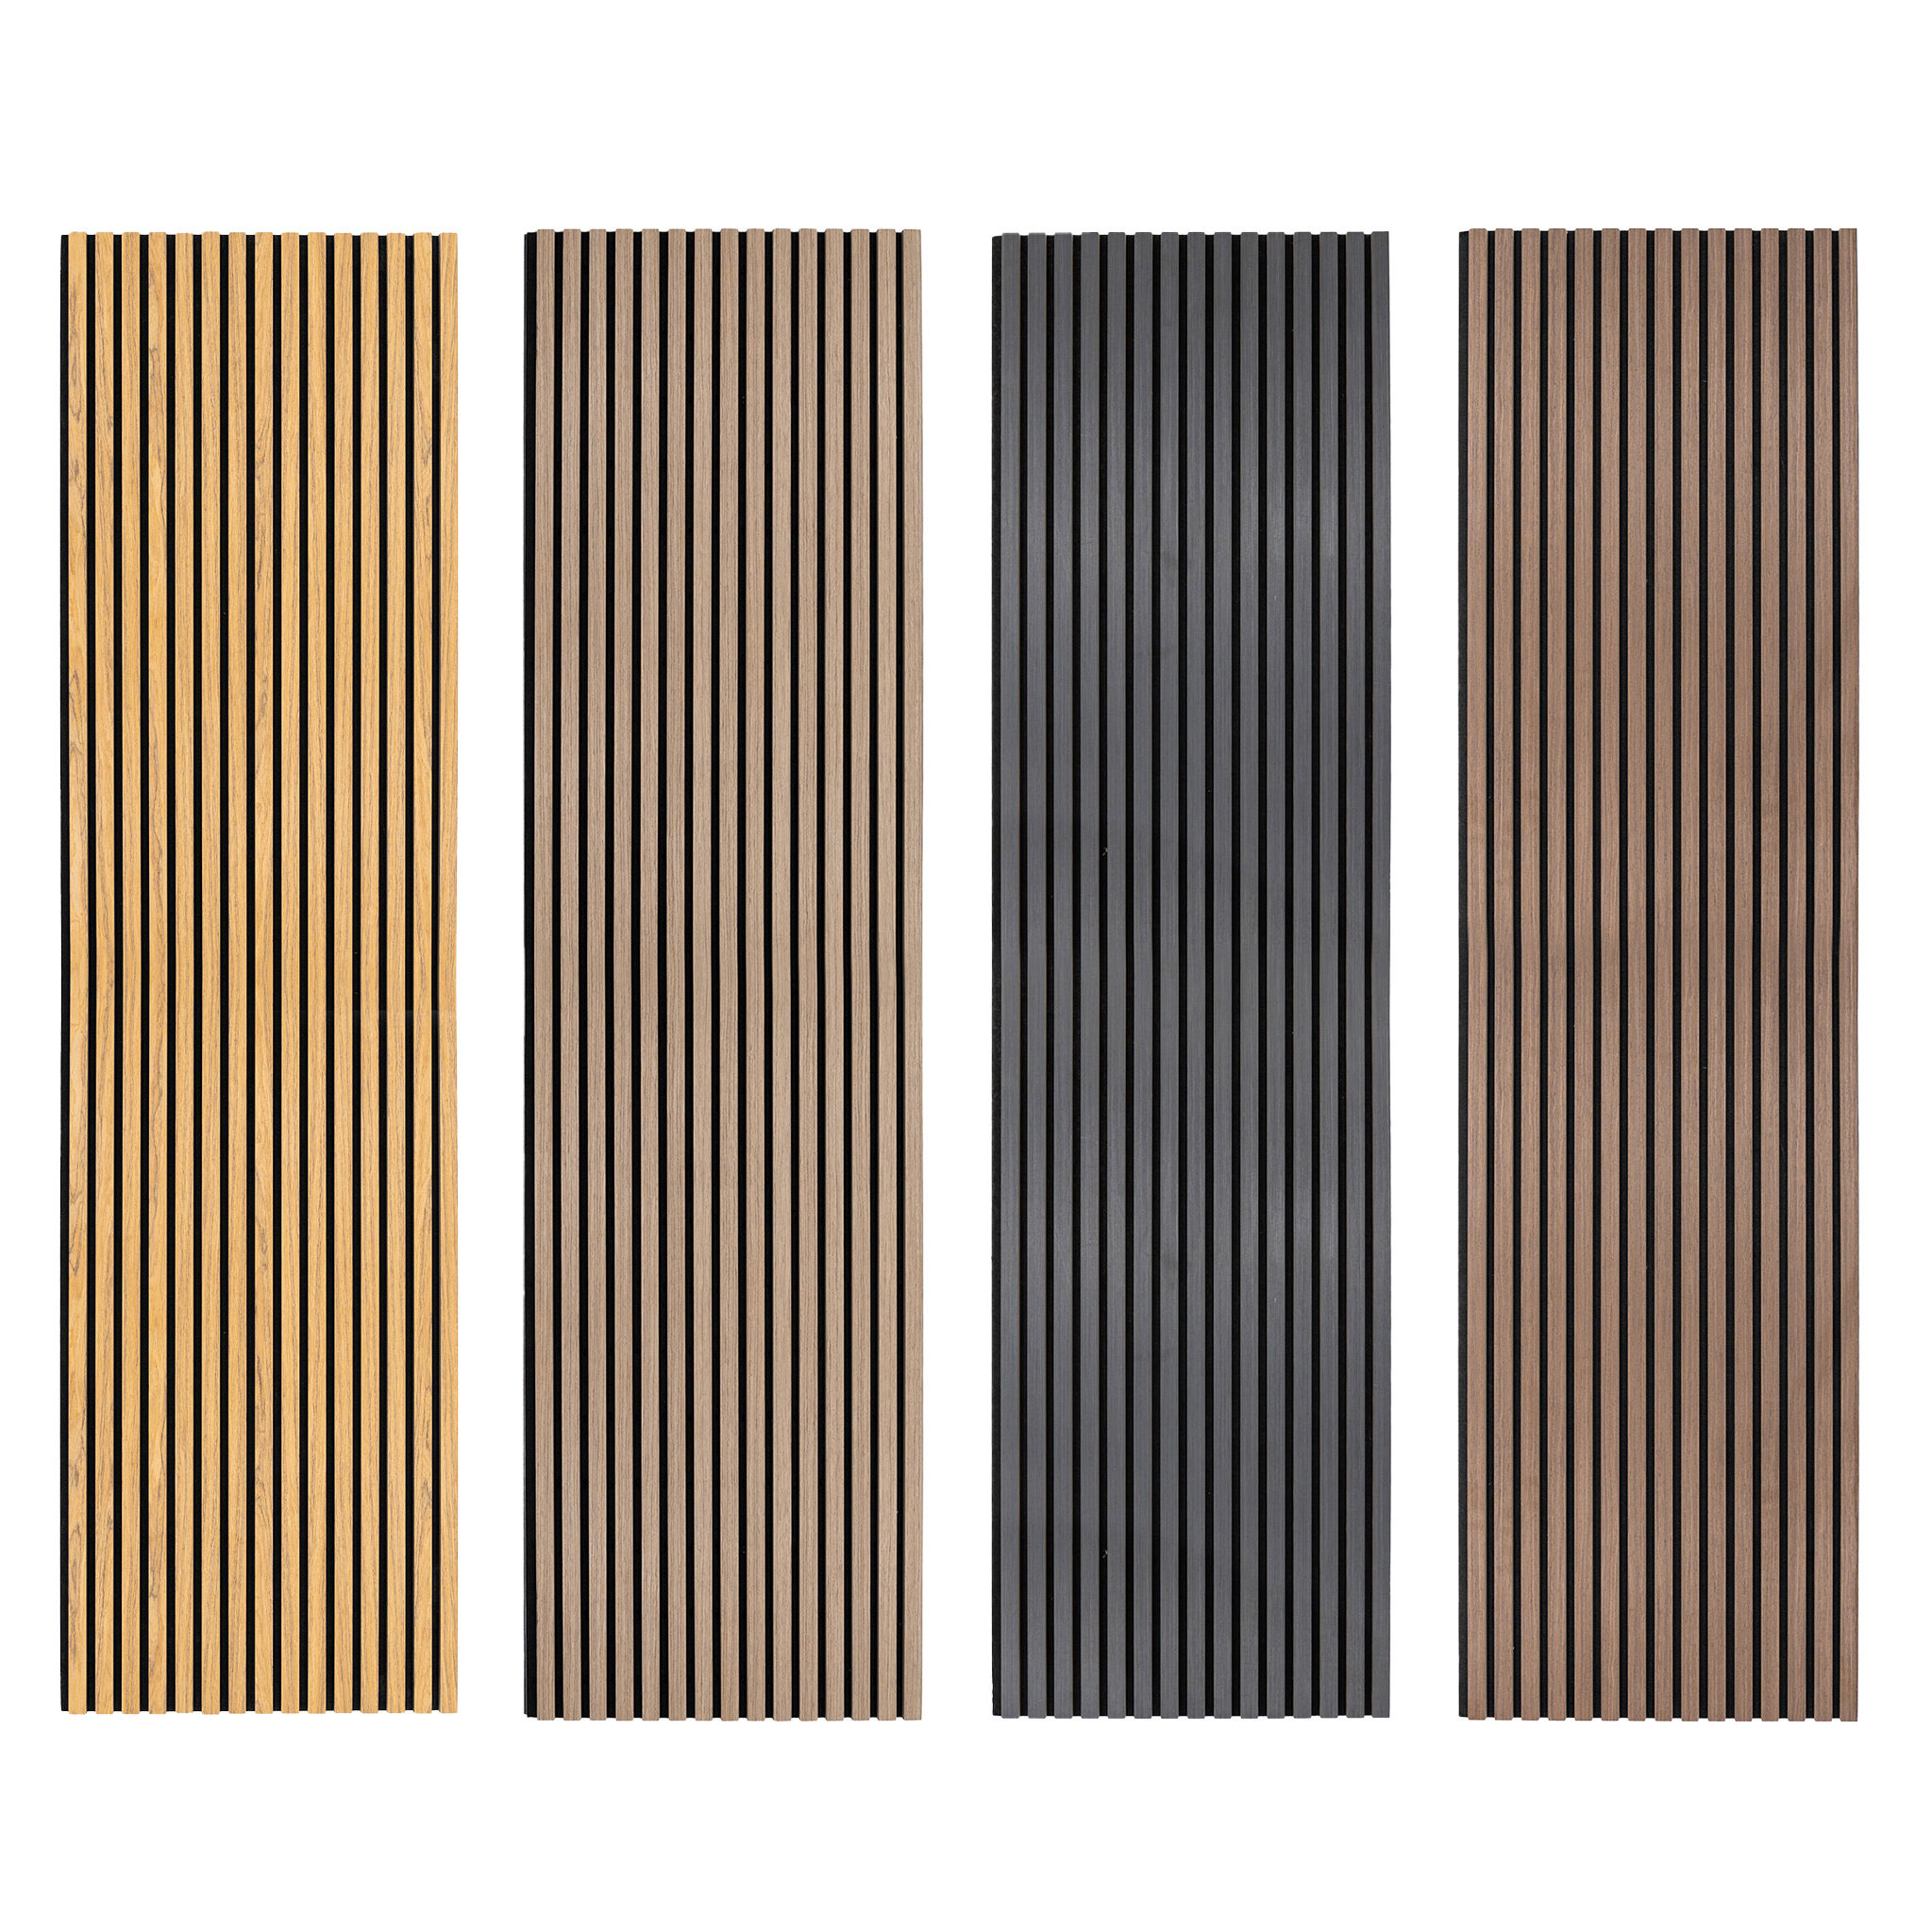 Instructions by monstershop Acoustic Slatted Wall Panels213937 213938 213939 213940 213942 213943 214561 214562 Product InformationAcoustic Slatted Wall PanelsThe Acoustic Slatted Wall Panel combines elegant design with practical functionality, offering an easy solution to enhance your interior aesthetics while improving sound quality. Crafted with premium flame-retardant MDF slats and a high-performance acoustic backing, these panels effectively reduce noise and create a warm, modern ambience. Perfect for homes, offices, or commercial spaces, the Acoustic Slat Wall Panel is simple to install and designed to transform any wall or ceiling into a stylish, sound-optimised feature with added safety.
Panel
* Height – 2.4m / 240cm / 2400mm
* Width – 0.6m / 60cm / 600mm
* Depth - 0.021m / 2.1cm / 21mm
Slat
* Width – 0.27m / 2.7cm / 27mm
* Depth – 0.13m / 1.3cm / 13mm
* Felt thickness – 0.09m / 0.9cm / 9mm
GPSR Information
UK
EU
ToolsTape Measure Pencil Strong Adhesive Screwdriver Fine Tooth Handsaw and/or Circular Power Saw Straight Edge/Spirit Level Safety Glasses and Dusk Mask are recommended when cutting MDF PartsAcoustic Slatted Wall Panel Screws Wall Plugs 1. Using Adhesive(Please note – if using this method, some damage to wall and panel may incur if you wish to remove at a later date)
2. Using Adhesive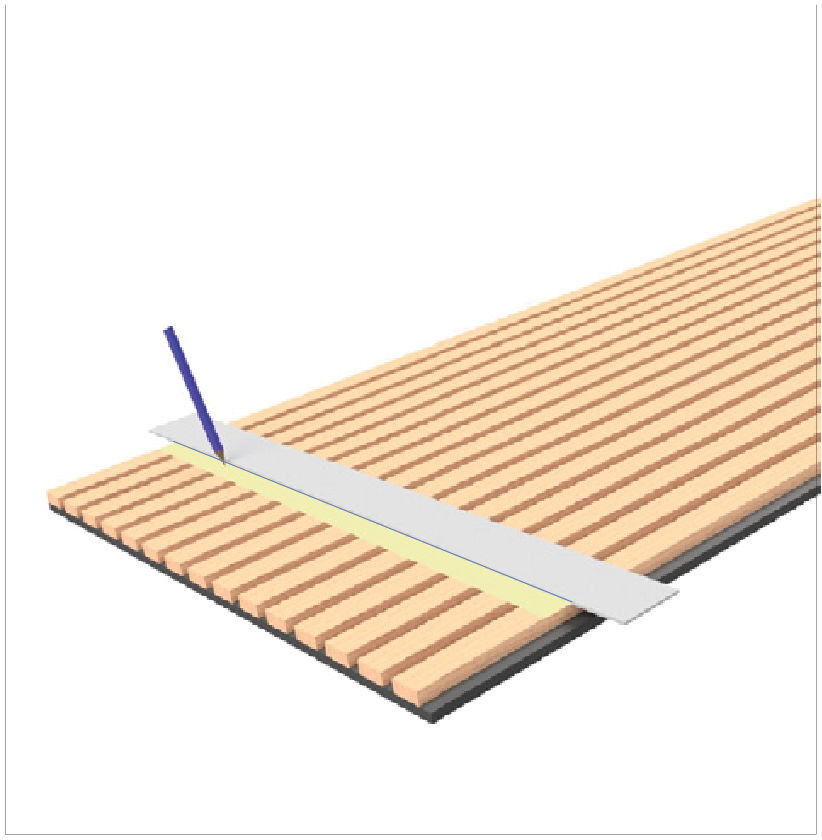 Measure and mark location of cut on the panel. Apply a strip of masking tape along area to be cut. Strike a line across using a pencil and straight edge. 3. Using Adhesive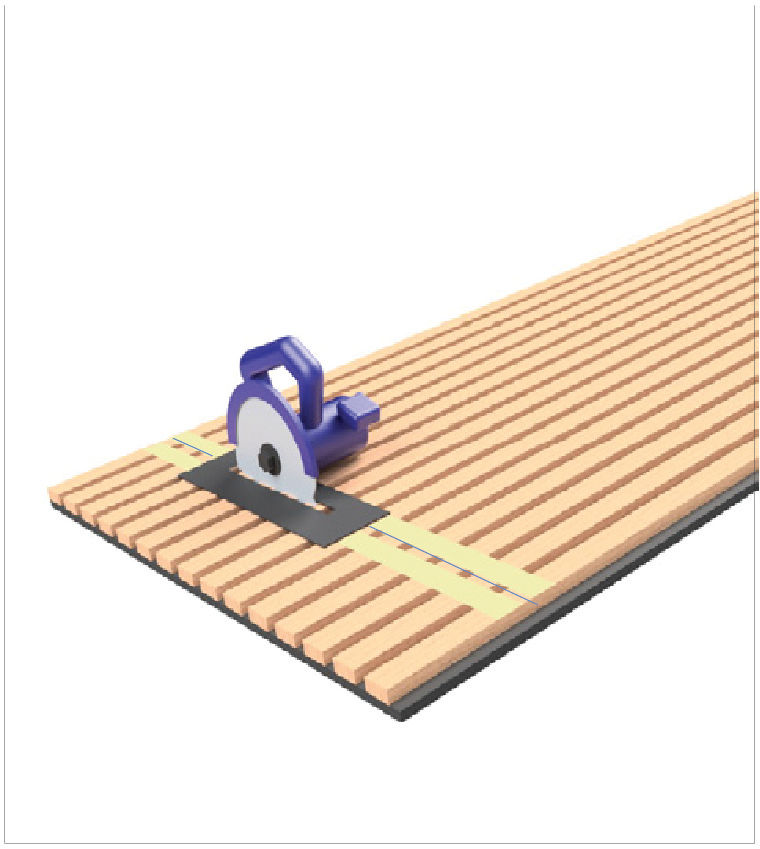 Cut panel to correct height using either a fine tooth handsaw or circular power saw. For best results, use a good quality sharp blade. Remove masking tape after cutting. 4. Using Adhesive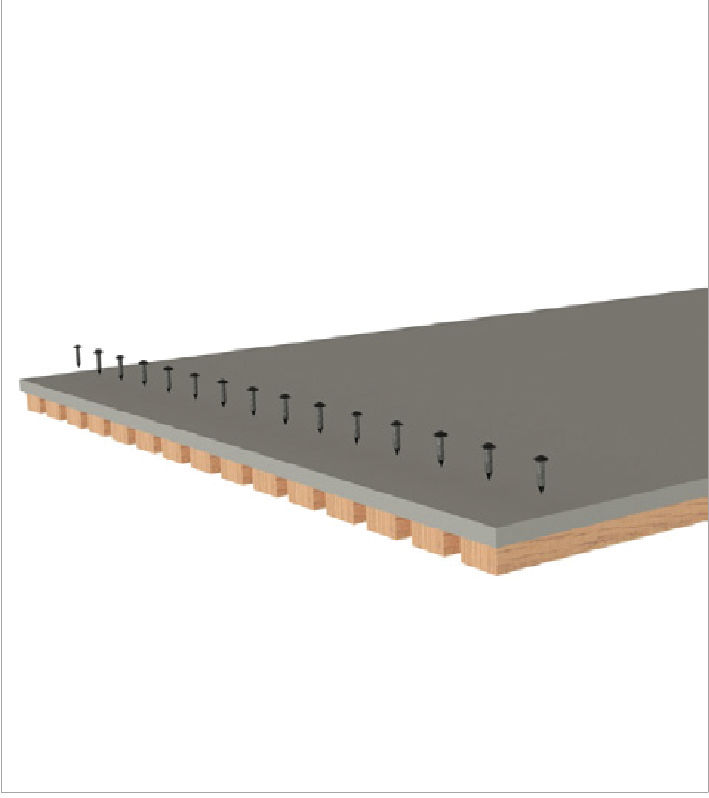 If slats on panel are loose after cutting, secure slats by inserting 15mm long screws through back of panel, through the felt and into the slats ensuring that screw heads are flush with back face of felt backing. Check panel fit on wall. 5. Using Adhesive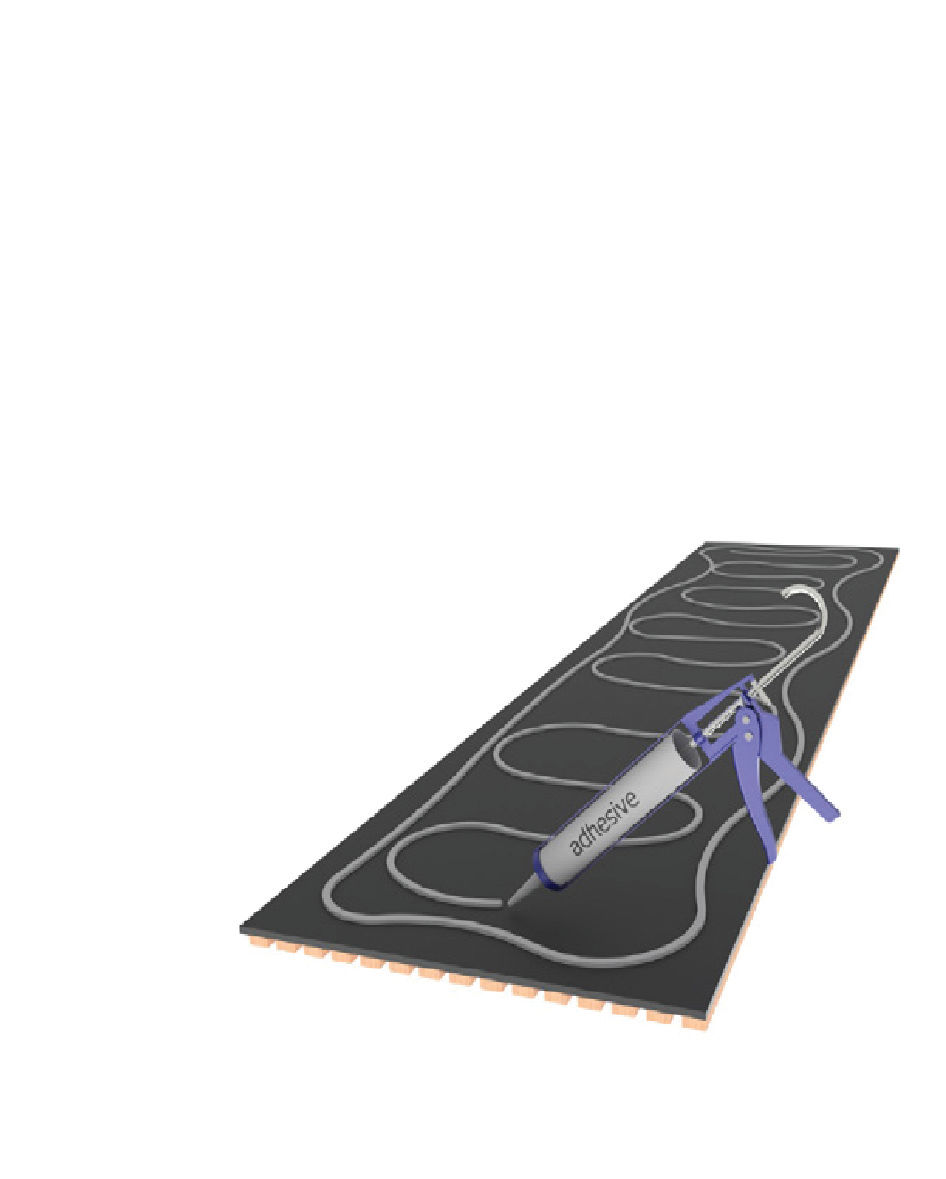 Next, apply a proprietary fast grab adhesive to the back of the panel. One standard cartridge should be enough to install 3 panels. 6. Using Adhesive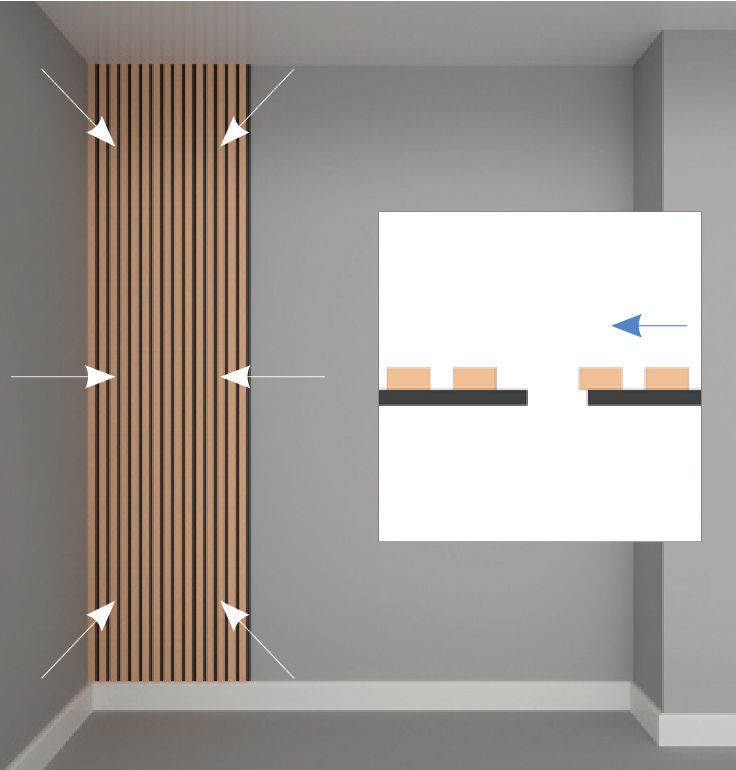 Working from left to right, carefully lift the panel up to the wall, ensuring that the panel side where the slat projects past the backing is to the left hand side and the open side where the slat is set back is to right hand side, ready to accept the next panel. Lead with the bottom edge, then locate fully up into position. Press the panel at the top, middle and bottom locations to ensure adhesive makes full contact with the wall. Check it is vertical using a spirit level. 7. Using Adhesive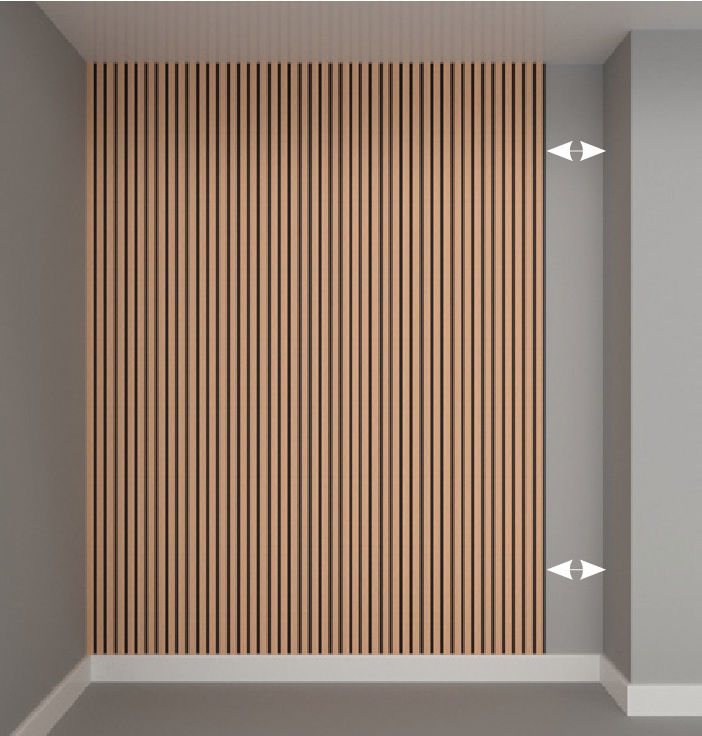 Repeat the above procedure for all remaining full width panels. When you come to the end of the run, it may be necessary to cut the last panel to the correct width. Measure the distance from the edge of the panel to the wall, at top and bottom, to check it's parallel. 8. Using Adhesive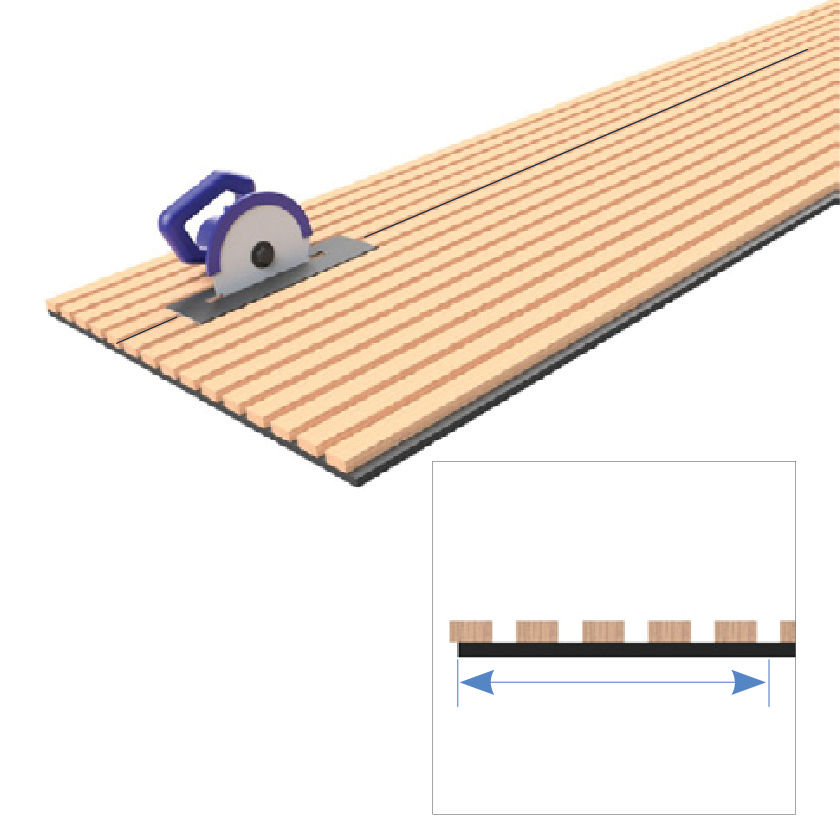 Transfer the measurements to the panel and mark. If the mark falls on a slat, please apply masking tape before marking. Cut the panel to the correct width. Place onto the wall to check its fit. Remove panel and apply adhesive to the back of the panel and install as previous. 9. Sockets and Switches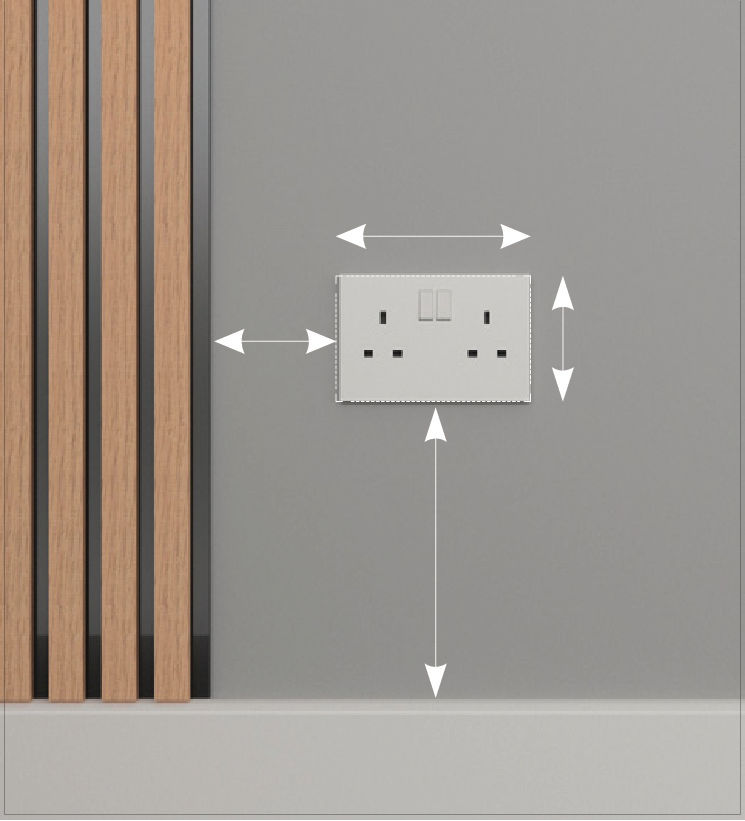 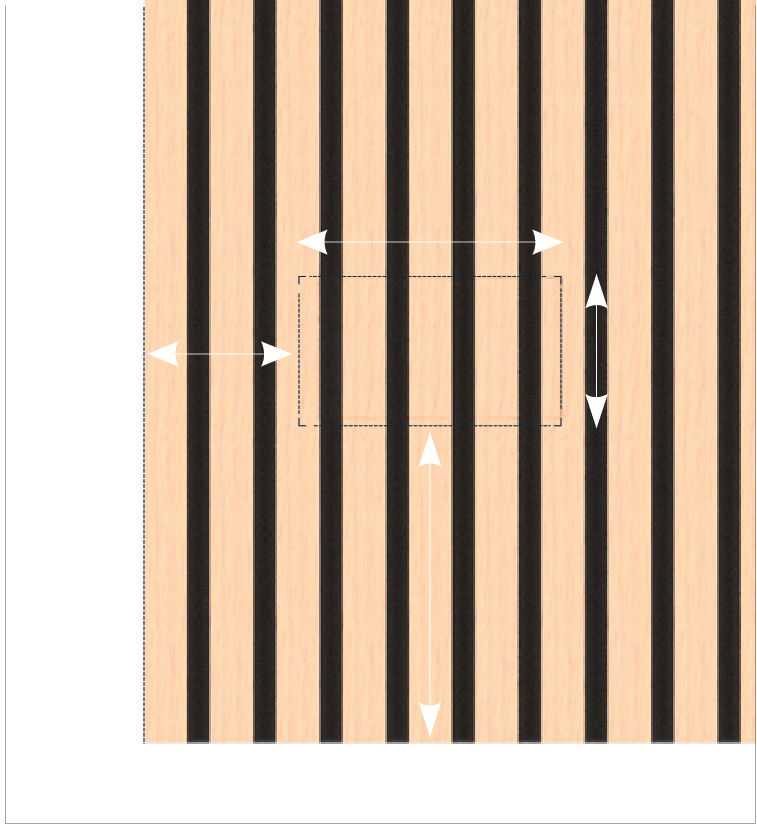 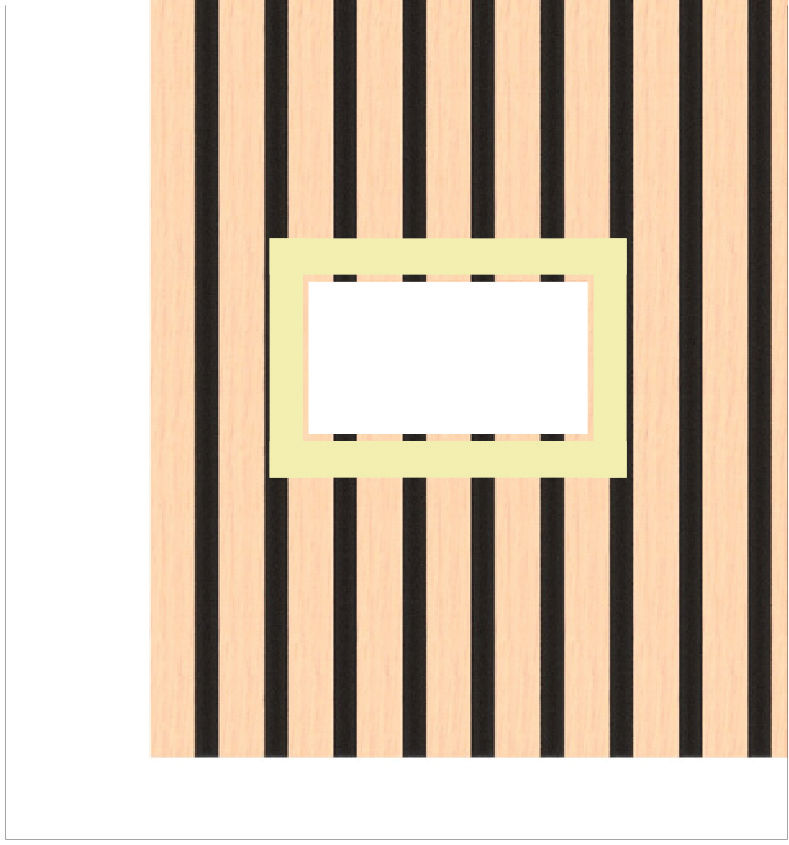 To cut your panel to accommodate light switches and sockets, measure the size and location of the socket/switch. Transfer these measurements to the panel and mark the location of the socket/switch. Apply masking tape to the cut area. Cut the marked area using a jigsaw with good quality blades. Secure any loose slats following the same procedure used in Step 4. 10. Screw to Wall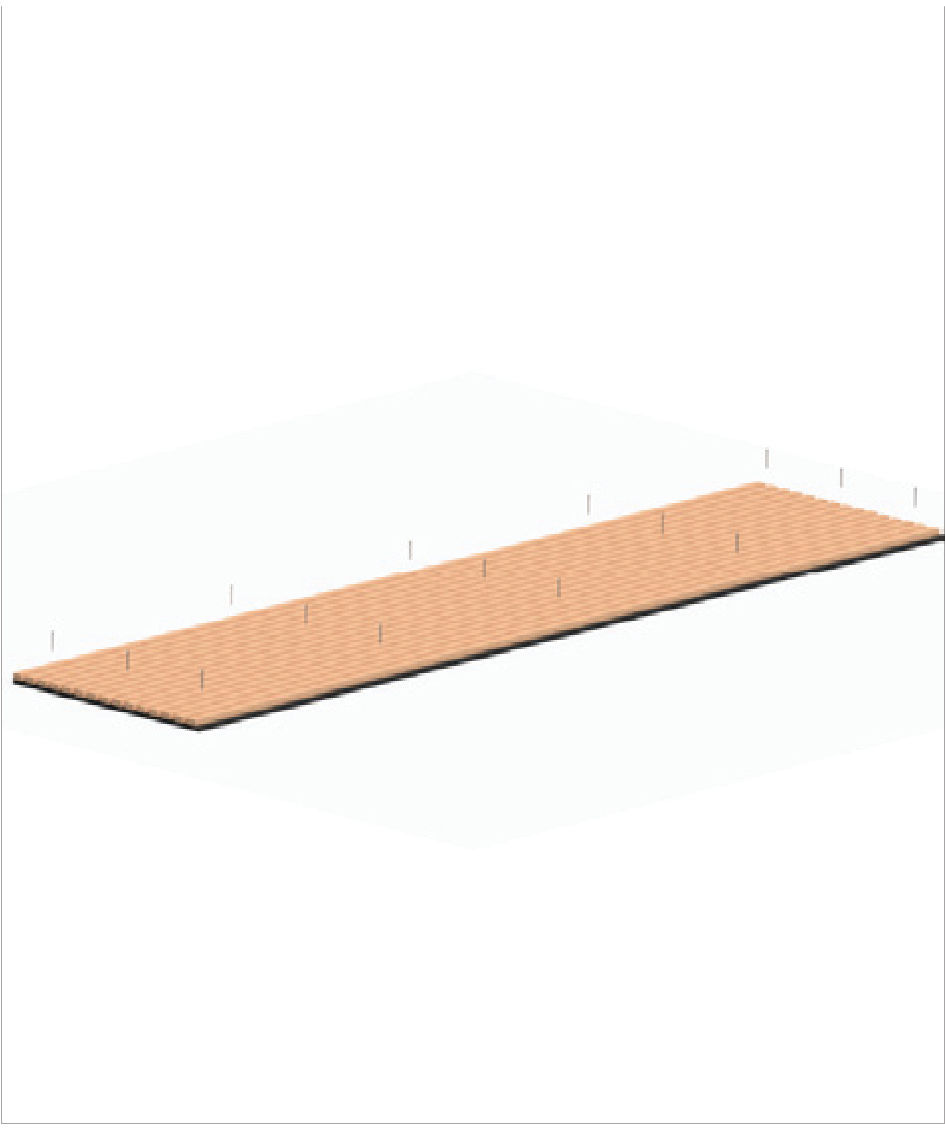 To secure the panel to the wall using screws, you will require 15 off, 3.5mm x 35mm black drywall screws set in 5 rows of 3. Top and bottom screws should be placed no closer than 50mm from the ends. On a 2.4m panel, rows should be spaced approx. 575mm apart. Using black coloured screws will help the screw heads blend in with the black backing felt. 11. Screw to Wall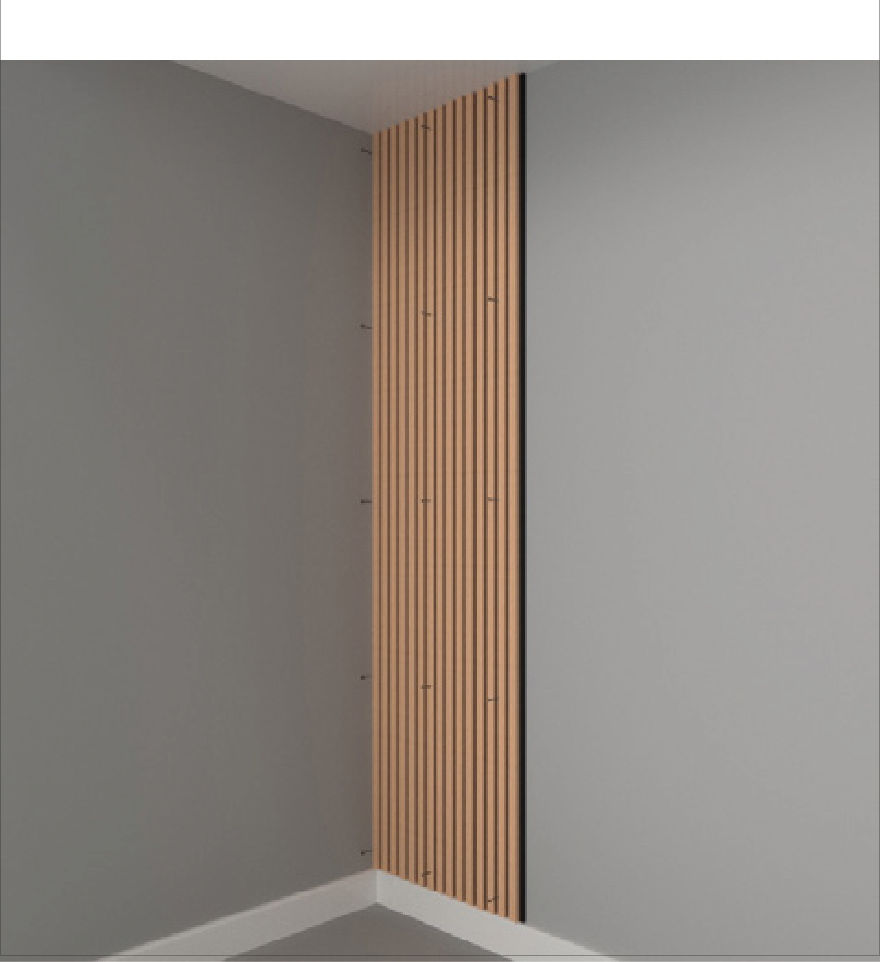 Cut the panel to the required height and insert 15 screws through the front of the panel into the felt backing, ensuring they slightly protrude from the back. Position the panel correctly on the wall and use a spirit level to ensure it is vertical. Gently tap or rotate each screw with a screwdriver to create location marks on the wall. Then, remove the panel. 12. Screw to WallDrill and plug all location marks on wall using appropriate plugs suitable for the wall construction. 13. Screw to WallPlace the panel back onto the wall and secure the panel using screws. Repeat the process for remaining panels. 14. Screw to Battens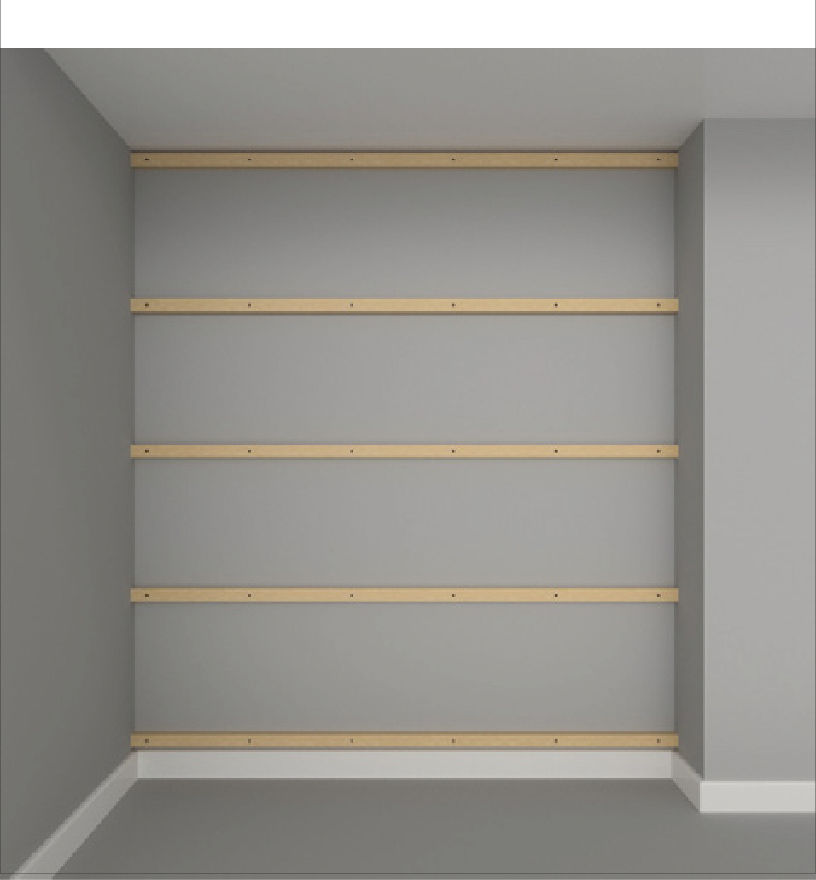 Securely drill and fix five battens (45mm x 45mm) to the wall, evenly spaced. You have the option of installing mineral wool between the battens to improve insulation and increase sound absorption. 15. Screw to BattensMeasure and cut the panels as shown in adhesive fixing method instructions. 16. Screw to BattensPosition the panel against the battens at the starting point on the left side of the wall. Secure it using five rows of three screws. Repeat this process for the remaining panels. 17. Fixing to CeilingsIf you are installing panels to the ceiling, please ensure all fixings are located at structural points i.e into the joists. 18. Fixing to CeilingsThis installation will require 2 people. Care should be taken if using step ladders. Alternatively, the use of a Panel Lifter Hoist Jack would be ideal for the job, depending on how many panels are being installed. |