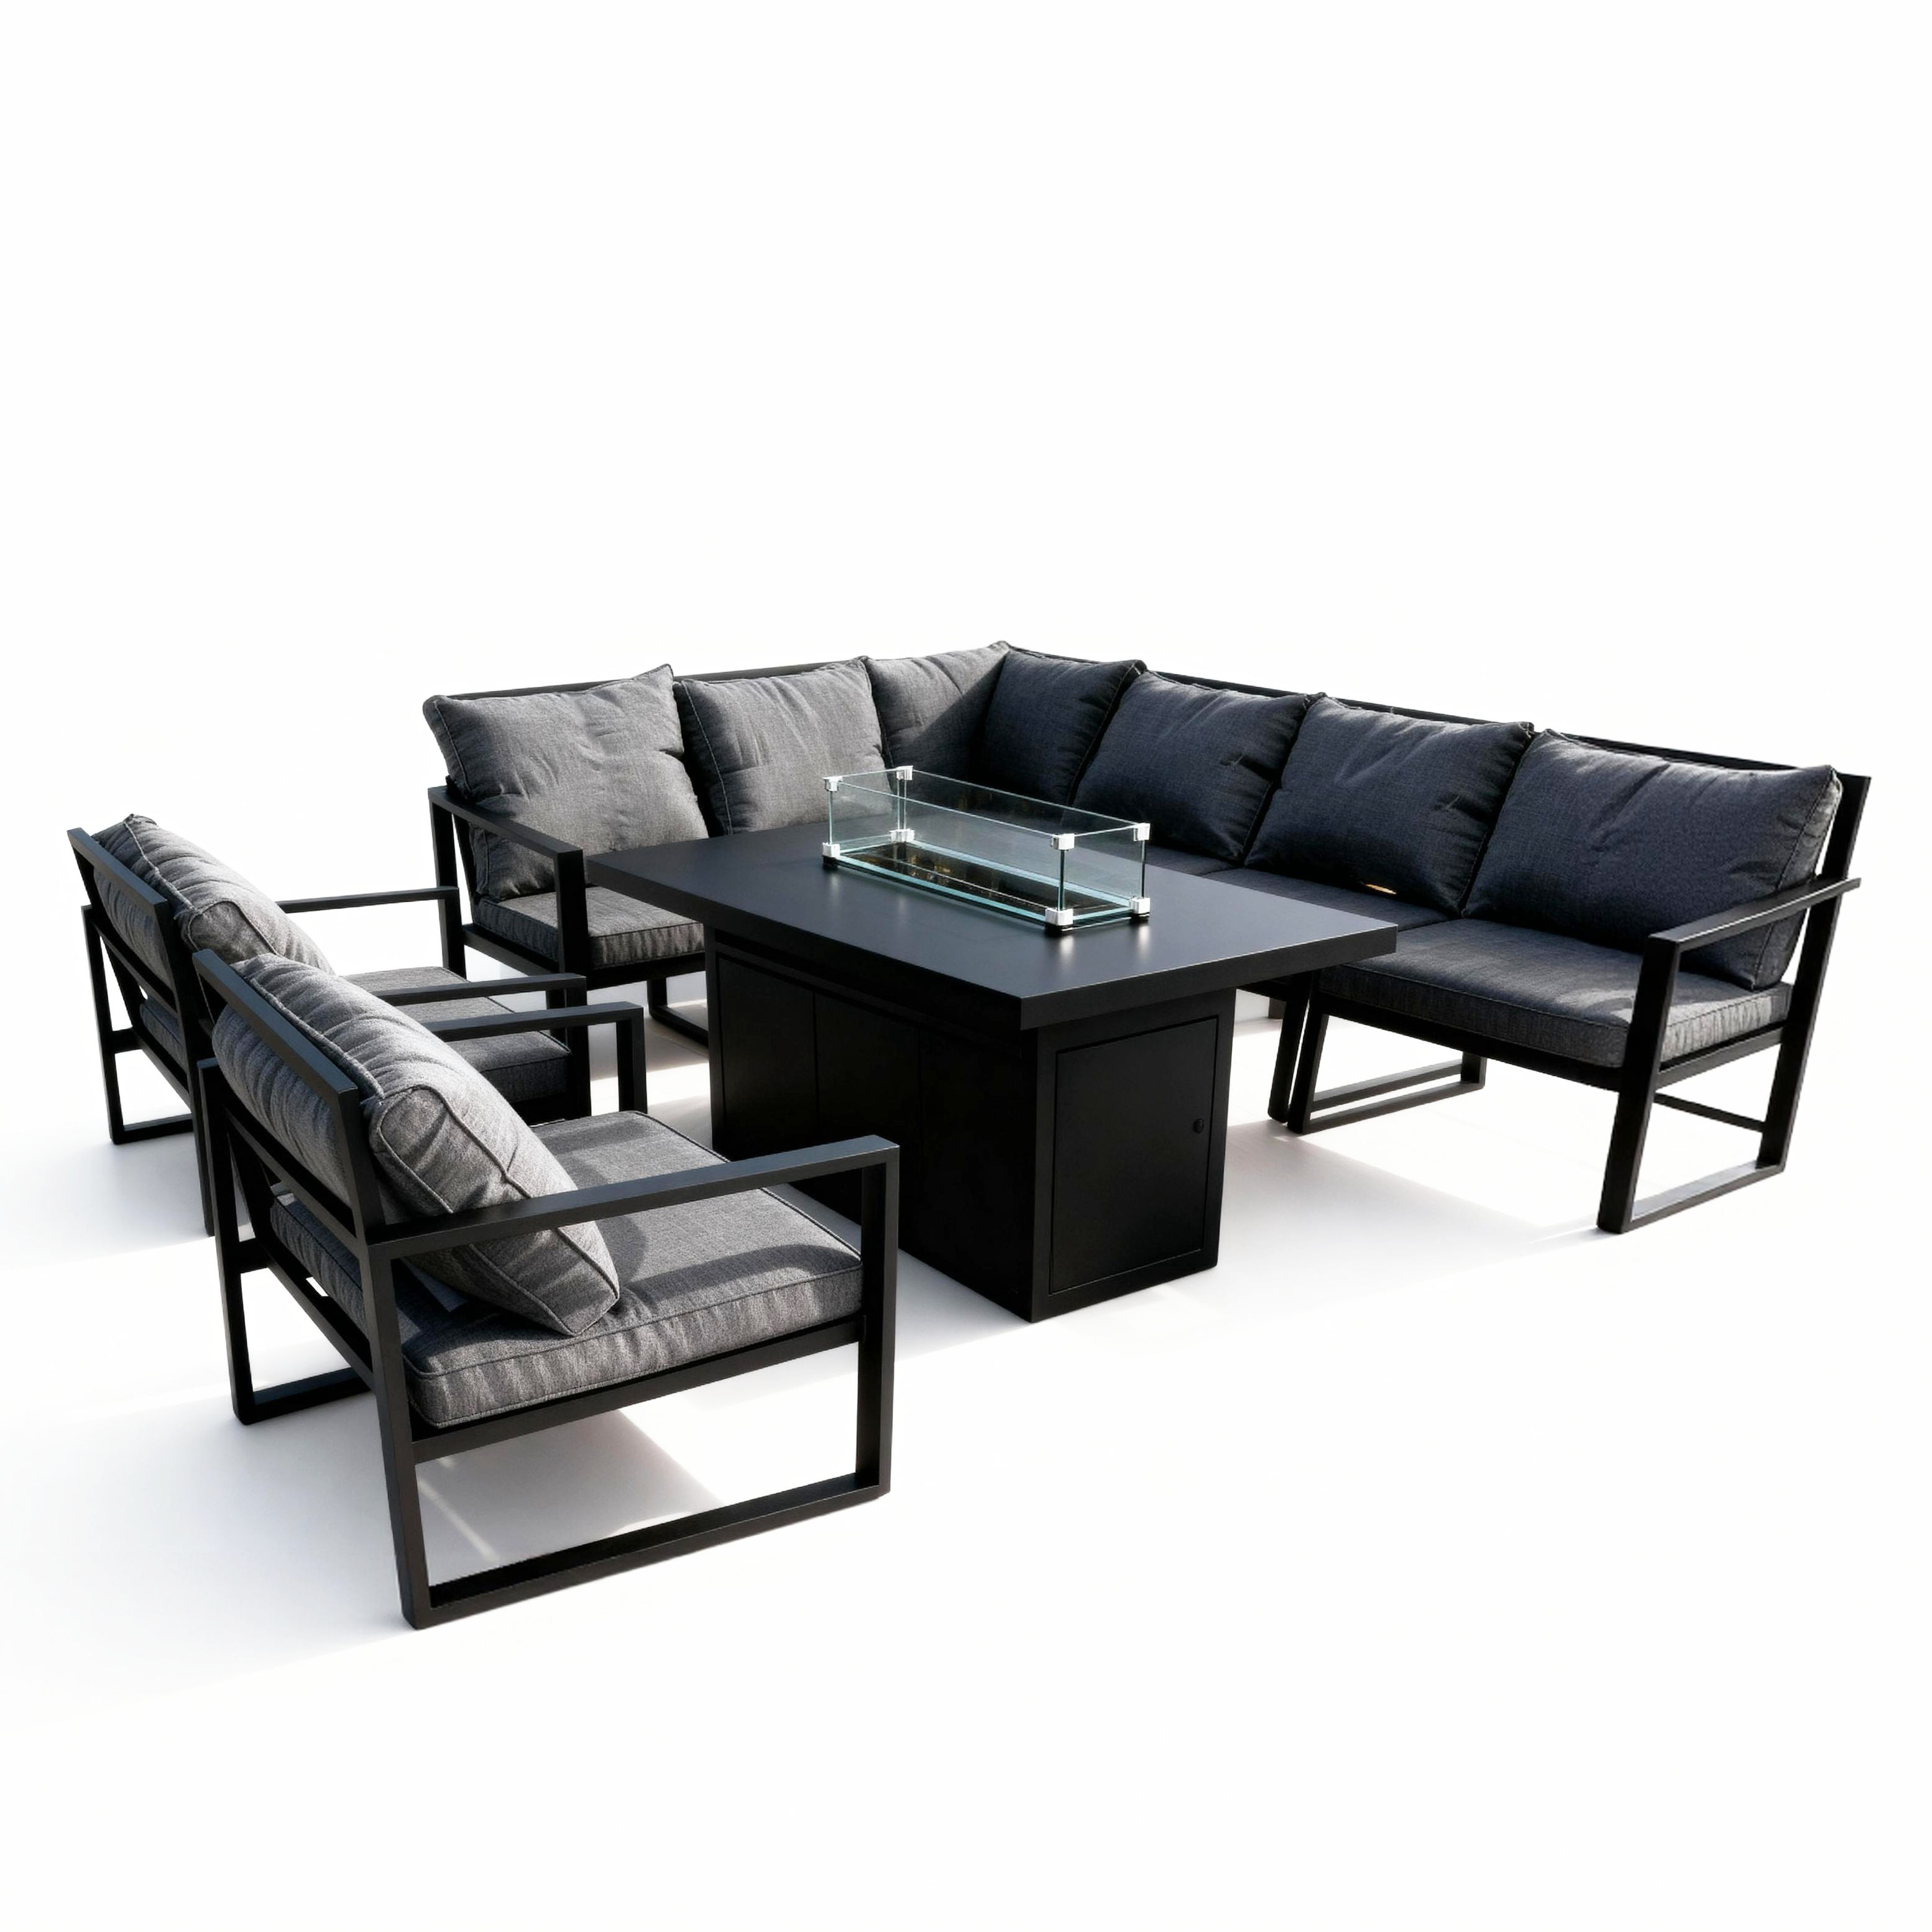
This modular aluminium 7-seater sofa set is designed for
flexibility, allowing you to arrange each piece to suit your outdoor space. It features a gas
firepit table with a superior, durable tabletop for both style and functionality.
Product Information
Aluminium 7 Seater Set with Firepit
This modular aluminium 7-seater sofa set is designed for
flexibility, allowing you to arrange each piece to suit your outdoor space. It features a gas
firepit table with a superior, durable tabletop for both style and functionality. A waterproof
rain cover is included to protect the entire set and ensure long-lasting performance.
Materials
Aluminium
SKU
216625
Specifications:
Attributes
Left Sofa with single armrest:
70W x 65D x 78H cm
Right Sofa with single armrest:
70W x 65D x 78H cm
Dining table with fire pit:
140L x 80W x 70H cm (Aluminum table top without glass)
Corner Sofa:
70L x 70W x 78H cm
Armless Sofa:
60L x 70W x 78H cm
Chair:
70L x 70W x 78H cm
Seat Cushion Thickness:
9cm
Back Rest Cushion Thickness:
14cm
part C:
23.5x23.5cm
Part G:
20.5x23.5cm
part I:
22x23.5cm
Part K:
22x23.5cm
part N:
22x23.5cm
GPSR Information
UK
Manufacturer:
Monster Group UK Limited, Monster House
19-23 Alan Farnaby Way,
Industrial Estate Sheriff Hutton,
York
YO60 6PG
Person Responsible:
Rana Harvey, Monster Group UK Limited,
Monster House
19-23 Alan Farnaby Way,
Industrial Estate Sheriff Hutton,
York
YO60 6PG,
England,
+441347878880
EU
Manufacturer:
Monster Group BV,
Van Heemskerckweg 28A & B,
Venlo 5928LL
Netherlands
+441347878880
Person Responsible:
Rana Harvey,
Monster Group BV,
Van Heemskerckweg 28A & B,
Venlo 5928LL,
Netherlands,
+44134787888
Parts
Part A - Armchair Side Frame
Part B - Armchair Side Frame
Part C - Armchair Base Frame
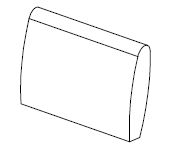
Part D - Armchair Back Panel
Part E - Sofa Side Frame
Part F - Sofa Side Frame
Part G - Sofa Base Frame
Part H - Sofa Back Frame
Part I - Seat Section
Part J - Back Frame
Part K - Base Section
Part L - Back Frame
Part M - Side Frame
Part N - Base Section
Part O - Back Frame
Part P - Base Frame
Part Q - Side Panel
Part R - Side Panel
Part S - Top Frame
Part T - Firepit Support Insert
Part U - Door Panel
Part V - Burner Unit
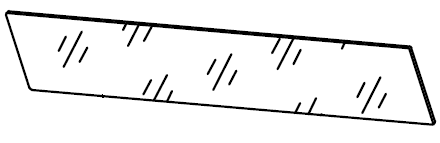
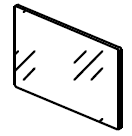
Part W - Glass Panels
Part X - Glass Panels
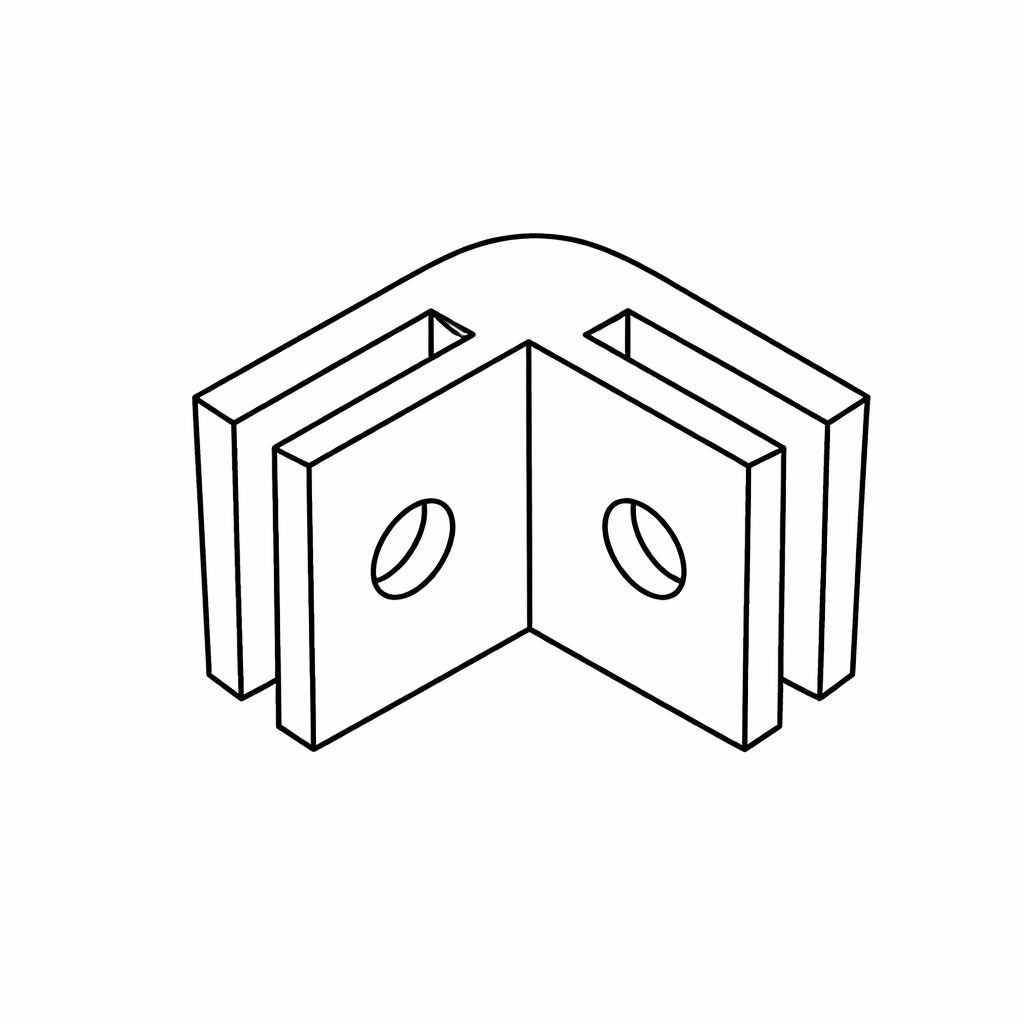
Part Y - Corner Bracket
Part Z - Bolts
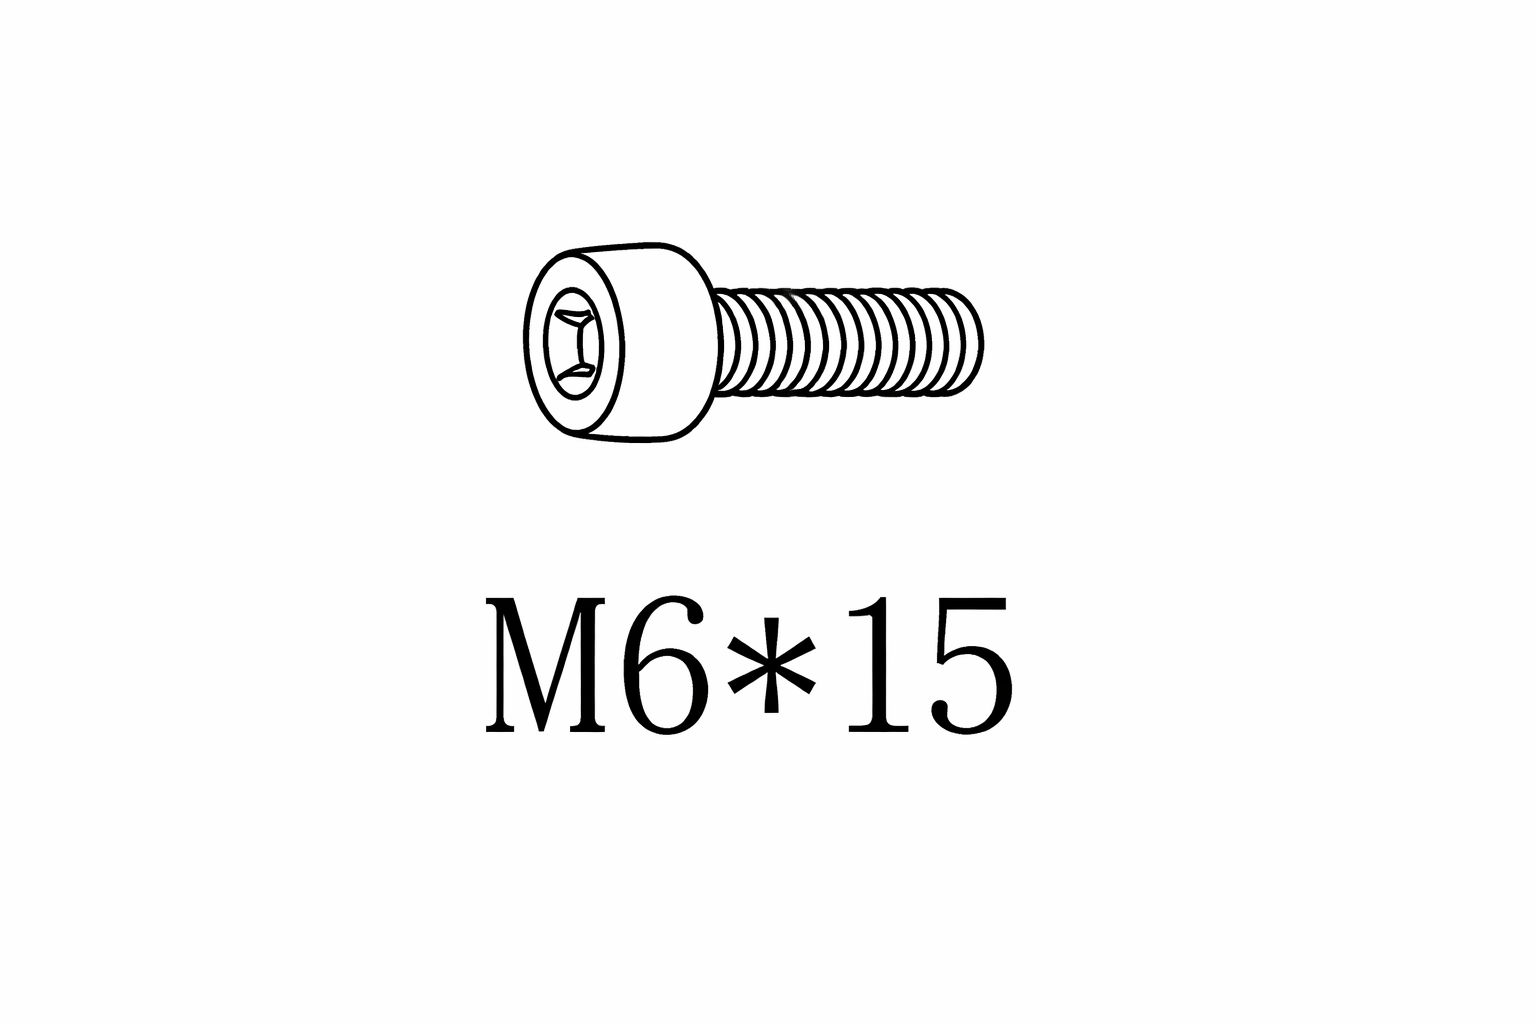
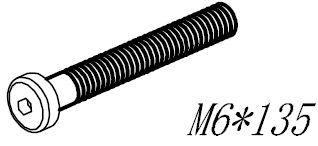
Part A1 - Bolt
Part B1 - Bolts
Part C1 - Bolts
Part D1 - Bolts
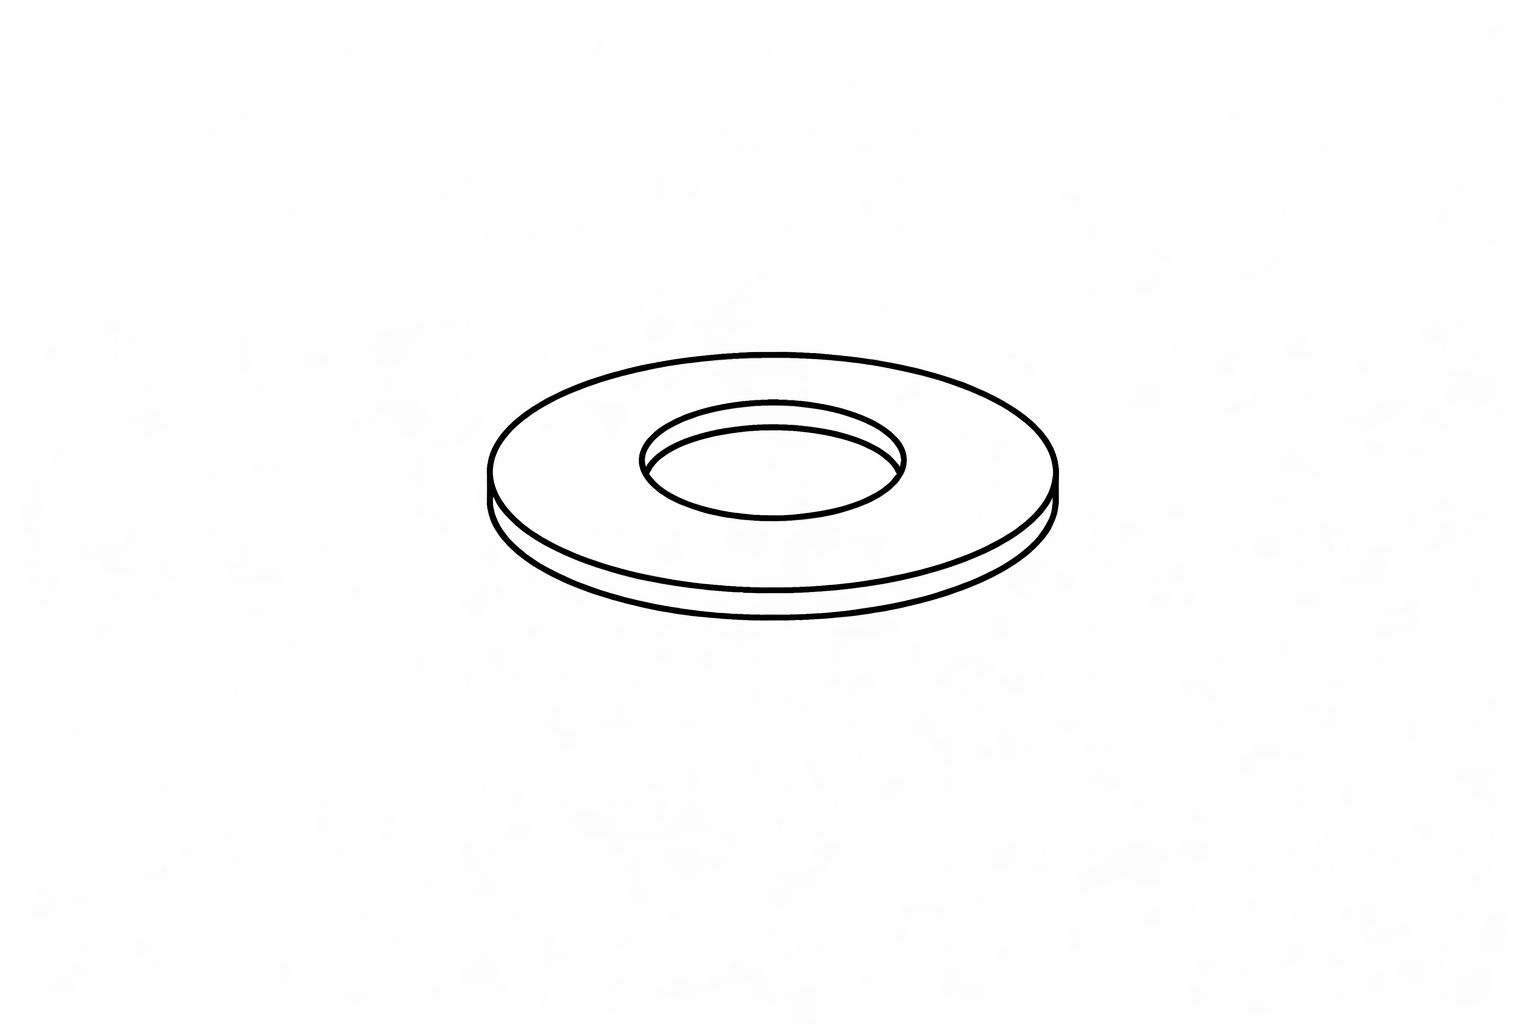
Part E1 - Washers
Part F1 - Nuts
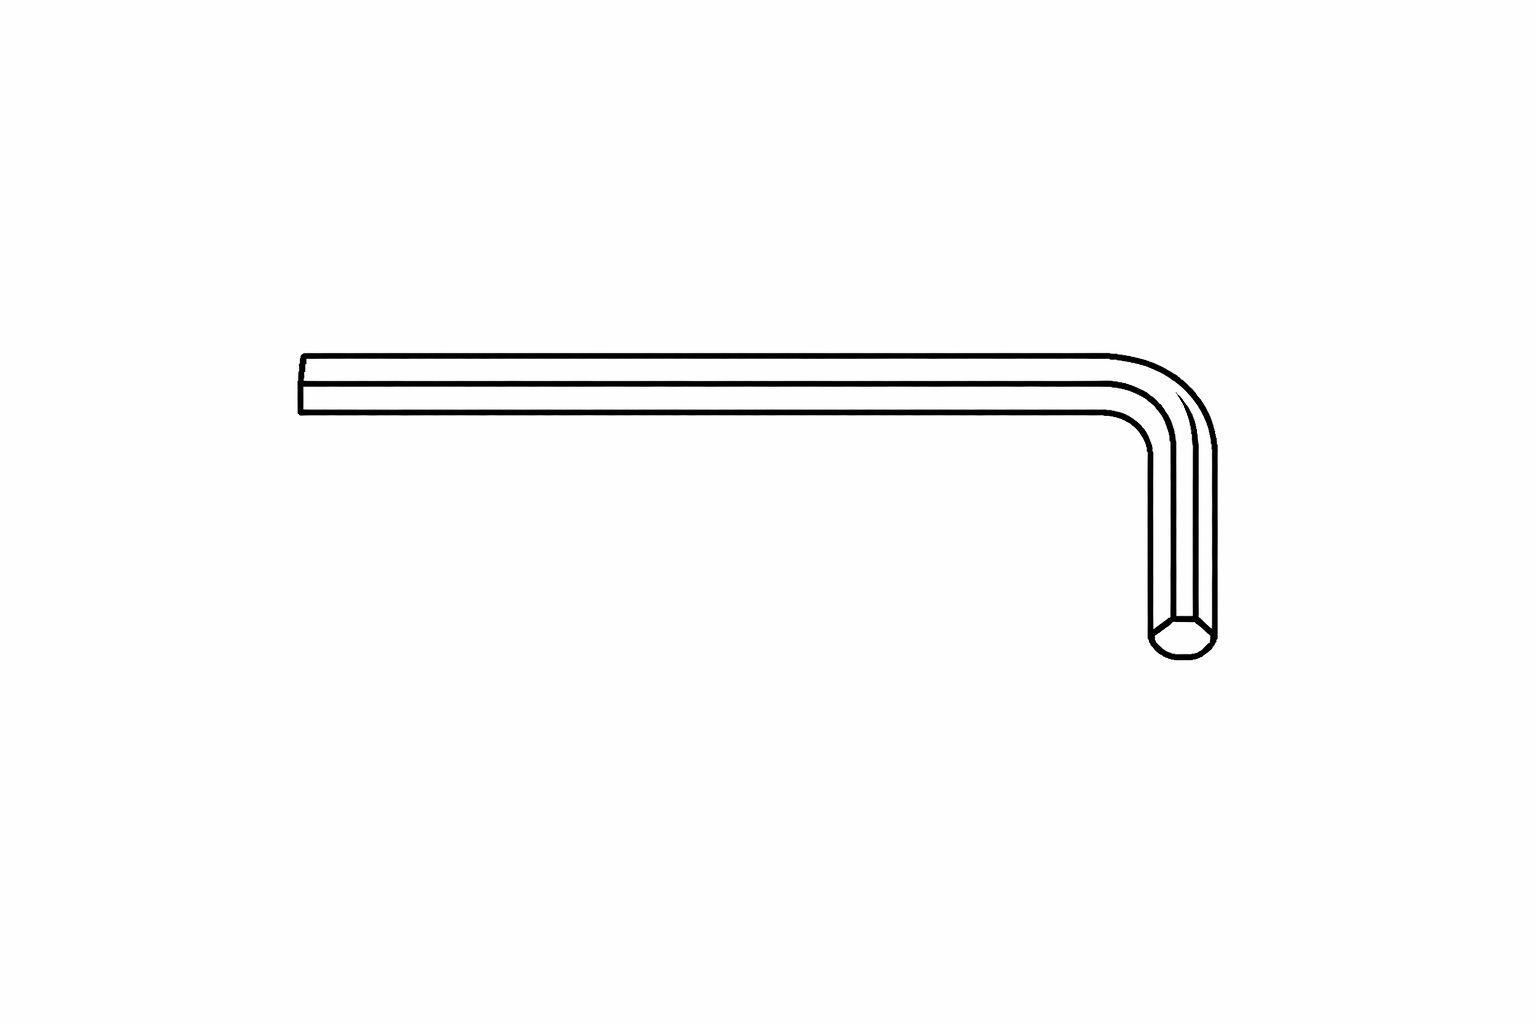
Part G1 - Allen Key
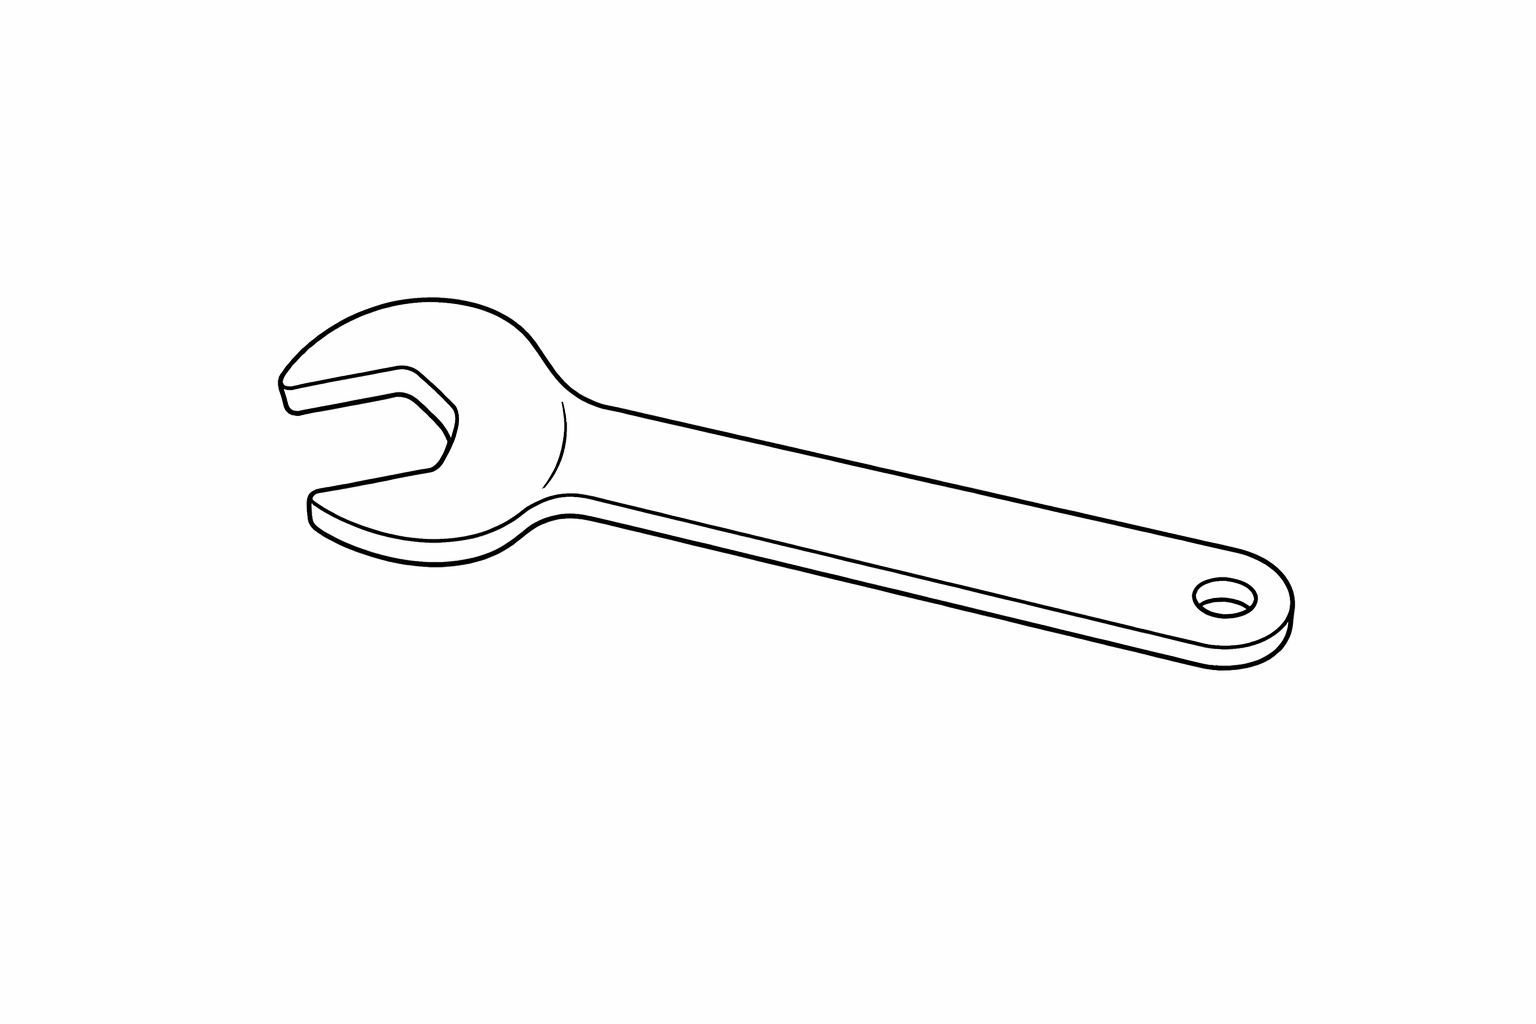
Part H1 - Spanner
Part I1- Glass Pebbles
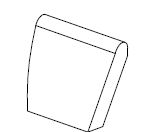
Part J1 - Seat Cushion
Part K1 - Back Rest Cushion
Part L1 - Left Back Cushion
Part M1 - Right Back Cushion
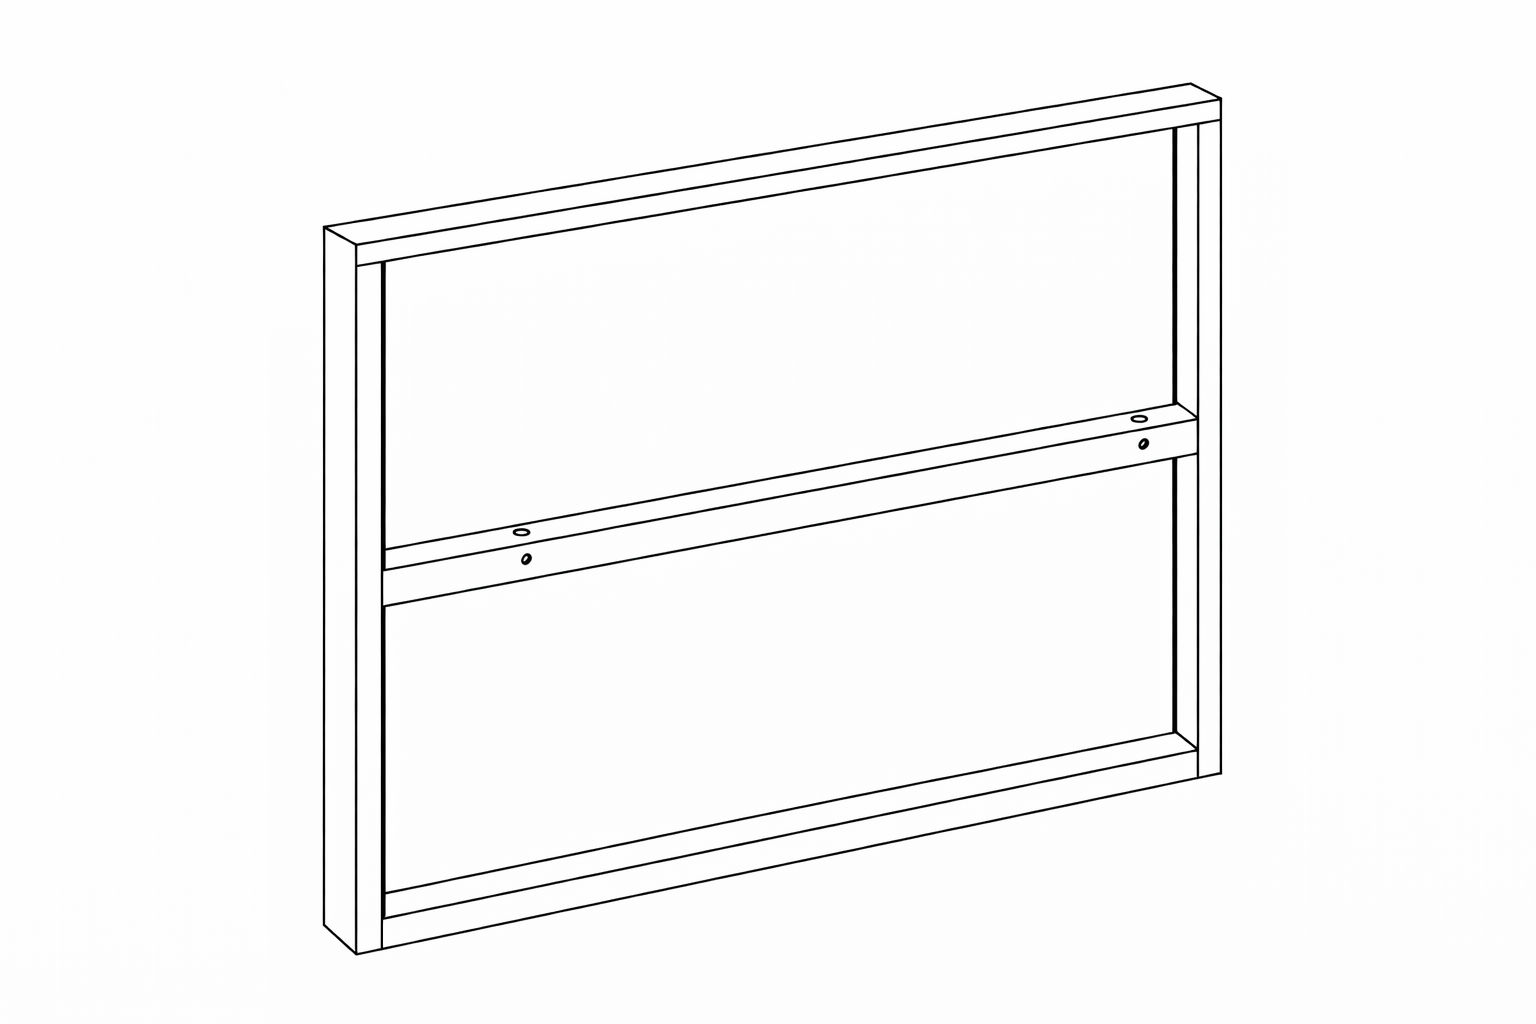
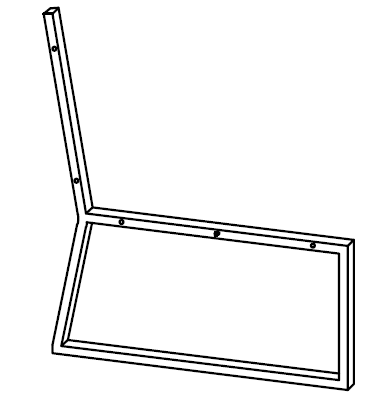
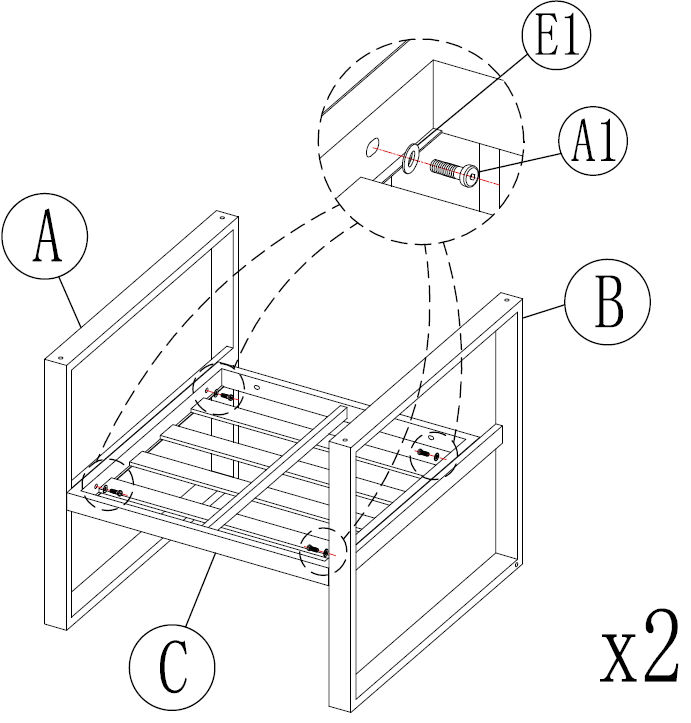
1. Step 1 - Attach the Side
Frames
1. Position the Base (Part C) Place the base section flat on the
ground. 2. Attach the Side Frame (Part A)
* Align the side frame (Part A) with the pre-drilled holes on one side of the base.
* Insert the washer (Part E1) onto the bolt (Part A1).
* Insert the bolt through the frame into the base.
* Hand-tighten only (do not fully tighten yet). 3. Attach Side Frame B
* Repeat the same process on the opposite side using the side frame (Part B).
* Again, insert the washer (Part E1) onto the bolt (Part A1) before tightening. 4.
Secure the Frame
* Once both sides are aligned correctly and the frame is square, fully tighten all bolts using
the Allen key.
*
Notice:
Do not fully tighten bolts until all bolts are inserted.
Ensure the frames are upright and aligned before final tightening.
You should now have the two side panels securely attached to the base frame.
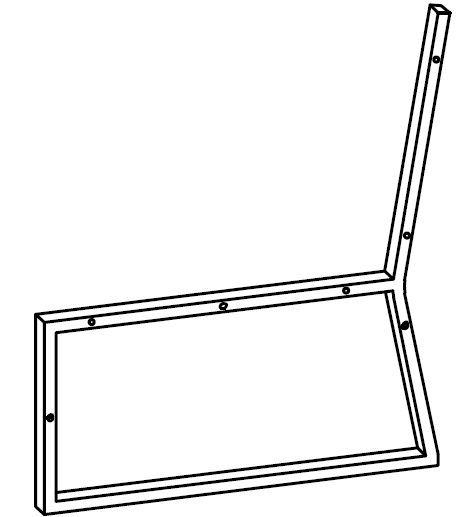
2. Step 2 - Attach the Back
Panel
1. Position the Back Panel (Part D)
* Stand the back panel upright between side frames (Parts A and B).
* Align the holes in the back panel with the holes in the side frames and base. 2.
Attach Lower Bolts (Part A1)
* Place a washer (Part E1) onto each bolt (Part A1).
* Insert bolts through the lower side frame holes into the back panel.
* Place a washer (Part E1) onto each bolt (Part B1).
* Insert bolts through the upper side frame holes into the back panel.
* Hand-tighten. 4. Align and Tighten
* Ensure the back panel is straight and fully seated.
* Once aligned, fully tighten all bolts using the Allen key.
*
Notice:
Do not fully tighten bolts until all bolts are in place.
Make sure the frame is square before final tightening.
The seat frame should now be securely assembled with the back panel attached.
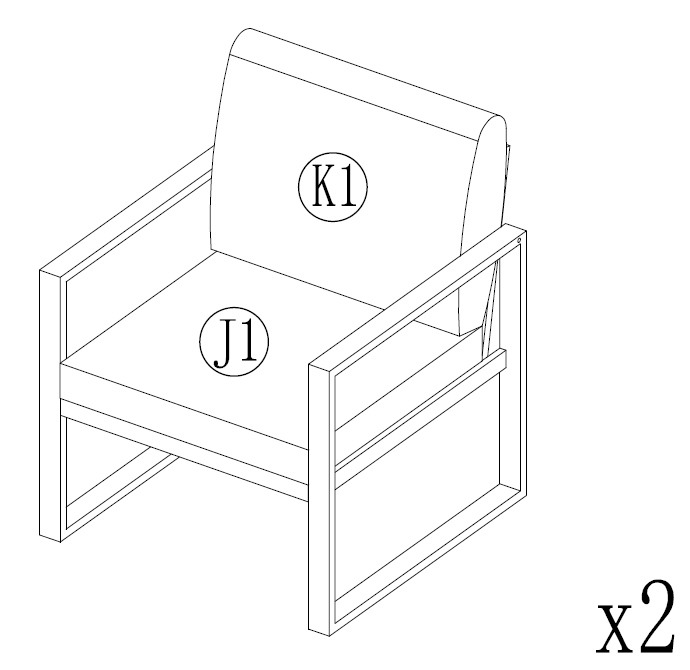
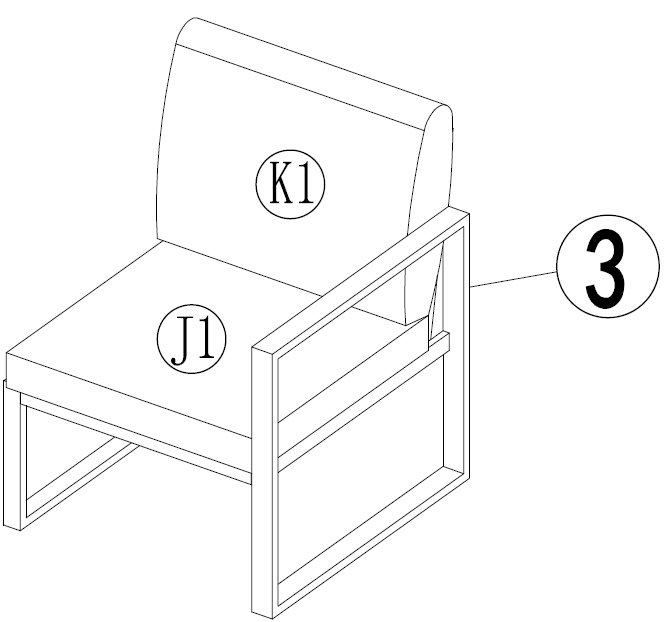
3. Step 3 - Insert the Seat and
Back Cushions
1. Place the Seat Cushion (Part J1)
* Lay the seat cushion flat onto the seat base.
* Ensure it sits evenly within the frame and is pushed fully back. 2. Position the
Back Cushion (Part K1)
* Stand the back cushion upright against the back panel.
* Adjust so it sits centrally between the side frames. 3. Final Adjustment
* Straighten both cushions so edges are aligned neatly with the frame.
*
Notice:
Make sure cushions are fully dry before placing outdoors.
If cushions include ties or Velcro straps, secure them to the frame.
Your armchair section is now complete. Repeat these steps for the second
armchair.
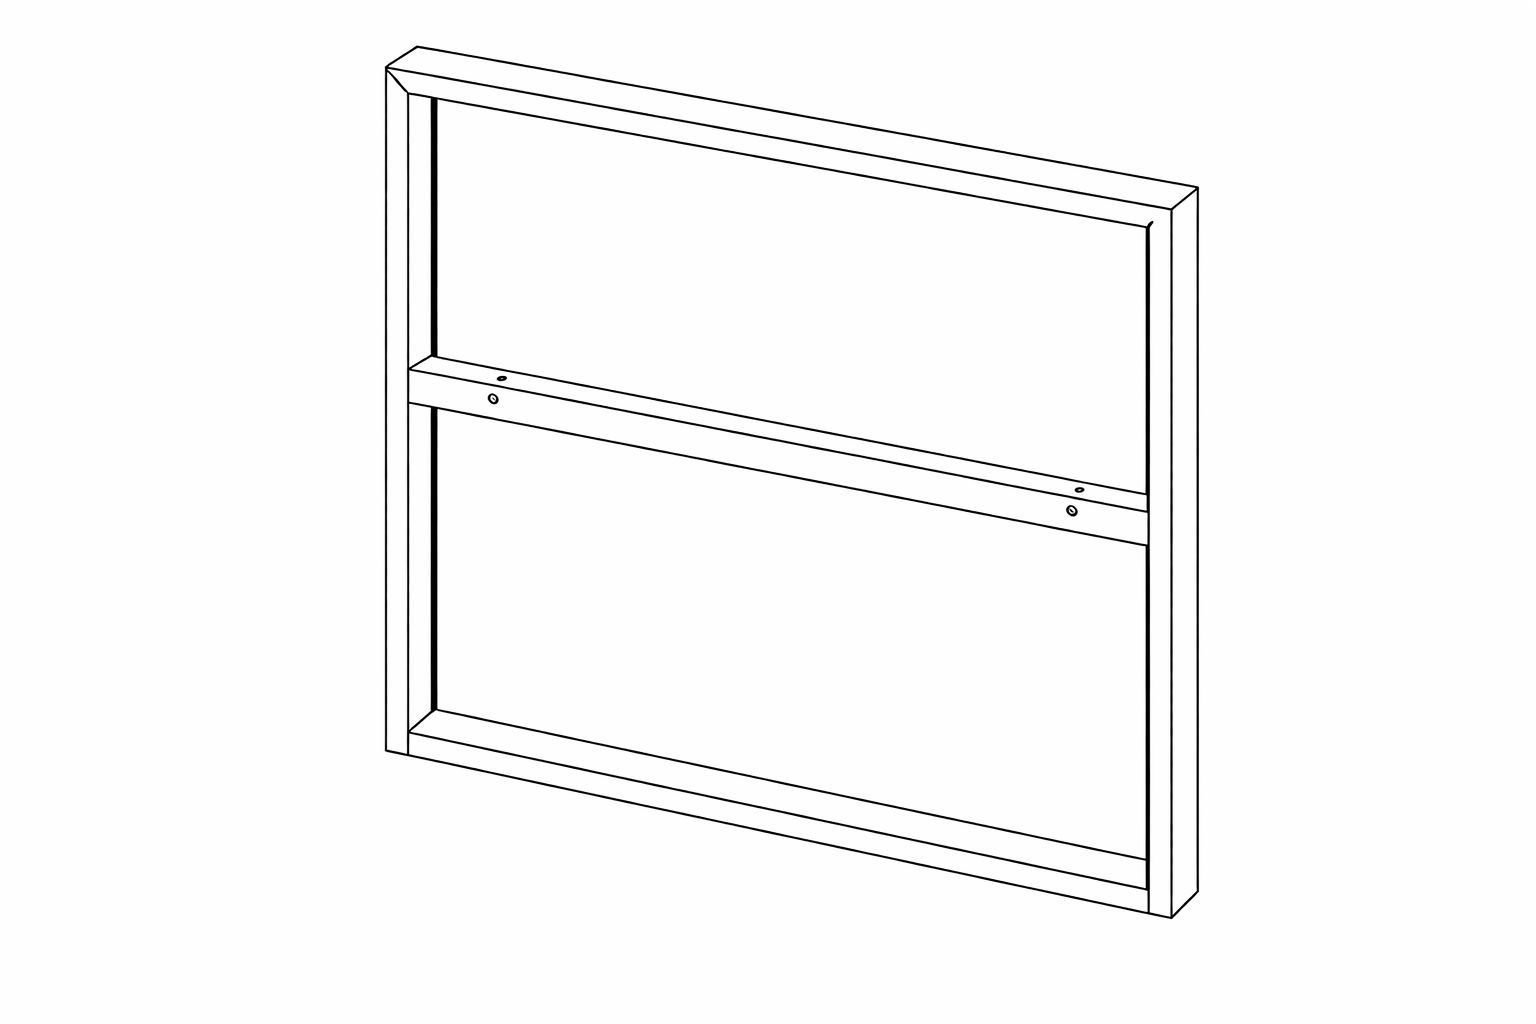
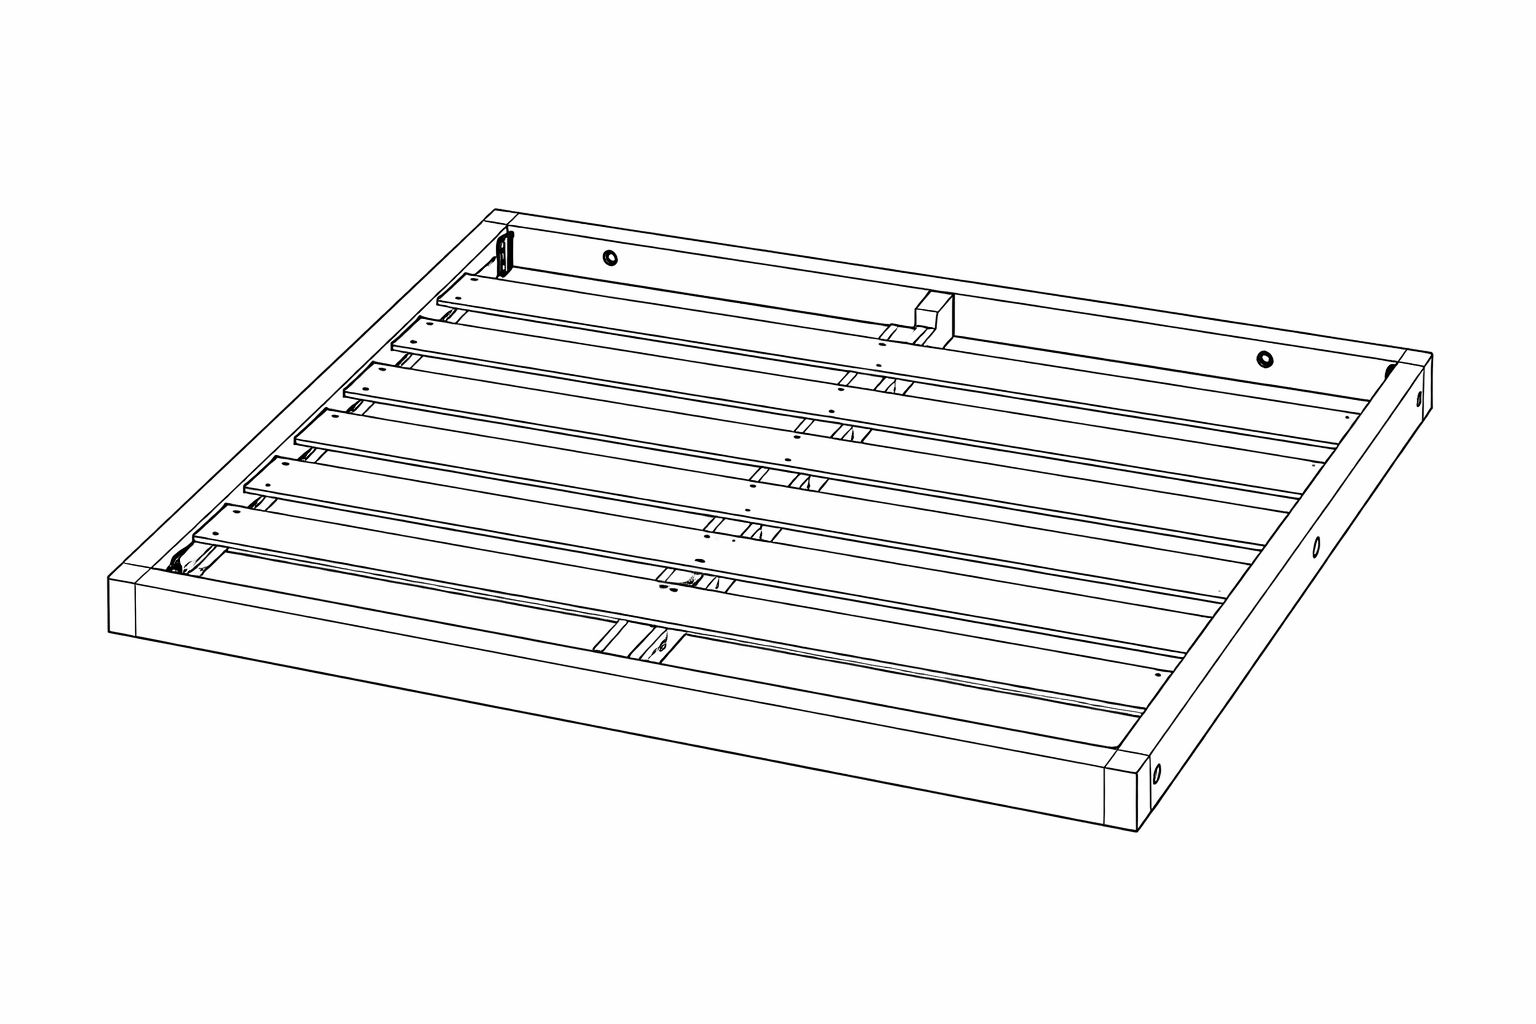
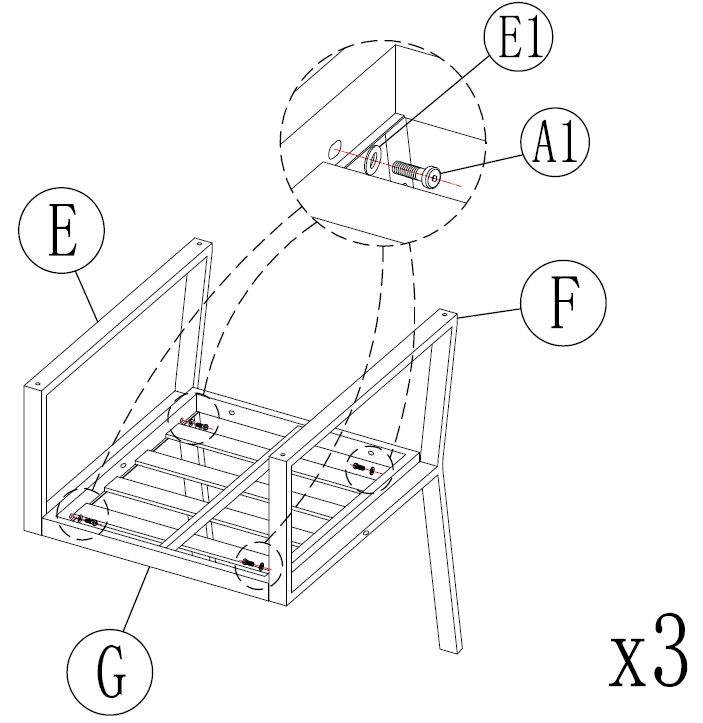
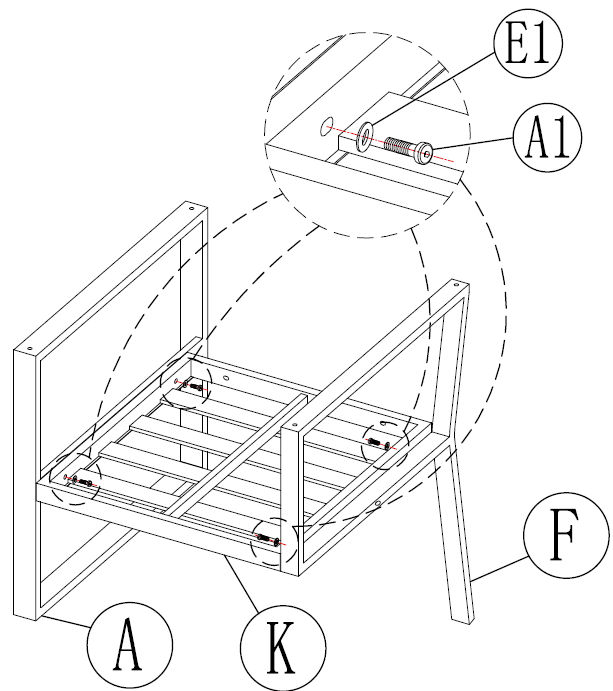
4. Step 1 – Attach Side Frames
to the Base
1. Position the Sofa Base Frame (Part G) Place the sofa base section flat
on a level surface. 2. Attach the Side Frame (Part E)
* Align the side frame (Part E) with the pre-drilled holes on one side of the base.
* Place a washer (Part E1) onto each bolt (Part A1).
* Insert the bolts through the frame into the base.
* Hand-tighten only. 3. Attach the Side Frame (Part F)
* Repeat on the opposite side using side frame (Part F).
* Insert washer (Part E1) onto each bolt (Part A1) before tightening. 4. Secure the
Frame
* Ensure both side frames are upright and properly aligned.
* Once aligned, fully tighten all bolts using the allen key.
*
Notice:
Do not fully tighten bolts until all bolts are in place.
Make sure the frame is square before final tightening.
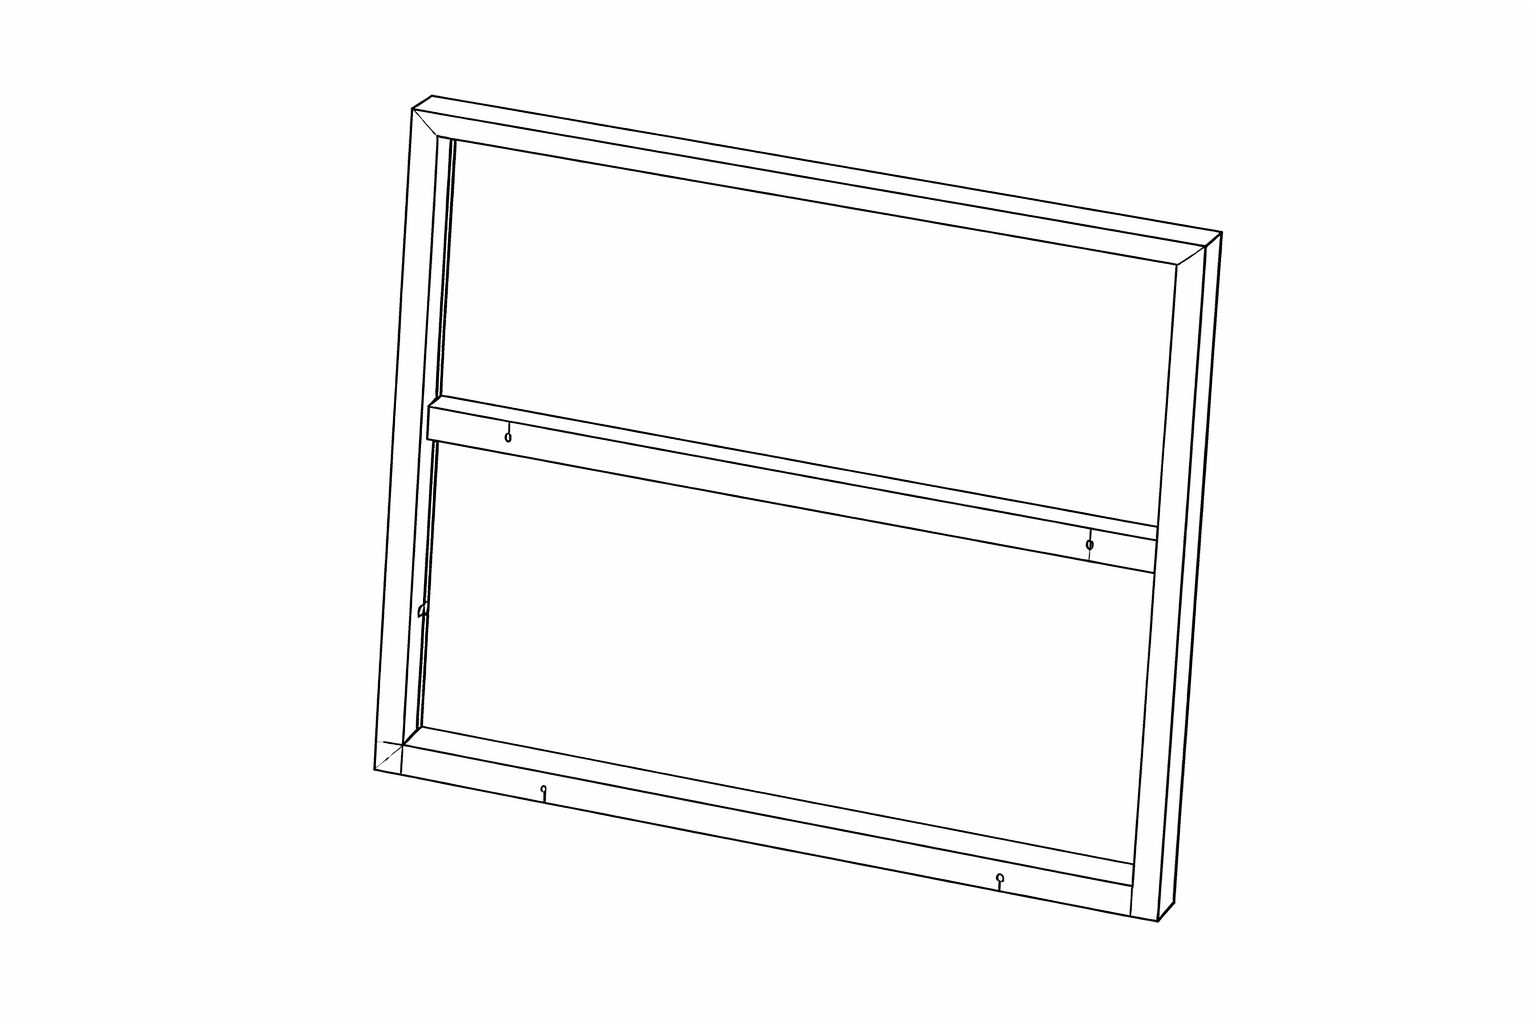
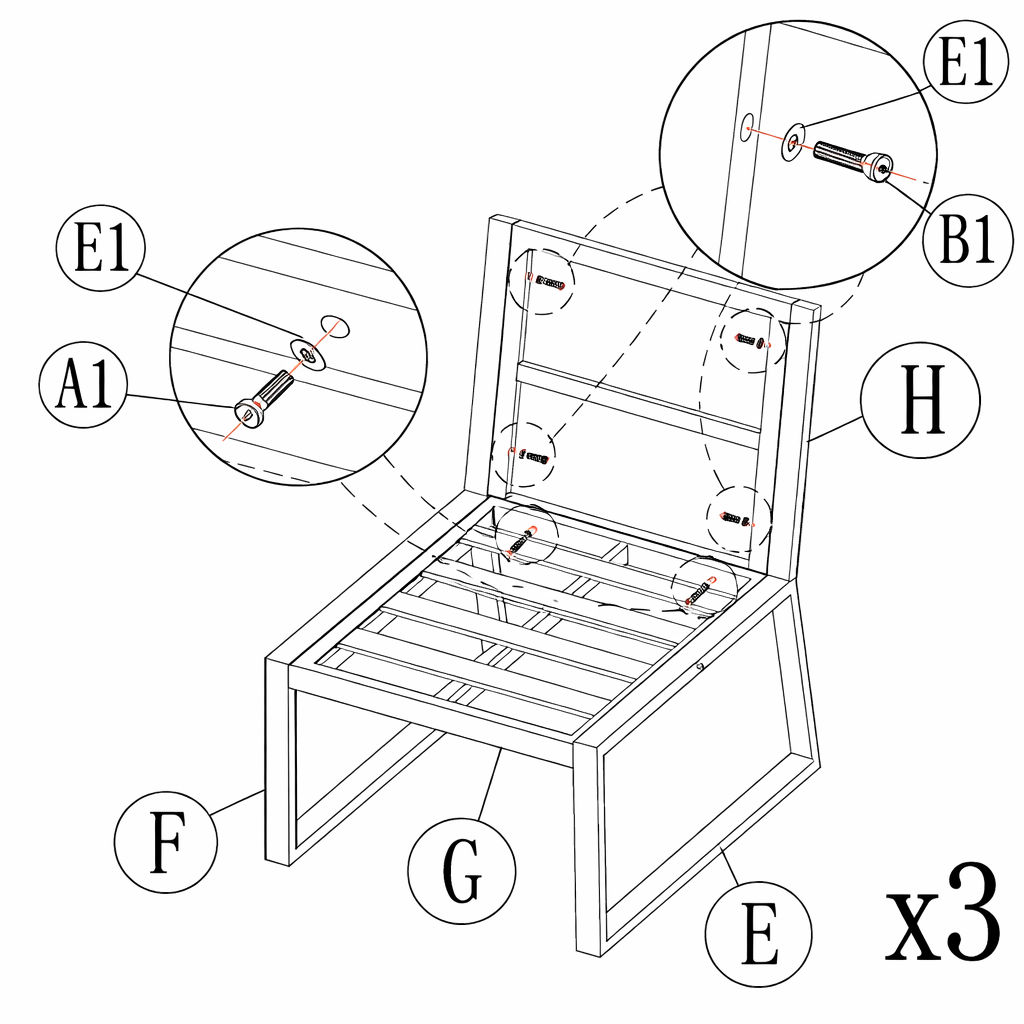
5. Step 2 - Attach the Back
Frame (Part H) to the Base (Part G)
1. Stand the Back Frame (Part H) Upright
-Place the back frame (Part H) onto the rear of the base (Part G) in between the side frames
(Parts E and F). 2. Insert Lower Bolts (A1) Put a washer (Part E1)
onto each bolt (Part A1). Insert through the lower holes (near the seat base). Hand tighten only. 3. Insert Upper Bolts (B1) Put a washer
(Part E1) onto each bolt (Part B1). Insert through the upper side holes into the back
frame. Hand tighten. 4. Tighten All Bolts Once aligned and
straight, fully tighten all bolts using the Allen key.
*
Notice:
Do not fully tighten until all bolts are inserted.
The seat frame is now assembled and ready for cushions.
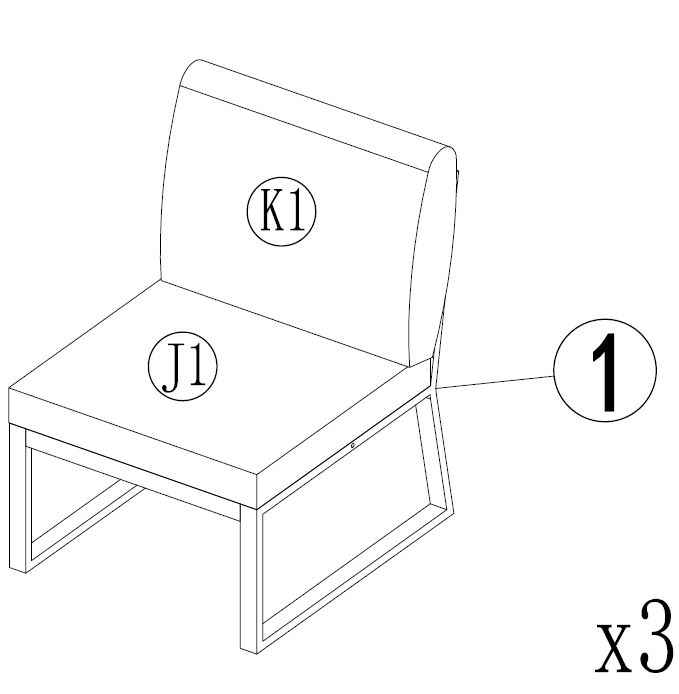
6. Step 3 - Insert Sofa Seat
& Back Cushions
1. Place the Seat Cushion (Part J1) Lay the seat cushion flat onto
the sofa base. Push it fully back so it sits neatly within the frame. 2.
Position the Back Cushion (Part K1) Stand the back cushion upright
against the backrest. Centre it evenly between the side frames. 3. Adjust
& Align Ensure both cushions are straight and flush with the frame
edges. Smooth out any folds in the fabric.
*
Notice:
Secure any cushion ties or Velcro straps (if included).
Ensure cushions are dry before outdoor use.
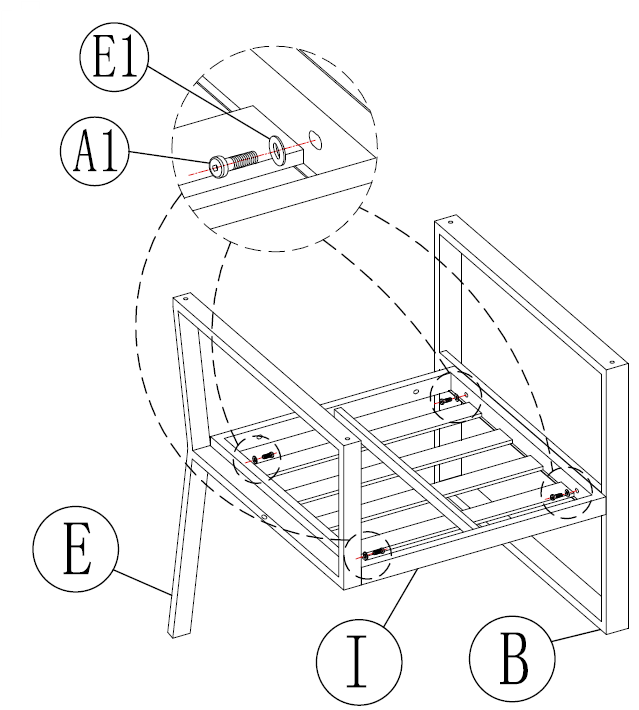
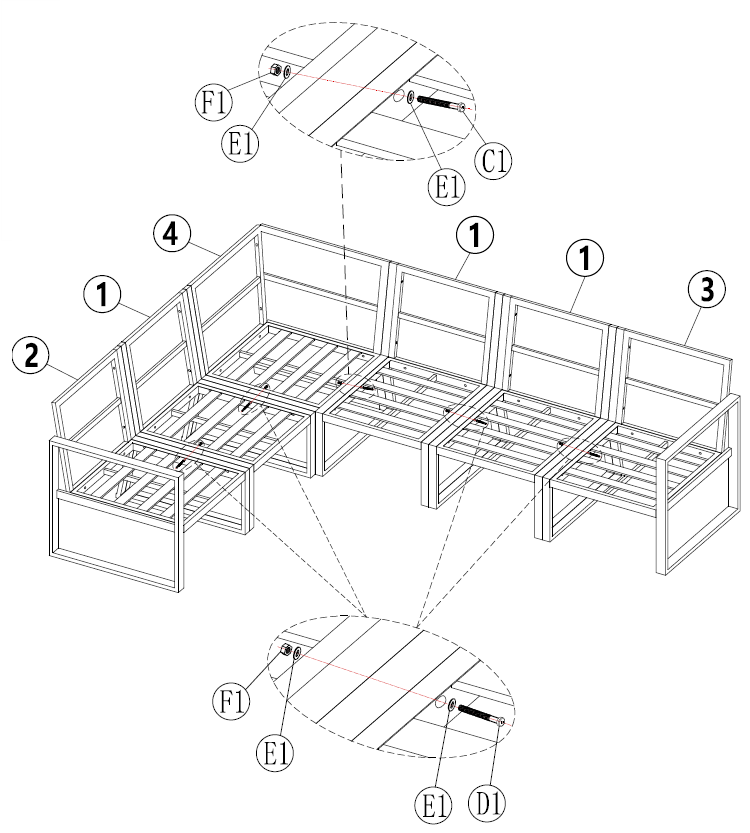
7. Step 4 - Secure Additional
Sofa Section to Arm Frame (E)
1. Align the Sections
* Position the next seat section I against the arm frame (Part E) and back frame (Part B).
* Ensure all connecting holes line up at the front, side, and rear points. 2.
Insert the Bolts (Part A1)
* Place a washer (Part E1) onto each bolt (Part A1).
* Insert bolts through the aligned holes at all connection points shown. 3.
Hand-Tighten First
* Lightly tighten all bolts to allow for small adjustments. 4. Final
Tightening
* Check that all sections are level and flush.
* Fully tighten all bolts using the Allen key.
*
Notice:
Do not fully tighten bolts until all are in place.
Ensure the sofa sits evenly on a flat surface before final tightening.
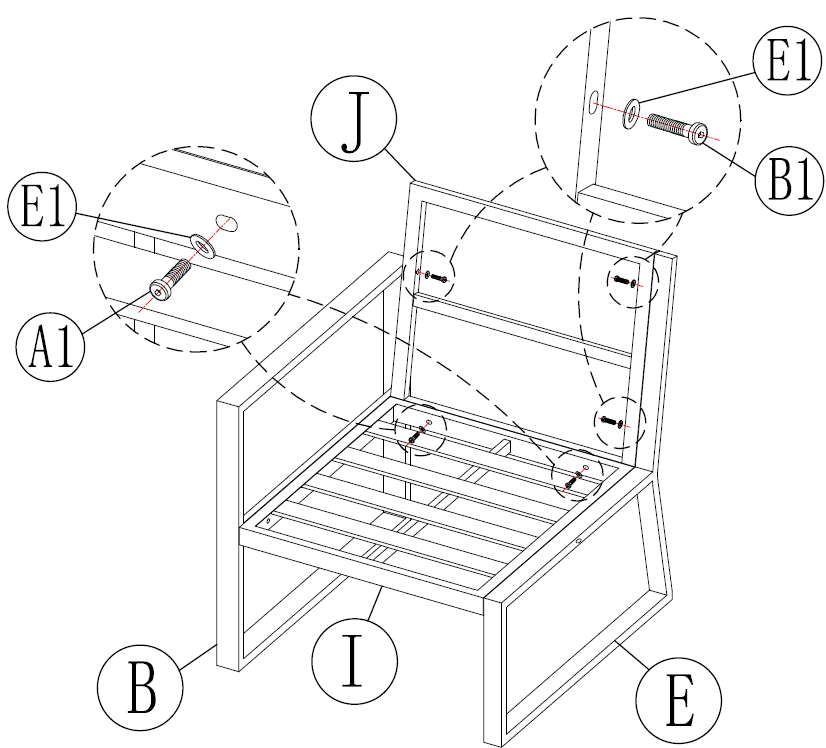
8. Step 5 - Attach the Back
Frame (Part J)
1. Position the Back Frame (Part J)
* Stand the back frame upright at the rear of the seat section I.
* Align the fixing holes with the side frames (Parts B and E) and the base. 2.
Attach Lower Bolts (Part A1)
* Place a washer (Part E1) onto each bolt (Part A1).
* Insert through the lower side/base connection points.
* Place a washer (Part E1) onto each bolt (Part B1).
* Insert through the upper side frame holes into the back frame.
* Hand-tighten. 4. Align & Fully Tighten
* Ensure the back frame is straight and fully seated.
* Once aligned, fully tighten all bolts using the allen key.
*
Notice:
Do not fully tighten bolts until all are inserted.
Assemble on a flat, level surface.
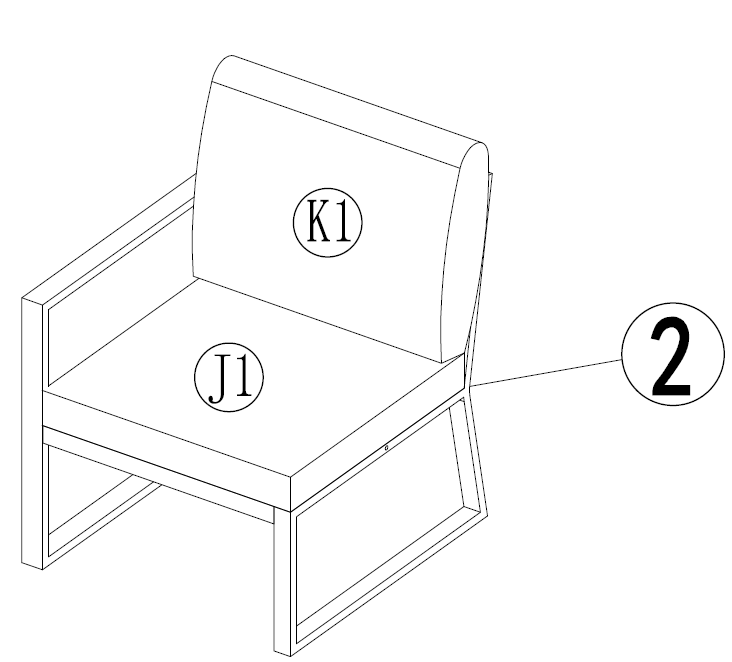
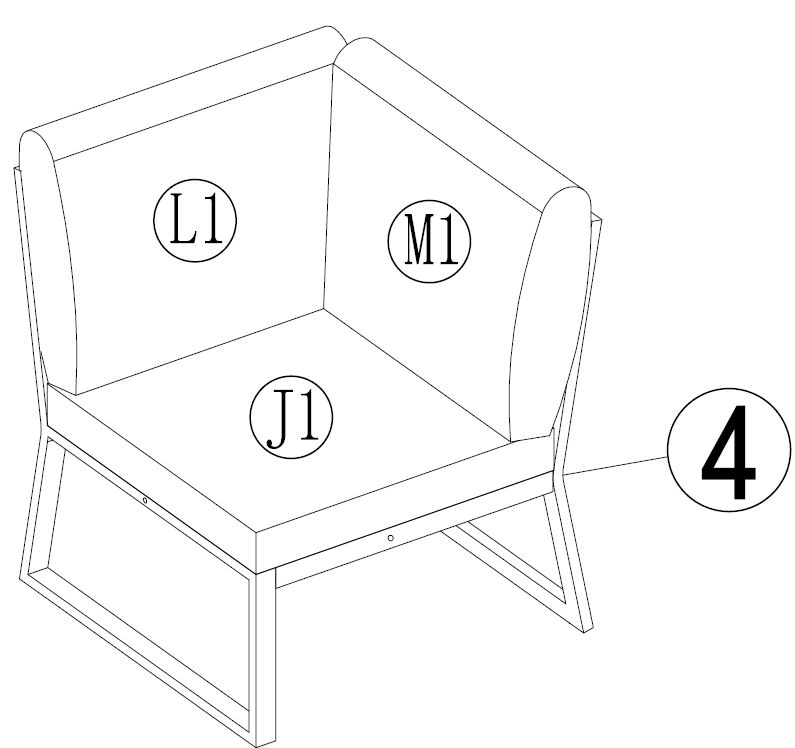
12. Step 9 - Insert Seat &
Back Cushions
1. Place the Seat Cushion (Part J1) Lay the seat cushion flat onto
the base. Push it fully back so it sits neatly within the frame. 2.
Position the Back Cushion (Part K1) Stand the back cushion upright
against the back frame. Ensure it sits centrally between the side frames. 3.
Final Adjustment Align both cushions so they are straight and flush
with the frame. Smooth out any creases or folds.
*
Notice:
Secure any cushion ties or Velcro straps if included.
Ensure cushions are dry before outdoor use.
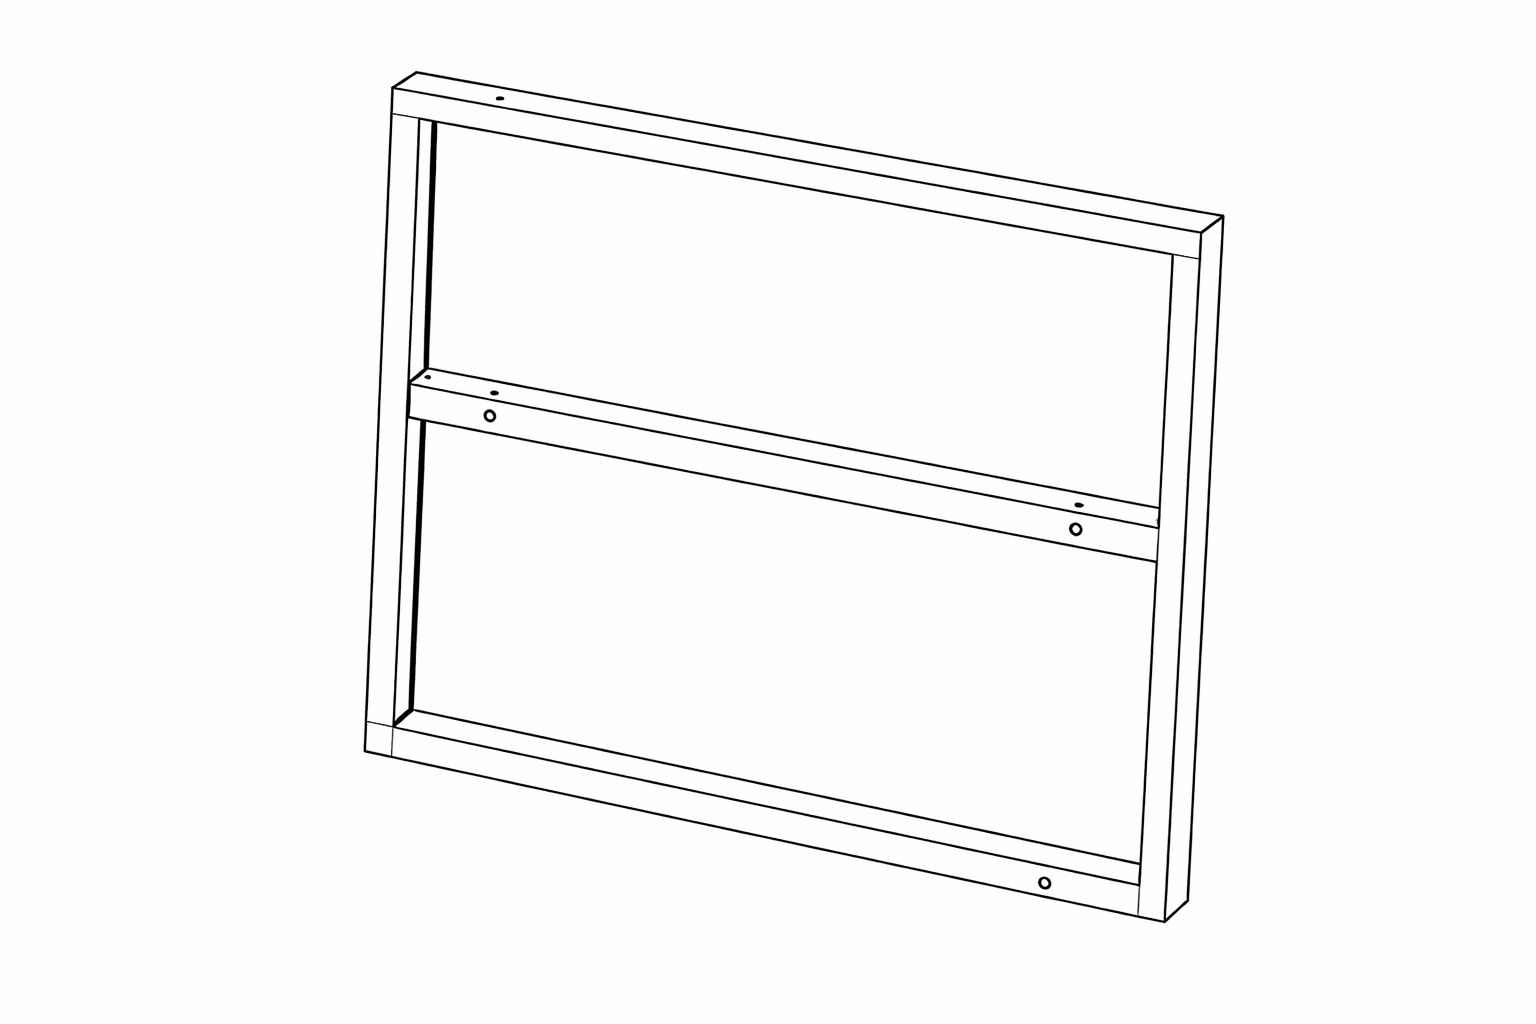
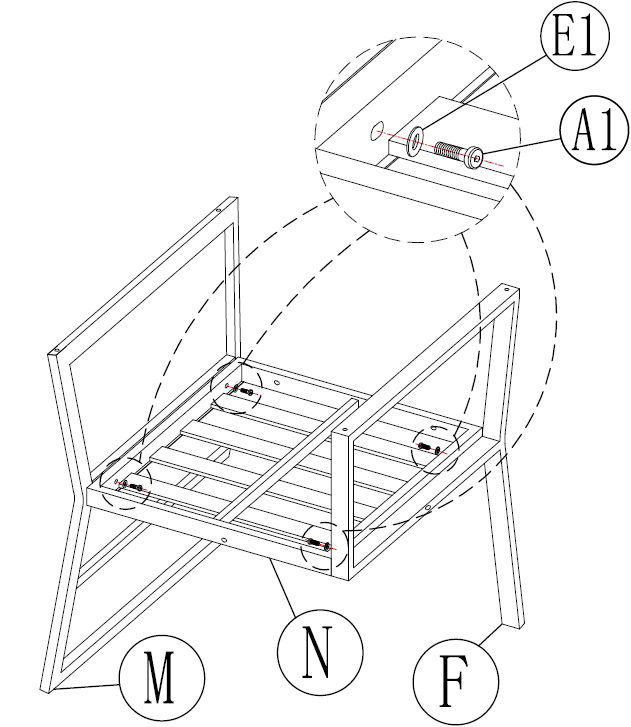
13. Step 10 - Attach the Side
Frames (Parts M & F) to the Base (Part N)
1. Position the Base (Part N) Place the base section on a flat, level
surface. 2. Attach the Side Frame (Part M)
* Align side frame (Part M) with the pre-drilled holes on the base.
* Place a washer (Part E1) onto each bolt (Part A1).
* Insert bolts through the frame into the base.
* Hand-tighten only. 3. Attach the Side Frame (Part F)
* Repeat the same process on the opposite side using the side frame (Part F).
* Ensure a washer (Part E1) is fitted to every bolt before tightening. 4. Align
& Fully Tighten
* Ensure both side frames are upright and square.
* Once aligned, fully tighten all bolts using the allen key.
*
Notice:
Do not fully tighten bolts until all bolts are in place.
Assemble on a level surface to ensure correct alignment.
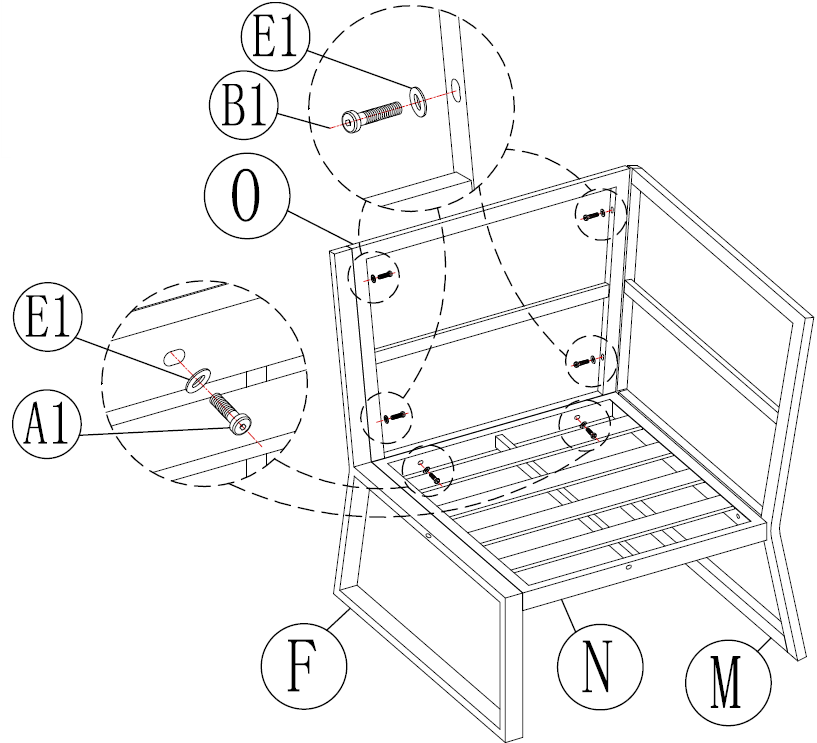
14. Step 11 - Attach the Back
Frame (Part O) to the Base (Part N)
1. Position the Back Frame (Part O)
* Stand the back frame upright at the rear of the base (Part N).
* Align the fixing holes with side frames (Parts M and F), and the base. 2. Attach
Lower Bolts (Part A1)
* Place a washer (Part E1) onto each bolt (Part A1).
* Insert through the lower connection points into the back frame.
* Repeat the same process using the bolt (Part D1) at the lower fixing points.
* Fit washers (Part E1) and secure with the nut (Part F1). 5. Fully Tighten All
Connections
* Once all sections are aligned, fully tighten using the allen key and spanner.
*
Notice:
Do not fully tighten until all connectors are installed.
Ensure all sections are flush and level before final tightening.
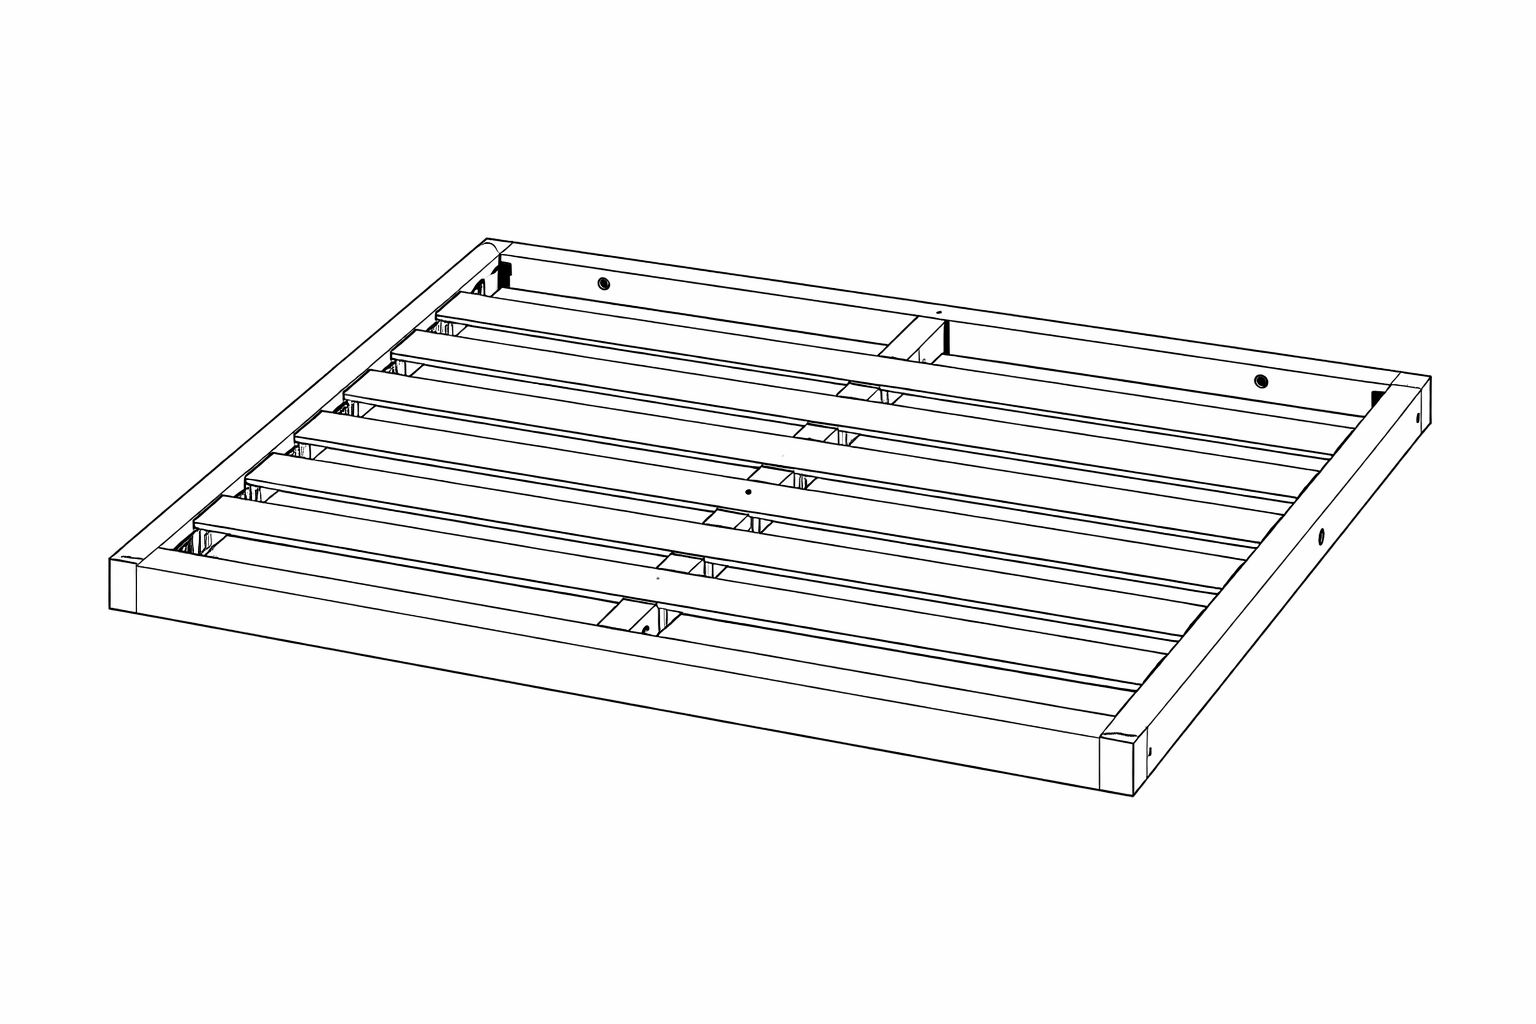
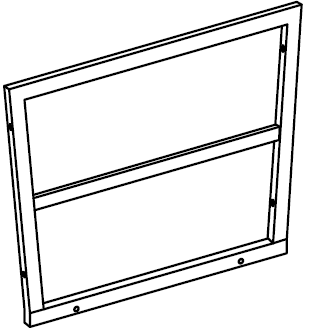
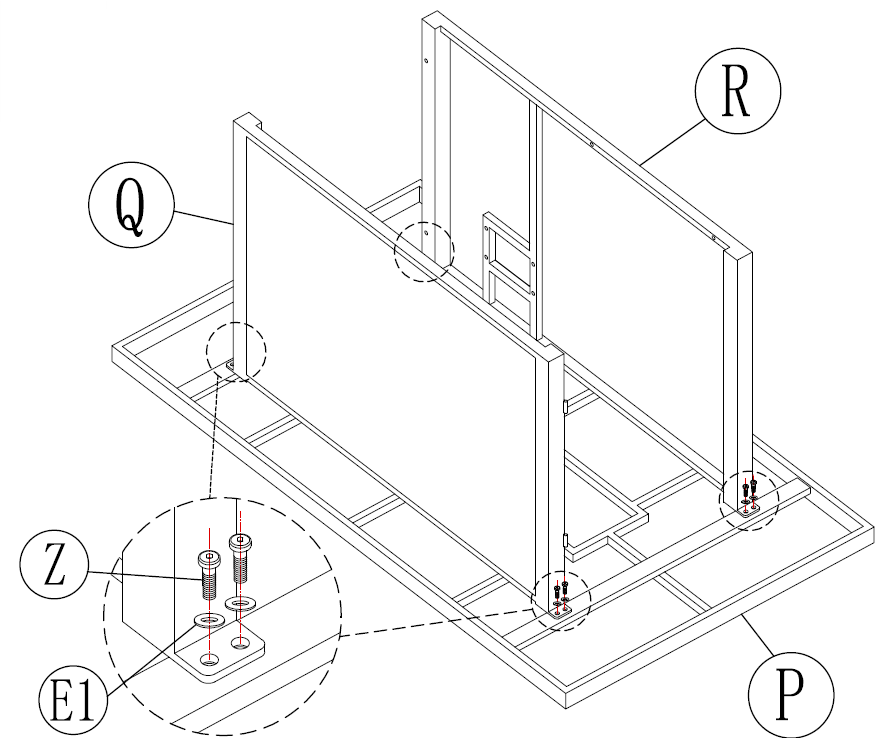
17. Step 1 - Assemble the
Firepit Table Frame
Position the Base (Part P)
Place the table base frame upside down on a soft, flat surface to prevent scratching.
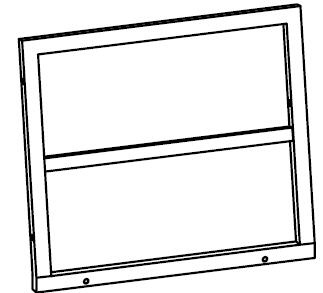
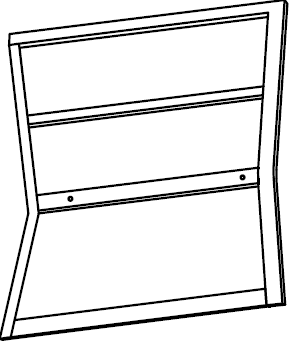
1. Attach Panel (Part Q)
* Align the panel (Part Q) with the pre-drilled holes on the base frame.
* Place a washer (Part E1) onto each bolt (Part Z).
* Insert bolts through the panel feet into the base frame.
* Hand-tighten only. 2. Attach the Panel (Part R)
* Repeat the process with the panel (Part R) on the opposite side.
* Ensure all bolts include washers before tightening. 3. Secure the Frame
* Check that both panels are straight and aligned.
* Fully tighten all of the bolts using the allen key. 4. Turn the Table
Upright
* Carefully turn the table frame upright once all bolts are secure.
*
Notice:
Do not fully tighten bolts until all are inserted.
Assemble on a soft surface to protect the finish.
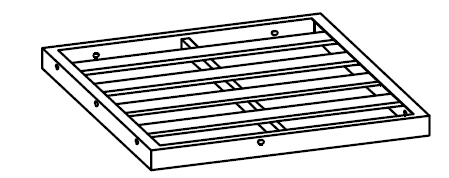
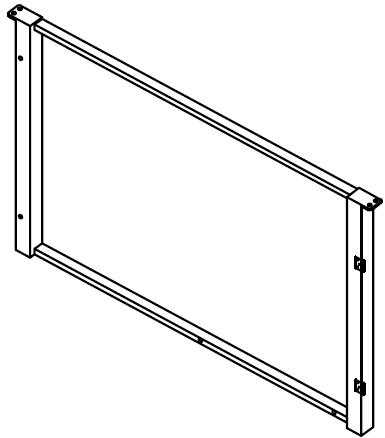
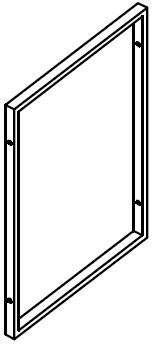
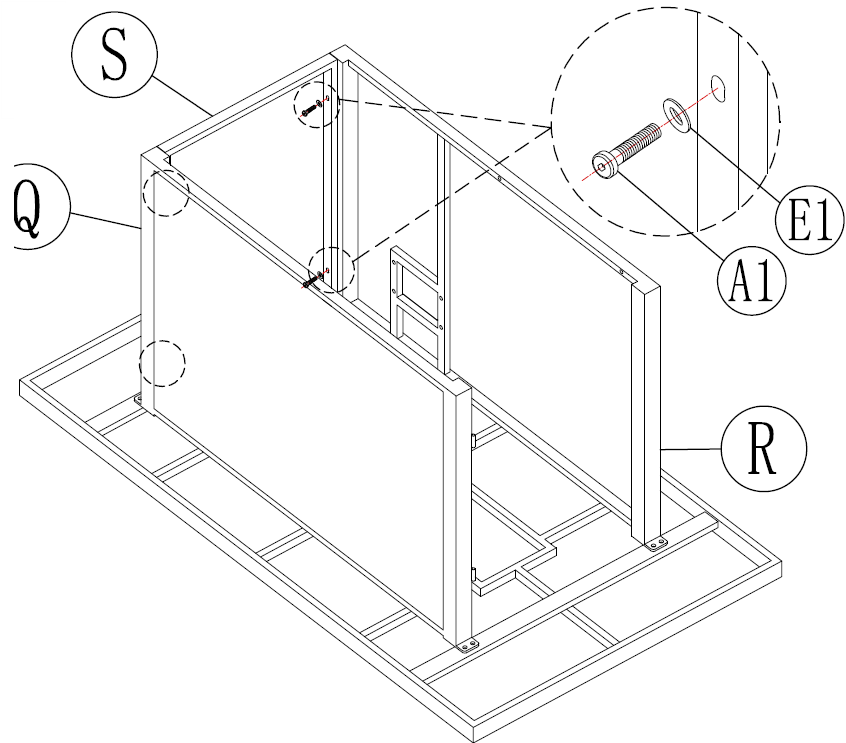
18. Step 2 - Attach the Top
Frame to The Firepit Table Base
1. Position the Top Frame (Part S)
* Place the top frame (Part S) onto the upright panels (Parts Q and R).
* Align all pre-drilled holes at the upper connection points. 2. Insert Bolts (Part
A1)
* Place a washer (Part E1) onto each bolt (Part A1).
* Insert the bolts through the aligned holes at all fixing points shown. 3.
Hand-Tighten First
* Lightly tighten all of the bolts to allow for adjustment. 4. Align & Fully
Tighten
* Ensure the top frame is level and square.
* Fully tighten all of the bolts using the allen key.
*
Notice:
Do not fully tighten bolts until all bolts are inserted.
Ensure the frame sits evenly before final tightening.
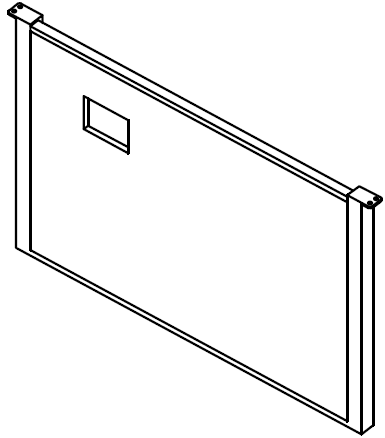
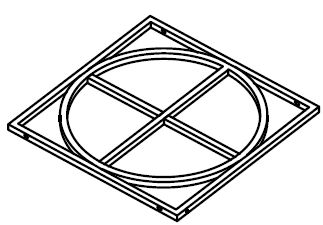
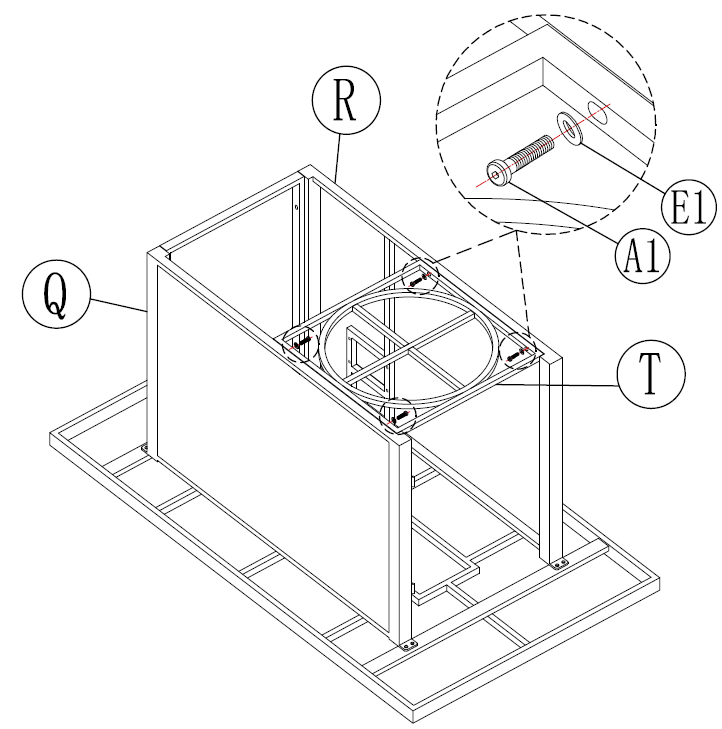
19. Step 3 - Install the
Firepit Support Insert
1. Position the Insert (Part T)
* Carefully lower the firepit support insert (Part T) into the top opening of the table frame.
* Ensure it sits evenly on the internal support ledges. 2. Align Fixing
Points
* Rotate or adjust the insert so that all pre-drilled holes align with the frame holes. 3.
Insert the Bolts (Part A1)
* Place a washer (Part E1) onto each bolt (Part A1).
* Insert bolts through the frame into the insert fixing points.
* Hand-tighten all of the bolts first. 4. Fully Tighten
* Once aligned and level, fully tighten all of the bolts using the allen key.
*
Notice:
Ensure the insert sits flat and level before tightening.
Do not overtighten bolts.
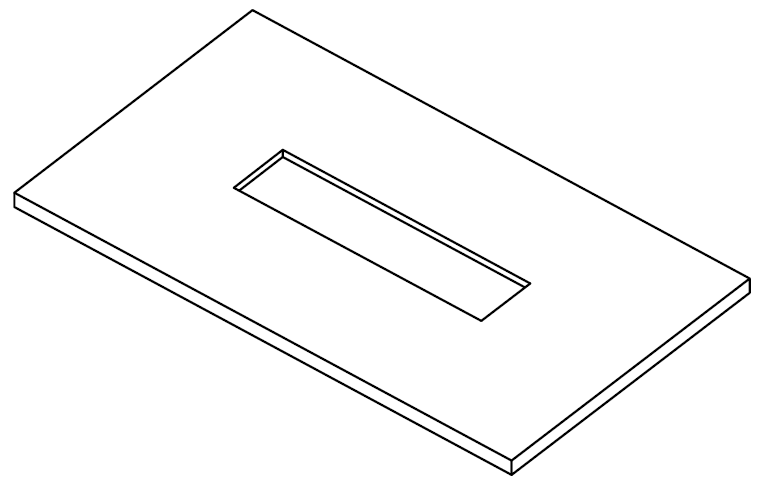
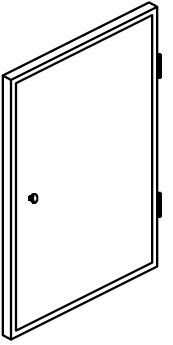
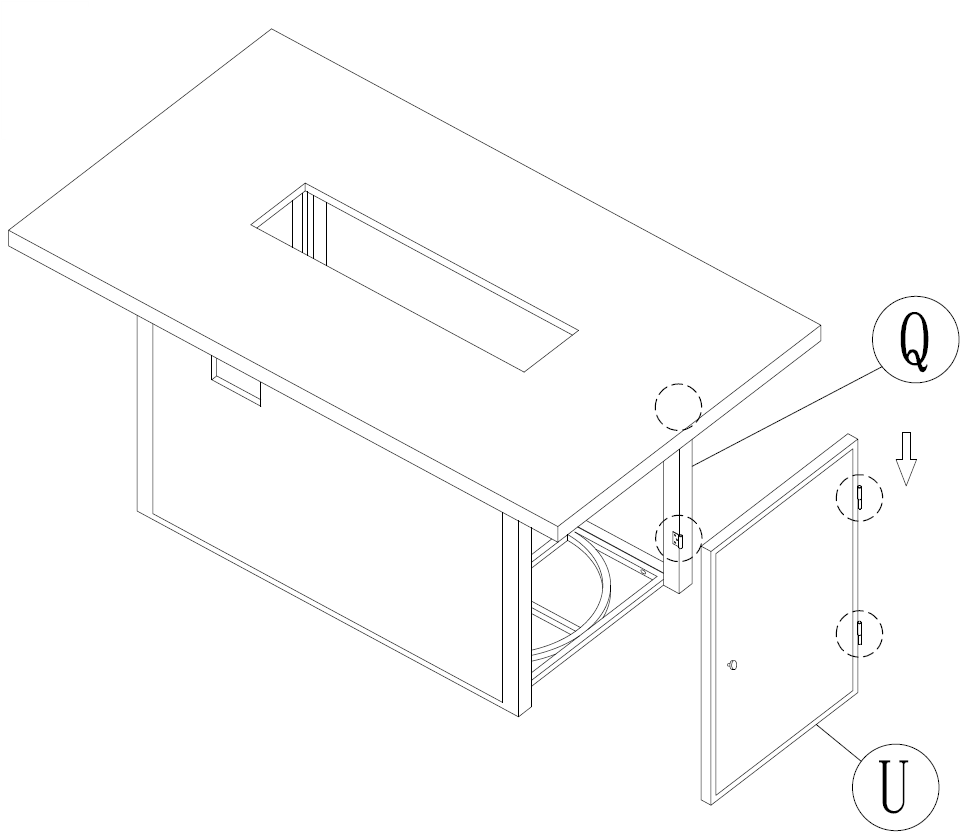
20. Step 4 - Install the Table
Top and Attach the Door
Fit the Table Top
Carefully lift the table top and lower it onto the assembled table frame.
Ensure the central opening aligns correctly with the firepit insert.
Check that the table top sits flush and level on all sides.
Attach the Door (Part U)
Align the hinges on the door (Part U) with the hinge plates inside the table frame.
Slot the hinges into position from top to bottom as shown.
Ensure the door is fully seated on both hinges.
Test that the door opens and closes smoothly.
Final Checks
Confirm the table top is secure and level.
Ensure the door is aligned and closes properly.
Check that all previously installed bolts are fully tightened.
*
Notice:
Before using the firepit, ensure all gas connections are installed according to the firepit
operating instructions.
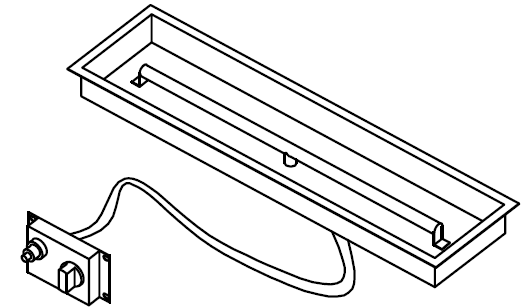
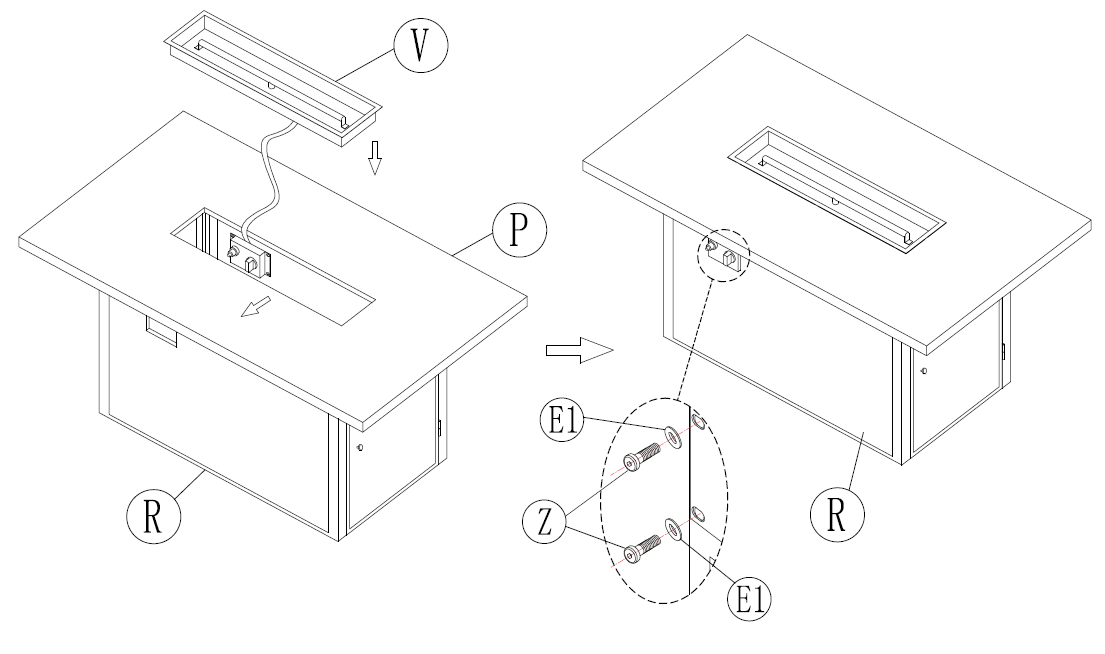
21. Step 5 - Install the Burner
Unit and Secure the Control Panel
Install the Burner Unit (Part V)
Carefully lower the burner unit (Part V) into the rectangular opening in the table top.
Feed the gas hose down through the opening toward the control panel area.
Ensure the burner sits flat and evenly within the insert frame.
Secure the Control Panel
Align the control panel with the mounting holes on the inside of the panel (Part R).
Place a washer (Part E1) onto each bolt (Part Z).
Insert the bolts through the panel into the control unit mounting holes.
Hand-tighten first, then fully tighten using the allen key.
Final Checks
Ensure the burner unit is seated level.
Confirm the control panel is securely fixed and aligned.
Check that the gas hose is not twisted or pinched.
*
Notice: Gas connection to the propane cylinder must be completed following
the firepit operating and safety instructions. Always perform a leak test before first use.
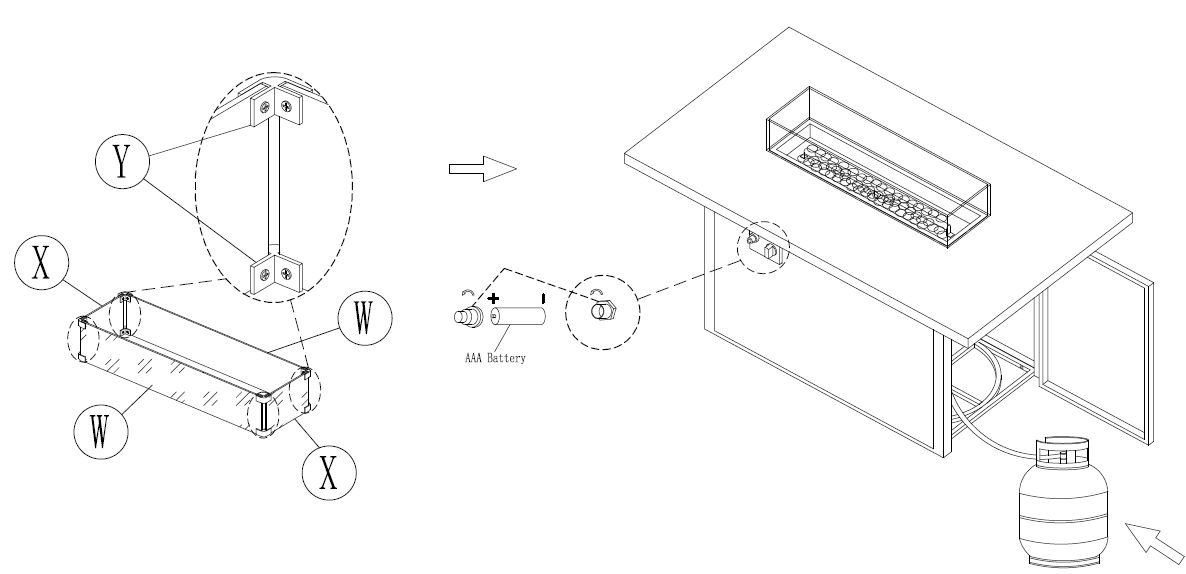
22. Step 7 - Install Glass
Guard, Insert Battery and Connect Gas
Assemble the Glass Guard:
1. Attach the Corner Brackets (Y)
* Fix the brackets (Part X) to the glass panels (Part W) at each corner as shown.
* Ensure all screws are securely tightened. 2. Install the Support Brackets (Part
Y)
* Secure the support brackets (Part Y) to the inside corners of the assembled glass
guard. 3. Position on the Table
* Carefully place the completed glass guard over the burner opening.
* Ensure it sits evenly and securely on the table top.
Insert the Battery:
1. Locate the ignition compartment on the control panel. 2. Insert 1 x AAA battery, ensuring
correct polarity (+ / –). 3. Secure the battery cap.
Connect the Gas Cylinder:
1. Place the gas cylinder inside the table cabinet. 2. Connect the gas hose regulator to the
cylinder valve. 3. Tighten securely by hand (do not overtighten with tools). 4. Keep the
hose free from twisting or pinching.
*
Notice:
Perform a full gas leak test using soapy water on all connections.
Ensure the glass guard is stable.
Only use outdoors in a well-ventilated area.
Keep flammable materials away from the unit.
23. Maintenance
Regular maintenance is essential to ensure the continued safety, structural stability and safe
gas operation of your 7 seater modular gas firepit sofa set. The following procedures support
the control measures identified in the product risk assessment and must be carried out
routinely.
General Structural Maintenance (Modular Seating)
Inspect all underside joining screws and interconnecting fixings at least every 3 months and
after any relocation. Tighten securely to prevent separation of modules and reduce instability
or trip hazards.
Check that all seating sections remain level and correctly aligned around the firepit table.
Uneven positioning may create instability or stress on the frame.
Examine metal frames for corrosion, cracking, distortion or weld fatigue. Discontinue use if
structural damage is identified until repaired or replaced.
Clean metal frames using mild soapy water and a soft cloth. Do not use abrasive cleaners,
solvent-based products or pressure washers.
Ensure adjustable feet (if fitted) remain secure and provide even ground contact.
Cushion Maintenance
Regularly inspect cushions for heat exposure damage, scorch marks or fabric degradation.
Ensure they remain correctly placed a safe distance away from the fire and are not pushed
into contact with the firepit table.
Store cushions in a dry, ventilated area when not in use to prevent moisture damage and
mould growth.
Allow cushions to dry fully before reuse if exposed to rain.
Replace any cushion showing signs of fire damage, excessive wear or filling displacement.
Gas Firepit and Table Maintenance
Before each use, visually inspect the gas hose, regulator and all connection points for
wear, cracking or deterioration.
Perform a gas leak test periodically and after every cylinder change using an approved leak
detection solution (never use a naked flame).
Ensure burner ports are clean and free from debris, insects or blockages. Clean gently with
a soft brush only when the unit is fully cool and disconnected.
Inspect the ignition system regularly to ensure reliable operation.
Clean the burner tray and media area of dust, debris or water accumulation to prevent uneven
flame distribution.
Check that the glass wind guard is clean, correctly positioned and free from cracks or
chips. Do not operate the firepit if damaged.
Allow the firepit to cool completely before fitting any protective cover.
Ensure the table surface remains stable and secure with no looseness between the firepit
housing and table structure.
Gas Cylinder and Hose Maintenance
Always store the gas cylinder outdoors in an upright position, away from heat sources and
direct sunlight.
Disconnect the cylinder when the firepit is not in use for extended periods.
Inspect the hose routing to ensure it does not create a trip hazard around the seating area.
Replace hoses showing signs of abrasion, UV degradation, cracking or stiffness.
Seasonal and Long-Term Storage
Thoroughly clean and dry all components before extended storage.
Store in a dry, covered location where possible.
Use a breathable protective cover only after the firepit has completely cooled.
Before re-use following long-term storage, conduct a full inspection of structural fixings,
burner condition and gas connections.
Replacement Parts and Modifications
Use only manufacturer-approved replacement parts for gas components, ignition systems and
structural fixings.
Do not modify the firepit burner, gas system, table housing or seating connection system.
Do not drill, weld or alter the frame structure, as this may compromise stability and
invalidate warranty.
Failure to carry out regular inspection and maintenance may increase the risk of gas leaks,
fire, burns, instability or structural failure and may invalidate the manufacturer’s warranty.
24.
Please read through the guide below if you have any issues or faults with your device.
The information covers and resolves the majority of frequently asked questions.
Q: There are parts missing from my order. A: If there appears to be any part
missing from your package contact our Customer Support team via the details on the Contact Us
page within 7 days of receipt.
For all other issues please contact our Customer Support department via the details on
the Contact page.