1. Step 1 - Attach the Side Panel to the Mounting Bracket
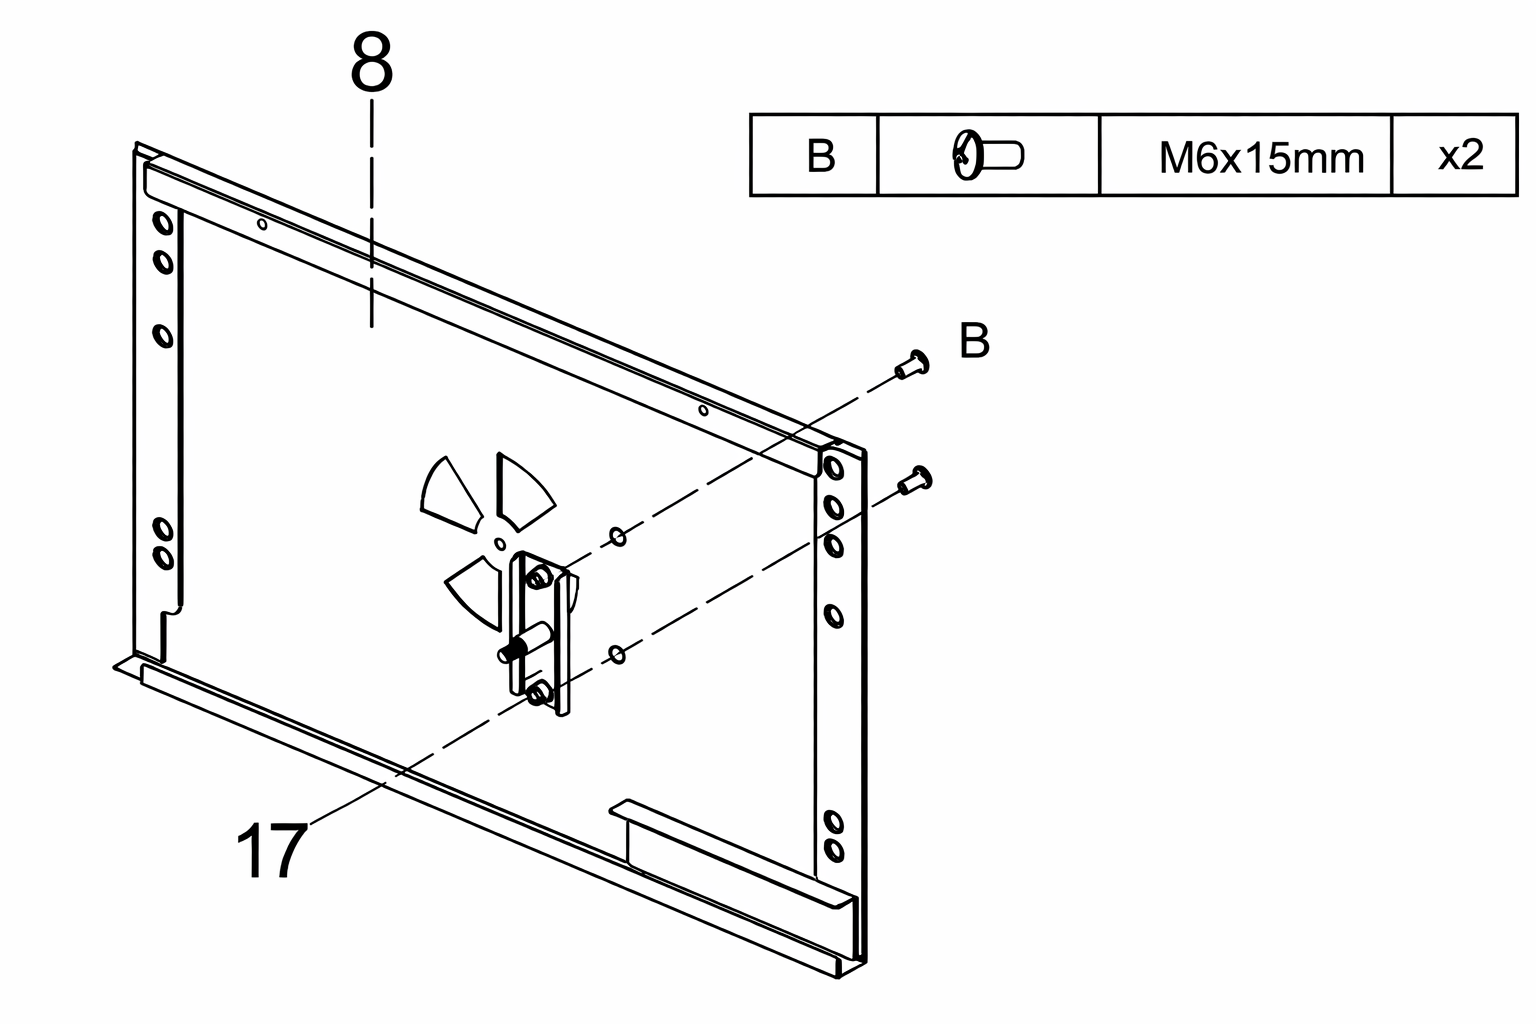
- Attach right hand side panel (Part 8) to the mounting bracket (Part 17) using the bolts (Part B).
Note: Make sure everything is lined up correctly before tightening the bolts.
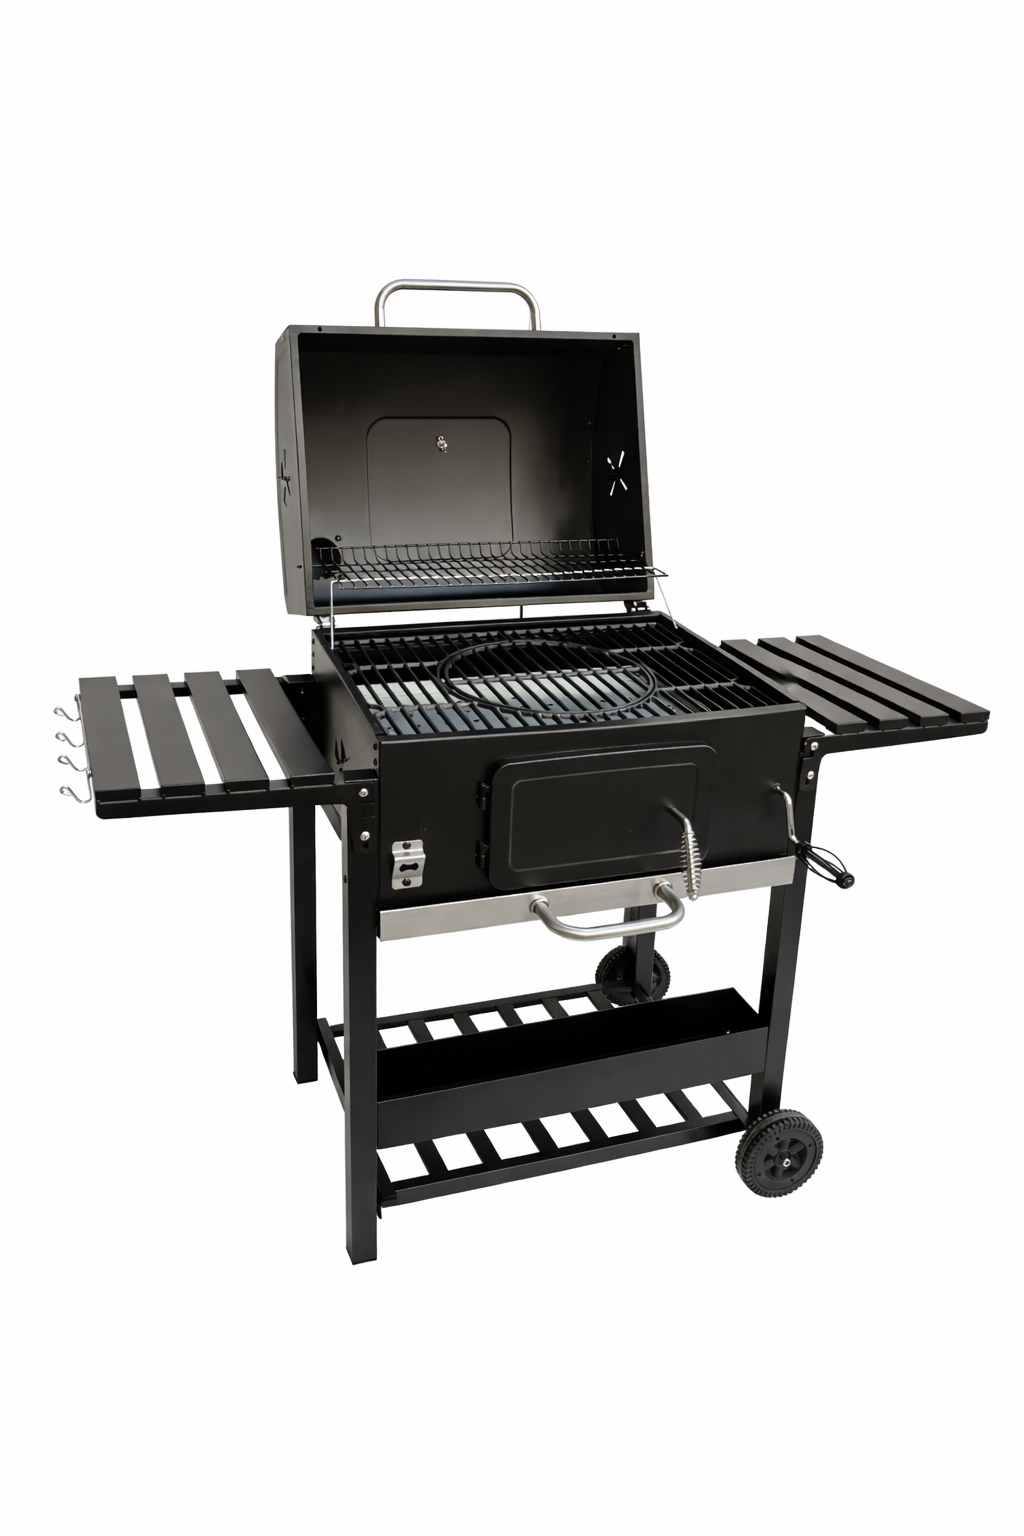 Instructions by monstershop BBQ Smoker Grills 2.0The XL and XXL BBQ Grills are robust outdoor charcoal grills built for entertaining and high-capacity cooking. Product InformationBBQ Smoker Grills 2.0The XL and XXL BBQ Grills are robust outdoor charcoal grills built for entertaining and high-capacity cooking. Designed for convenience and performance, they feature enhanced airflow control and ample storage to support efficient outdoor grilling. Perfect for patios and garden spaces, these grills deliver a reliable and versatile barbecue experience.
GPSR InformationUK
Monster Group UK Limited, Monster House 19-23 Alan Farnaby Way, Industrial Estate Sheriff Hutton, York YO60 6PG
Rana Harvey, Monster Group UK Limited, Monster House 19-23 Alan Farnaby Way, Industrial Estate Sheriff Hutton, York YO60 6PG, England, +441347878880 EU
Monster Group BV, Van Heemskerckweg 28A & B, Venlo 5928LL Netherlands +441347878880
Rana Harvey, Monster Group BV, Van Heemskerckweg 28A & B, Venlo 5928LL, Netherlands, +44134787888 Parts Part 1 - Thermostat  Part 2 - Vents 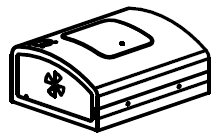 Part 3 - BBQ Lid 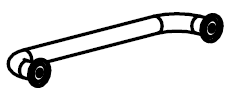 Part 4 - BBQ Lid Handle 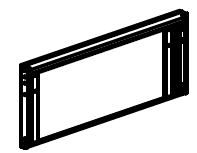 Part 5 - Back Panel 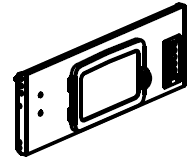 Part 6 - Front Panel with Door 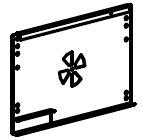 Part 7 - Left Side Panel 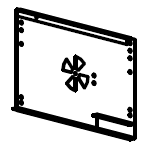 Part 8 - Right Side Panel 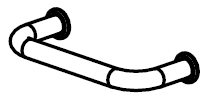 Part 9 - Lower Tray Handle 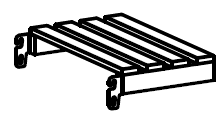 Part 10 - Side Shelves  Part 11 - Hooks 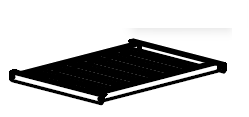 Part 12 - Lower Shelf 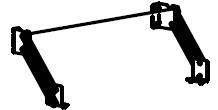 Part 13 - Support Bar 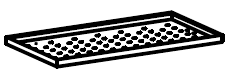 Part 14 - Stainless Steel Tray 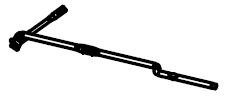 Part 15 - Threaded Mount  Part 16 - Chimney  Part 17 - Mounting Bracket  Part 18 - Storage Rack  Part 19 - Lower Tray  Part 20 - Brackets  Part 21 - Brackets  Part 22 - Bracket  Part 23 - Wheels  Part 24 - Left Legs  Part 25 - Right Legs  Part 26 - Support Bar 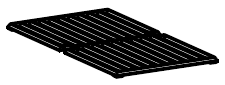 Part 27 - Stainless Steel Grill 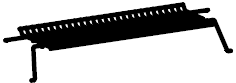 Part 28 - Upper Warming Tray  Part 29 - Adjustable Handle (XL) / Airflow Handle (XXL)  Part A - M5x12mm Bolts 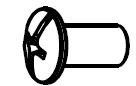 Part B - M6x15mm Bolts  Part D - M6x55mm Bolts 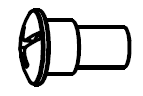 Part E - M6x12mm Bolts  Part F - M5mm Nuts  Part G - M6mm Nuts  Part H - M10mm Nuts 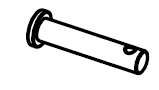 Part I - Pin Bolt  Part J - Pin 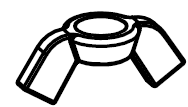 Part K - Wing Nut  Part M - M6 Wrench  Part N - M10 Wrench 1. Step 1 - Attach the Side Panel to the Mounting Bracket
Note: Make sure everything is lined up correctly before tightening the bolts. 2. Step 2 - Building the Base Frame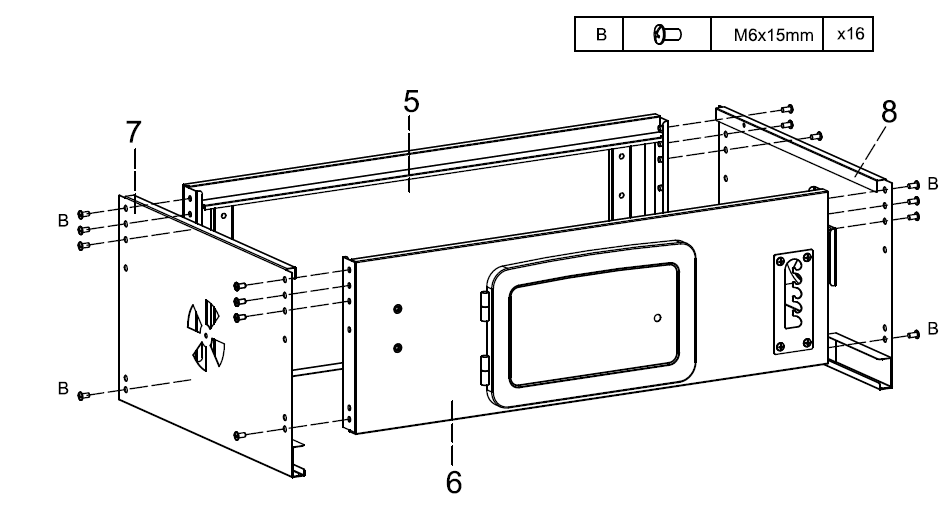
Note: Make sure everything is lined up correctly before securing the bolts. 3. Step 3 - Attaching the Vents to the Side Panels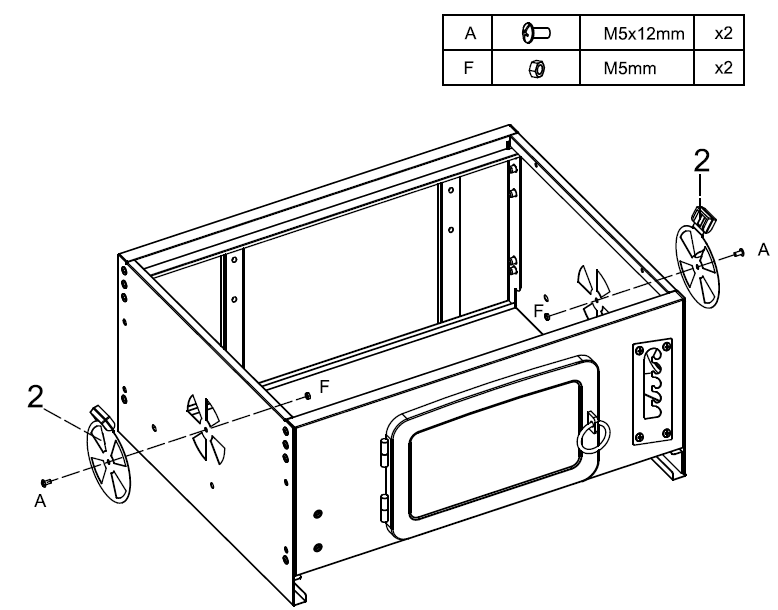
Note: Make sure everything is lined up correctly before securing the bolts. 4. Step 4 - Attach the Brackets to the Back Panel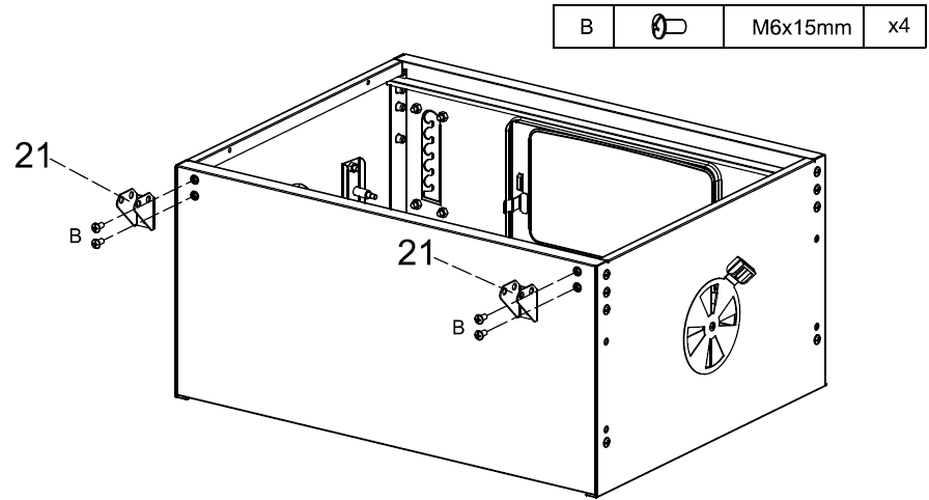
Note: Make sure that the bolts are lined up correctly with the holes. 5. Step 5 - Securing the Support Bar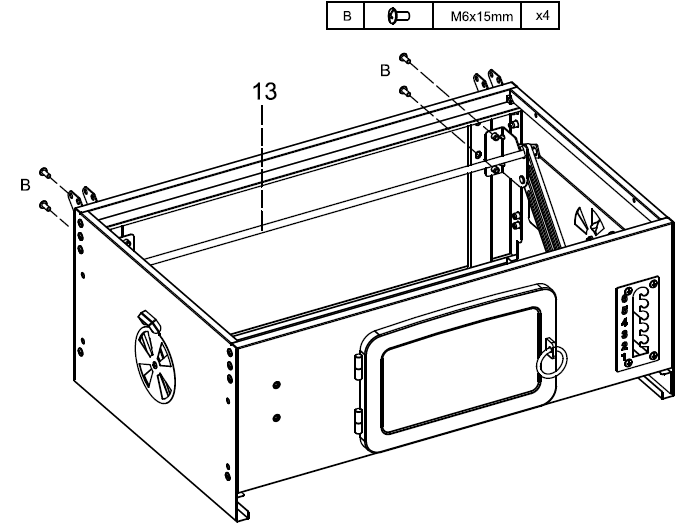
Note: Make sure everything is lined up correctly before tightening the bolts. 6. Step 6 - Installing the Threaded Mount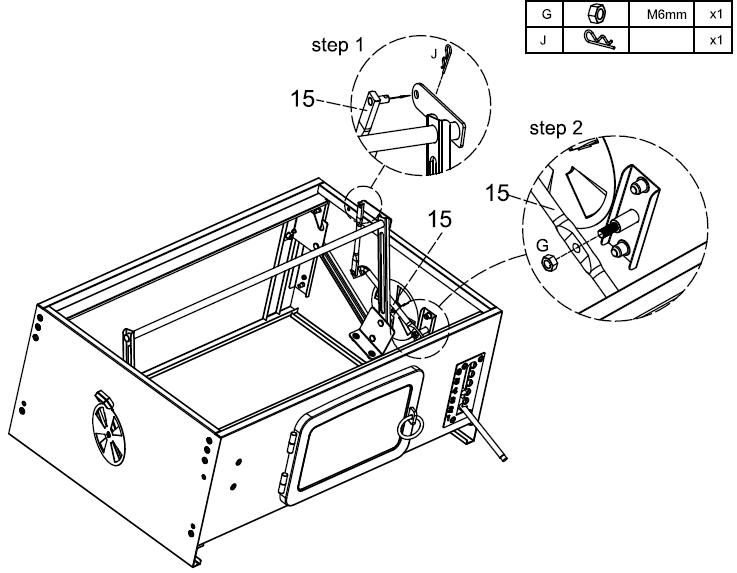
Note: Make sure everything is lined up correctly before tightening the nut. 7. Step 7 - Install the Stainless Steel Tray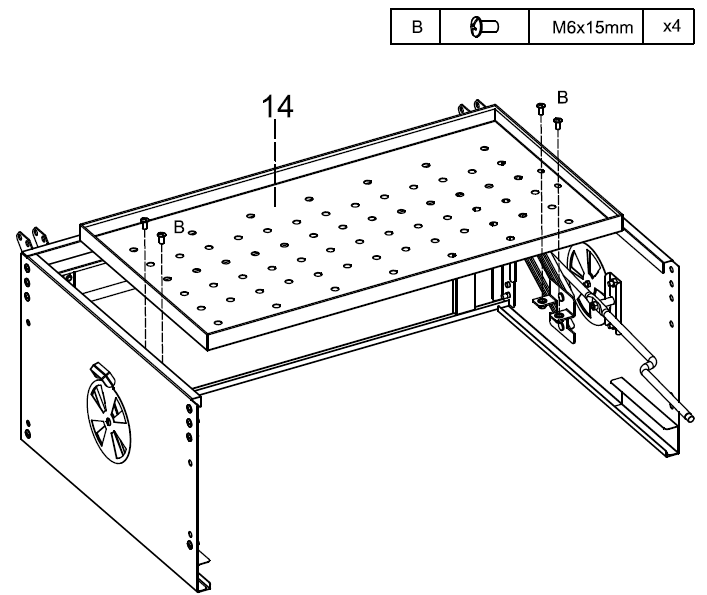
Note: Make sure everything is lined up correctly before securing the bolts. 8. Step 8 - Attaching the Adjustable Handle (XL) / Airflow Handle (XXL)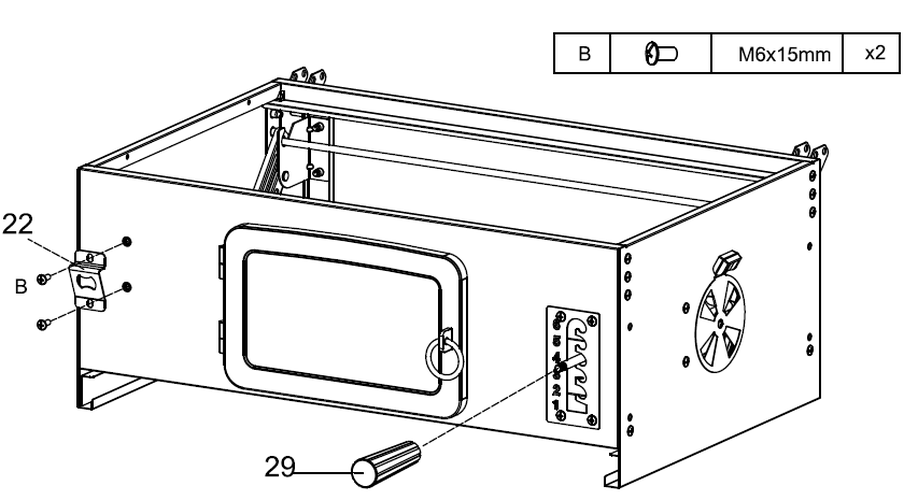
Note: Make sure everything is lined up correctly before securing the bolts. 9. Step 9 - Attaching the Legs and Bottom Shelf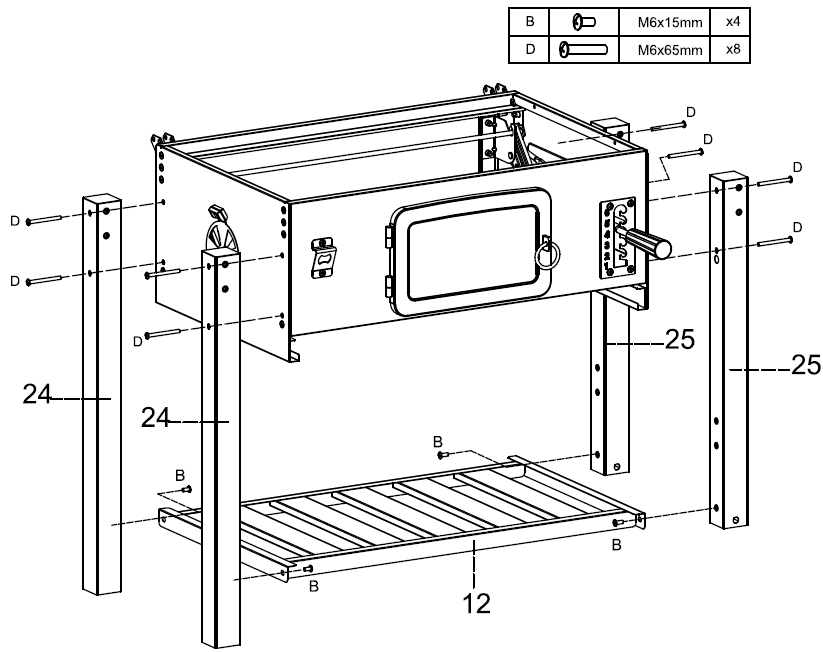
Note: Make sure everything is lined up correctly before securing the bolts. 10. Step 10 - Attaching the Wheels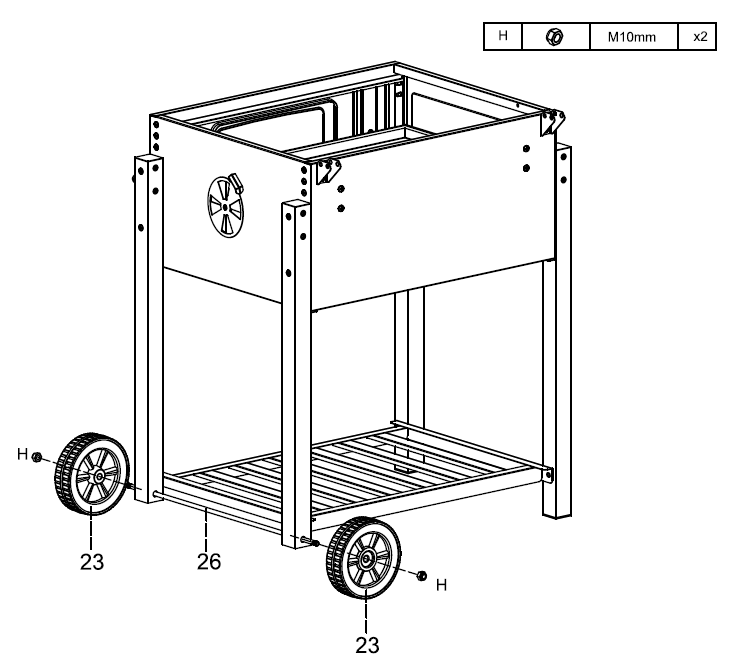
Note: Make sure the support bar is balanced evenly before securing the wheels into place. 11. Step 11 - Attaching the Storage Rack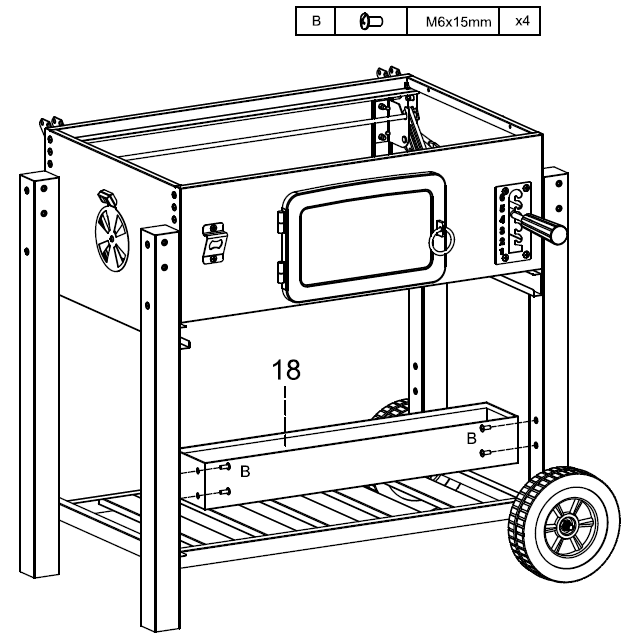
Note: Make sure the rack is balanced evenly before securing the bolts. 12. Step 12 - Installing the Side Shelves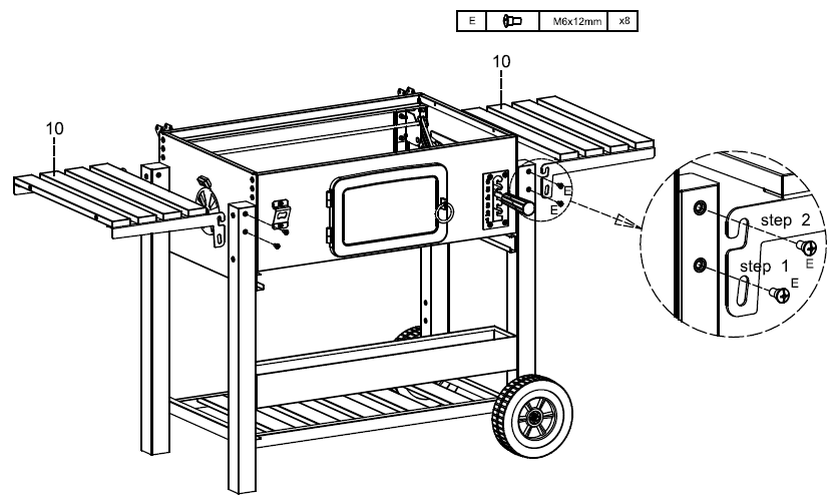
Note: Make sure the holes in the side shelves and legs are lined up correctly before securing the bolts. 13. Step 13 - Installing the Hooks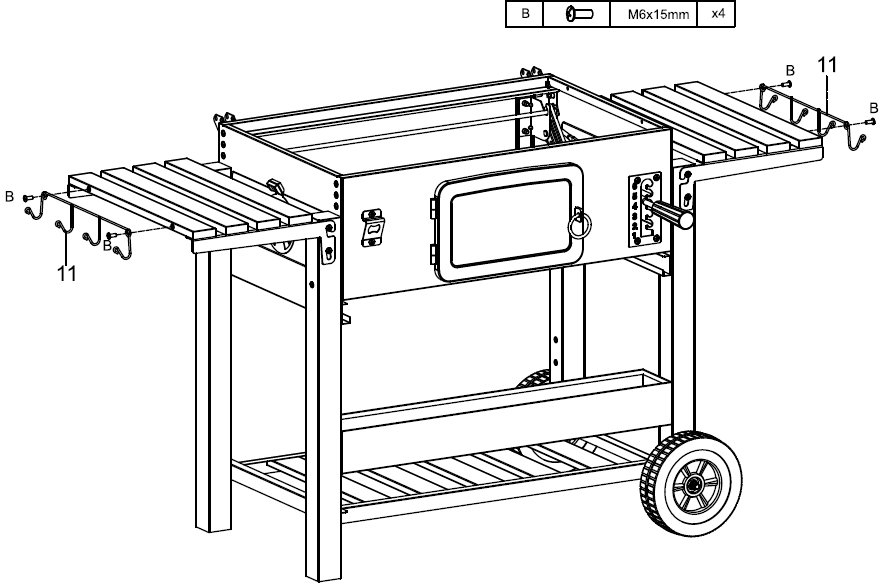
Note: Make sure everything is lined up correctly before securing the bolts. 14. Step 14 - Secure the Vents to the BBQ Lid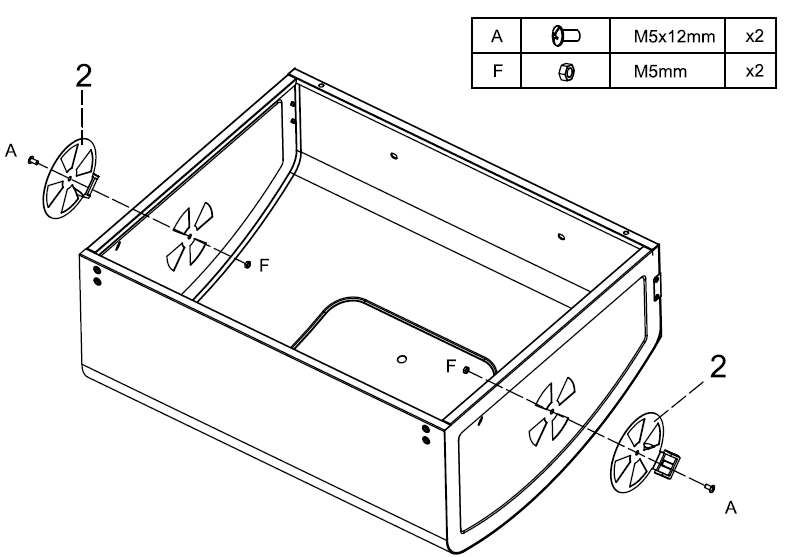
Note: Make sure the holes are lined up correctly before securing the bolts. 15. Step 15 - Attaching the BBQ Lid Handle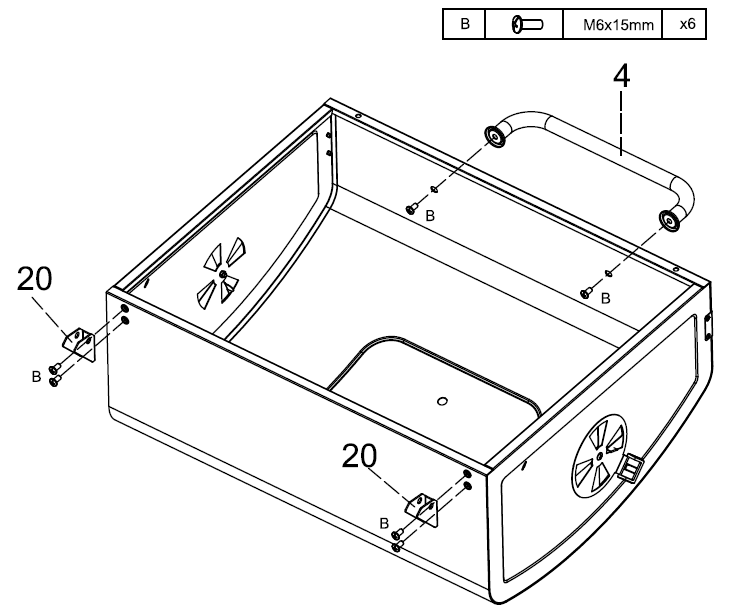
Note: Make sure everything is lined up correctly before securing the bolts. 16. Step 16 - Install the Thermostat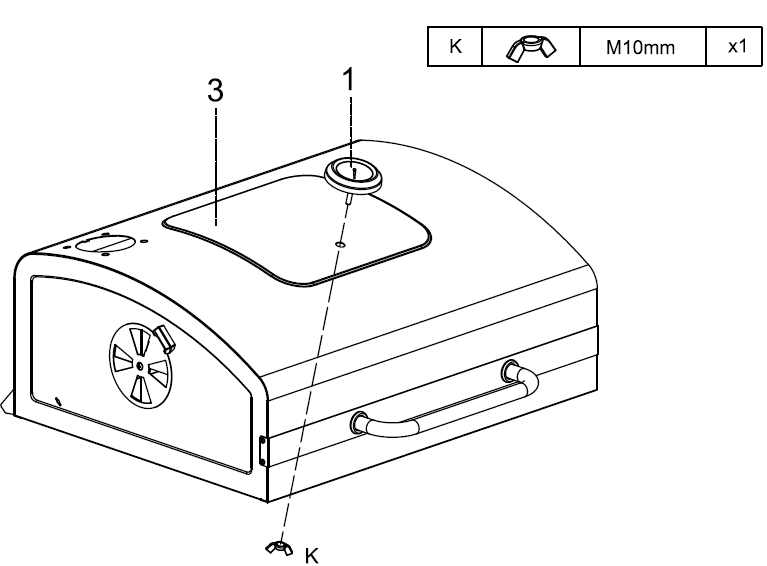
17. Step 17 - Attaching the Chimney to the BBQ Lid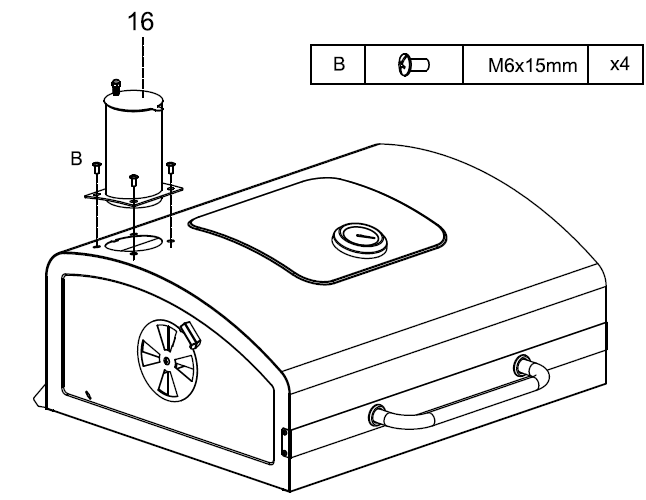
Note: Make sure everything is lined up correctly before securing the bolts. 18. Step 18 - Attaching the BBQ Lid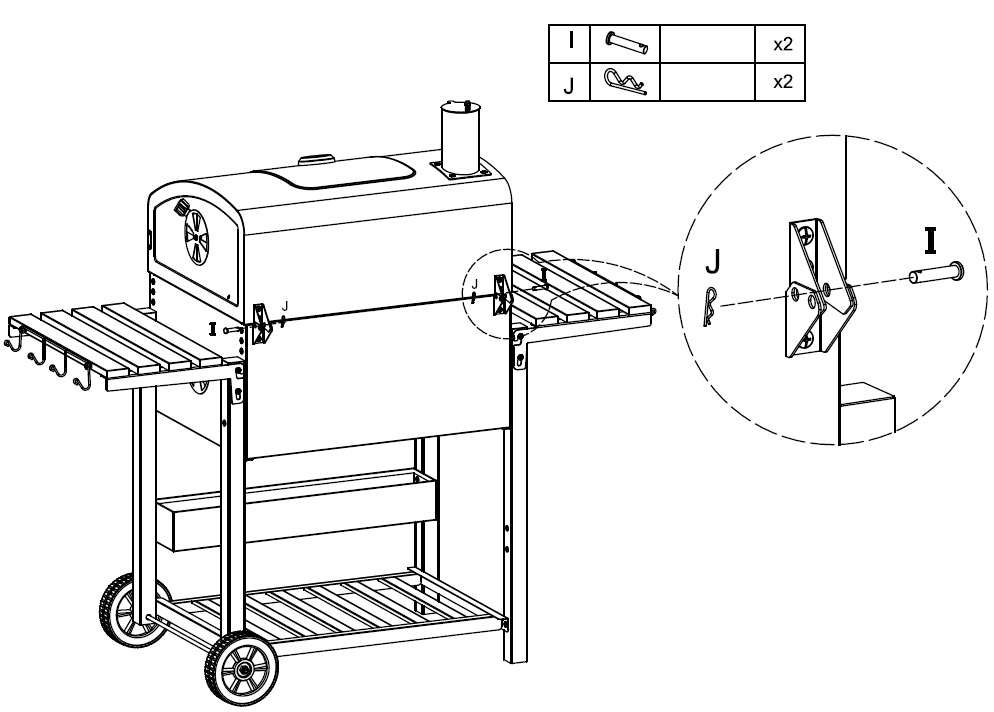
Note: Make sure the BBQ lid is lined up correctly before securing the bracket. 19. Step 19 - Installing the Upper Warming Tray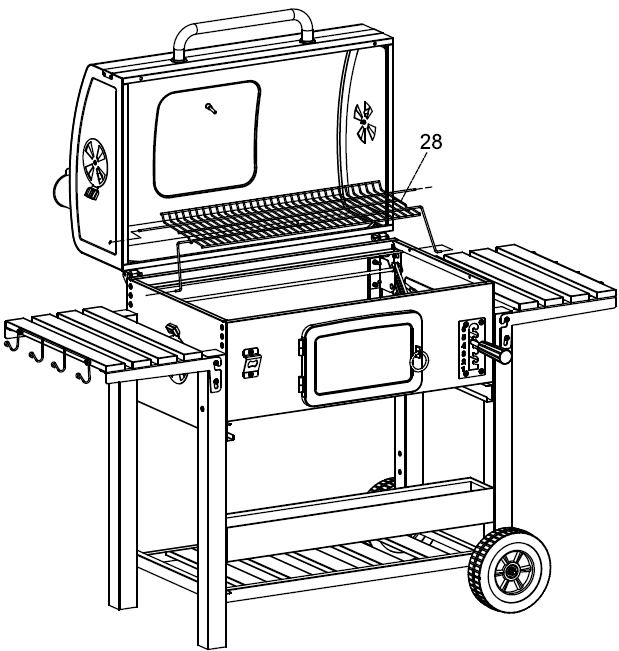
Note: Make sure everything is secured tightly before installing the upper warming tray. 20. Step 20 - Installing the Stainless Steel Grill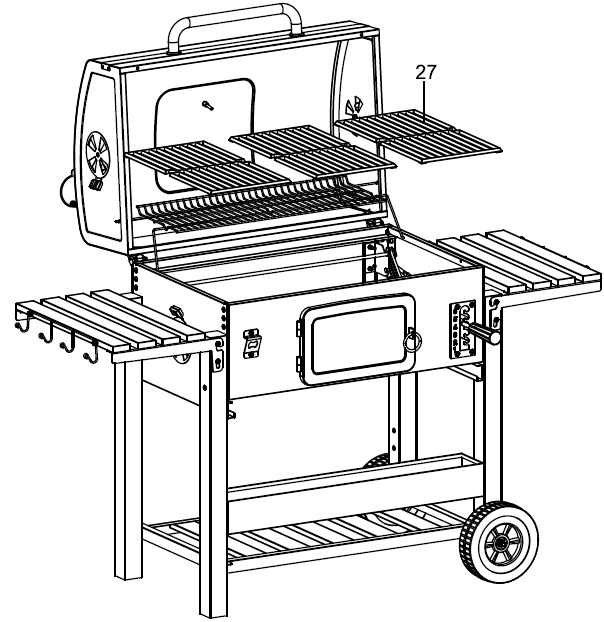
Note: Make sure everything is secured tightly before installing the stainless steel grills. 21. Step 21 - Attaching the Handle to the Lower Tray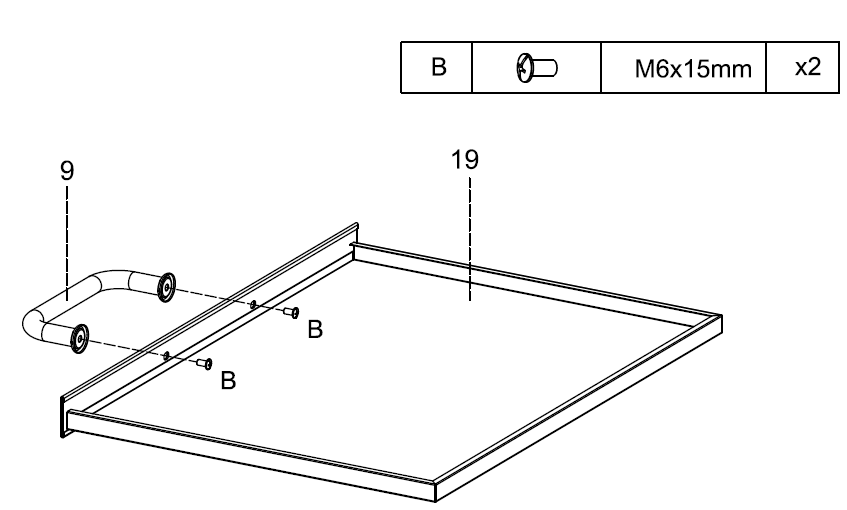
Note: Make sure the parts are lined up correctly before tightening the bolts. 22. Step 22 - Installing the Lower Tray
Note: Make sure everything is secured correctly before installing the lower tray. 1. Maintenance
2. TroubleshootingPlease read through the guide below if you have any issues or faults with your device. The information covers and resolves the majority of frequently asked questions. Q: There are parts missing from my order. A: If there appears to be any part missing from your package contact our Customer Support team via the details on the Contact Us page within 7 days of receipt. For all other issues please contact our Customer Support department via the details on the Contact page. |