This guide provides step-by-step instructions for assembling components and using the Mechanic Repair Stand
Product Information
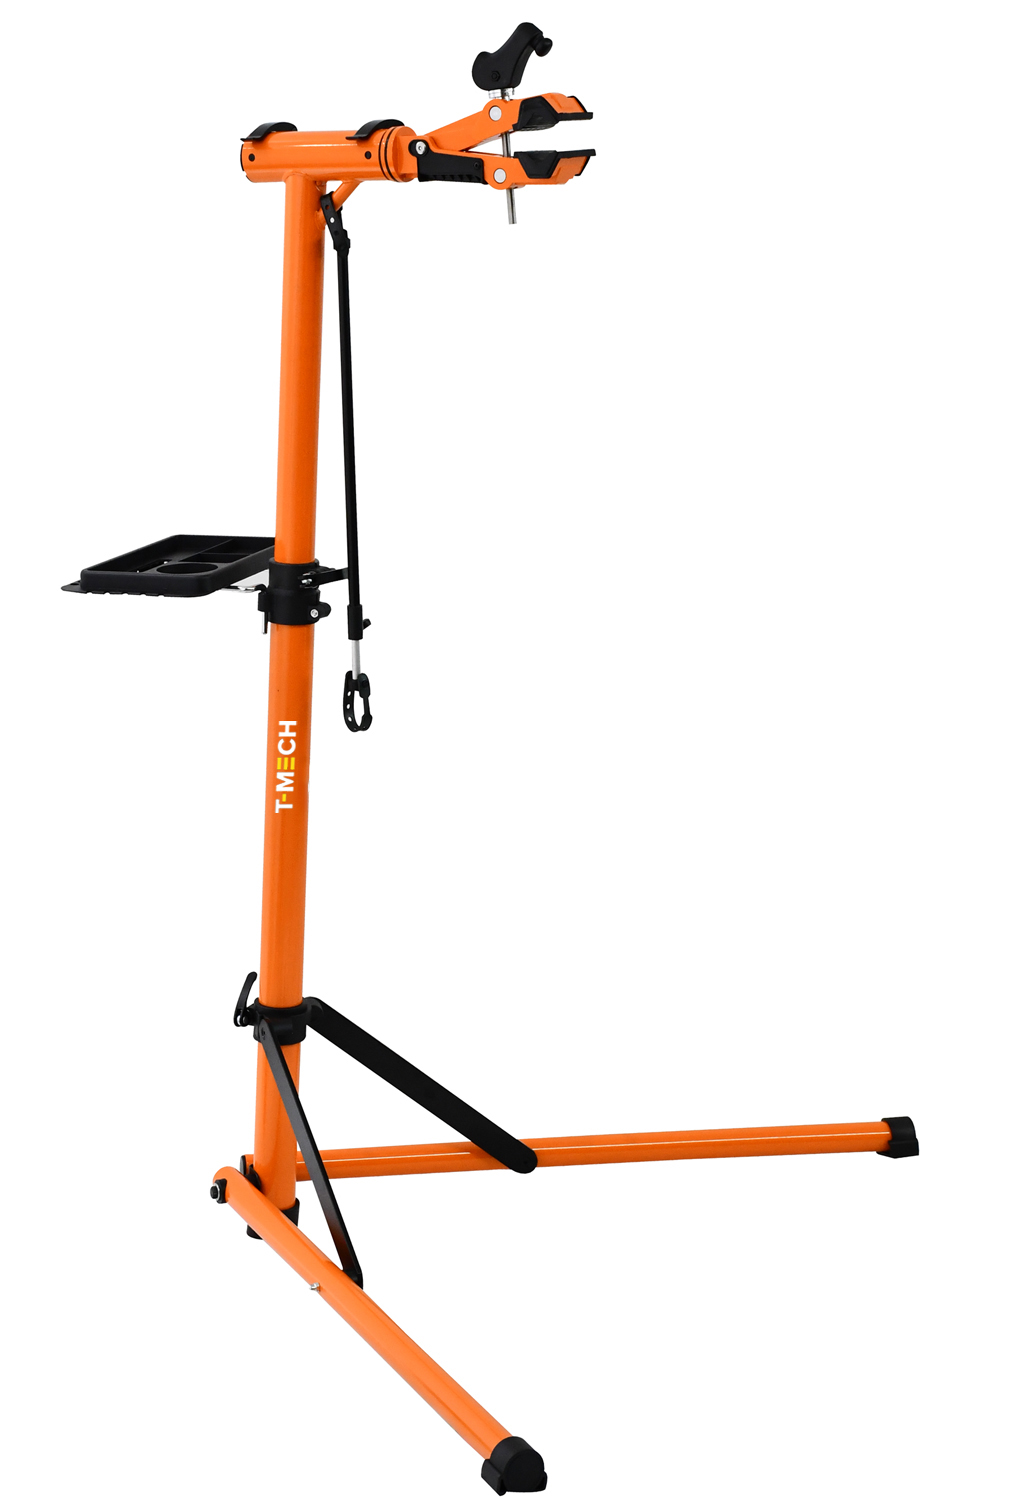
Mechanic Repair Stand
This aluminium alloy bicycle repair stand is designed to securely hold bikes for maintenance, cleaning, and adjustments, featuring a 360° rotating clamp and adjustable height for ergonomic working. Built with a durable powder-coated frame and stable base, it accommodates a wide range of bicycle sizes. The integrated magnetic tool tray and additional stabilising rod with straps enhance convenience and bicycle stability during repairs.
1. Opening the stand and inserting the Calliper head
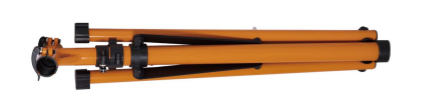
Open the quick release lever at the bottom of the stand to unfold the legs then close the lever to lock the legs securely in place
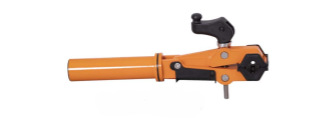
Open the two quick release levers at the top of the stand.
Insert the calliper head into the top of the stand and close the levers to secure.
2. Tool Tray Assembly & Securing
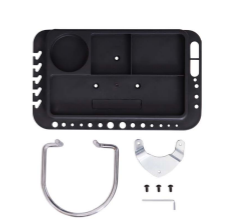
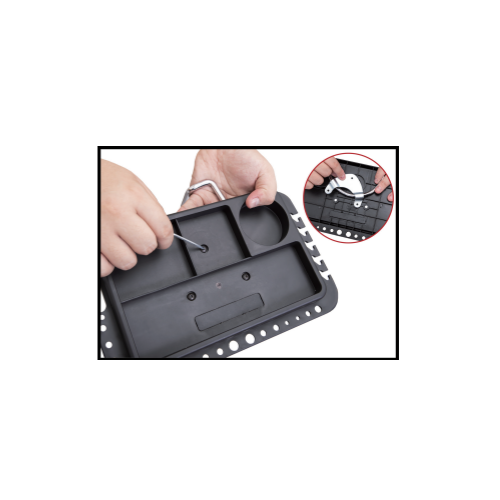
Place the U-shaped retaining clip into position on the tool tray.
Position the metal plate over the retaining clip, aligning it with the pre-drilled holes and trapping the clip in place.
Hold the plate in position and turn the tray over.
Insert the three screws from the front side of the tray.
Using an Allen key, tighten each screw until the metal plate is securely fixed in place.
3. Adding the tool tray
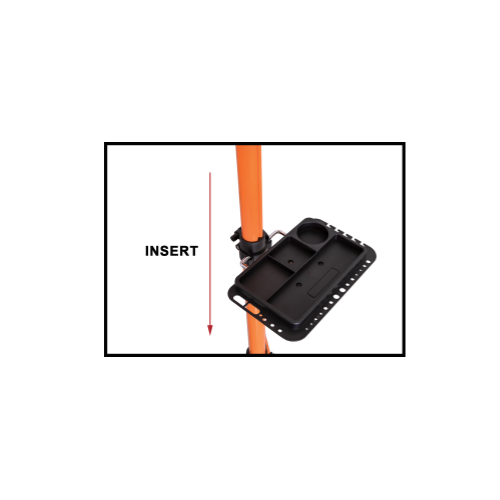
Line up the retaining clip arms with the holes on the stand and push down until the tool tray is in place.
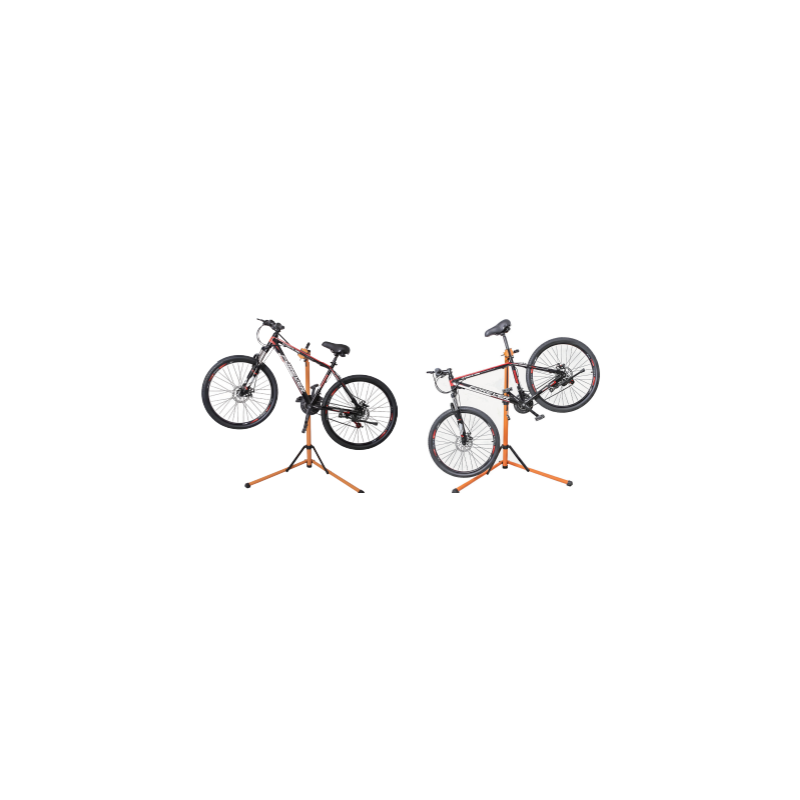
4. Using the Repair stand and adjustable support rod
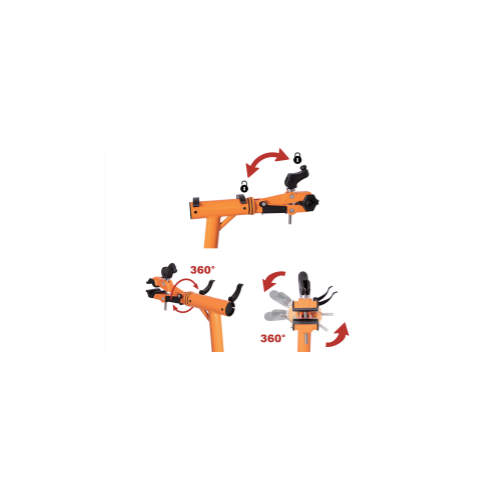
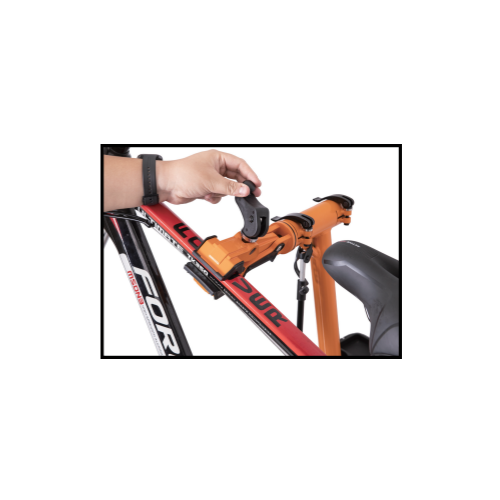
Open the calliper head by turning the handle to widen the clamp.
Lift the bike and position the frame between the clamp jaws (typically the seat post or frame tube).
Tighten the handle until the bike is held securely in place. Do not overtighten.
To adjust the height, open the height adjustment quick-release on the main pole, raise or lower the stand to the desired position, then close the quick-release firmly to lock it in place.
Adjust the angle of the calliper head as needed to suit your working position.
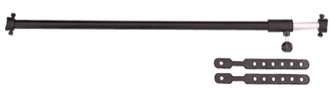
To use the adjustable support rod, attach one end to the stand and the other end to the front of the bike (typically the handlebar or fork). Adjust the rod length to stabilise the front wheel and prevent movement during repairs.
Once everything is secure and stable, carry out your maintenance or repairs.
When finished, loosen the handle and carefully remove the bike.
Note:
Always seek assistance when lifting the bike onto or off the stand, and when supporting its weight while making adjustments.
5. Maintenance
Regularly inspect the stand for wear, damage, or corrosion, especially on the clamp, joints, and load-bearing parts.
Check and tighten all bolts, screws, and locking mechanisms to ensure stability and safe operation.
Clean the stand after use to remove dirt and grease; avoid harsh chemicals that may damage materials.
Lightly lubricate moving parts such as the clamp and adjustment joints to maintain smooth operation.
Ensure the clamp jaws and locking mechanisms remain clean and function securely without slipping.
Inspect the stabilising rod and straps for wear or damage and replace if necessary.
Store the stand in a dry, indoor environment and avoid exposure to moisture or extreme temperatures.
Replace any damaged or worn components only with manufacturer-approved parts.
6. User Demonstration
Clamp the bike by the seat post whenever possible. If required, the frame may also be clamped, ensuring the area is strong and free from damage. Do not clamp fragile or thin tubing.
7. Troubleshooting
WHAT DO I DO IF THERE ARE MISSING PARTS FROM MY ORDER?
If there appears to be any part missing from your order, contact our friendly and helpful Customer Support Team within 7 days of receipt.