Instructions for assembling, installing, and using the Cast Iron Chimenea, a robust outdoor fireplace designed to warm up your garden and patio spaces. It includes safety advice, maintenance tips, and troubleshooting guidance to ensure safe and effective use.
Product Information
Cast Iron Chimenea
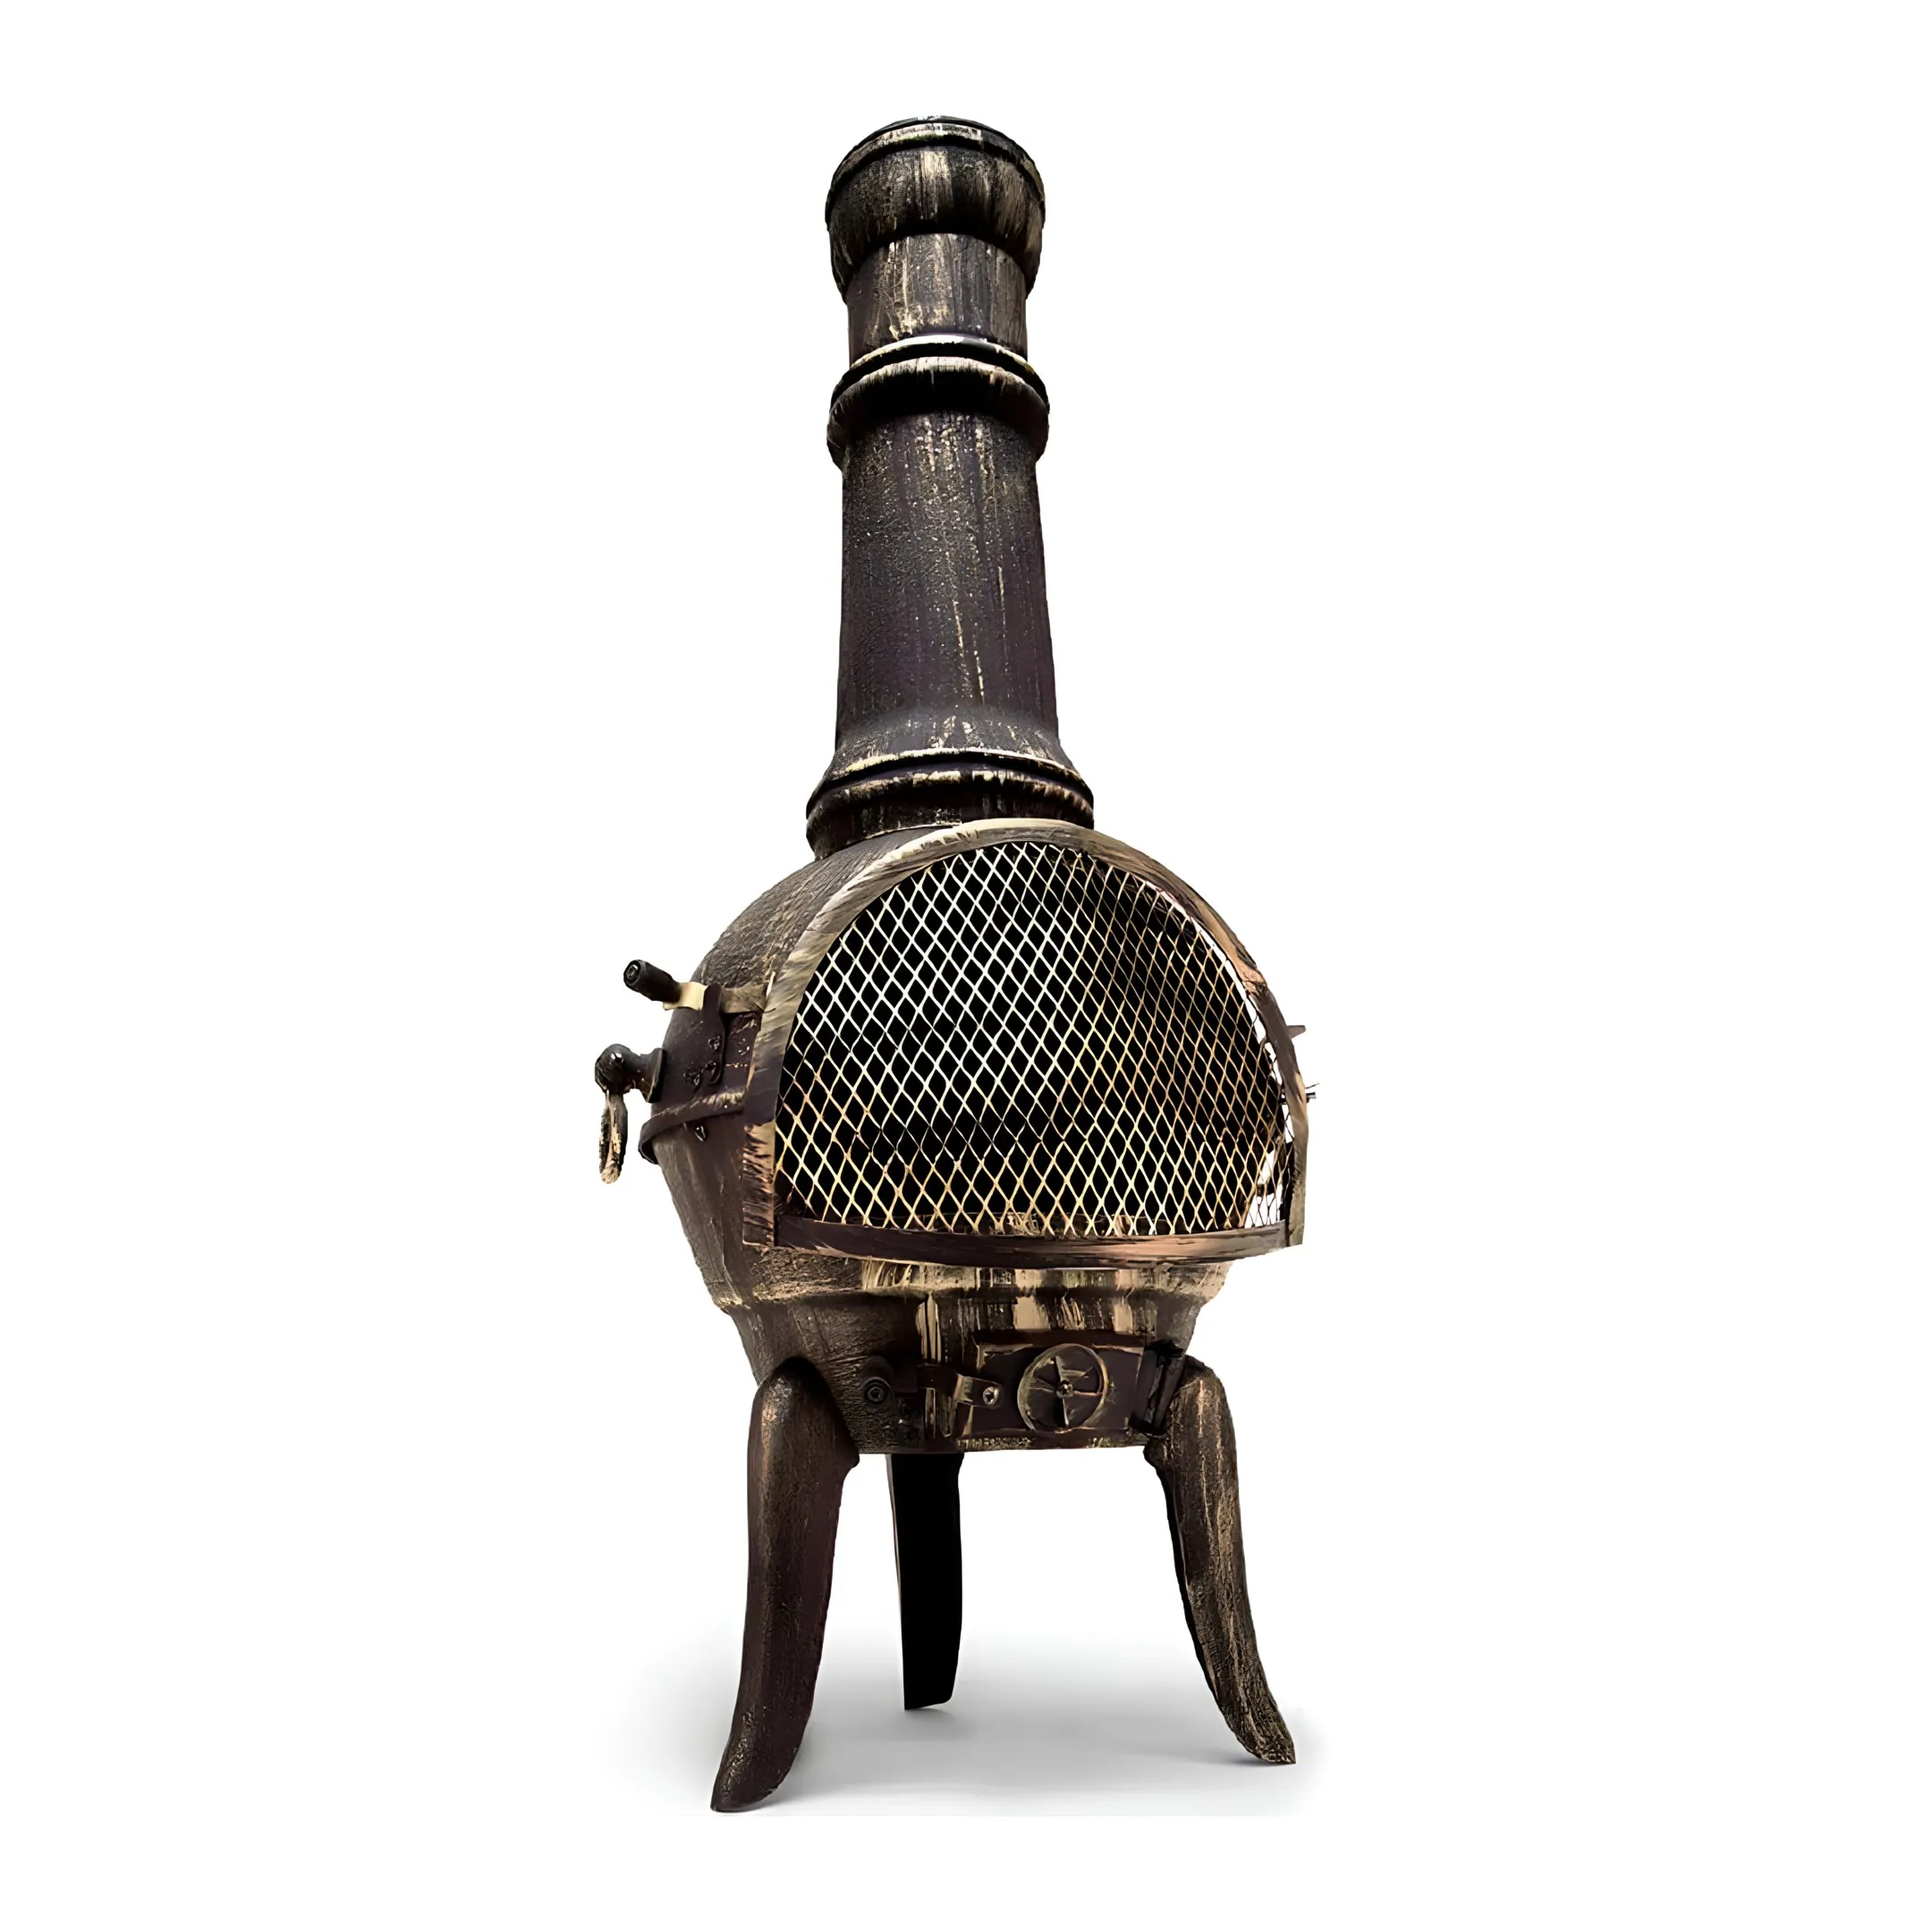
The cast iron chimenea is a durable outdoor heating appliance designed to provide warmth and a cosy atmosphere in garden and patio spaces. Made from robust cast iron, it features a tall flue for effective smoke ventilation and a mesh spark guard to help contain embers. Its sturdy construction and classic design make it a reliable and stylish addition for outdoor use.
SKU
27845
Specification:
Attribute:
Colour:
Black with Bronze Finish
Weight:
23.5KG
Height:
110cm / 1.10m / 43.3"
Depth:
50cm / 0.50m / 19.7"
Chimenea Material:
Cast Iron
BBQ Rack Material:
Stainless Steel
Rain Cover Material:
600D Oxford Fabric Cover
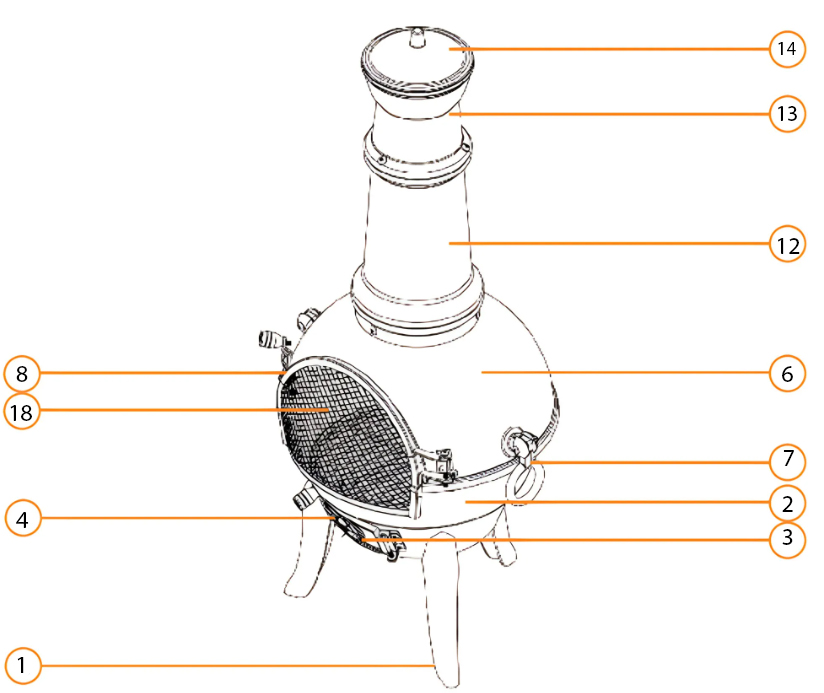
Parts
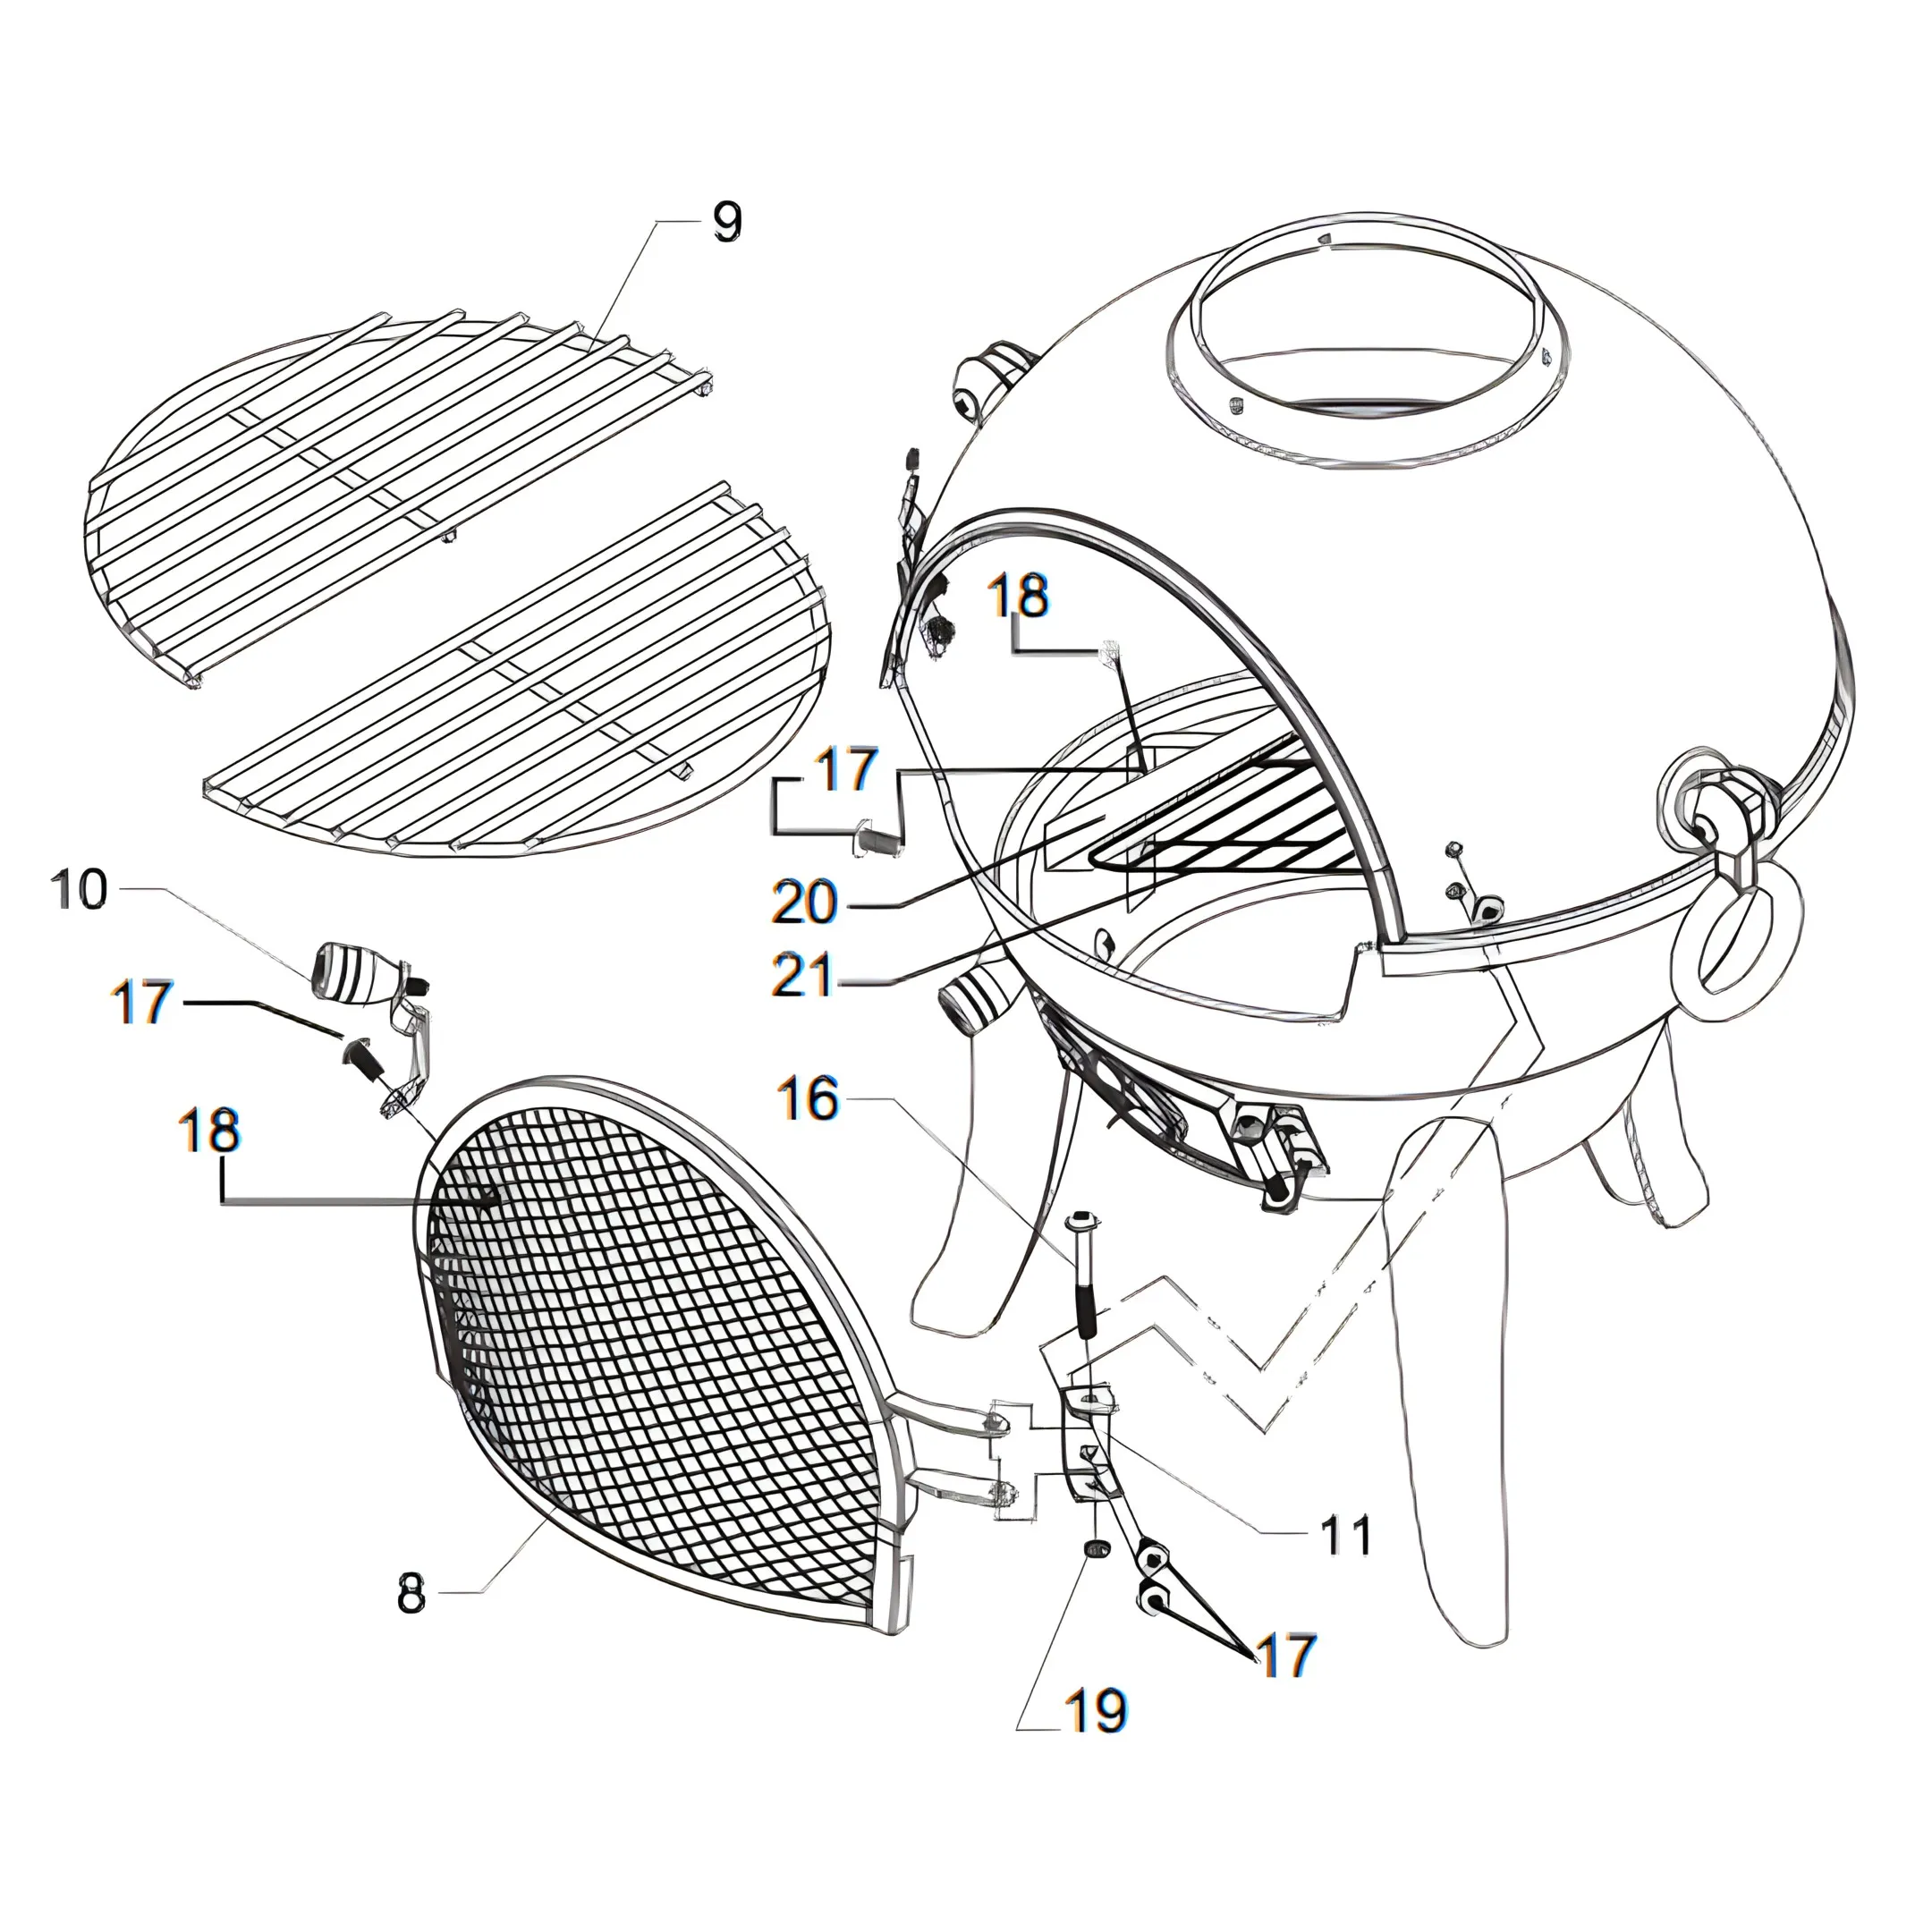
1Part 1 - Leg
2Part 2 - Base Bowl
3Part 3 - Air Vent
4Part 4 - Air Vent Lock
5Part 5 - Bracket
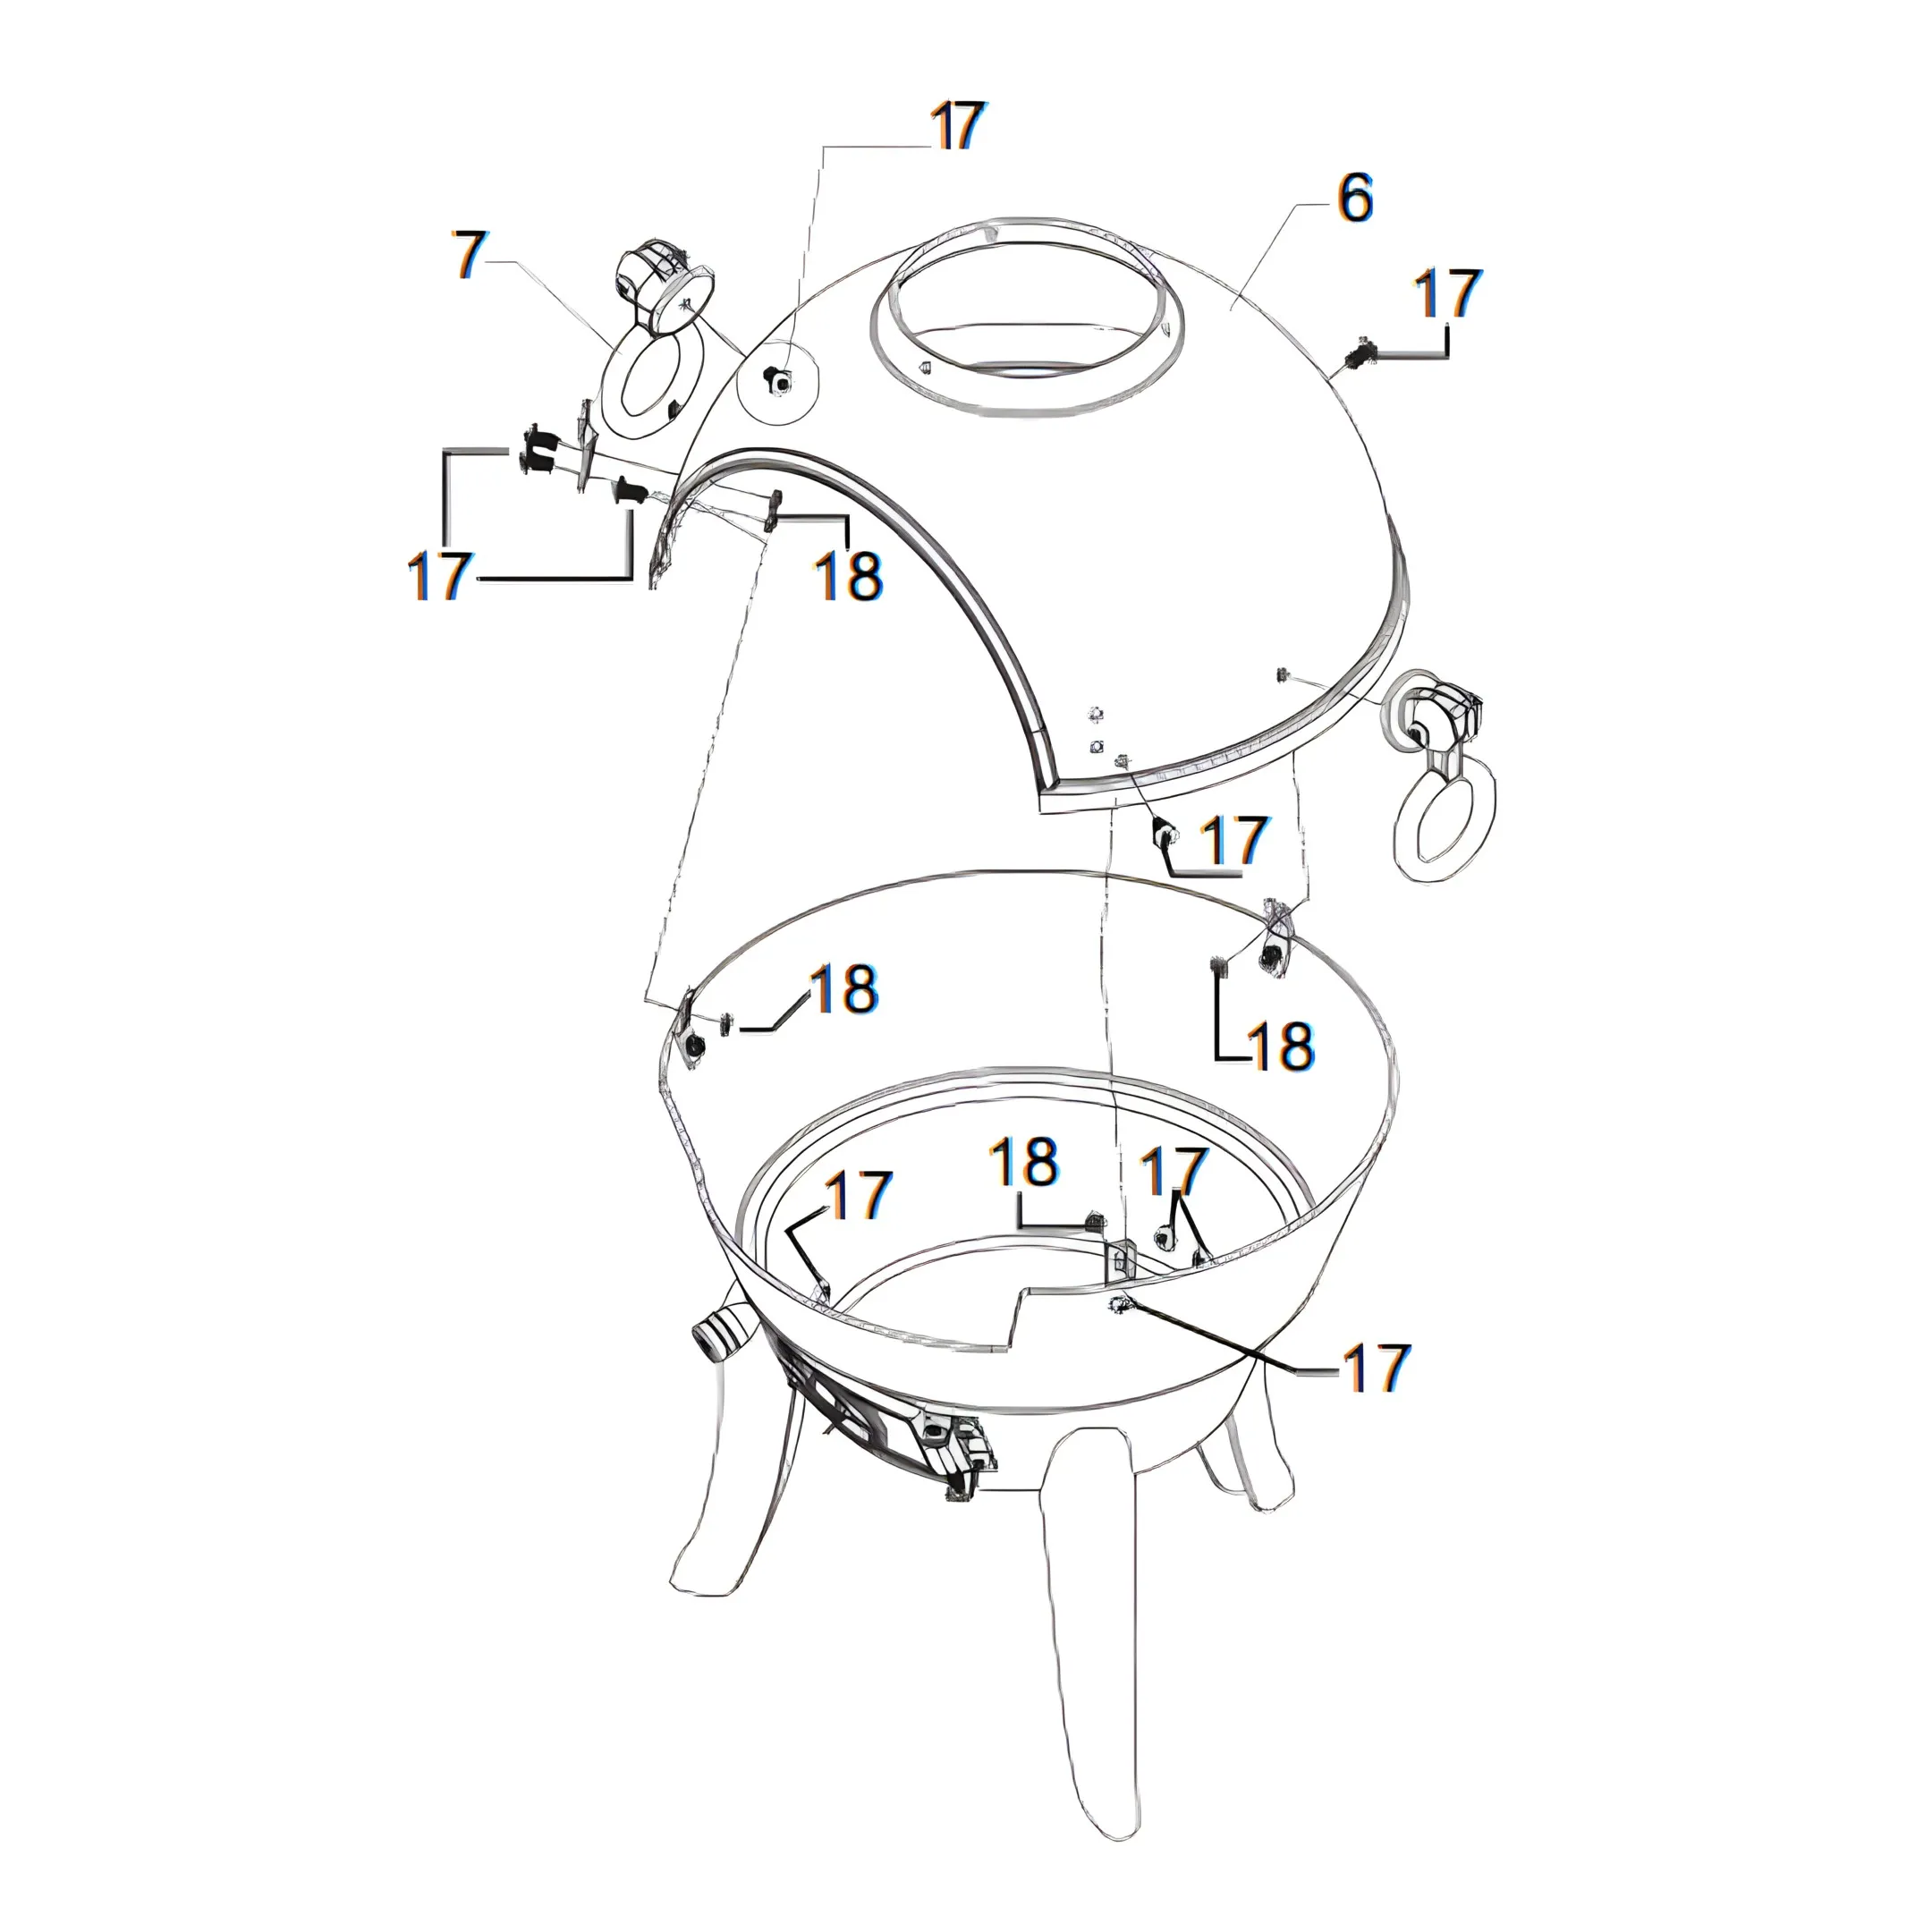
6Part 6 - Cover Bowl
7Part 7 - Handle
8Part 8 - Mesh Door Frame
9Part 9 - Coal Gate
10Part 10 - Door Frame Lock
11Part 11 - Door Frame Plate
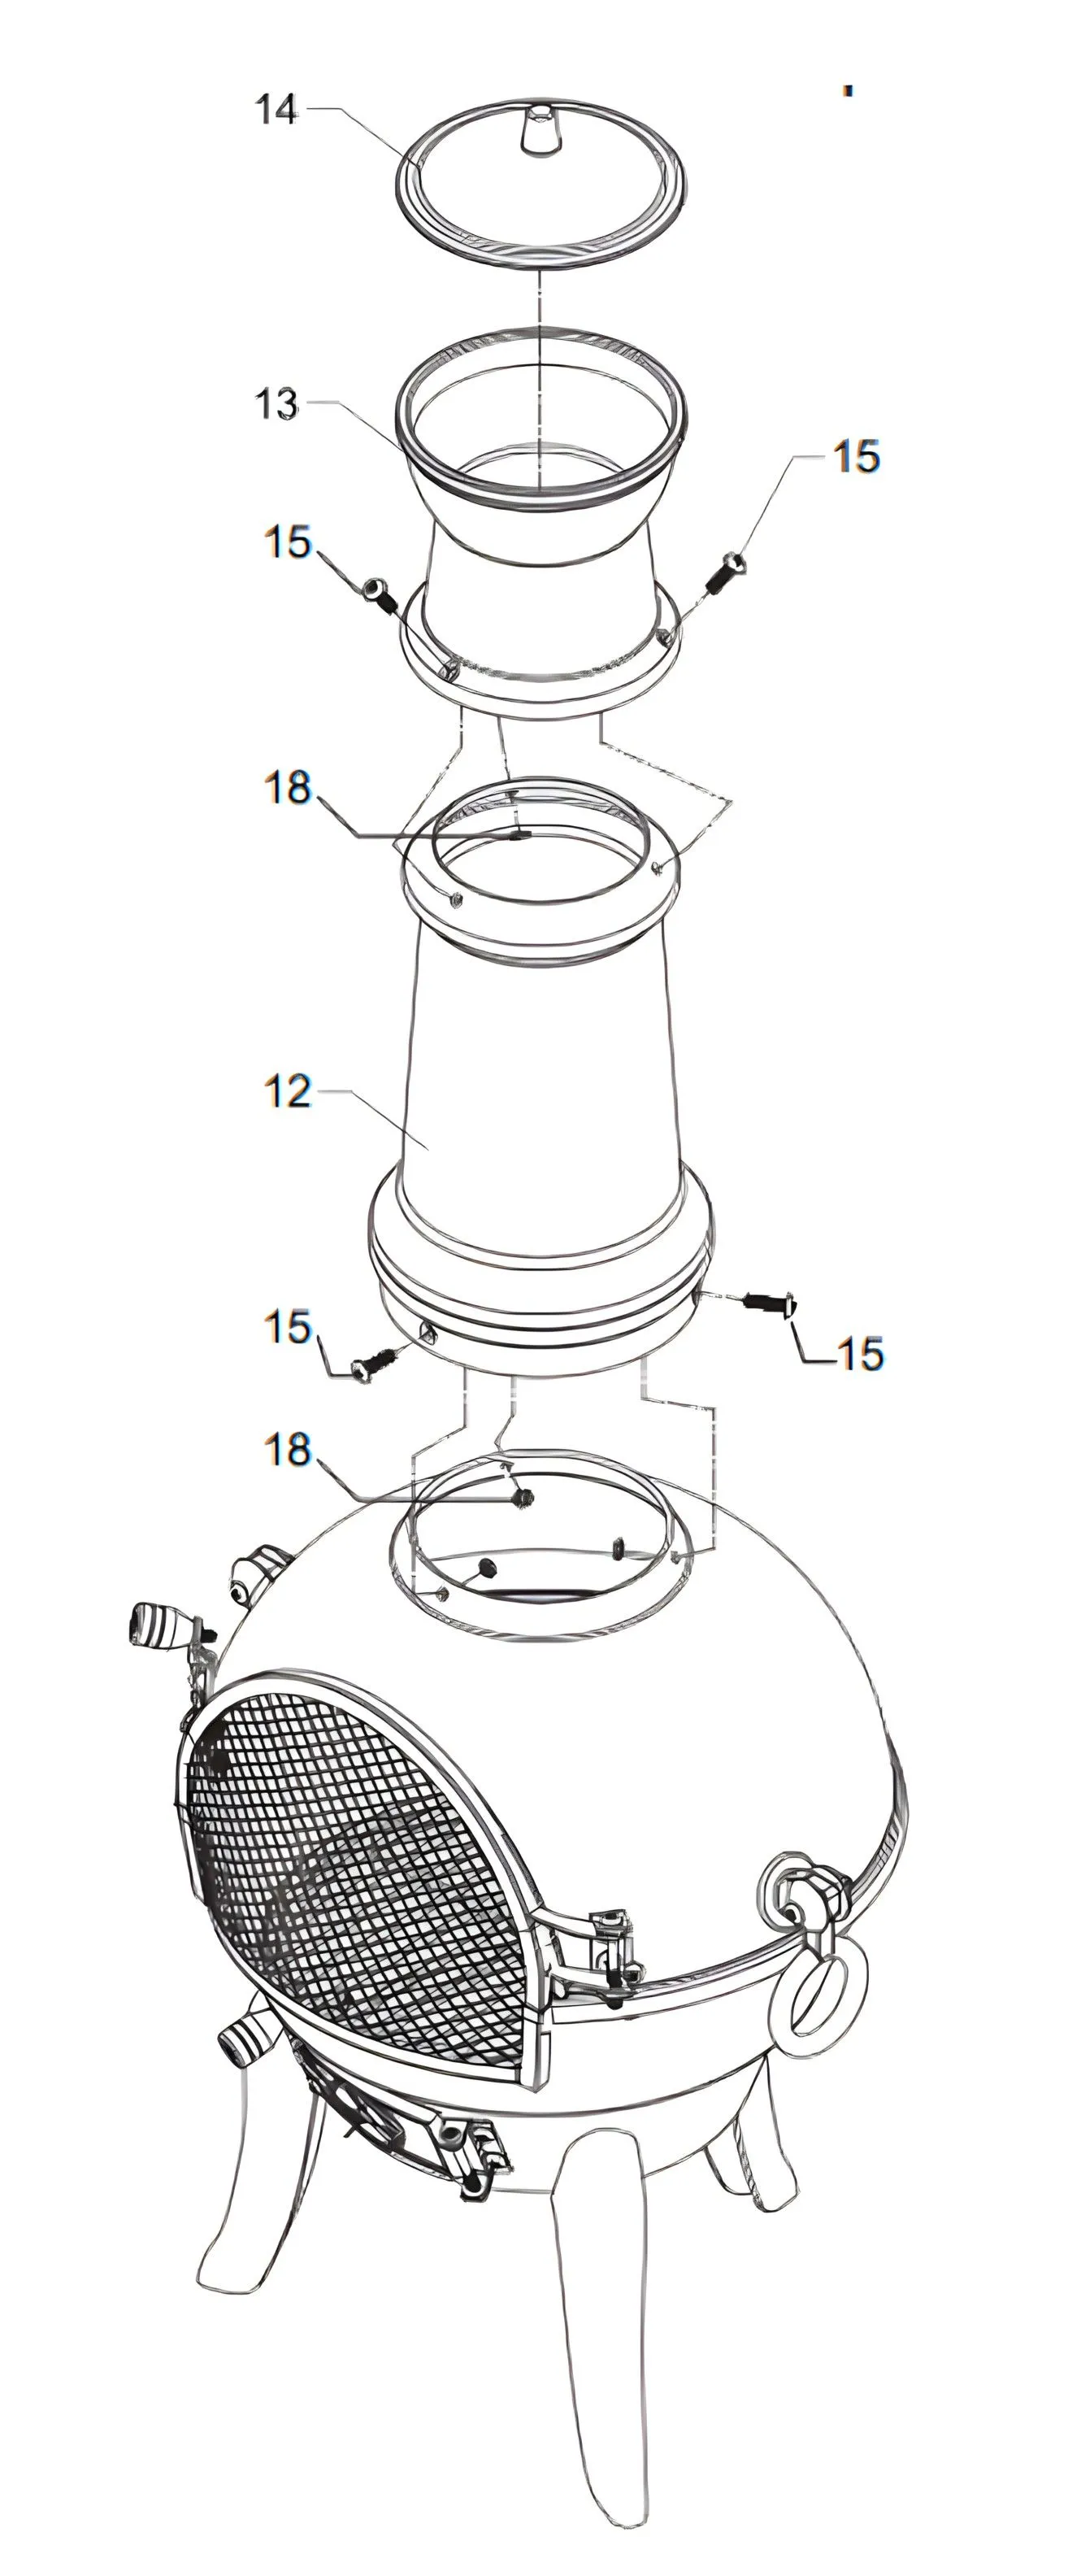
12Part 12 - Chimney (Base)
13Part 13 - Chimney
14Part 14 - Chimney Cover
15Part 15 - Screw M6*L25
16Part 16 - Long Screw
17Part 17 - Screw M5*L60
18Part 18 - Nuts
19Part 19 - Nut M6
20Part 20 - Grill Shelf
21Part 21 - Grill
22Part 22 - Grill Handles
23Part 23 - Poker
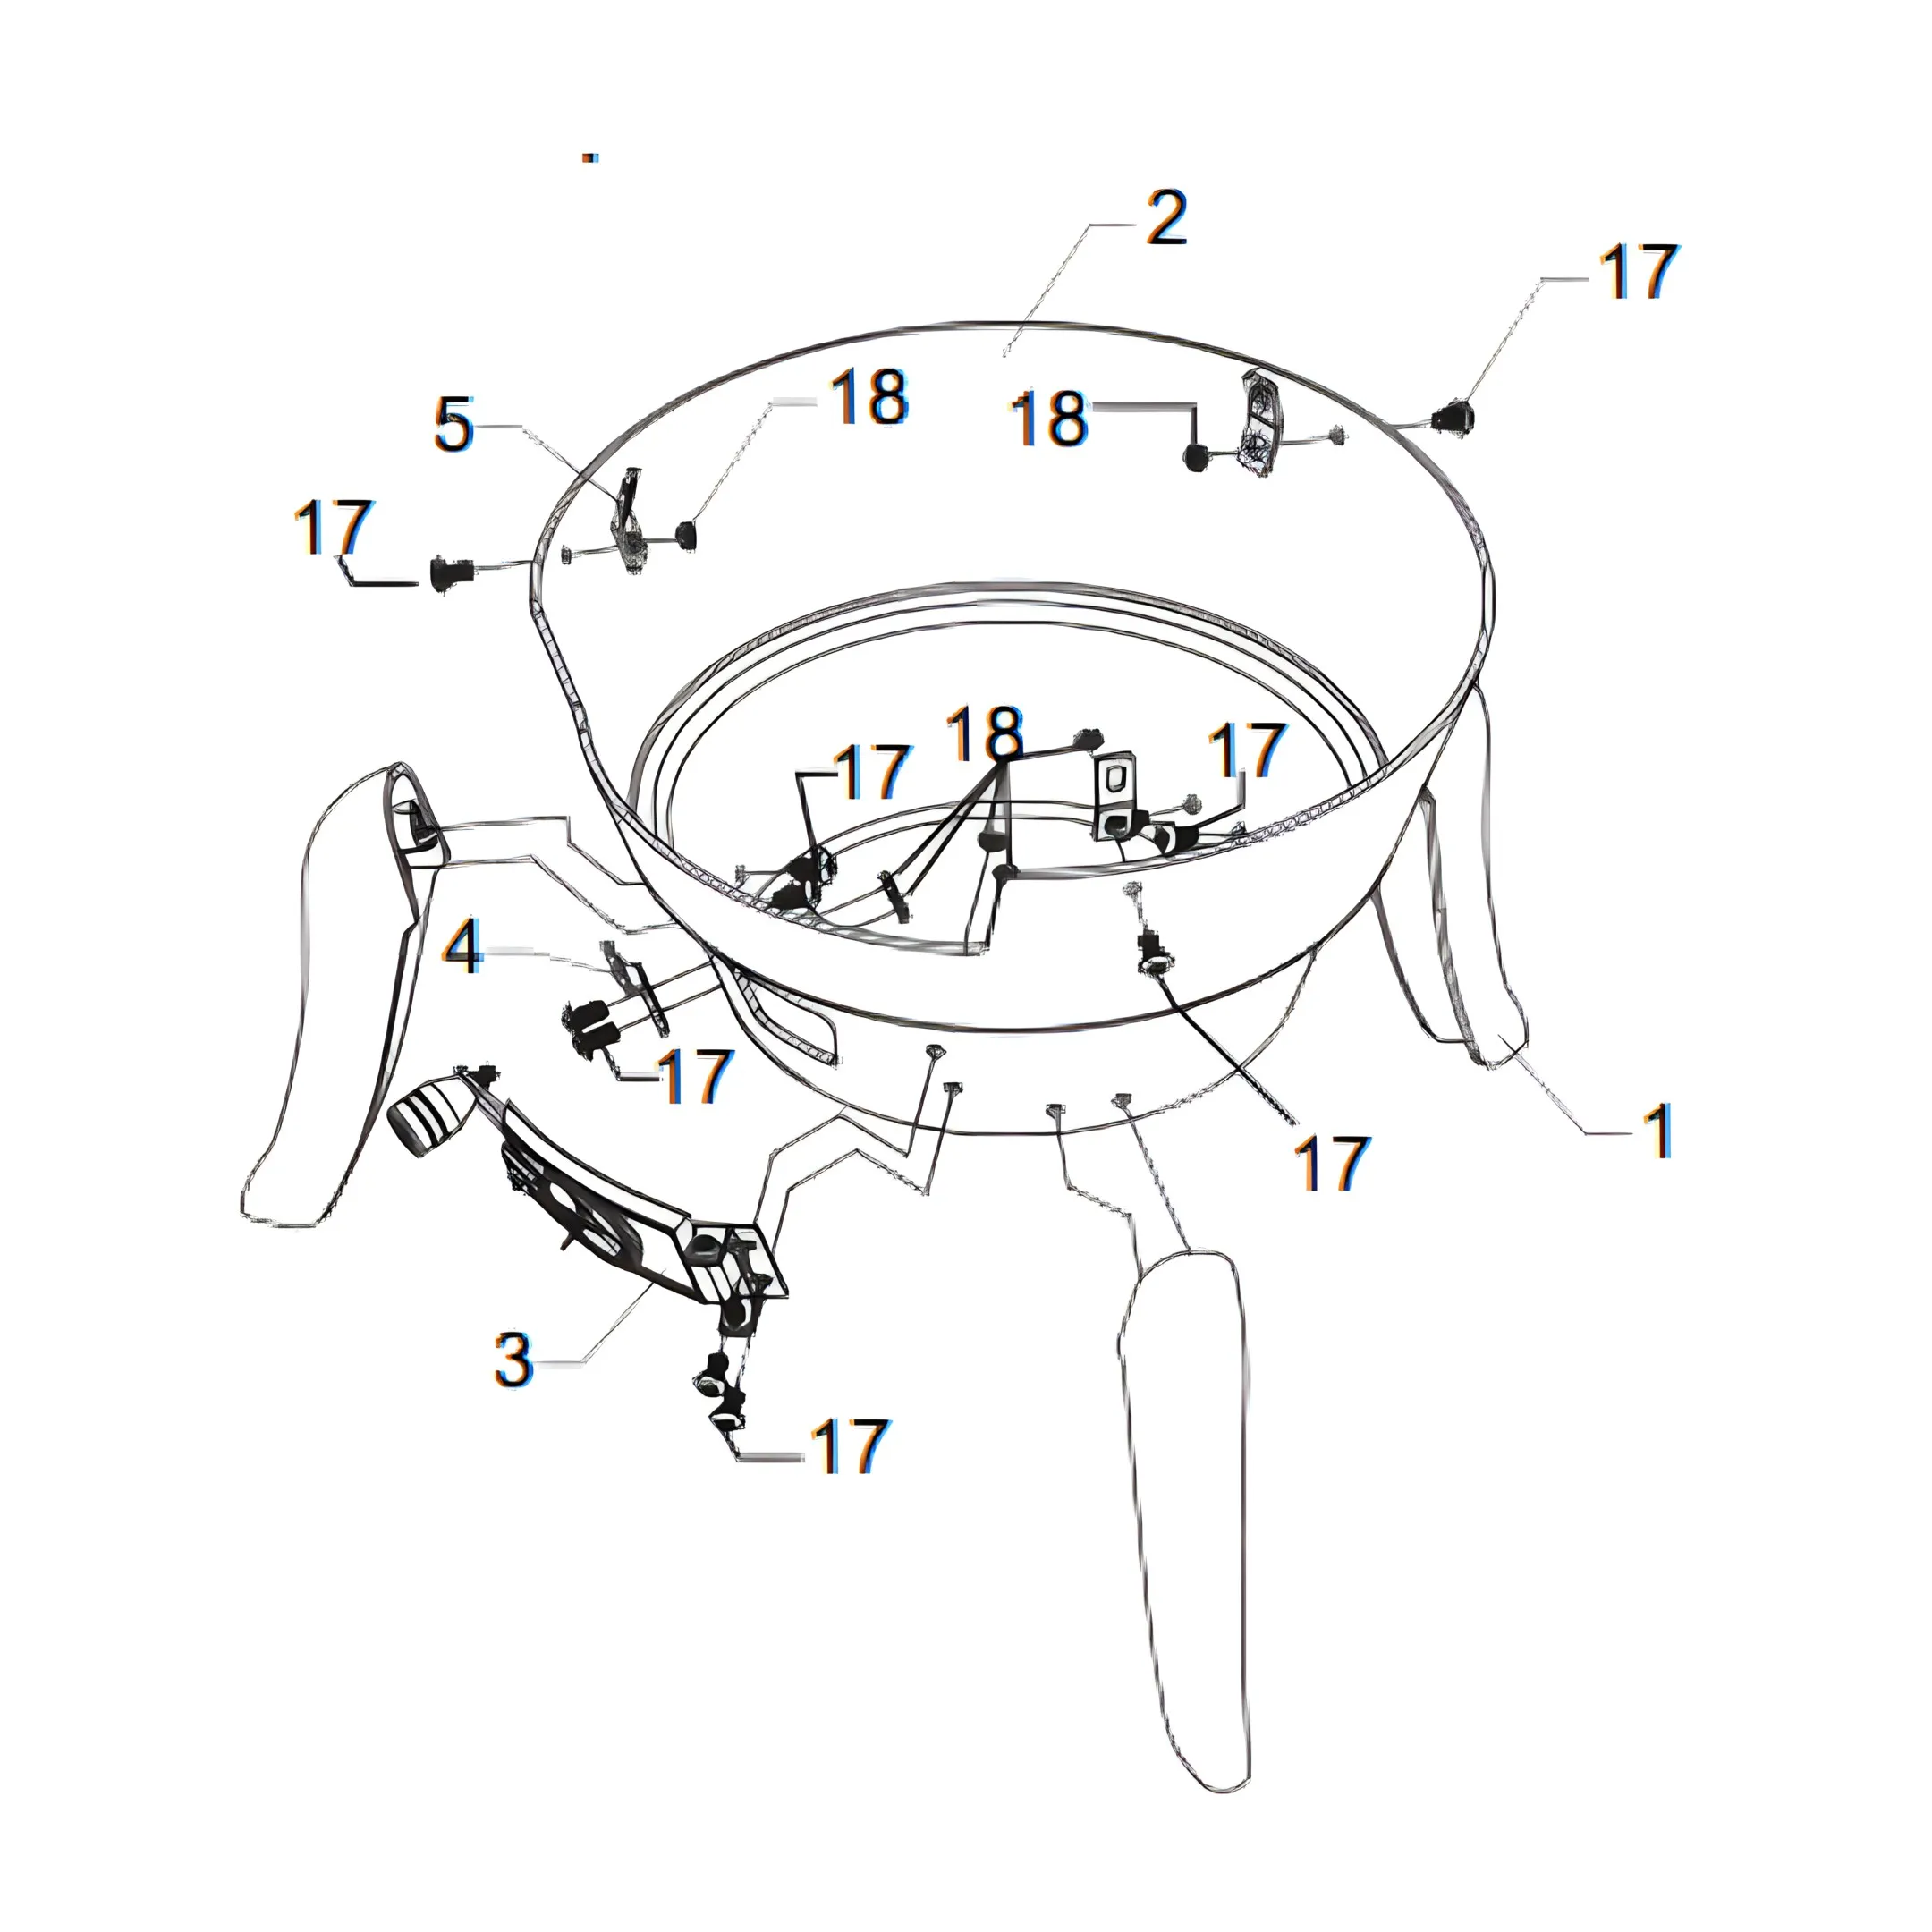
1. Attaching the Legs
Attach the 3 legs (part 1) to the base (part 2) using the screws (part 17) provided.
2. Securing the Brackets
Screw the 3 brackets (part 5) in place using three screws (part 17) and three nuts (part 18).
3. Installing the Air Vent
Attach the air vent (part 3) underneath the door frame indent in the base (part 2) on the right side, and then the air vent lock (part 4) on the left side, using the screws (part 17) and nuts (part 18) provided.
4. Placing the Cover Bowl
Place the cover bowl (part 6) on top of the base (part 2), and align the pre-made holes to line up with the remaining holes in the brackets. Use three screws (part 17) and three more nuts (part 18) to securely lock the cover in place.
5. Attaching the Handles
Attach the handles (part 7) to each side of the chimenea using screws (part 17).
6. Assembling the Coal Grate
Place the 2 coal grate parts (part 9) together at the bottom of the base (part 2).
7. Attaching the Mesh Door Frame
Attach the mesh door frame (part 8) to the cover bowl (part 6) by first screwing the door frame plate (part 11) in place using the screws (part 17) and nuts (part 18) provided.
Then attach the mesh door frame (part 8) to the plate (part 11) by using the long screw (part 1) and the nut (part 19) provided.
8. Securing the Door Frame Lock
Screw the door frame lock (part 10) in place with the provided screws (part 17) and nuts (part 18).
9. Installing the Shelves and Grill
Inside the chimenea and above the coal grate, attach the shelves (part 20) on the right and left side, using the screws (part 17) and nuts (part 18). Proceed by placing the grill (part 21) between the shelves (part 20).
10. Assembling the Chimney
To complete the chimenea, connect the chimney base (part 12) to the cover bowl (part 6), and then connect the chimney (part 13) to the chimney base (part 12). Use the screws (part 15) and nuts (part 18) to attach these parts.
11. Placing the Chimney Cover
Place the chimney cover (part 14) on top of the assembled chimney.
12. Maintenance
Clean out all ash and debris after each use once the chimenea has completely cooled (allow at least 24 hours)
Use heat-resistant gloves and appropriate tools when removing ash to prevent burns
Dispose of ash in a non-combustible container and ensure it is fully extinguished
Regularly inspect the chimenea for cracks, damage, or structural weaknesses before and after use
Check that all components, including the flue and spark guard, remain securely fitted and undamaged
Remove soot build-up from internal and external surfaces to maintain proper airflow and performance
Wipe down exterior surfaces regularly to remove moisture, dirt, and residue that may cause corrosion
Regularly check for rust or corrosion and address promptly to maintain safe operation
Store the chimenea in a dry, covered area when not in use to protect it from rain and environmental damage
Consider using a weatherproof cover when the chimenea is not in use for extended periods
Ensure ventilation openings and the flue remain clear of blockages at all times
Avoid leaving standing water inside the chimenea, as this can accelerate rusting and material degradation
Periodically check for loose fittings or components and tighten as necessary
Do not use abrasive cleaning tools that may damage the cast iron surface or protective coating
13. Troubleshooting
What do I do if there are missing parts from my order?
If there appears to be any part missing from your order, contact our friendly and helpful Customer Support Team within 7 days of receipt.
For all other issues, please contact our Customer Support Team.