1. Checking Parts
Ensure you have each part needed to assemble the Chimenea by checking against the provided parts list.
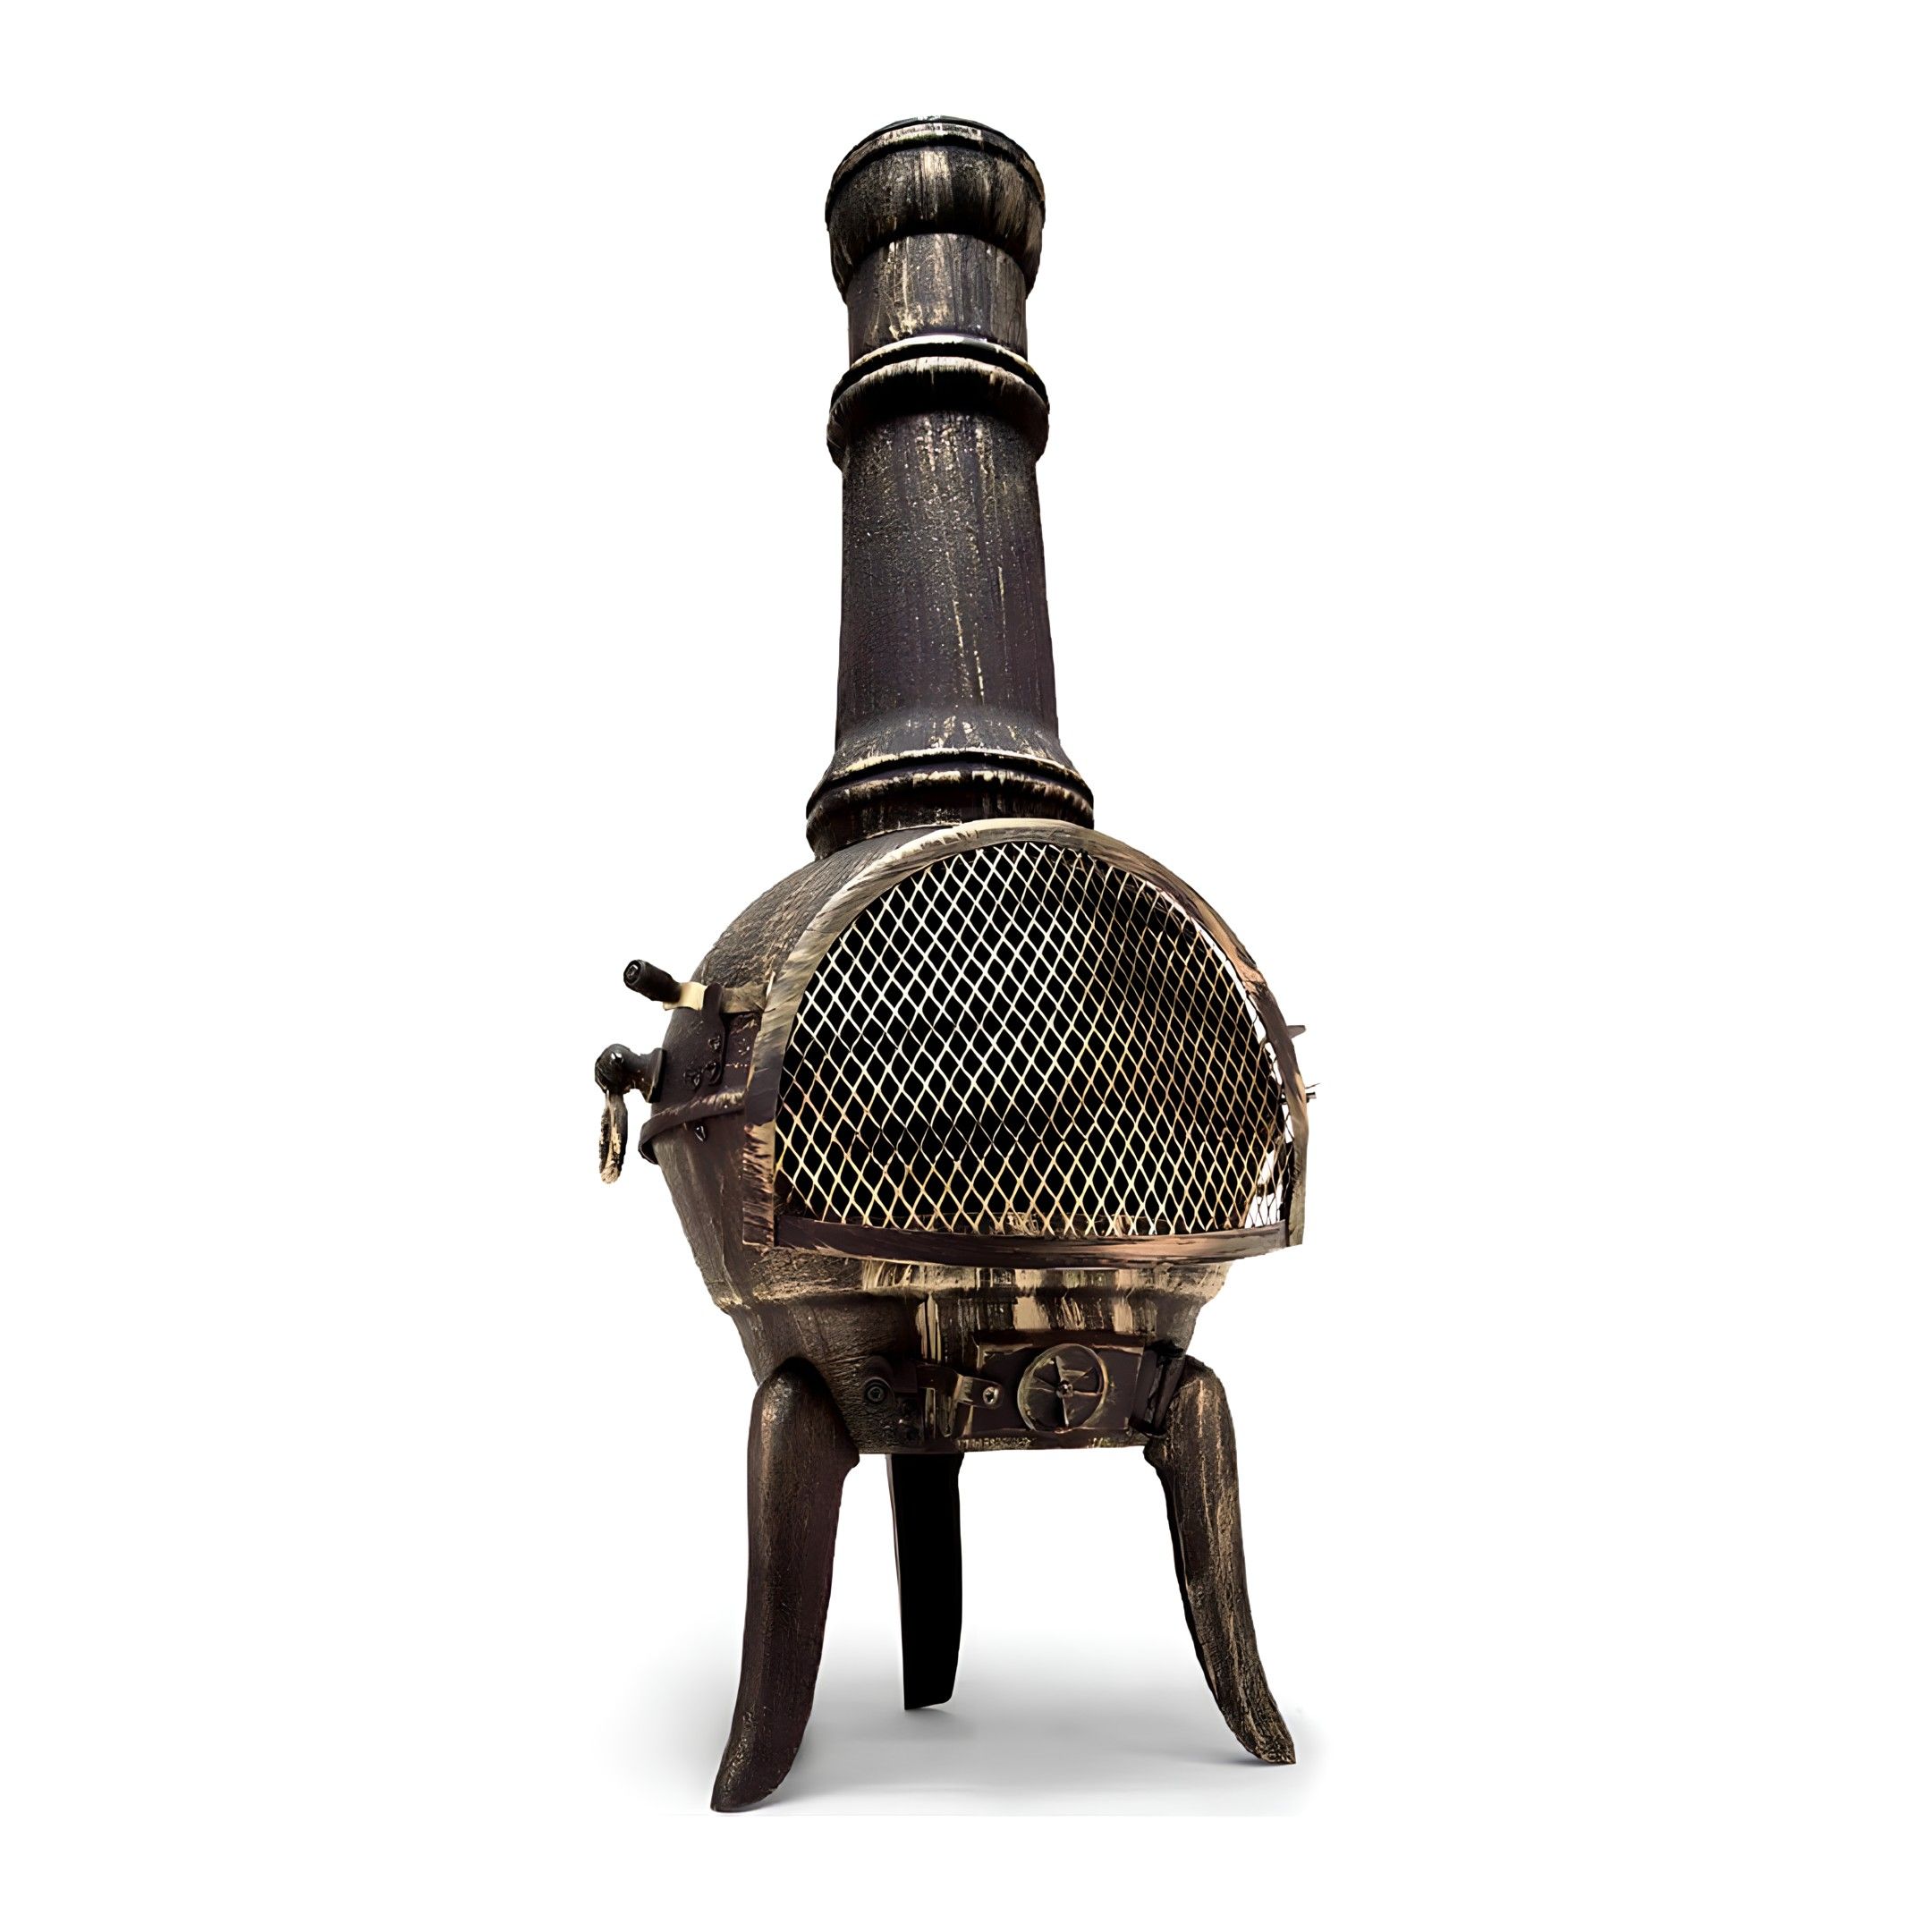 Instructions by monstershop ChimeneaInstructions for assembling, installing, and using the Monster Chimenea, a robust outdoor fireplace designed to warm up your garden and patio spaces. It includes safety advice, maintenance tips, and troubleshooting guidance to ensure safe and effective use. Product InformationChimeneaThe Monster Chimenea will aid in warming up your garden and patio space in the chilly summer evenings and nights. Whether you plan small gatherings in your back-yard, or larger BBQ parties, you will make an impression with your new heat source! With its sturdy and robust build, this chimenea can burn wood, coal and charcoal. View product (opens in new tab)
GPSR InformationUK
EU
Parts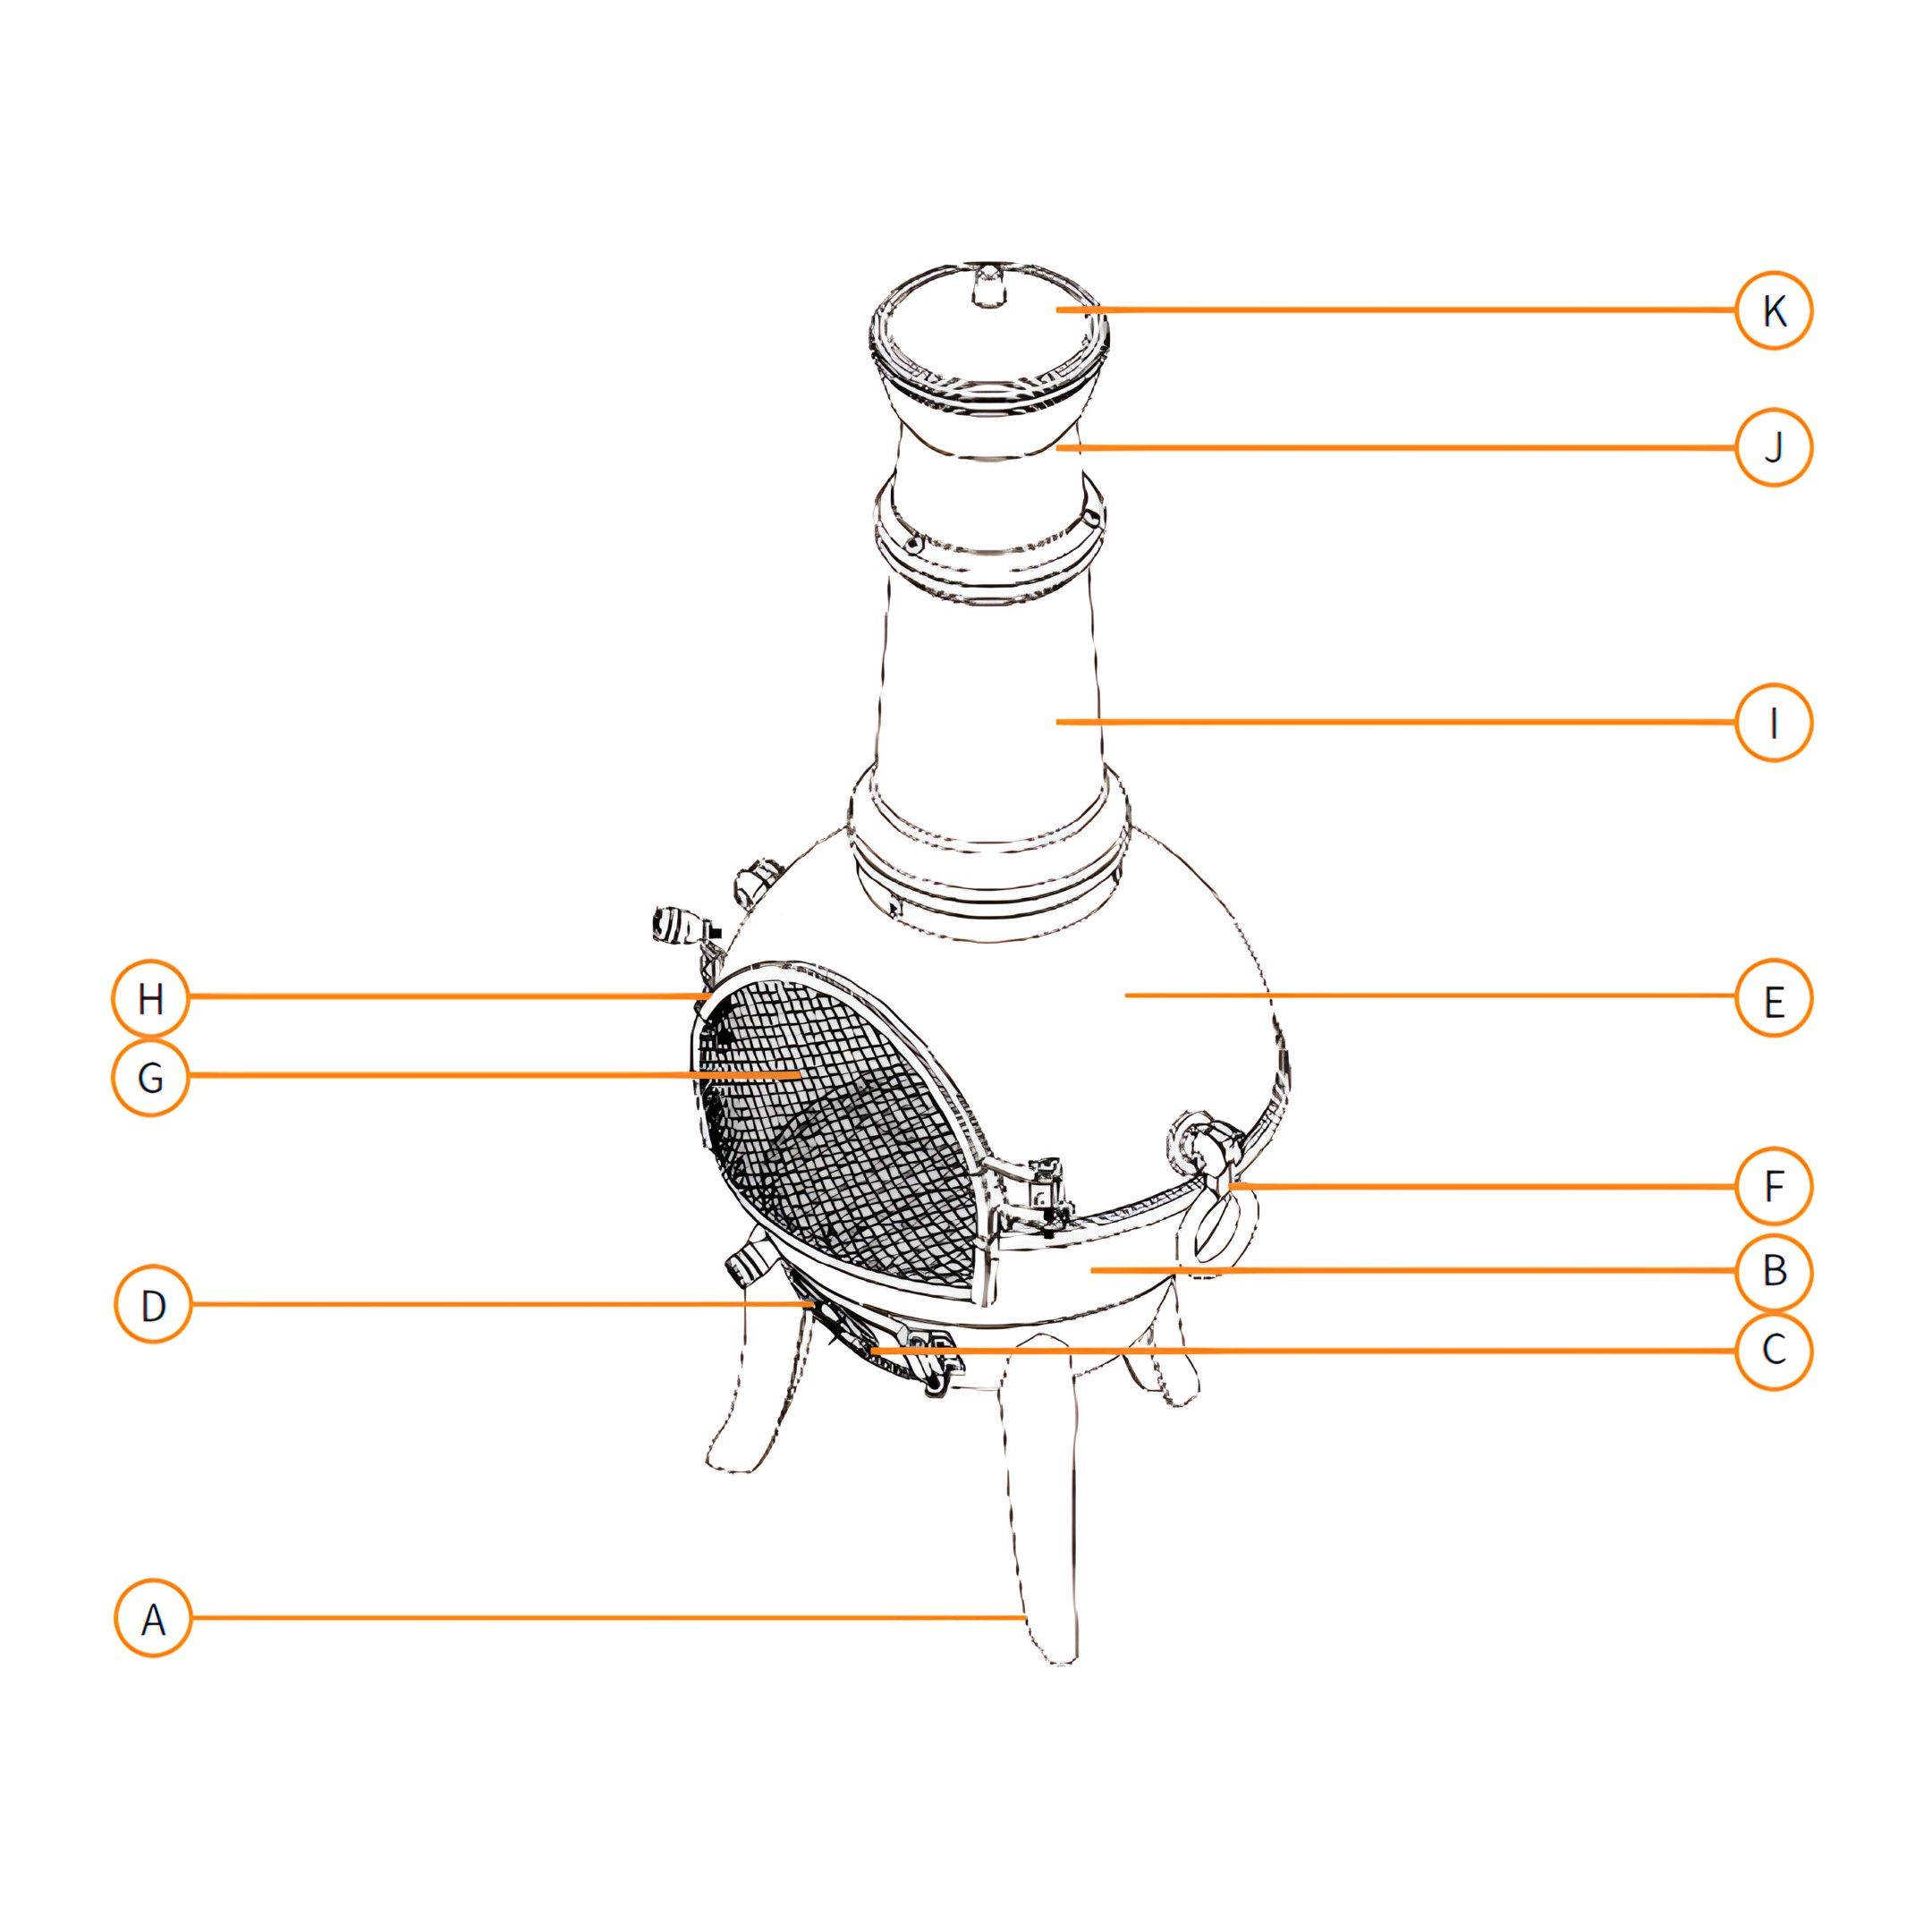 1Leg 2Base bowl 3Air vent 4Air vent lock 5Cover bowl 6Handle 7Mesh door frame 8Door frame lock 9Chimney (base) 10Chimney 11Chimney cover 12Bracket 13Coal grate 14Door frame plate 15Screw M6*L25 16Screw M5*L60 17Screw M6*L15 18Nut M6 19Nut M5 20Grill shelf 21Grill 22Grill handles 23Poker 1. Checking PartsEnsure you have each part needed to assemble the Chimenea by checking against the provided parts list. 2. Attaching the Legs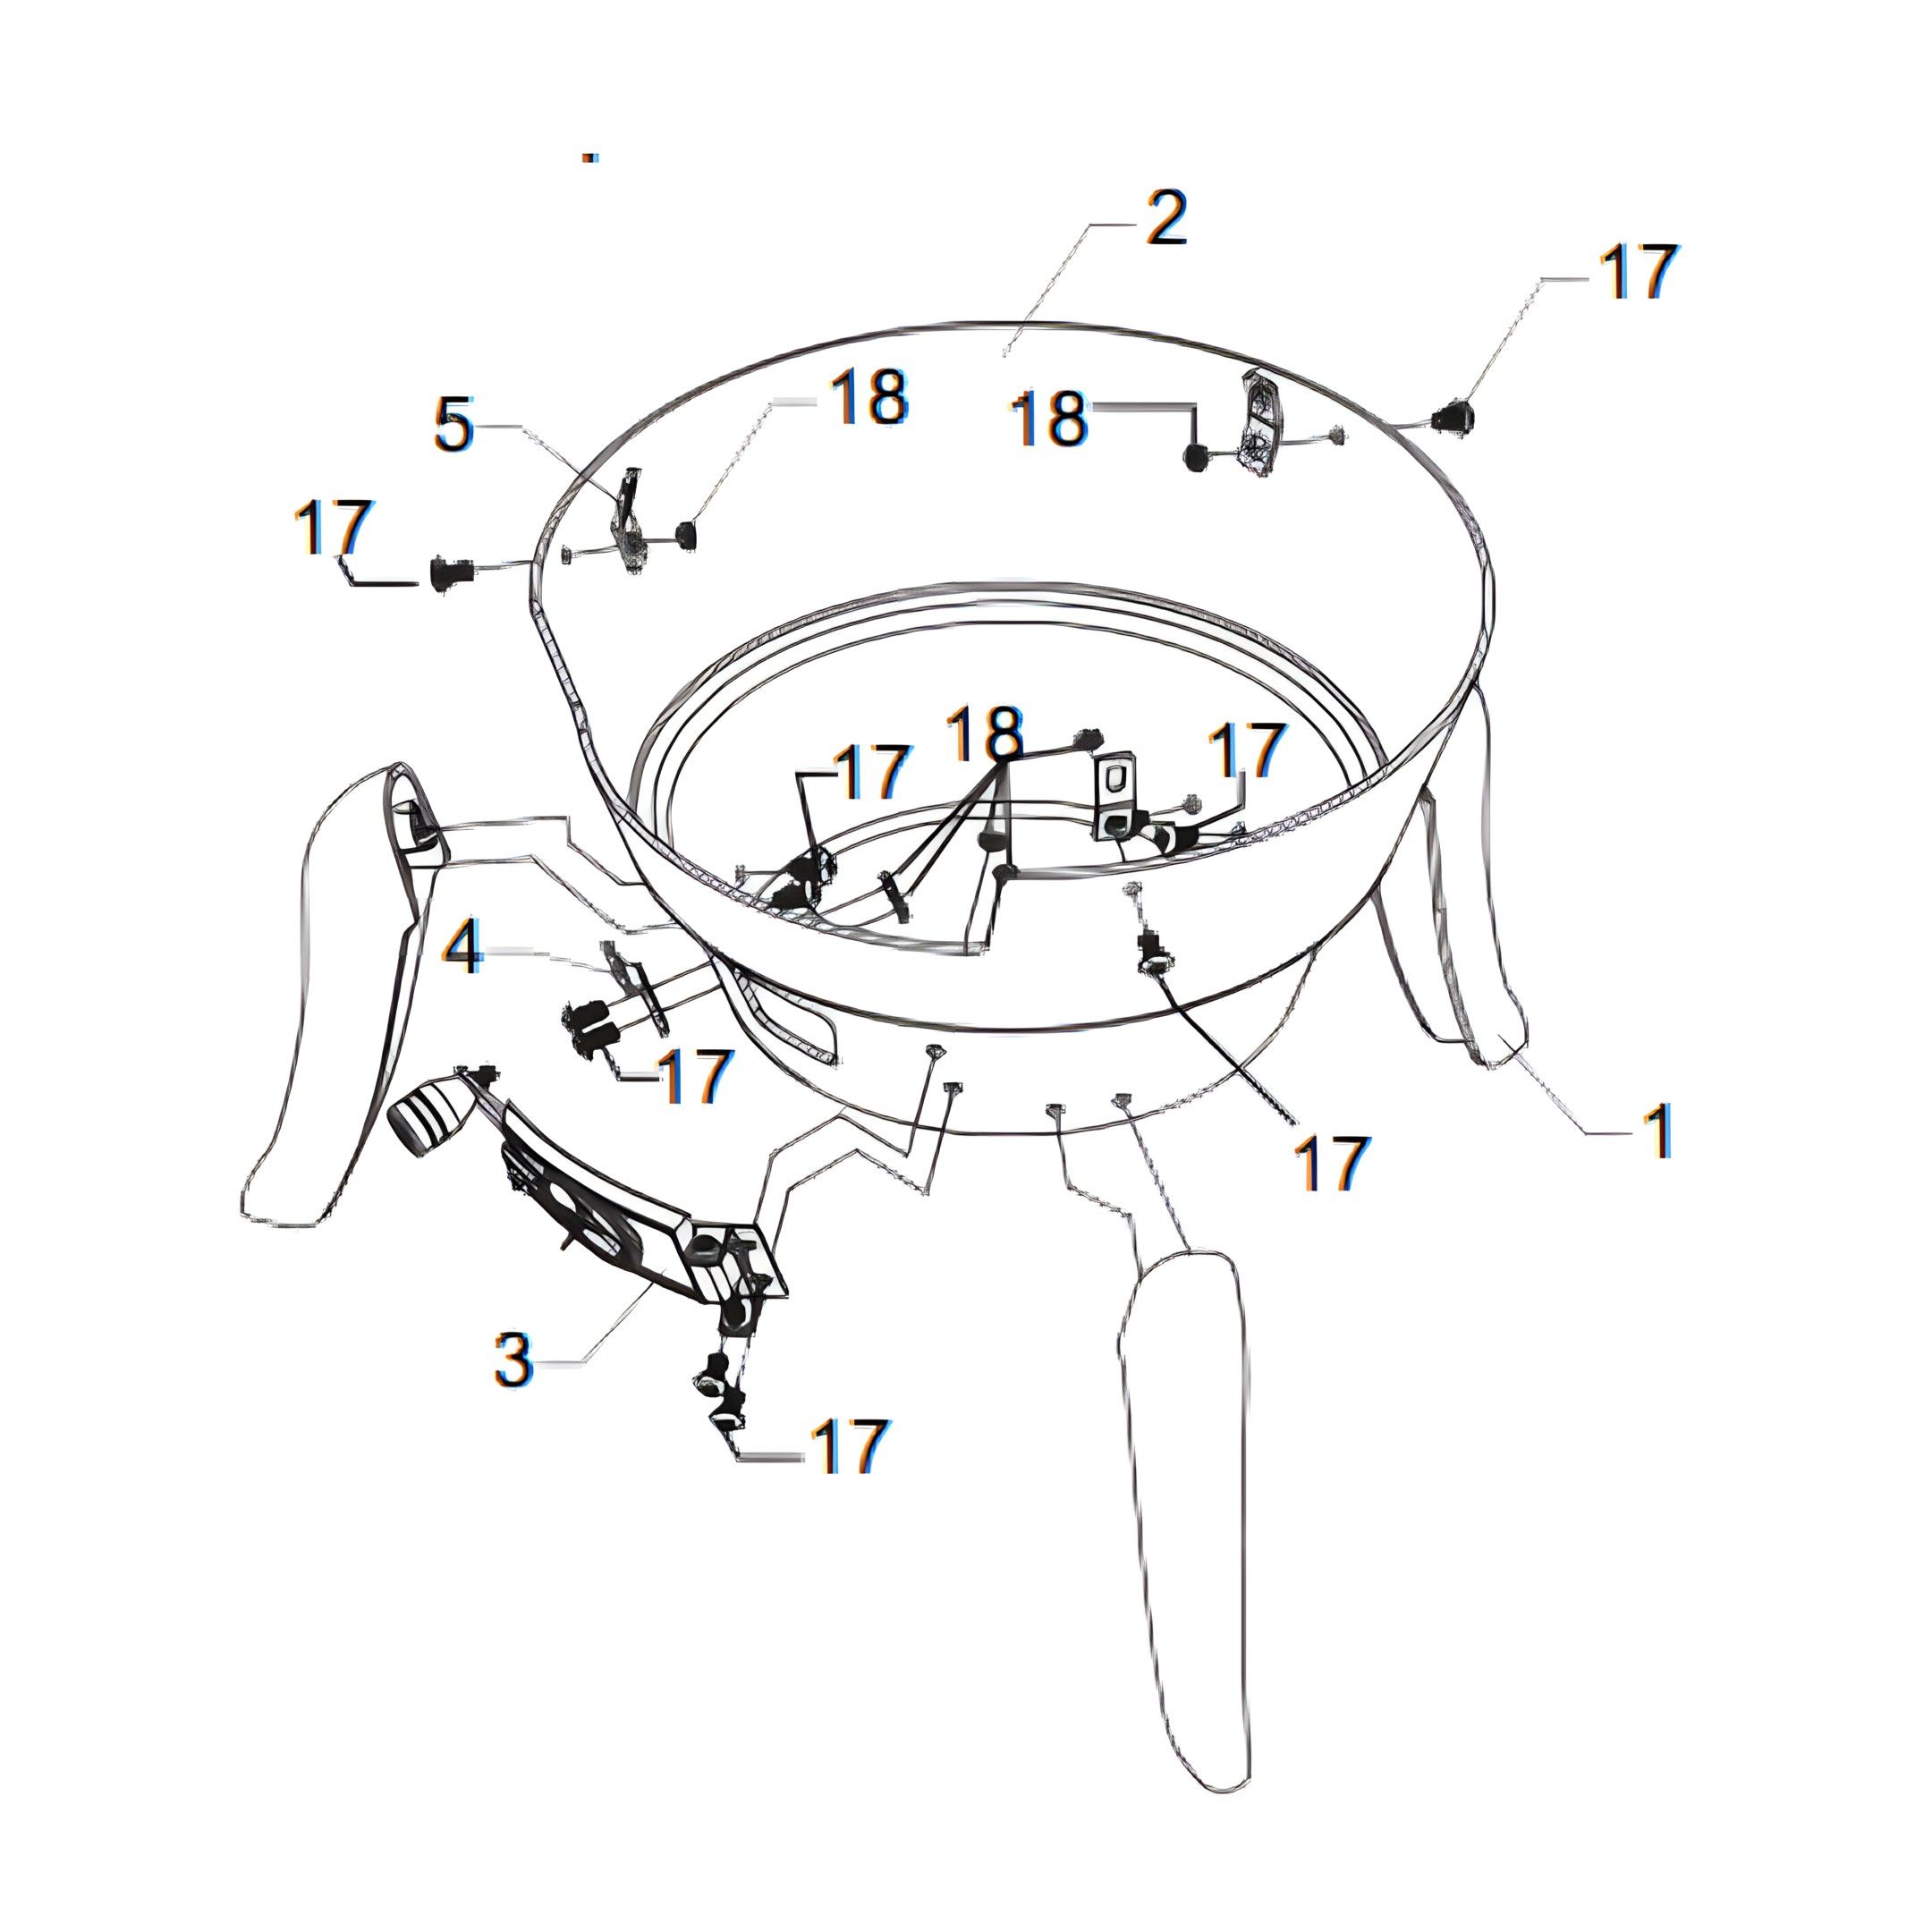 -Attach the 3 legs (1) to the base (2) using the screws (17) provided. 3. Securing the BracketsScrew the 3 brackets (5) in place using three screws (17) and three nuts (18). 4. Installing the Air VentAttach the air vent (3) underneath the door frame indent in the base (2) on the right side, and then the air vent lock (4) on the left side, using the screws (17) and nuts (18) provided. 5. Placing the Cover Bowl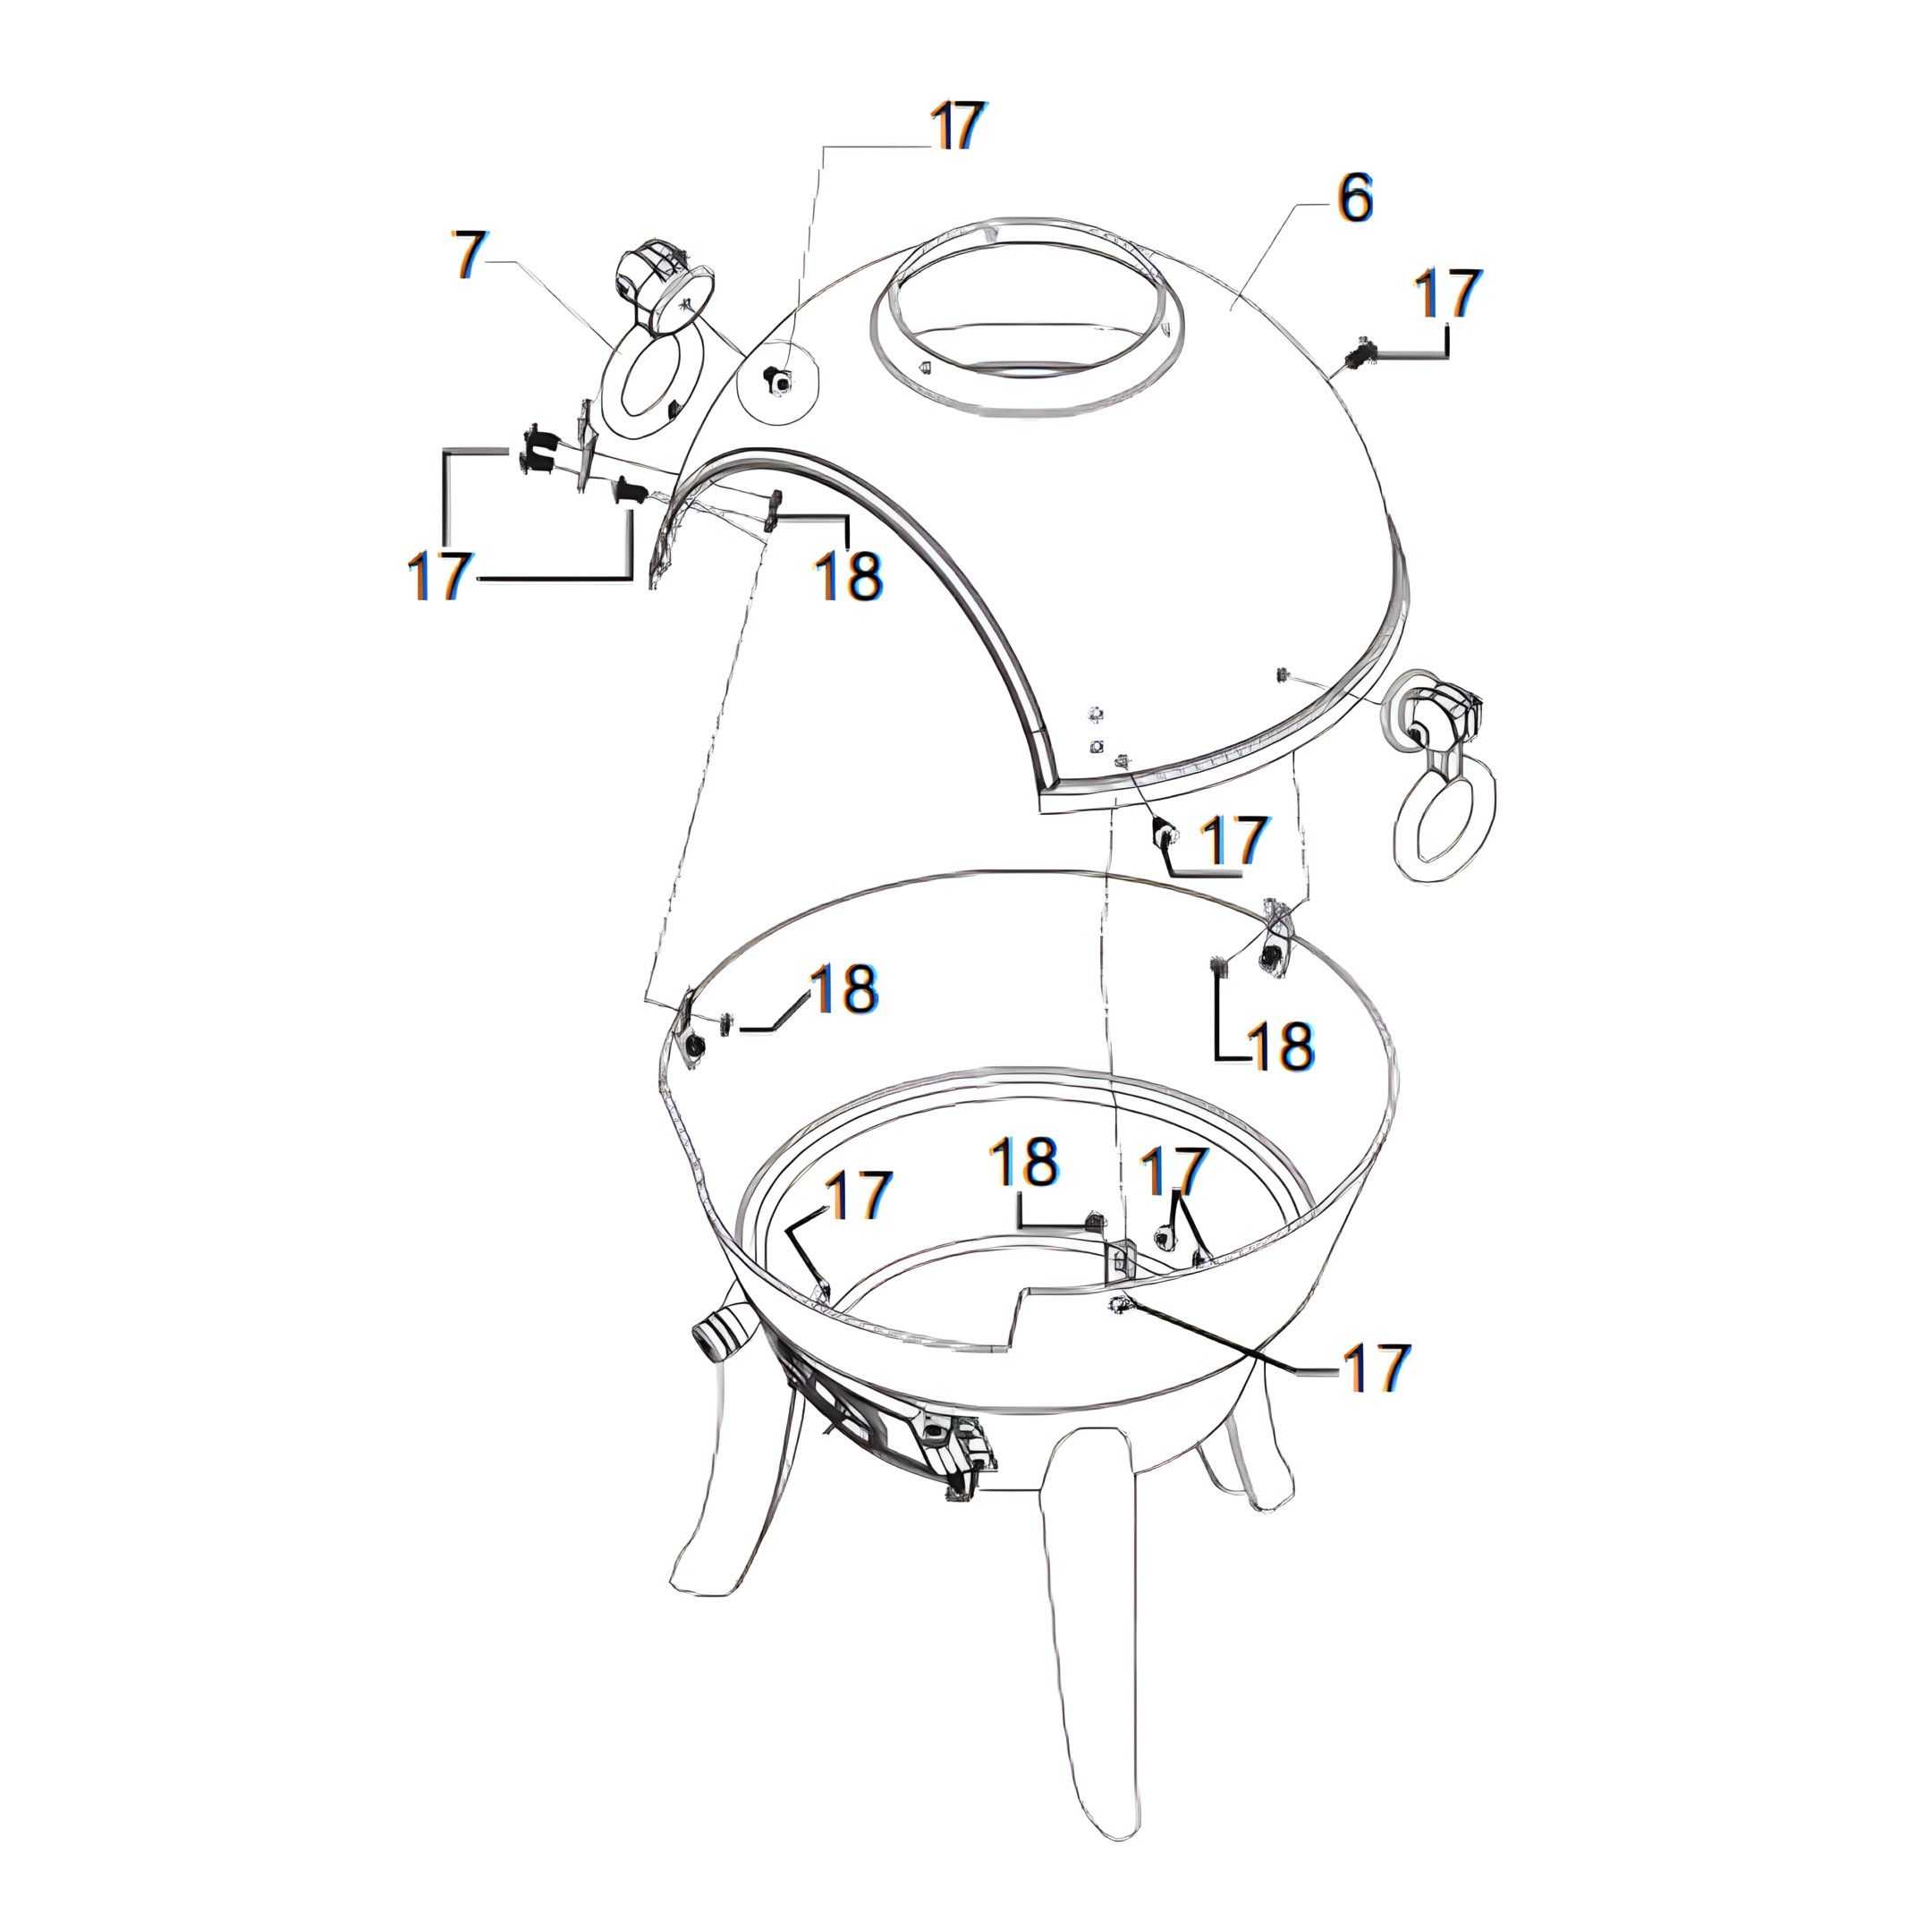 Place the cover bowl (6) on top of the base (2), and align the pre-made holes to line up with the remaining holes in the brackets. Use three screws (17) and three more nuts (18) to securely lock the cover in place. 6. Attaching the HandlesAttach the handles (7) to each side of the chimenea using screws (17). 7. Assembling the Coal GratePlace the 2 coal grate parts (9) together at the bottom of the base (2). 8. Attaching the Mesh Door Frame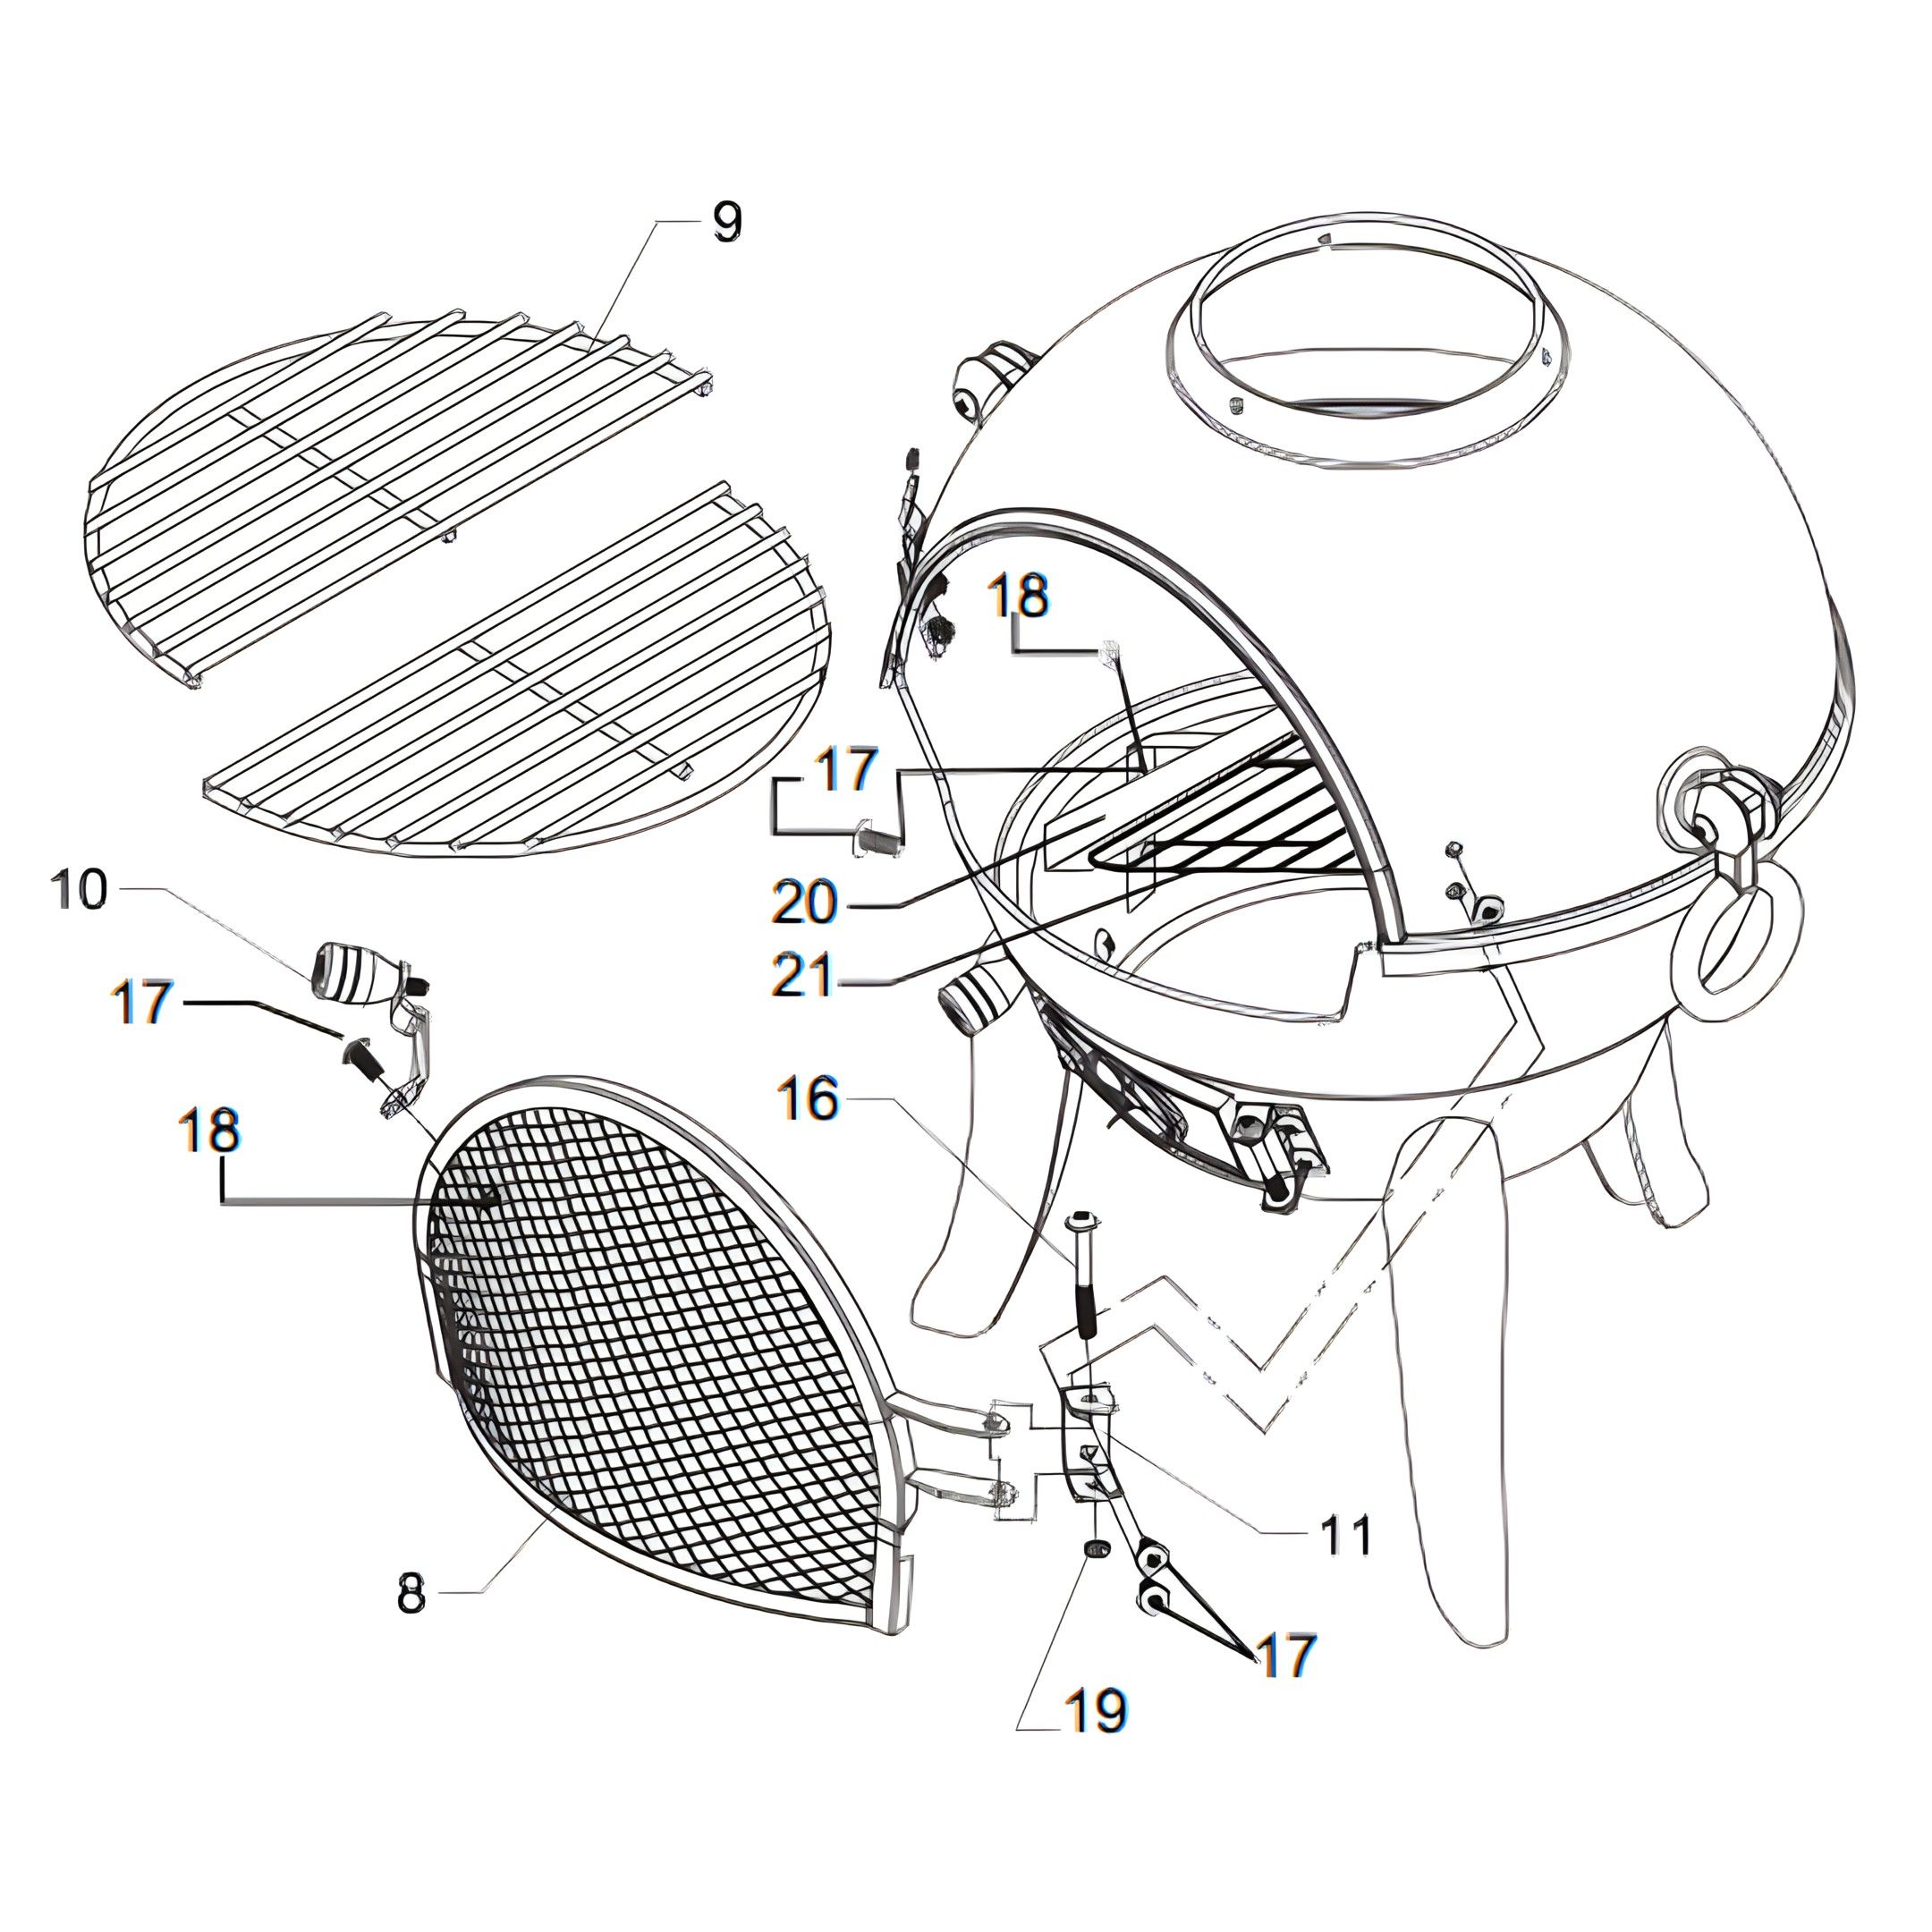 Attach the mesh door frame (8) to the cover bowl (6) by first screwing the door frame plate (11) in place using the screws (17) and nuts (18) provided. Then attach the mesh door frame (8) to the plate (11) by using the long screw (16) and the nut (19) provided. 9. Securing the Door Frame LockScrew the door frame lock (10) in place with the provided screws (17) and nuts (18). 10. Installing the Shelves and GrillInside the chimenea and above the coal grate, attach the shelves (20) on the right and left side, using the screws (17) and nuts (18). Proceed by placing the grill (21) between the shelves (20). 11. Assembling the Chimney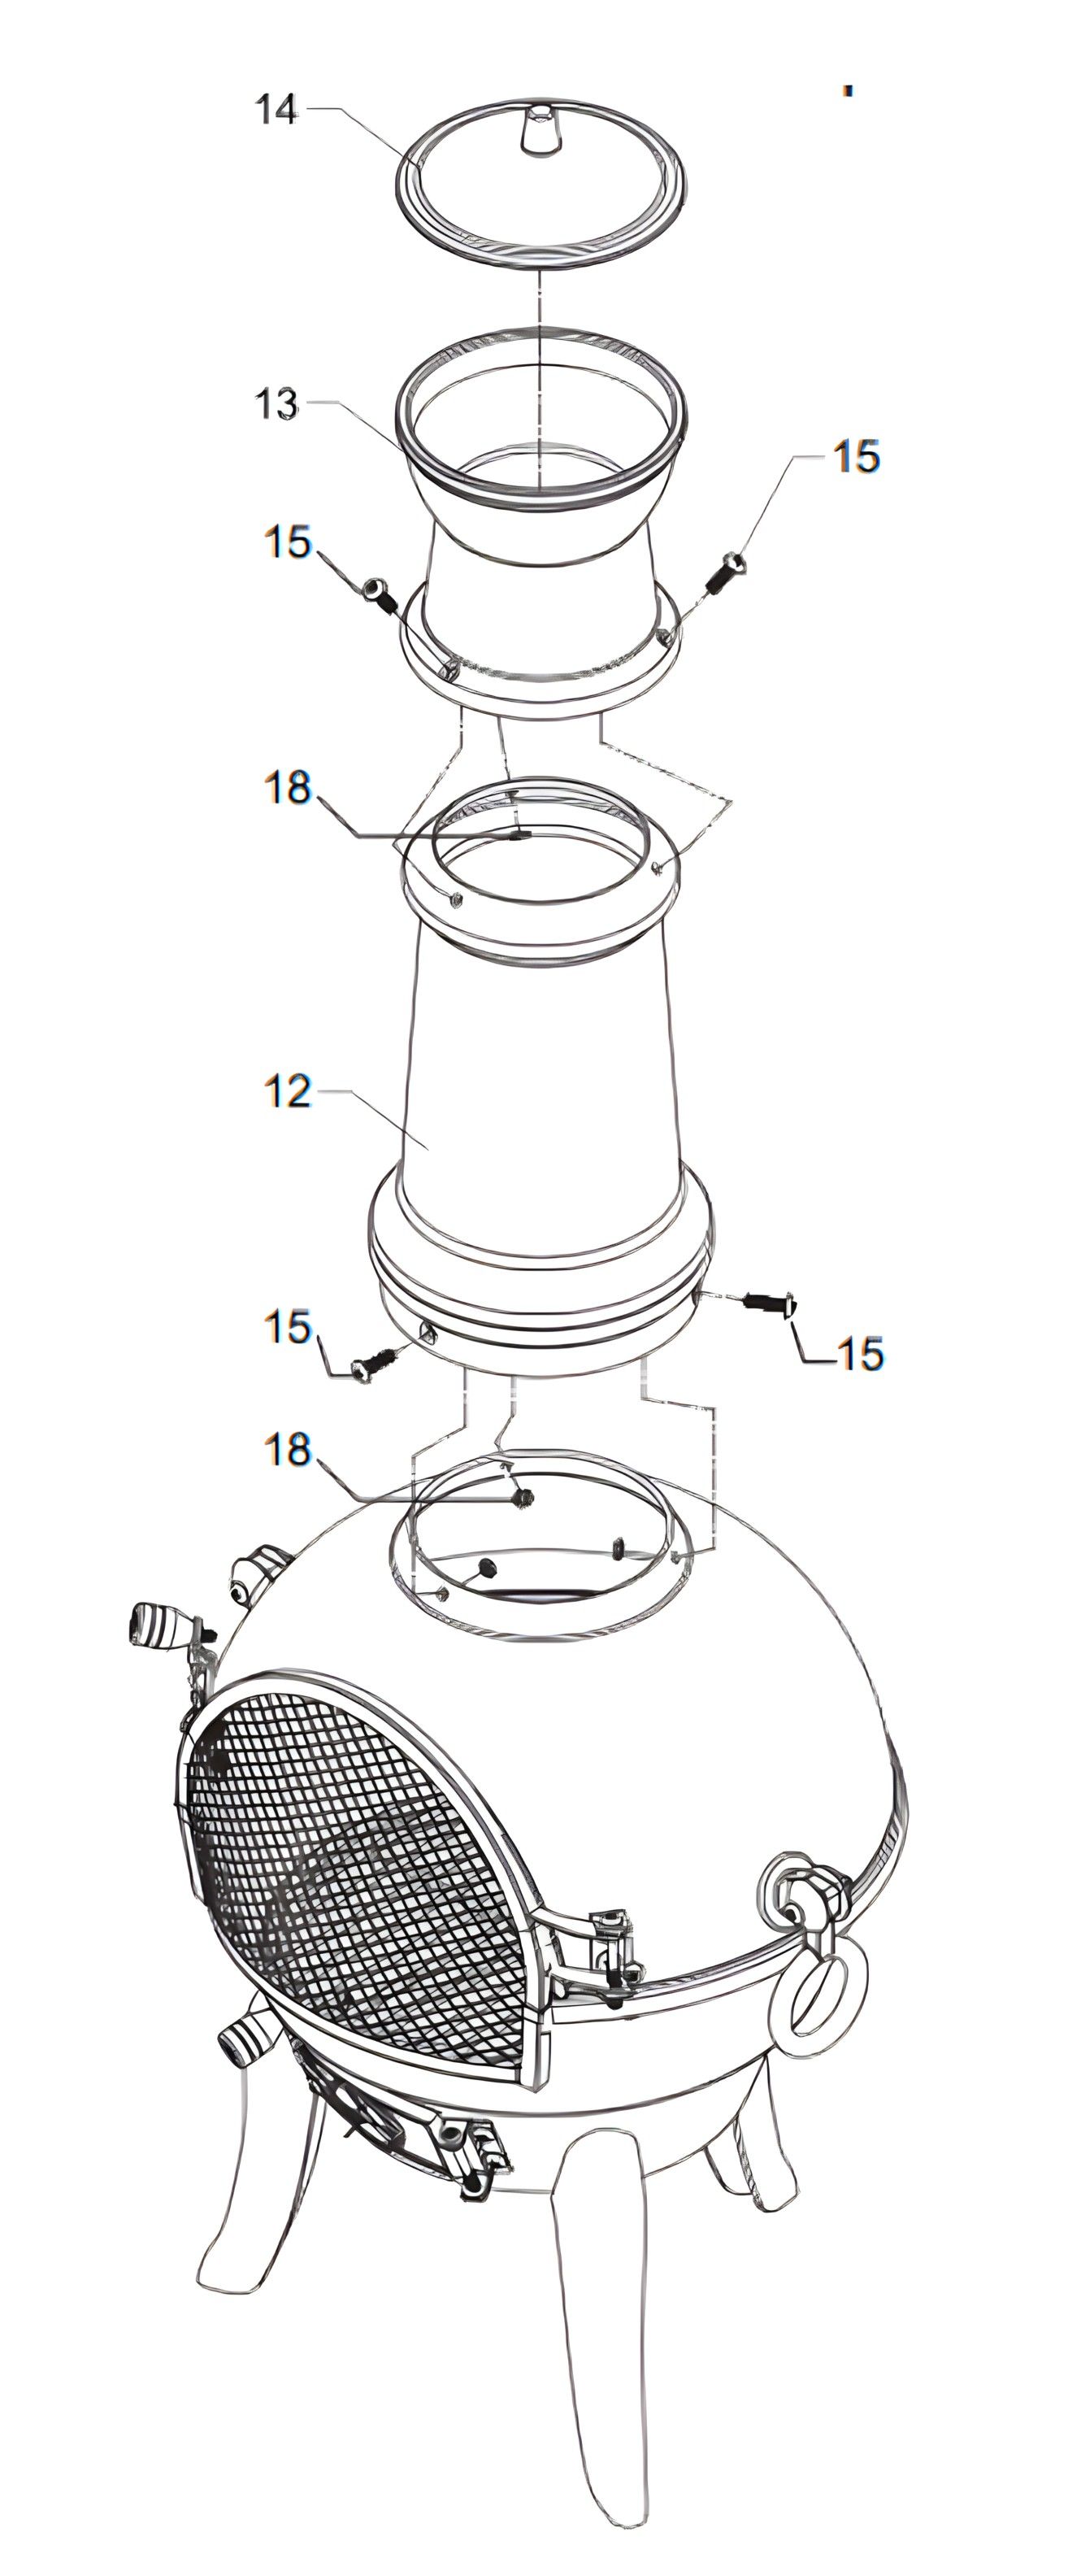 To complete the chimenea, connect the chimney base (12) to the cover bowl (6), and then connect the chimney (13) to the chimney base (12). Use the screws (15) and nuts (18) to attach these parts. 12. Placing the Chimney CoverPlace the chimney cover (14) on top of the assembled chimney. 13. CleaningTo ensure the appearance of your chimenea, clean the surface with a soft cloth. Apply a chimenea surface oil with a rag if desired. Do not use a wire brush to clean the surface, as this may scratch or damage the surface material. 14. StoringCover the chimenea with its rain cover when not in use, to protect it against harsh weather conditions. Preferably, bring the chimenea inside over winter time. Please allow the chimenea to cool down completely before covering it with its rain cover. 15. CorrosionRusting may happen to all cast iron products. To avoid this as much as possible ensure the above storing measures are followed, and that the chimenea is not overfired. If corrosion has already happened, high temperature paints may be used to touch up the rusting on the chimenea. 16. Resolution GuideWhat do I do if there are missing parts from my order? If there appears to be any part missing from your order, contact our friendly and helpful Customer Support Team within 7 days of receipt. For all other issues, please contact our Customer Support Team.
|