monstershopmonstershop.co.uk
Instructions by monstershopClothes Airer
monstershop

Clothes Airer

Clothes Airer
Before you start
Safe Working PracticeMaterialsTools
Steps
1. Locating Ceiling Joists2. Marking Fixing Points3. Drilling Pilot Holes4. Installing Pulleys5. Positioning the Cleat Hook6. Attaching the Cleat Hook7. Threading the Rope8. Securing the Rope Ends9. Adjusting the Rack Ends10. Setting the Loading Position11. Inserting the Laths12. Weight Limit & Usage Guidance13. Maintenance14. Resolution Guide

No results

monstershop
monstershop / Clothes Airer
Clothes Airer
monstershop

Instructions by

monstershop

Clothes Airer

Dry clothes the eco-friendly way with this ceiling-mounted Clothes Airer. Featuring 6 durable pine laths and classic cast-iron ends, it uses natural heat to dry clothes in 2–4 hours. A stylish, sustainable alternative to tumble dryers with zero energy cost!

Product Information

Clothes Airer

Thank you for purchasing this Monster Shop Clothes Airer. The classic design of this Clothes Airer gives your home a perfect, Victorian vibe. Easy to install, it maximises space by draping clothes from above and saves electricity and money in the process. It’s a unique alternative to using radiators or a tumble-dryer, and works better than free-standing airers too! Made from cast iron and ethically sourced, varnished wood, this Monster Shop Clothes Airer finds the perfect balance between traditional, eye-catching design and efficient, long-lasting results. See how much you can save! You should be aware of the maximum weight load capacity of your clothes airer. This is approximately 30 KG. Under no circumstance should you exceed this weight.  We at Monster Group UK understand that it is a new and exciting purchase, and although it is tempting to get stuck in, please read the instructions before you commence assembly. Please refer to and read Safety Advice, Safe Working Practice to ensure prevention of injury or damage to the product before starting.
View product (opens in new tab)
Materials
Pine (laths), Cast Iron (pulleys, racks, cleat hook, screws), Cotton (rope).
Dimensions
0.9m Clothes Airer90cm x 56 cm
1.2m Clothes Airer120cm x 56 cm
1.4m Clothes Airer140cm x 56 cm
1.5m Clothes Airer150cm x 56 cm
1.8m Clothes Airer180cm x 56 cm
2m Clothes Airer200cm x 56 cm
2.4m Clothes Airer240cm x 56 cm

Safe Working Practice

Please read through the safe working practice outlined here to ensure prevention of injury or damage to this product.

  • Ensure you have read and fully understood the instructions set out in this manual before attempting to install the pulley system.
  • When drilling the pilot holes, it is recommended another person accompanies you to ensure the pilot holes are straight.
  • Never drill above or below an electrical socket. If you are unsure about electrical wiring or plumbing, use a detector to ensure it is safe before drilling into the wall or ceiling.
  • Do not apply excessive leverage. If the turning /rotating action of the pulleys becomes stiff or difficult to move, remove the pulley and drill a wider/deeper pilot hole.
  • Ensure the rope can run through the runners of the pulleys unobstructed and without rubbing against the pulley blocks. This can lead to fraying and a weakening of the rope.

Tools

Screwdriver
Drill
4mm Drill Bit
Pencil

Materials

Wooden Laths
Double Pulley
Cotton Rope
Rawlplugs
Cast Iron Rack Ends
Single Pulley
Cleat Hook
Wall Screws

1. Locating Ceiling Joists

  • Find a wooden beam or joist within your ceiling by tapping the ceiling with the handle of a screwdriver. A hollow sound indicates no joist/beam, while a solid sound signals a beam or joist. Listen for a solid sound and mark with a pencil.

2. Marking Fixing Points

Measure from the first marked point to find the second fixing point using the guide below. Ensure to mark only where there is a beam or joist behind the ceiling. 

  • 0.9m Clothes Airer: 80cm apart
  • 1.2m Clothes Airer: 100cm apart
  • 1.4m Clothes Airer: 118cm apart
  • 1.5m Clothes Airer: 126cm apart
  • 1.8m Clothes Airer: 150cm apart
  • 2.0m Clothes Airer: 166cm apart
  • 2.4m Clothes Airer: 200cm apart

3. Drilling Pilot Holes

  • Use a 4mm drill bit to drill 2 x pilot holes into the ceiling at the marked fixing points.

4. Installing Pulleys

  • Screw the pulleys into the pre-drilled holes in the ceiling. Use washing-up liquid or oil on the thread to help fit the pulleys if necessary.

5. Positioning the Cleat Hook

  • Place the Cleat Hook to a nearby wall and mark with a pencil. 

Note: Attach the Cleat Hook to a wall closest to the Double Pulley, NOT the Single Pulley.

6. Attaching the Cleat Hook

  • Fit 2 x Rawlplugs and drill 2 x Screws into place to attach the Cleat Hook.

7. Threading the Rope

  • Thread the rope as shown in the Image.

8. Securing the Rope Ends

  • Thread the rope ends through the Cast Iron Rack End eyes and tighten firmly, as shown in the image. Cut the remains of the rope ends.

9. Adjusting the Rack Ends

  • Pull the loop so that the Rack Ends are raised towards the ceiling. In this position, tie a knot in the loop.

10. Setting the Loading Position

  • Let down the Rack Ends to a position in which you could load clothes. Tie another knot in the loop here.

11. Inserting the Laths

  • Place the laths through the Cast Iron Rack Ends. You can use the Cleat Hook to hold your desired position for the Airer.

12. Weight Limit & Usage Guidance

The Clothes Airer is built to withstand up to 30kg of clothes. Do not overload.

For best results, operate well below this weight threshold so that the airer can be safely and easily pulled toward the ceiling.

13. Maintenance

Generally speaking, your Clothes Airer should not face any problems after assembly. However, we recommend to check the following often;

  • Check that the pulleys are still firm into the ceiling and haven’t twisted or turned.
  • Check there is no fraying to the rope and all knots are tight.
  • Check the Cleat Hook is firm and flush against the wall and the screws are secure to the wall.

14. Resolution Guide

  • WHAT DO I DO IF THERE ARE MISSING PARTS FROM MY ORDER?

If there appears to be any part missing from your order, contact our friendly and helpful Customer Support Team within 7 days of receipt.

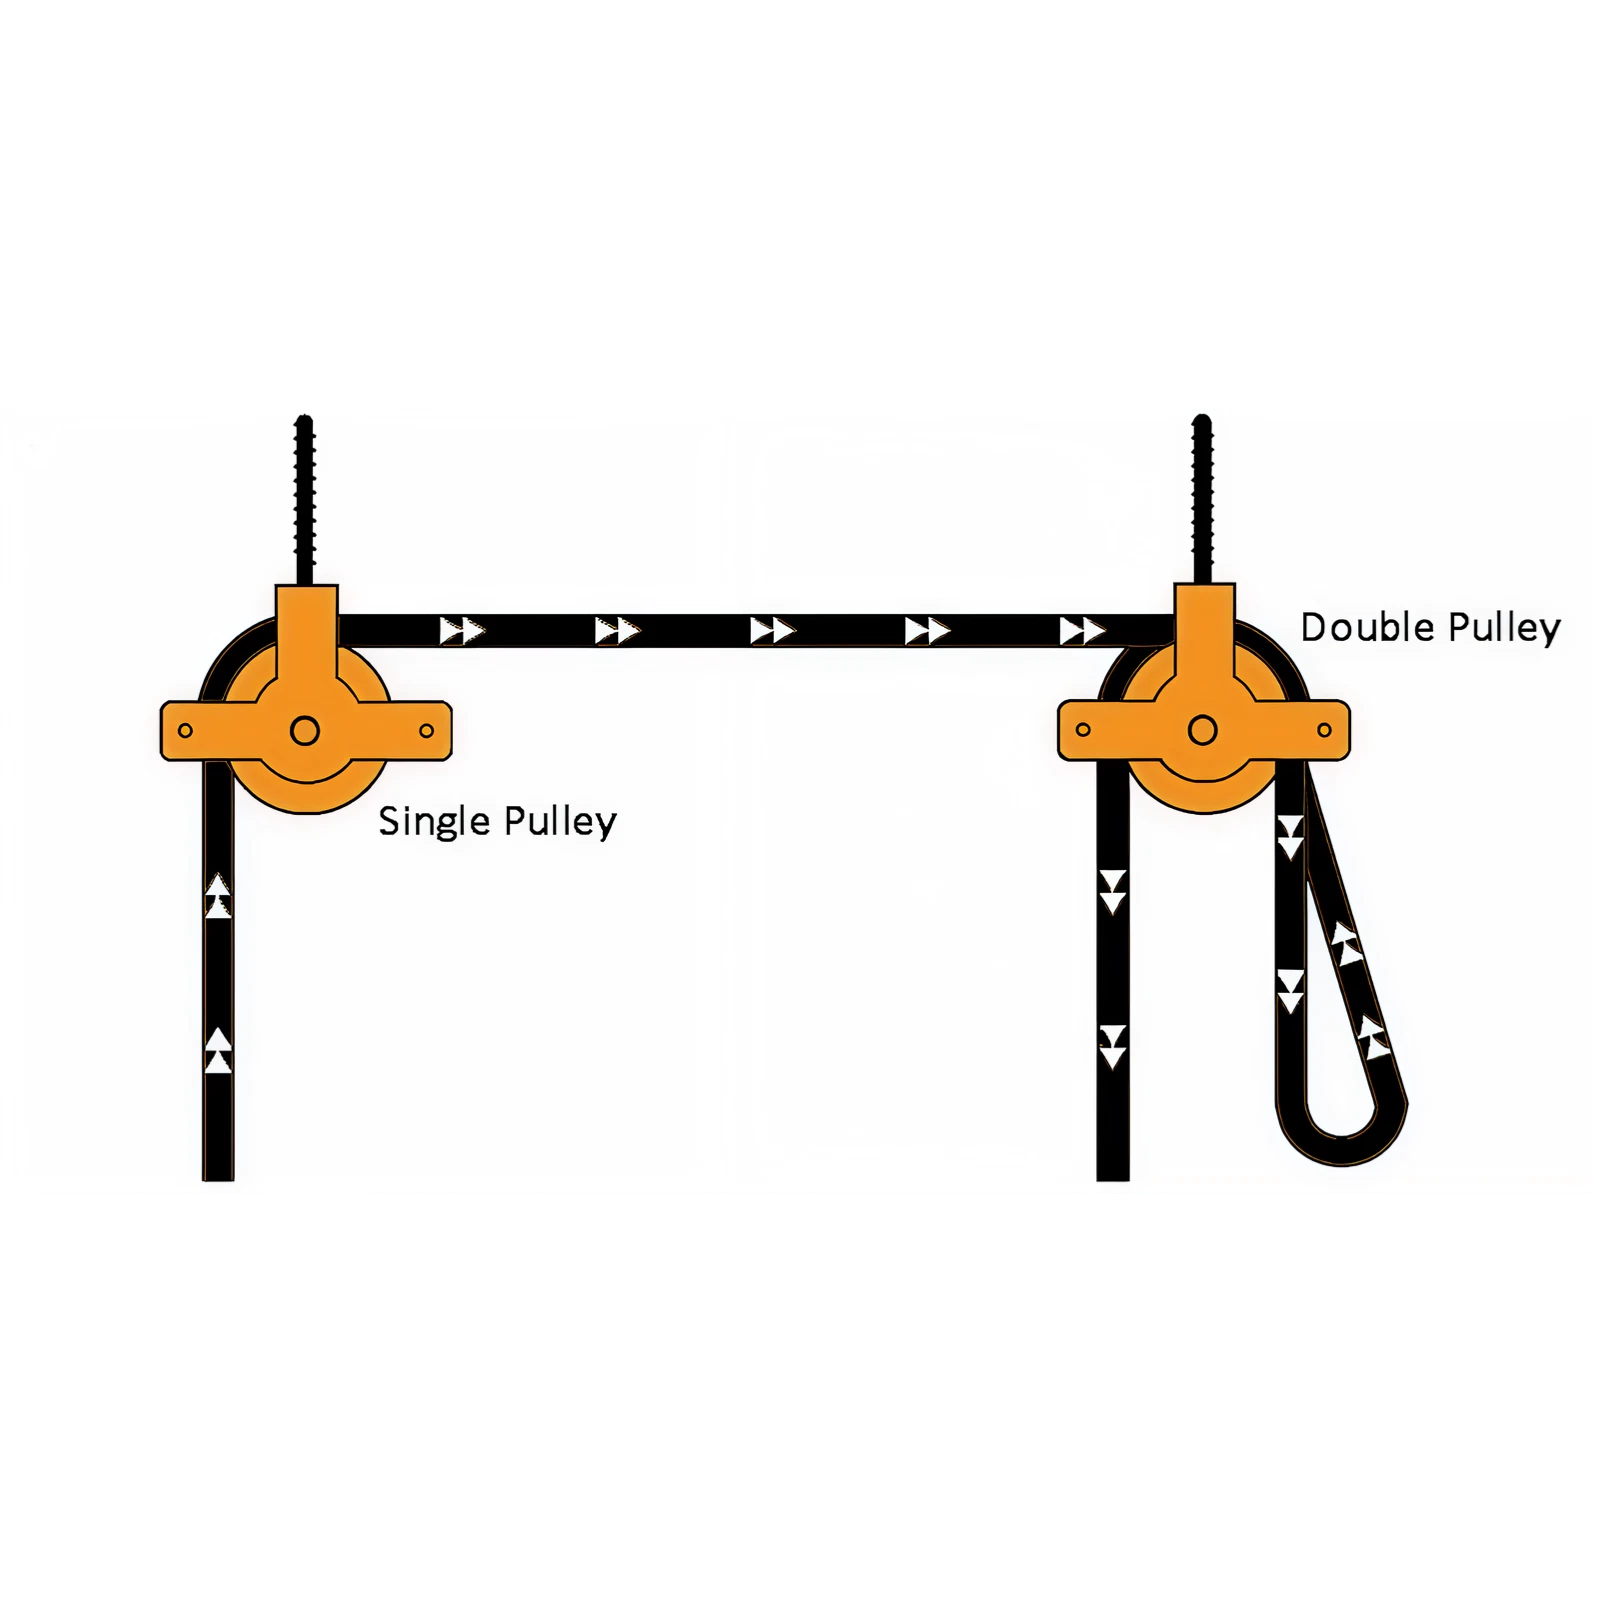
  • WHAT DO I DO IF THE PULLEYS/CLEAT HOOK ARE NOT FIXING INTO THE CEILING/WALL FIRM ENOUGH?

Ensure you have pre-drilled deep enough into the wall, and ensure that you have used the rawlplugs provided. If the problem persists, check that there is a wooden beam/joist where you are drilling. If there is no beam/joist, the rawlplug and screw will have no leverage to attach to. Detach and reposition if necessary.

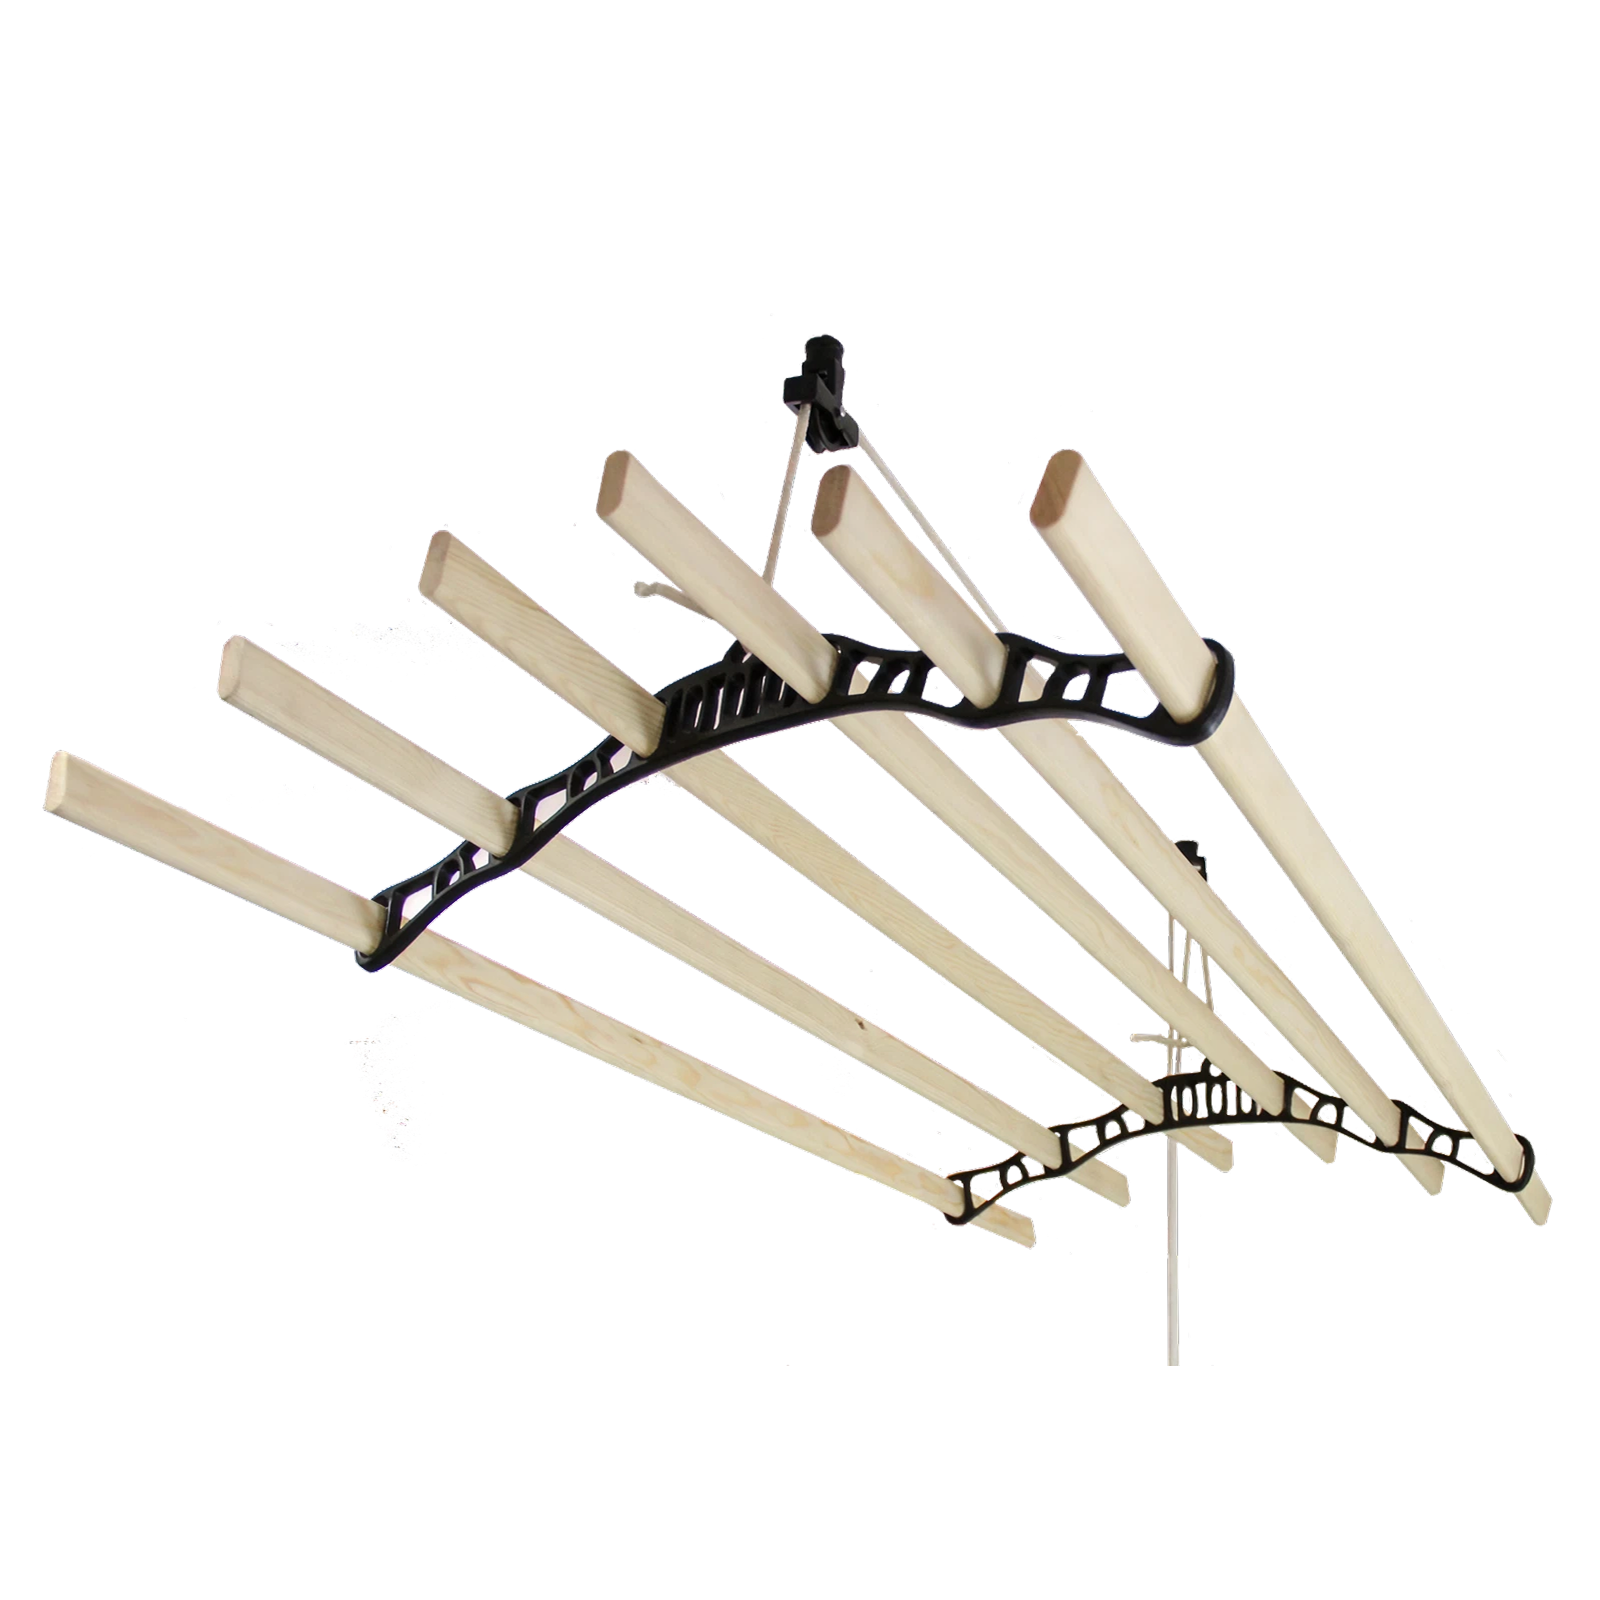
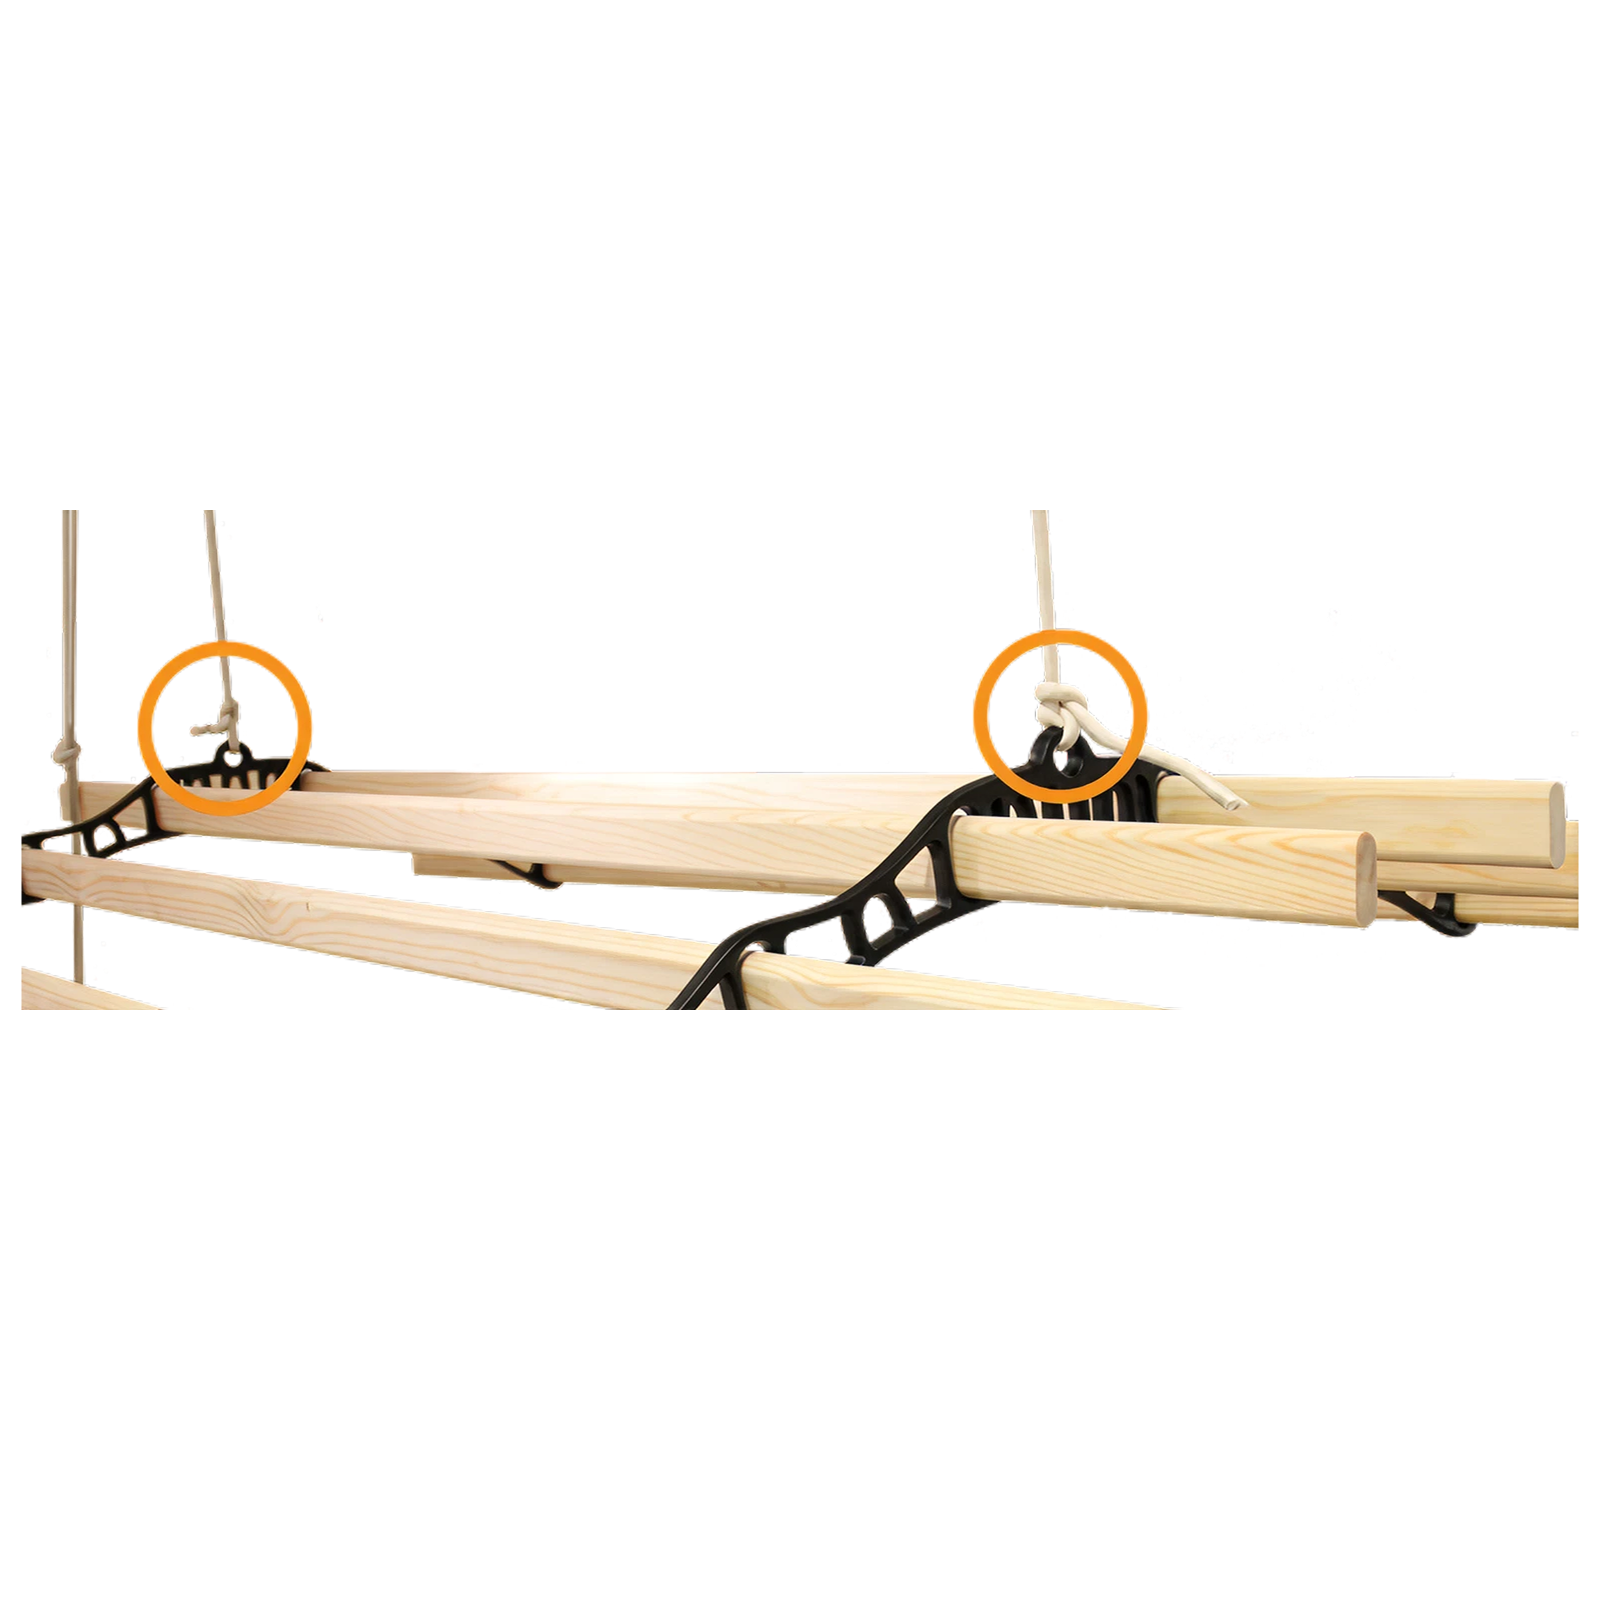
  • WHAT DO I DO IF MY WOODEN LATHS DO NOT REACH ACROSS THE CAST IRON RACKS?

Did you use the guide, measure the distance and mark with a pencil first? If not, re-read the assembly instructions and follow the marking guide.

FOR ALL OTHER ISSUES, PLEASE CONTACT OUR CUSTOMER SUPPORT TEAM.

monstershop
monstershop (opens in new tab)Terms (opens in new tab)Privacy (opens in new tab)