1. Turning On the Oven
Reminder: Each deck has its own control panel.
1. Turn the power switch ON. The temperature indicator will come on, and the red light on the temperature dial will illuminate.
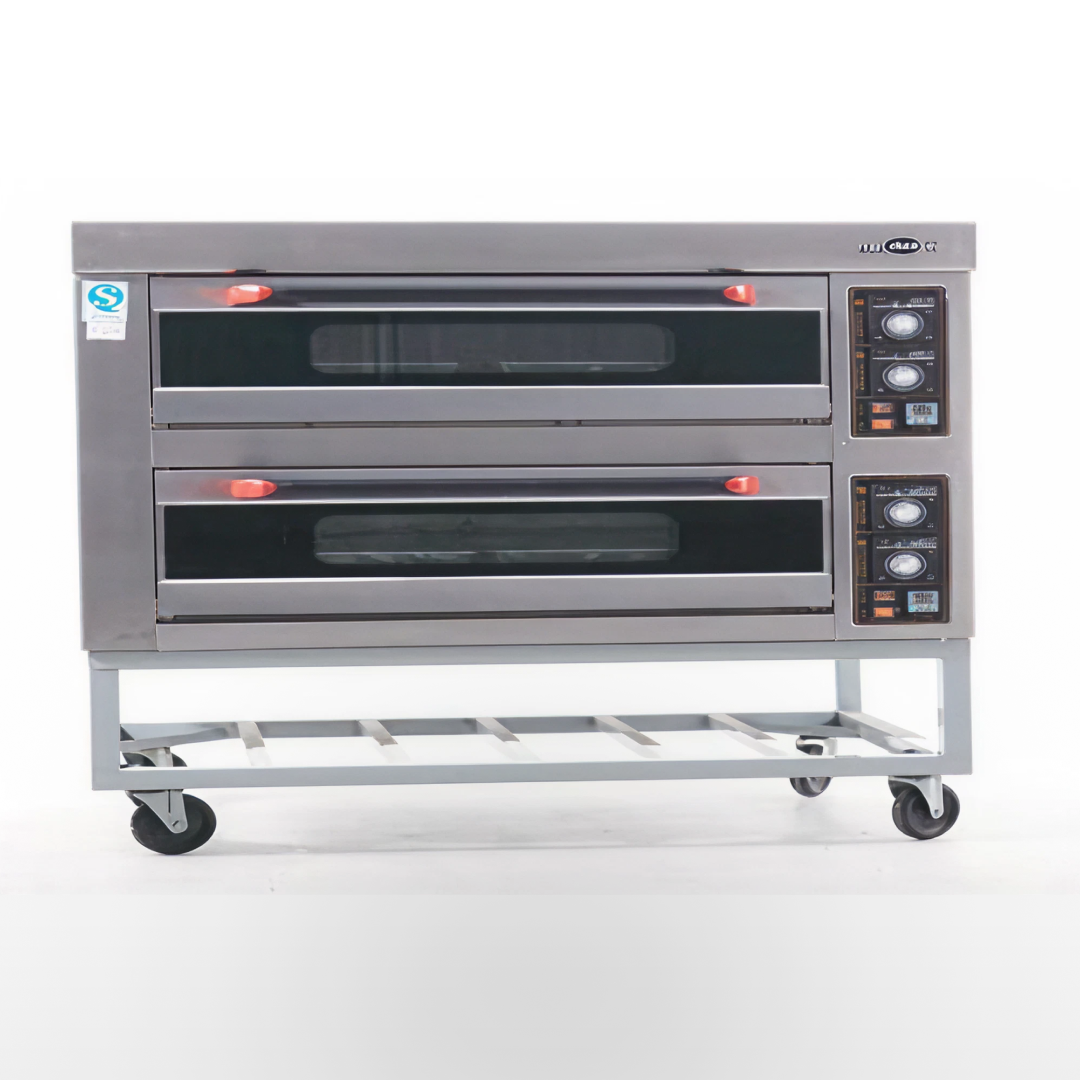 Instructions by monstershop Commercial OvenCook like a pro with the KuKoo Commercial Baking & Pizza Oven. With 2 decks holding up to 12x10" pizzas, it heats to 400°C and features reinforced steel doors. Freestanding on wheels, it’s perfect for restaurants, cafés, or takeaways. Three-phase, single-phase convertible. Product InformationCommercial OvenThe Commercial Oven is ideal for any restaurant, take-away, cafe or pub. The oven has two decks that can be controlled separately.
As it is free-standing, the commercial oven can be up and running immediately and moved around your kitchen. The reinforced steel doors give you access to each deck separately, as well as keeping the heat in. The temperature range is between 0°C and 400°C.
The oven is pre-set as single phase, however the oven is capable of being a three phase oven. Ask a qualified electrician for further advice and help when converting the oven from single to three phase. The oven needs a 6mm cable for wiring.
We at Monster Group UK understand that this is a new and exciting purchase, and although it is tempting to get stuck in please carefully read these instructions before you start using this oven.
Please Note: The Kukoo Commercial Oven is designed to be used by a competent person. It should not be used or stored in wet or damp conditions.
Please refer to and read Safety Advice, Safe Working Practice to ensure prevention of injury or damage to the device before starting. View product (opens in new tab)
Monster Guarantee If you wish to return a product in perfect working order, we provide a 30 day returns policy as long as the item is unopened and in a resalable condition. A 12 month warranty applies to all of our electrical products; we will cover the cost of labour and parts. Our policy is to try and repair the item before arranging an exchange or refund. If for any reason a part is missing please get in touch with us within 7 days on receipt of your order. You can contact our friendly and helpful Customer Support Team via email or call. For full terms and conditions contact our Support Department via the details on the Contact Us page. 1. Turning On the OvenReminder: Each deck has its own control panel. 1. Turn the power switch ON. The temperature indicator will come on, and the red light on the temperature dial will illuminate. 2. Adjusting Temperature1. Adjust the top and bottom temperatures of the deck using the temperature control. The light on the dial will turn green as the oven begins to heat up. 3. Placing Food in the OvenOnce the oven is heated, place the food inside the oven. 4. Using the Timer1. Turn the timer switch to ON. 5. Turning Off the Oven1. Turn the power switch to OFF when you have finished cooking. 6. Cleaning and Maintenance
7. Appliance Drawing: Single Phase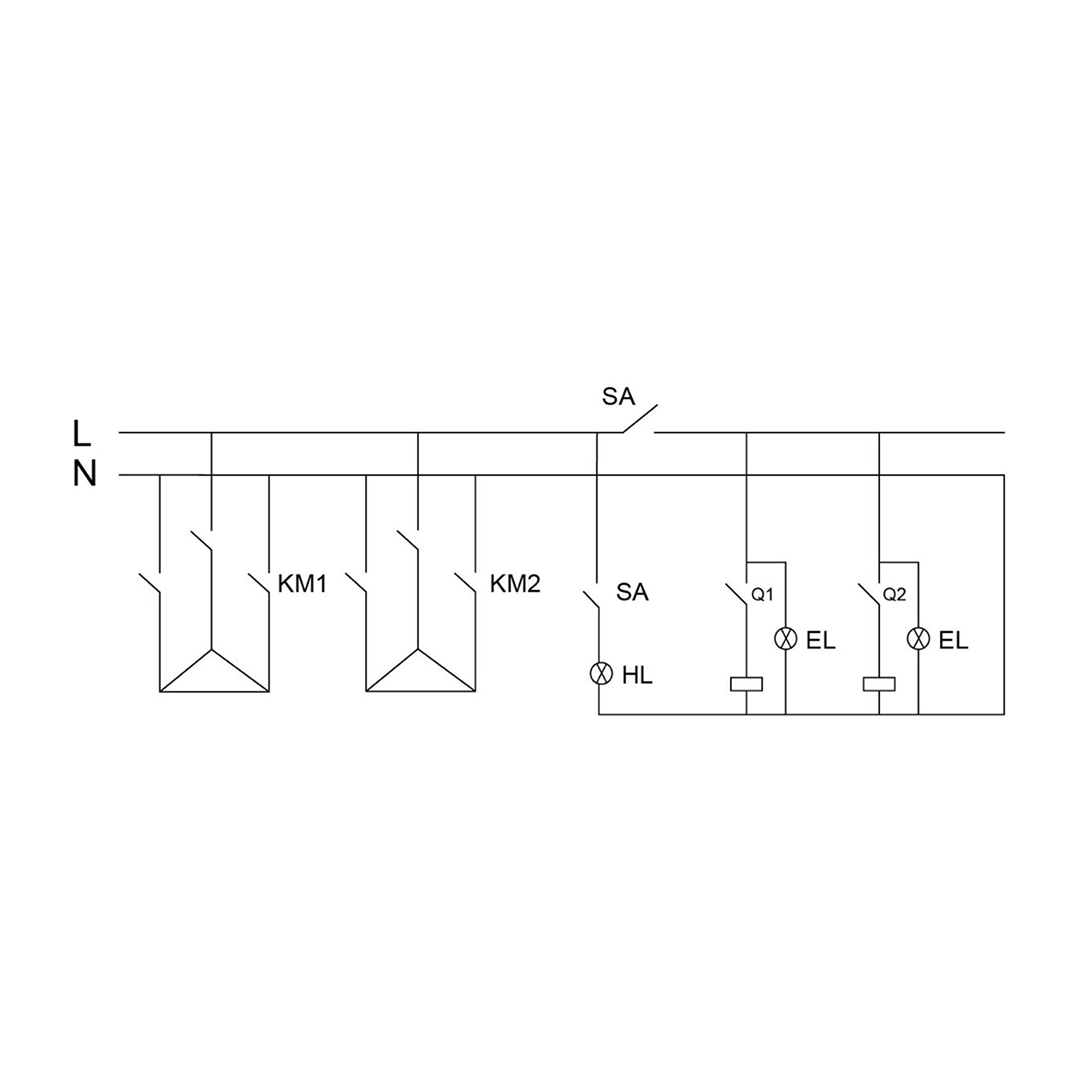
8. Appliance Drawing: Three Phase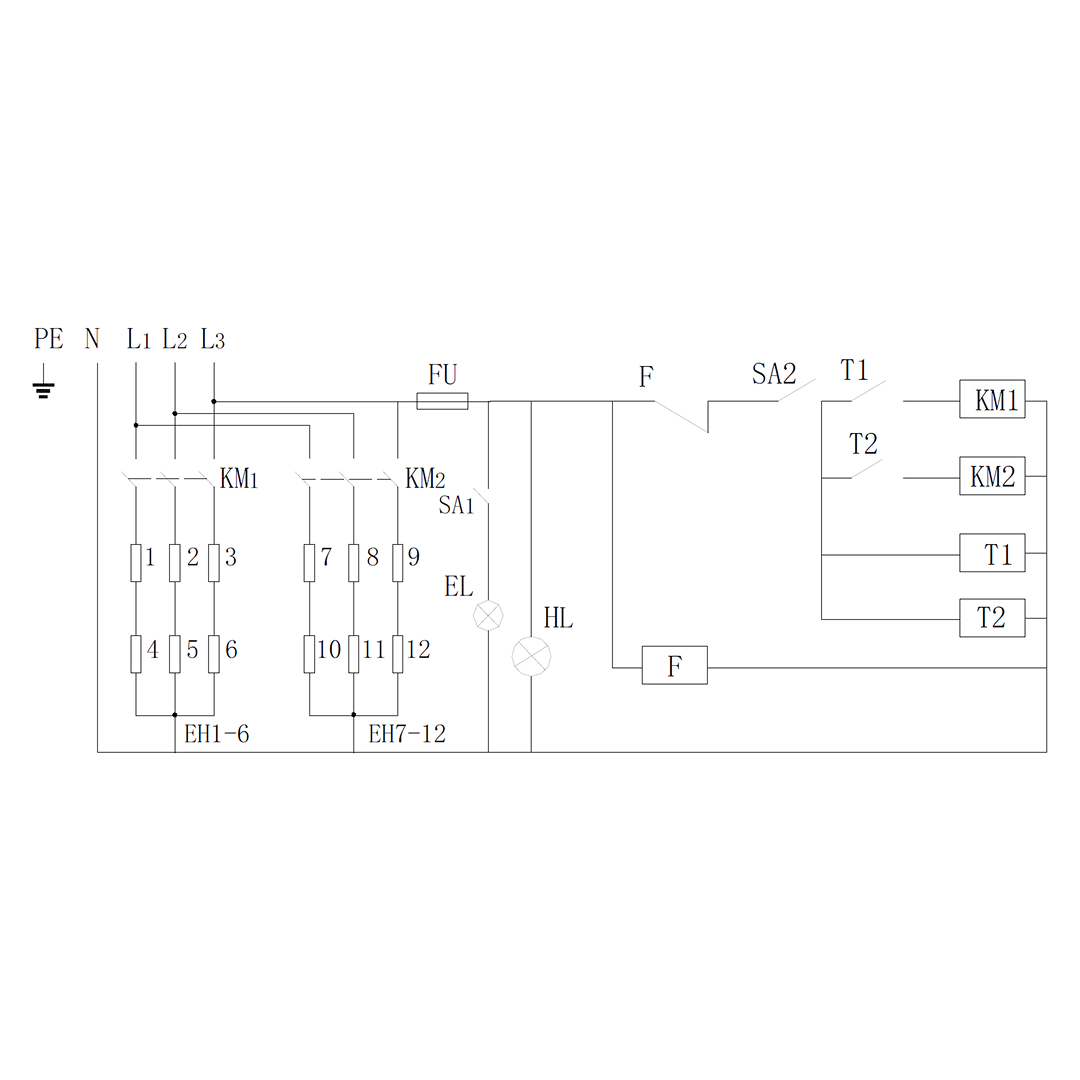
9. Resolution GuidePlease read through the guide below if you have any issues or faults with your device. The information covers and resolves the majority of frequently asked questions.
If there appears to be any part missing from your package, contact our Customer Support team via the details on the Contact Us page within 7 days of receipt.
The power supply may not meet the requirements of the specification. Check that you have the correct power supply, and that it is supplying the correct voltage.
Do not touch or tamper with any of the wires or components. Repair or maintenance inside the control box should only be carried out by skilled electricians.
Make sure the oven is turned off and remove the power supply. Open the right-hand side panel of the oven; inside, you should see the light bulb. Unscrew the bulb and replace it with a new one. Replace the panel and turn the power back on to check the light.
There appears to be an issue with the temperature controller. Contact our Customer Support team for more advice and help if you are dealing with this problem.
There may be a problem with the switch, fuse box, or power supply. Repair or maintenance inside the control box should only be carried out by a skilled electrician. For all other issues, please contact our Customer Support department via the details on the Contact page. |