Prior to installation, it is important to review the overall layout of your battens to ensure appropriate support to your Slatted Cladding Boards. Take into consideration the design of each section, especially for the following:
Where Cladding Boards meet at a butt end, two battens are needed to create a double joist.
Consider features of your wall such as windowsills, door frames, soffits and drainpipes. Sufficient batten support must be installed to accommodate these areas.
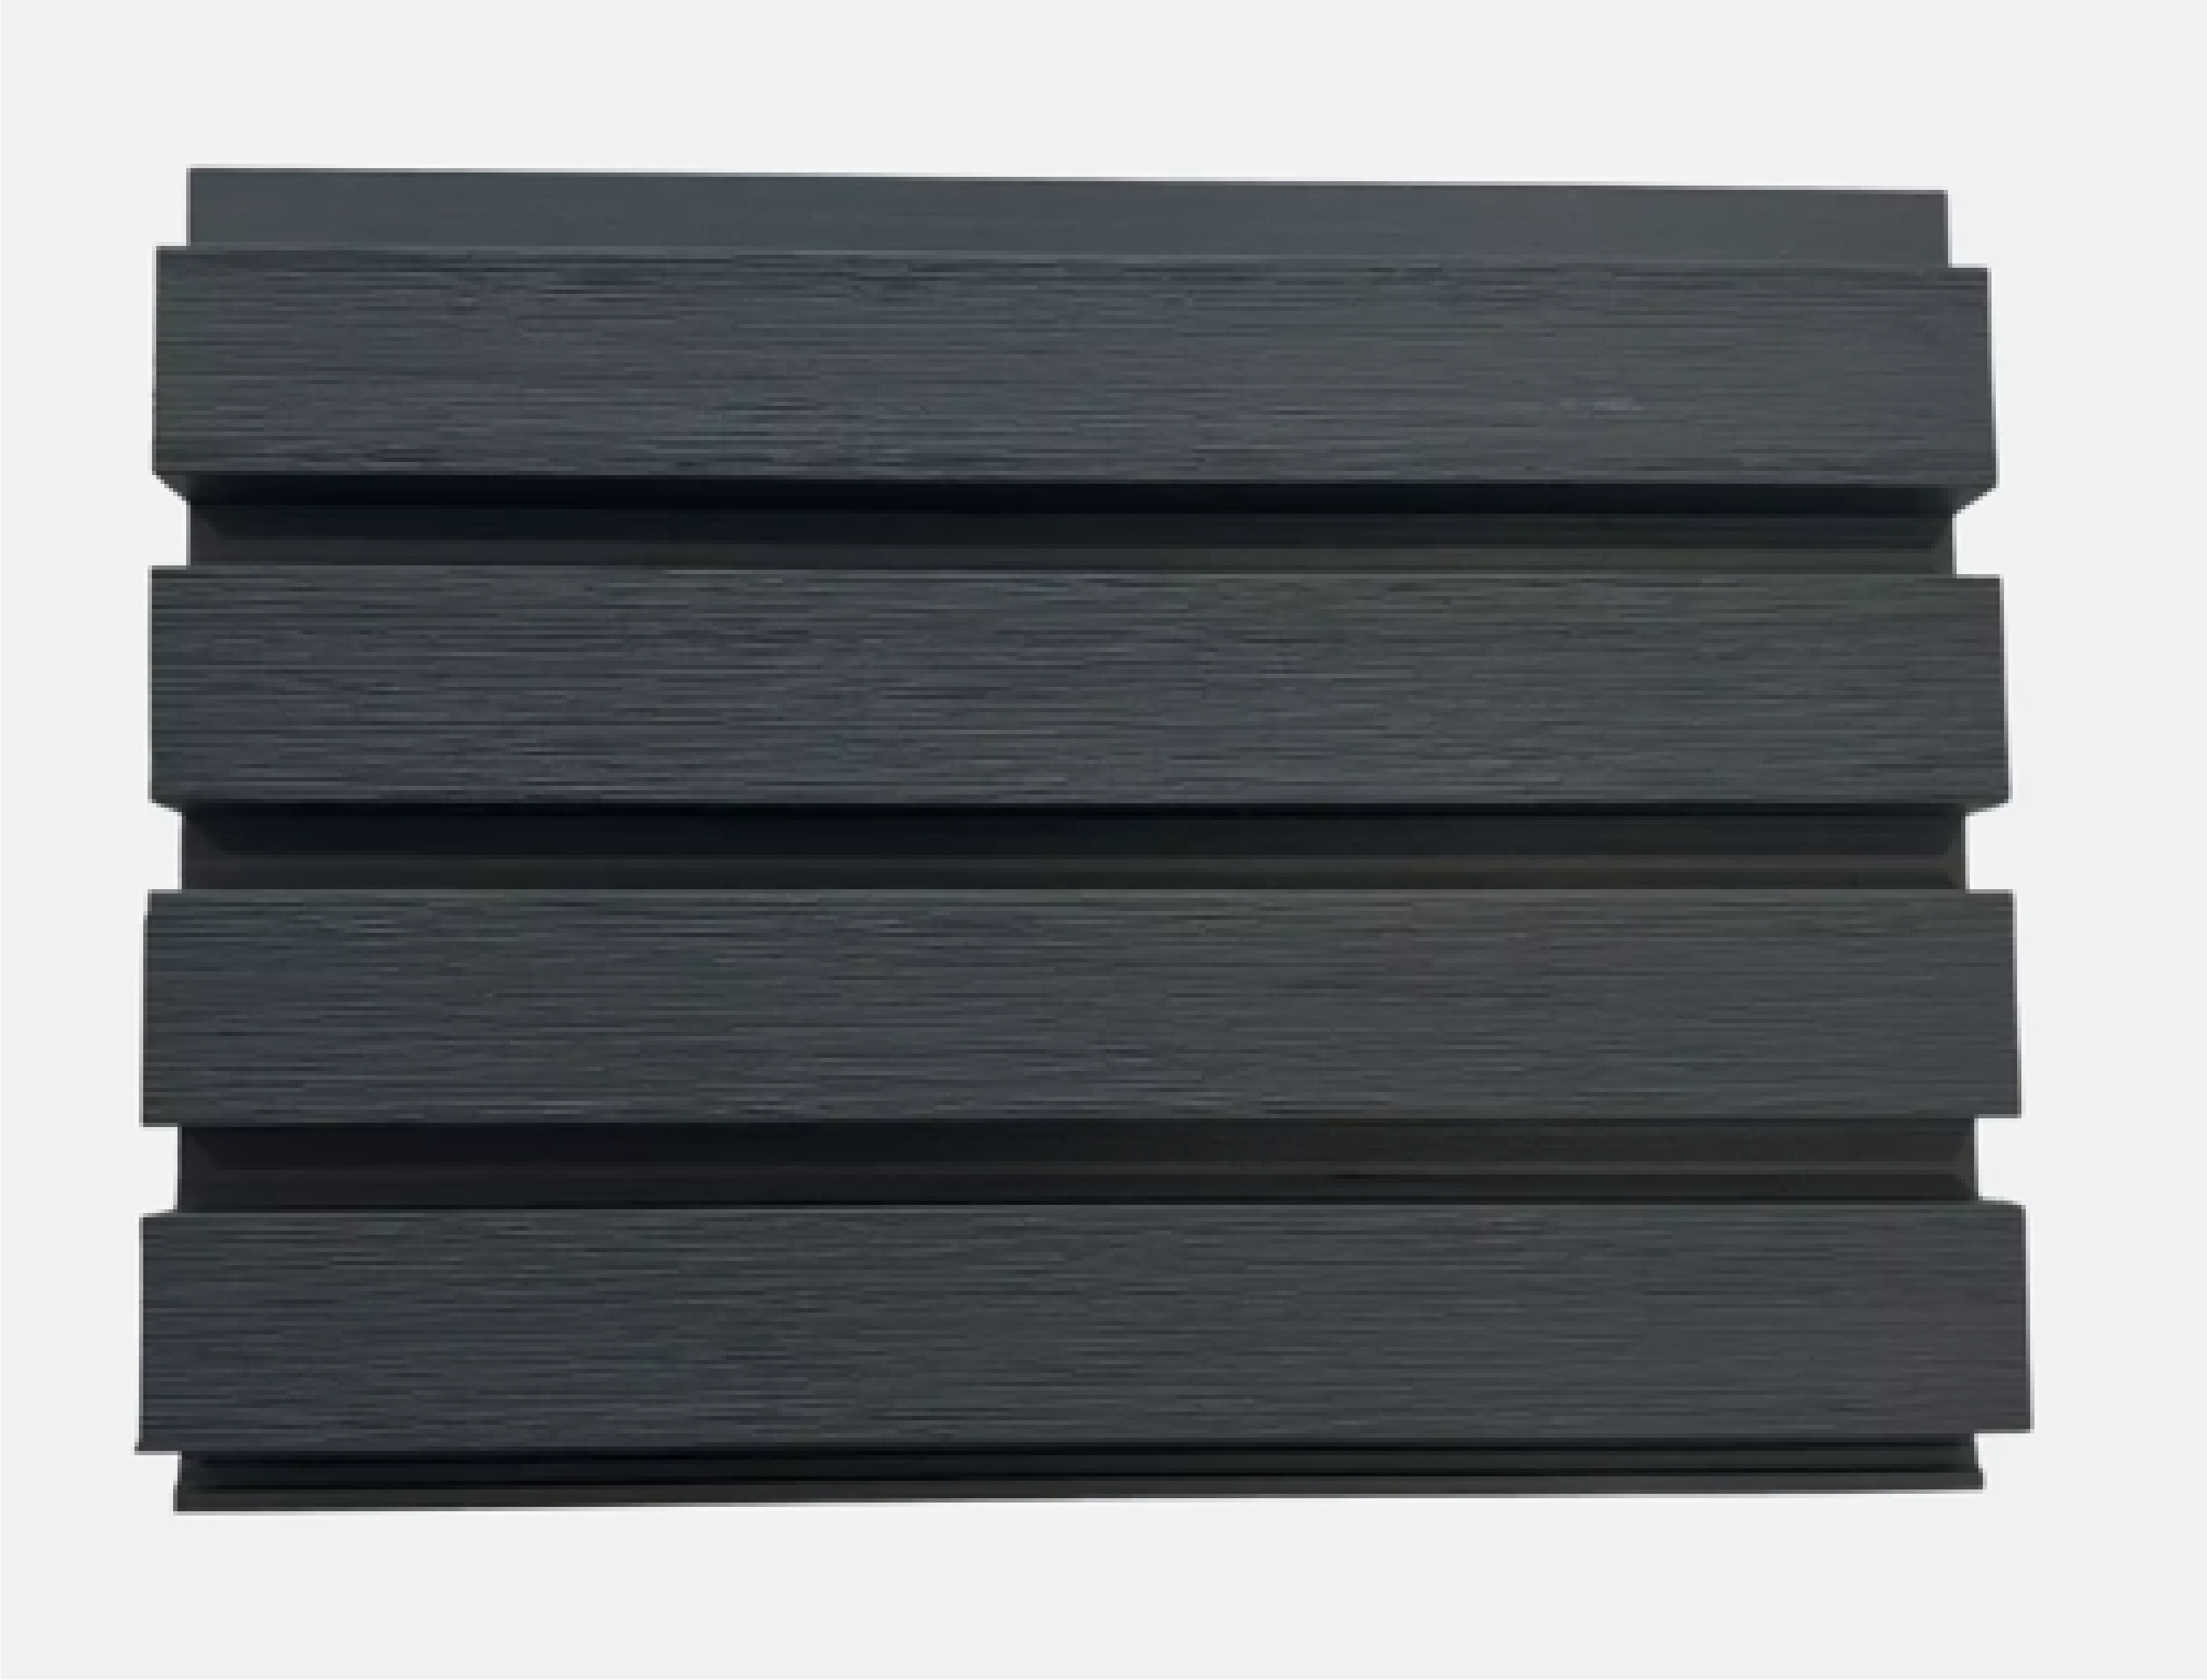
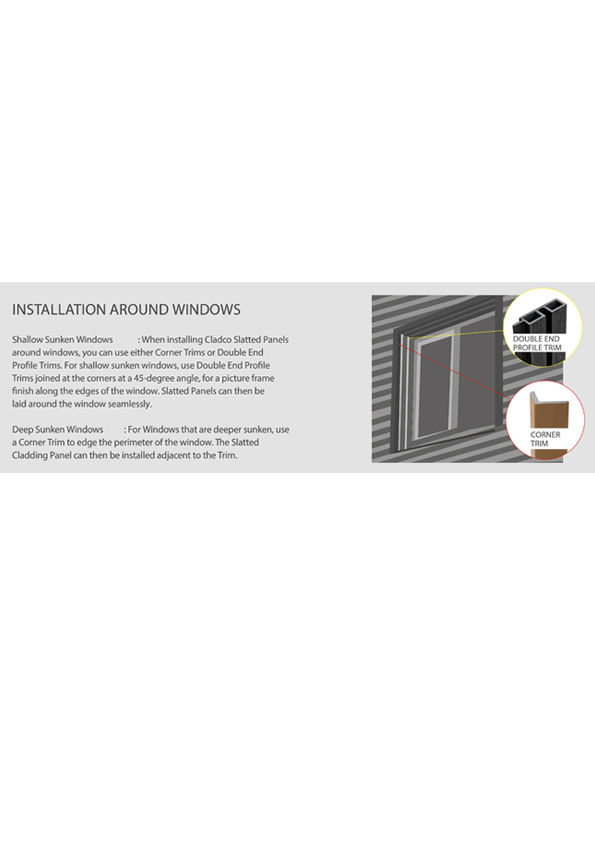
Slatted Cladding Panels have a tongue and groove effect and so if you are looking to use Trims, these must be calculated in line with the direction of the Slatted Panels beforehand.
2. Vertical Installation
BATTENS
For a strong and durable sub-structure, use either 30mm x 50mm composite battens or 50mm x 25mm timber battens to support your Slatted Cladding Panels. Composite battens are recommended for enhanced longevity, though timber battens can be used following the same installation process.
Installation Guidelines:
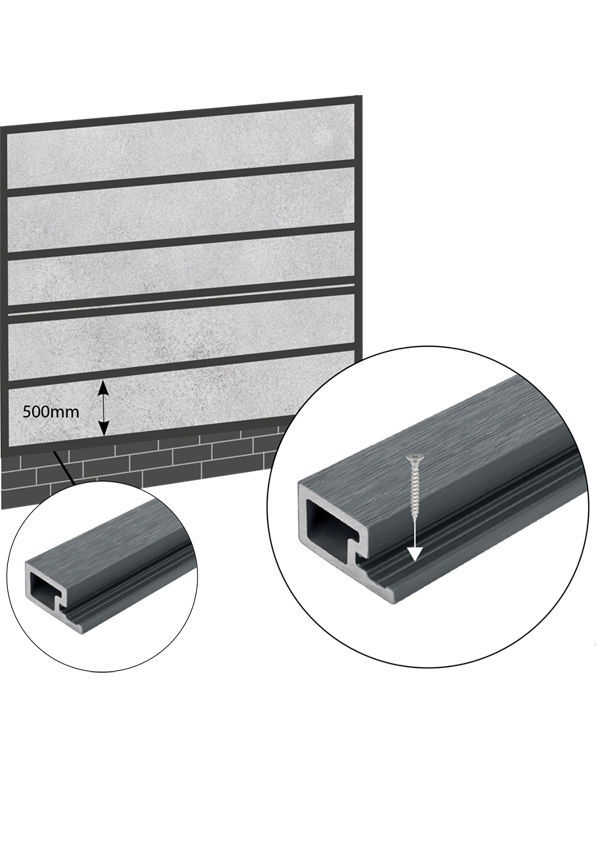
Pre-Drilling: Pre-drill both the battens and the underlying surface using a 6mm drill bit.
Secure battens at least 50mm deep into the surface below.
Use screws of at least 80mm to accommodate the batten width and ensure a firm hold. Choose screws and fixings appropriate for the surface material.
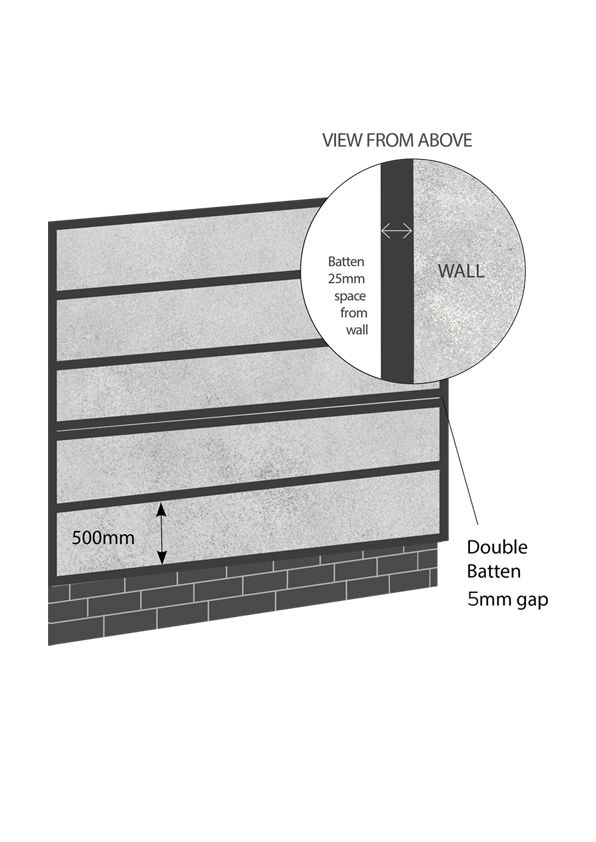
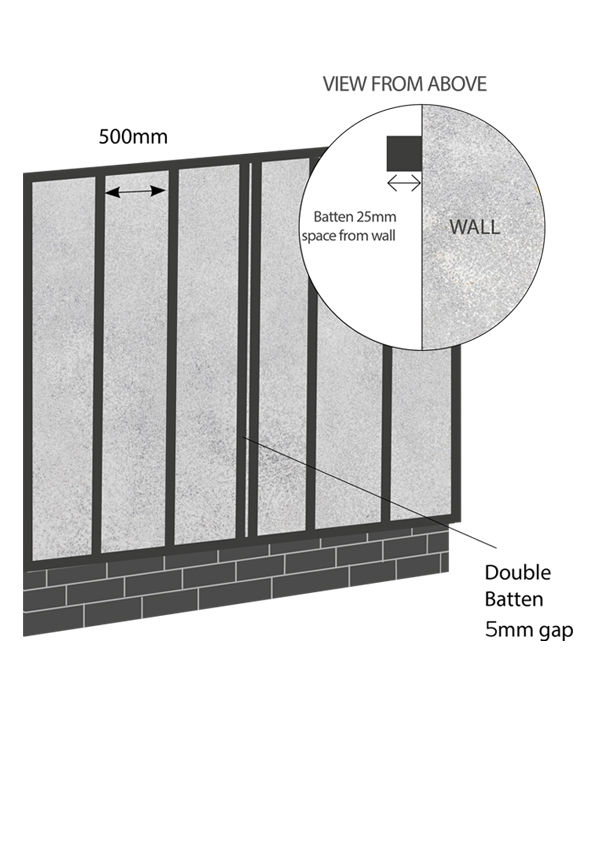
Batten Positioning for Vertical Installation: Fix battens horizontally to a flat and stable surface.
Maintain a minimum gap of 500mm between battens.
Battens must run across the entire width of the area being clad.
Additional battens may be required where two panels meet, ensuring a 5mm expansion gap between each. Panels must always be supported where they join.
Install battens at a 90-degree angle to the intended direction of the Slatted Cladding Panels.
Perimeter Batten Framing: It is recommended to install battens around the perimeter to create a batten frame.
This prevents visible gaps between the cladding panels and the wall.
A batten frame also helps keep out debris, small animals, and insects from entering the underside of the cladding.
Double Battens & Pre-Drilling
Double Battens Installation: Install double battens where two panels meet, ensuring a minimum 5mm expansion gap between each batten.
Each panel must be fully supported by its own batten at the joining point.
Pre-Drilling to Prevent Damage: To prevent cracking or splitting, always pre-drill both the Slatted Cladding Boards and Battens before fixing them in place.
Batten Selection & Ventilation
There is no specific requirement for which type of batten to use for your Cladding framework. However,
A minimum 25mm gap must be maintained between the wall and the Slatted Cladding Panels to allow for proper airflow and ventilation.
3. Vertical Installation
FIXING THE FIRST BOARD
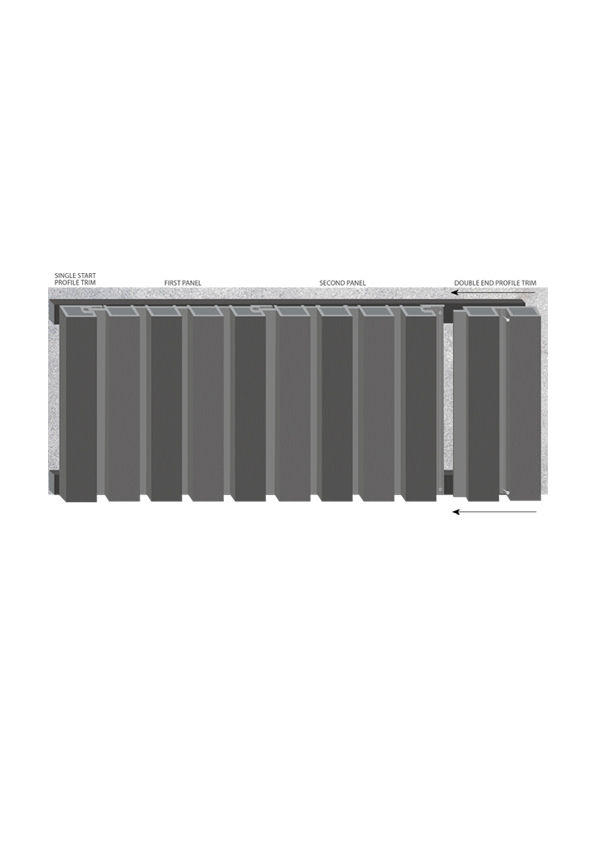
Before installing the Slatted Cladding Panels, first secure the Single Start Profile Trims alongside the battens using 20mm screws. Ensure a 5mm expansion gap between the Slatted Panels and the Internal/External Corner Trim or Double End Profile Trim. For consistency, it is recommended to fully install each section before moving on.
Important Notes:
The Single Start Profile Trims can only be installed on one end of the wall due to the tongue-and-groove design.
To ensure proper alignment throughout the installation, take accurate measurements before purchasing your Wall Cladding.
4. Vertical Installation
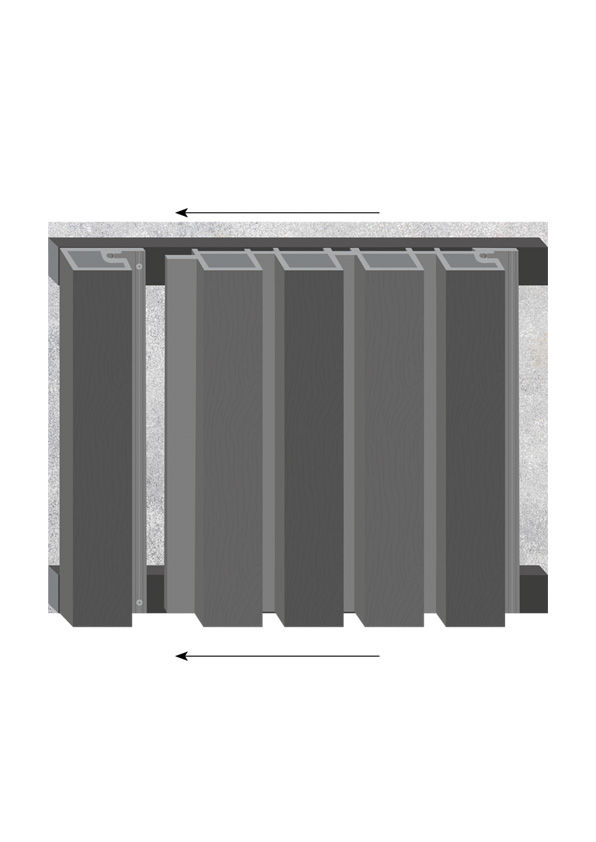
FIXING FROM LEFT TO RIGHT
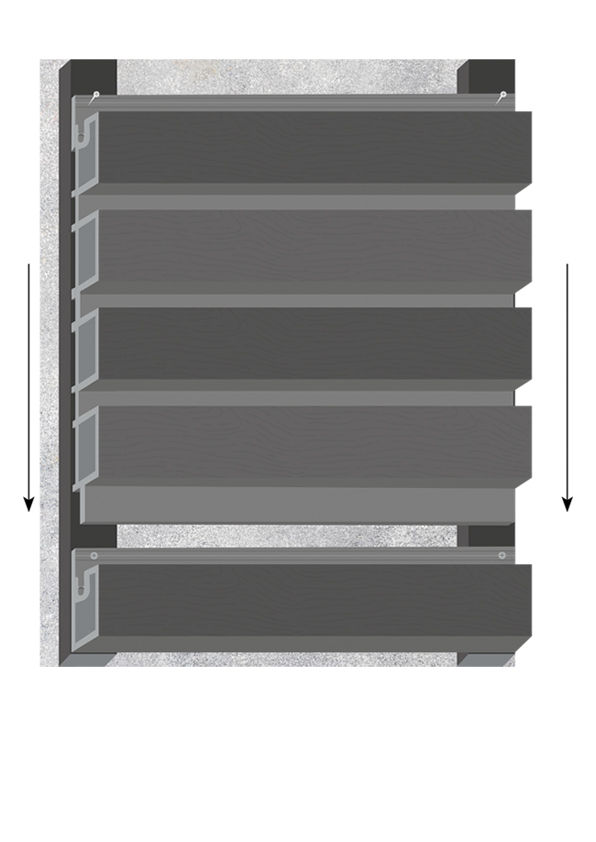
Slot the second panel into place using the tongue-and-groove method.
The non-grooved lip of the second panel will conceal the screws from the first panel. Secure the panel by fixing screws into the top grooved lip.
Repeat this process for each additional Slatted Panel, ensuring they are firmly secured to the battens underneath.
Expansion Gaps for Trims:
When installing a panel next to a Double End Profile Trim, leave a 5mm expansion gap between the panel and the trim face.
When installing a panel next to an Internal or External Corner Trim, leave a 5-7mm expansion gap between the panel and the trim corner.
This ensures the board sits flush against the trims and maintains a seamless profile.
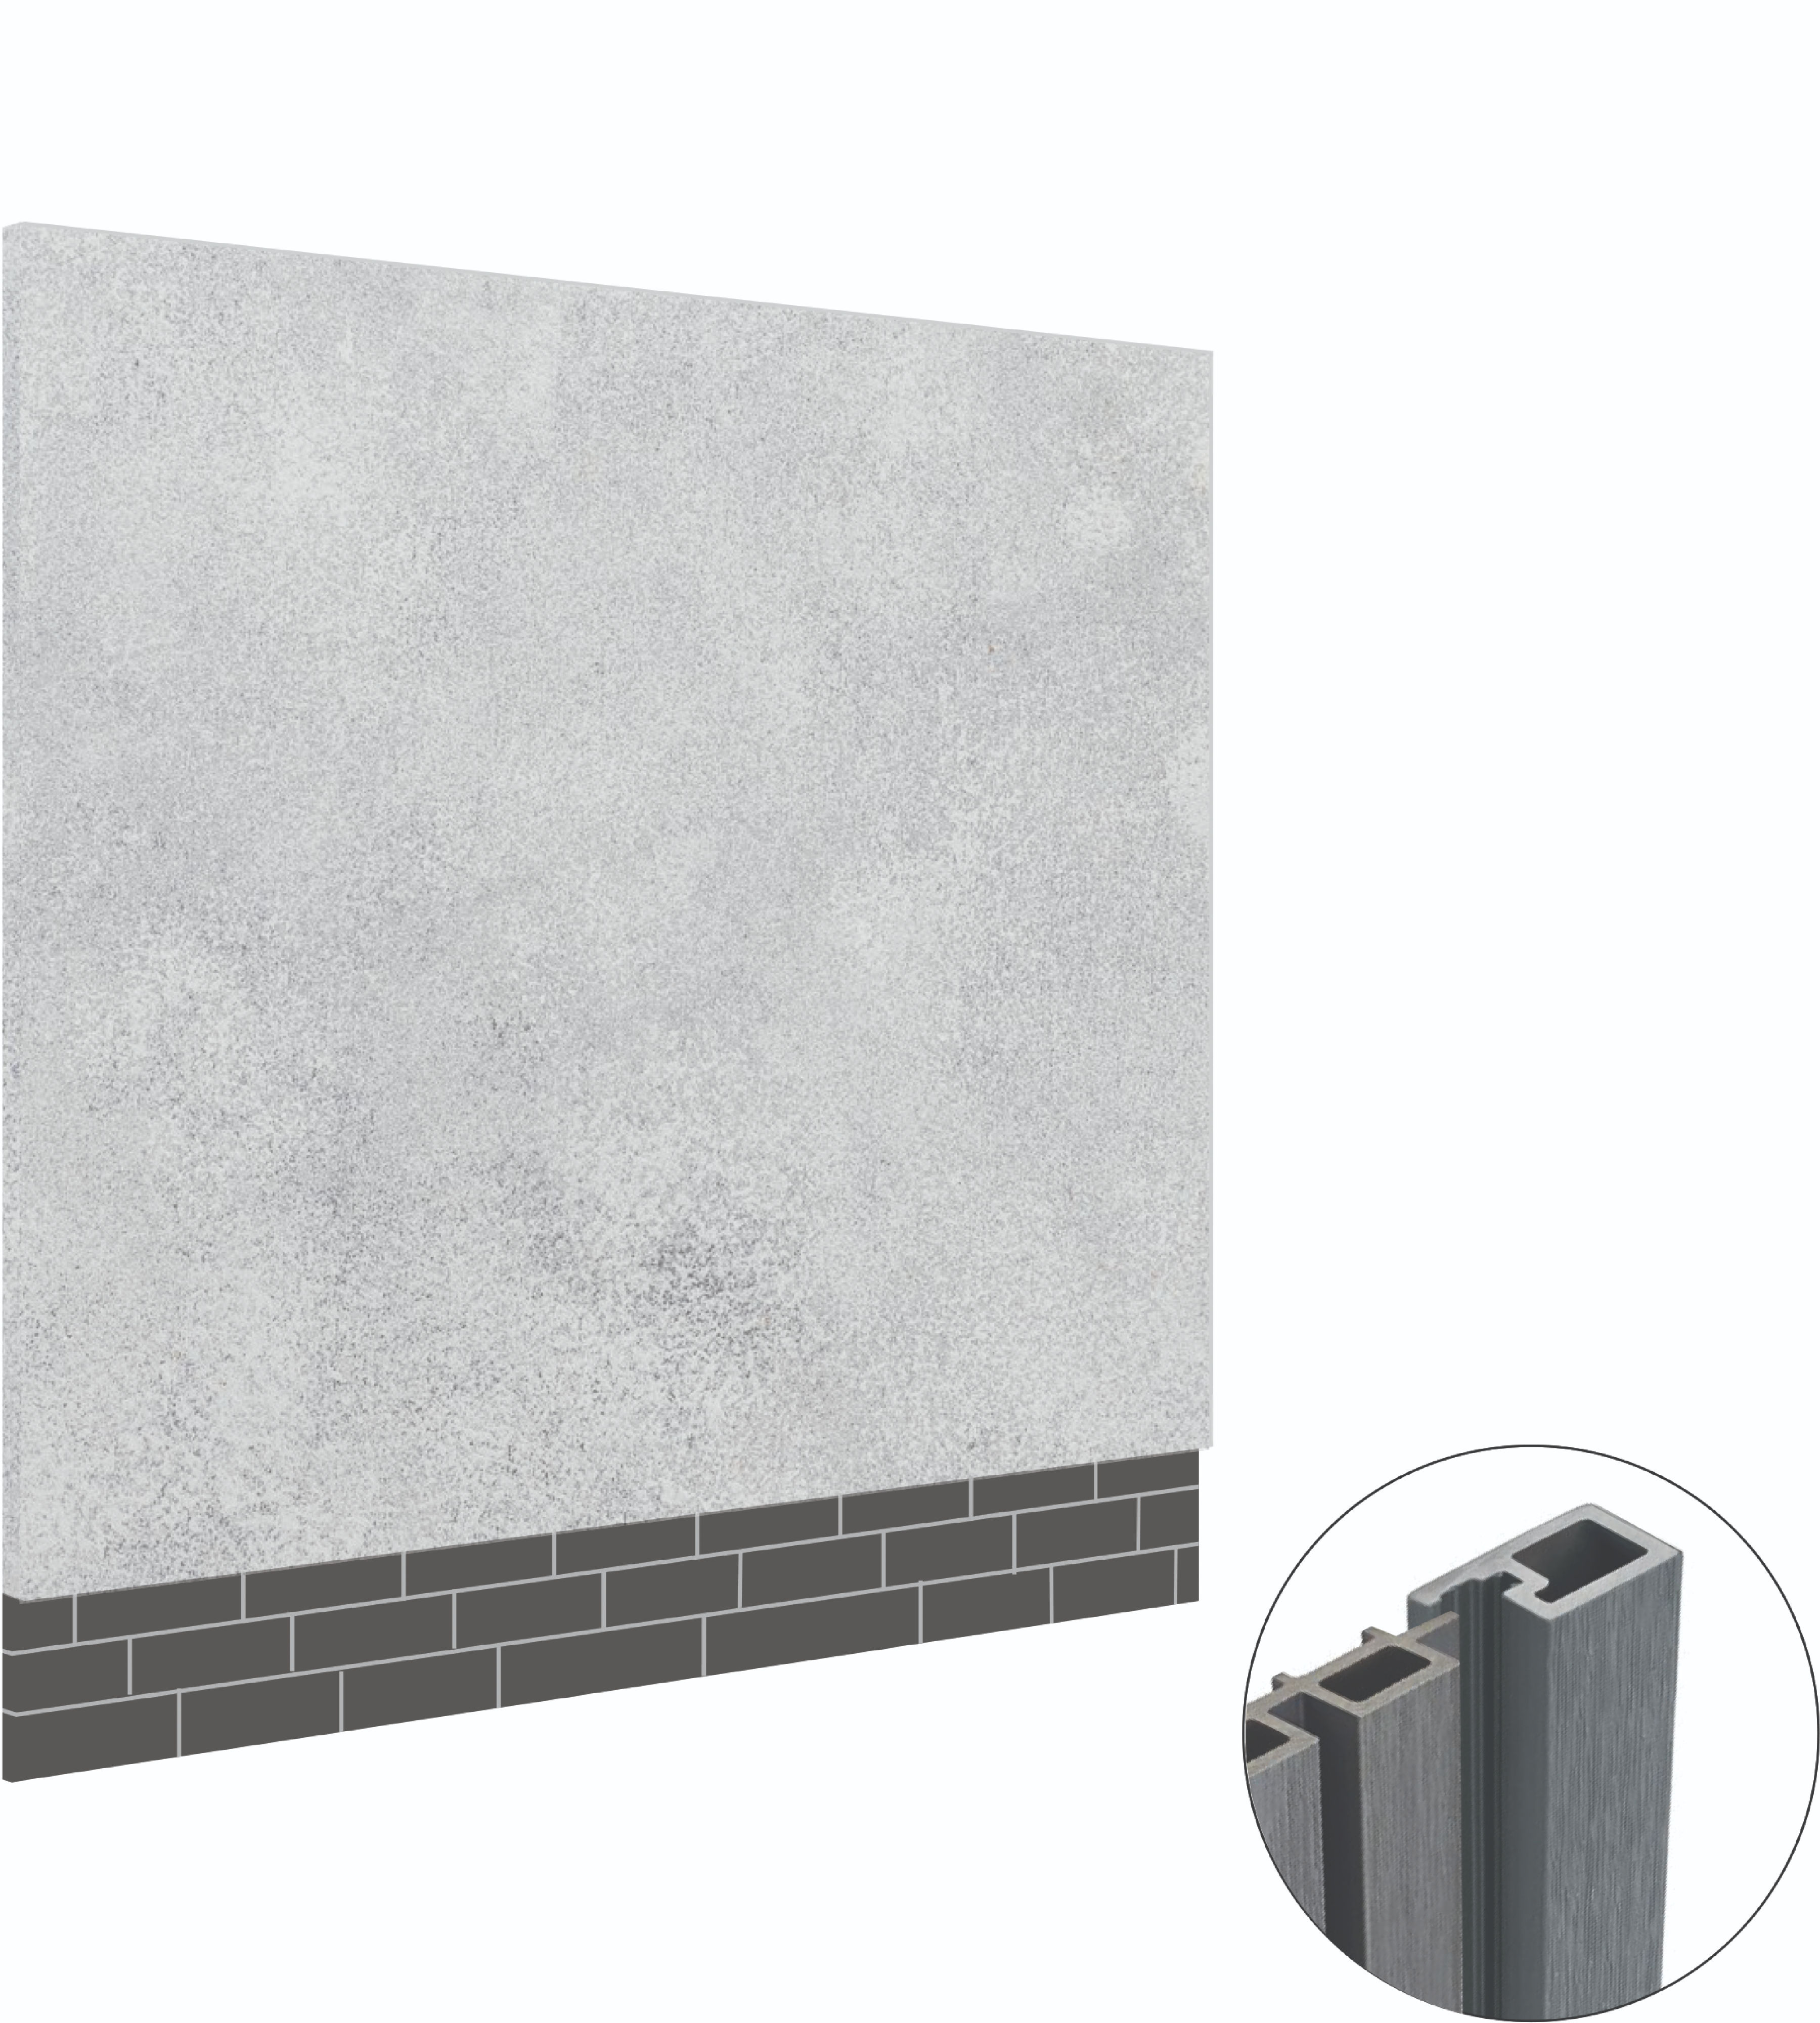
Finishing the Side Edges
Complete the edges of your Slatted Wall Cladding installation with a Double End Profile Trim. This trim is a narrower version of the panels and provides a clean, seamless finish at the wall ends, as shown in the second diagram.
5. Vertical Installation
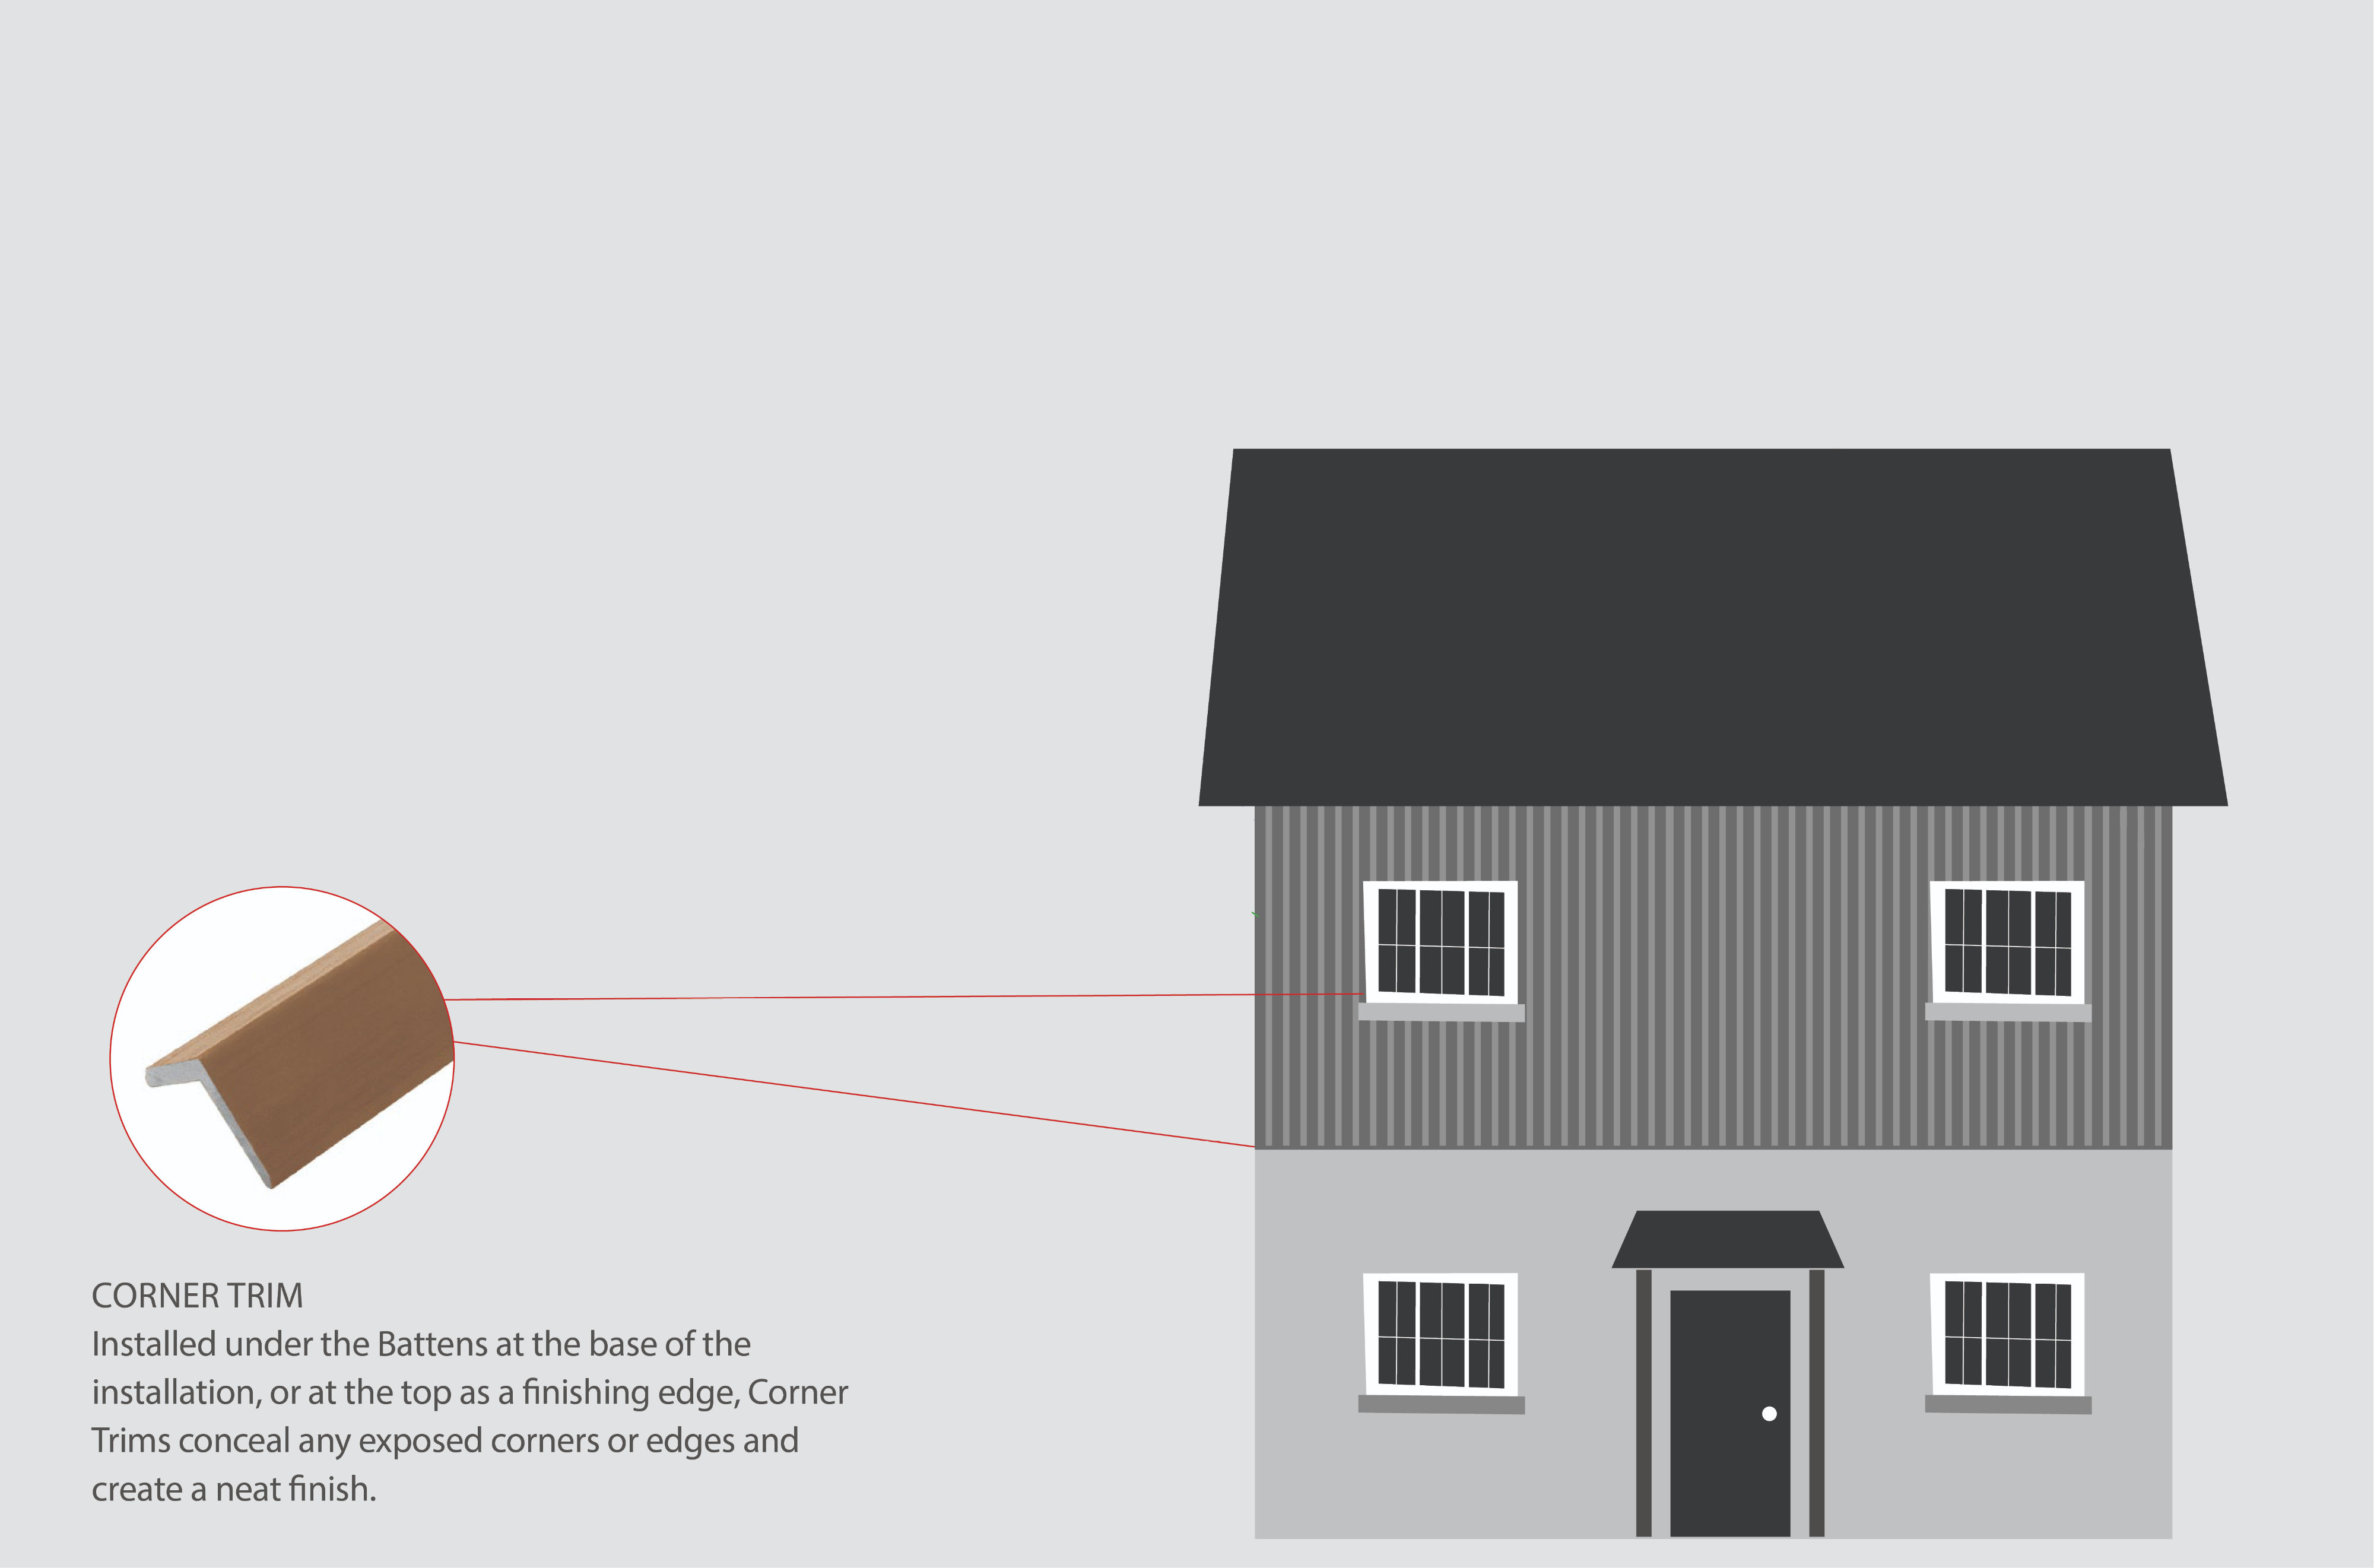
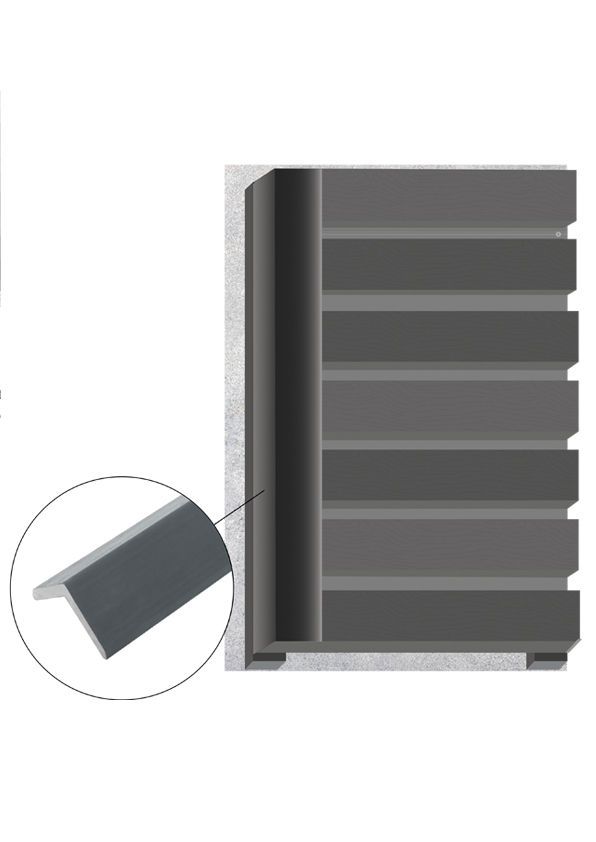
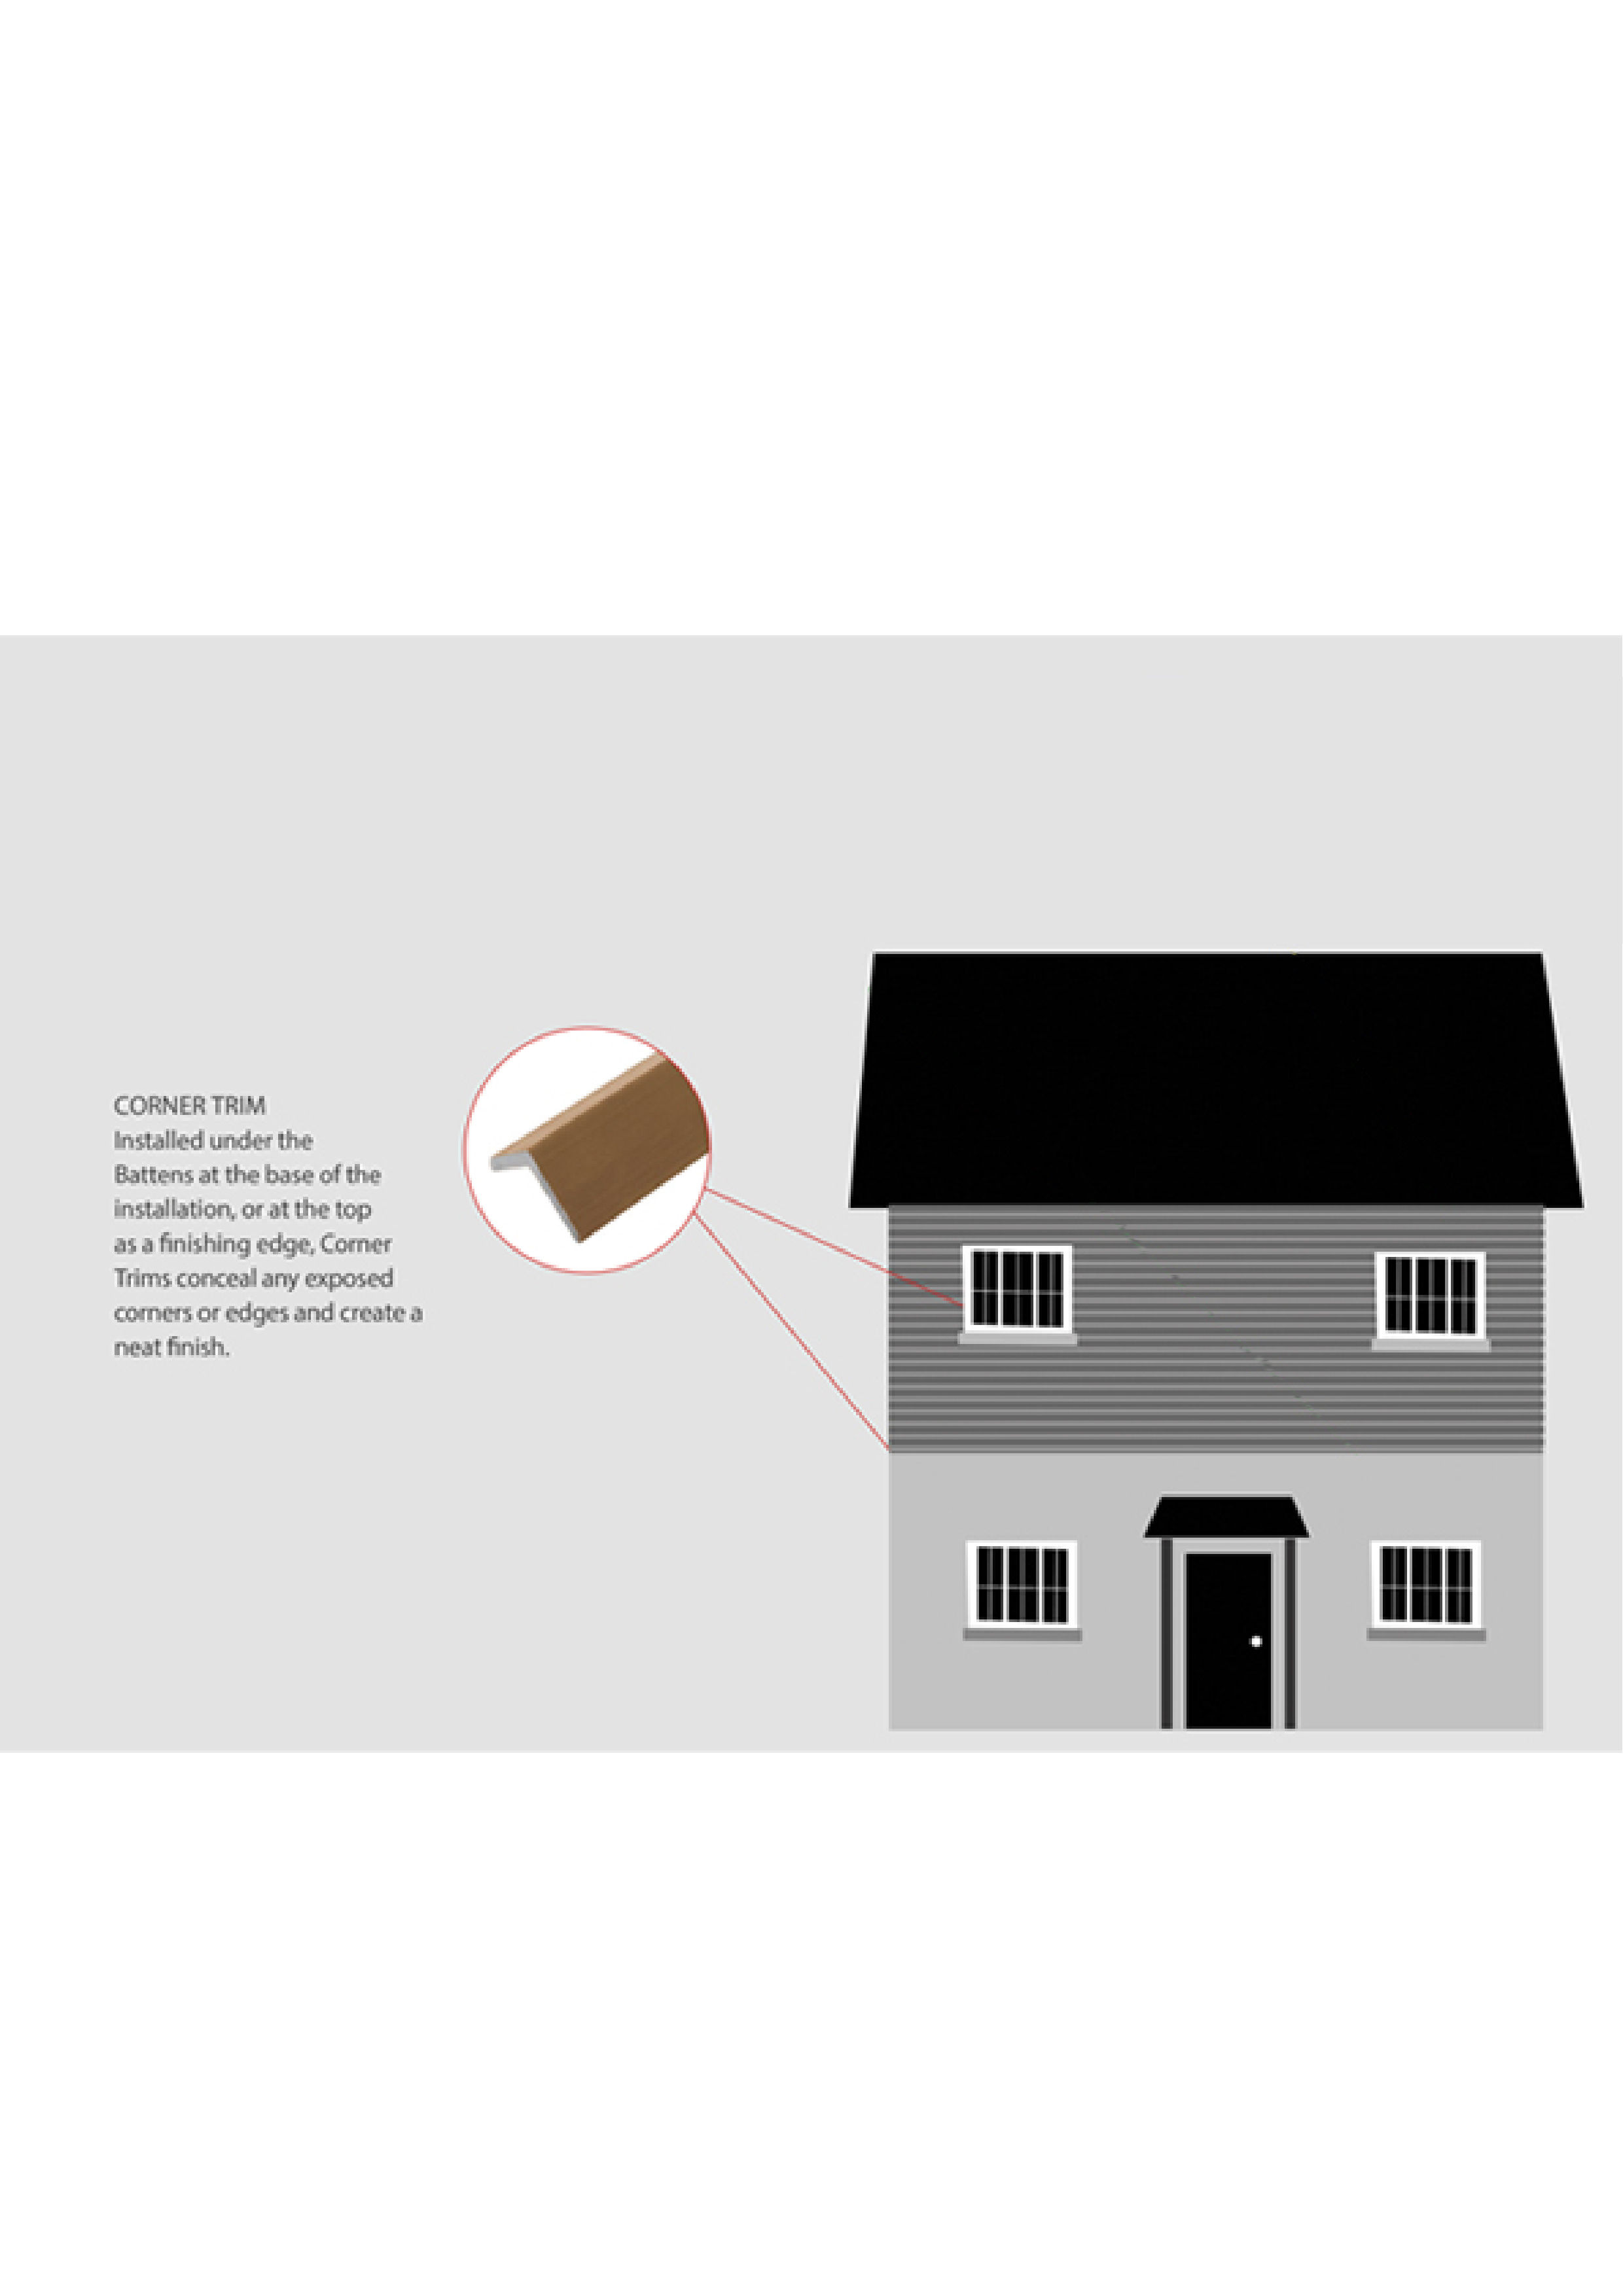
INSTALLING CORNER TRIMS
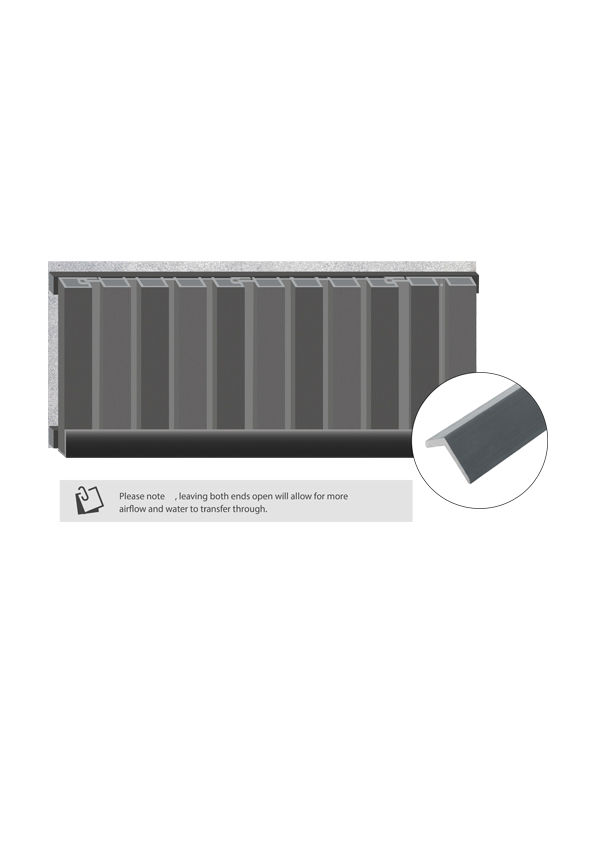
For a polished and professional finish, consider using Corner Trims along the top and/or bottom of your installation. These trims:
Conceal hollow panel ends, enhancing the overall appearance.
Prevent water pooling, reducing the risk of moisture damage.
Installation Guidelines:
1. Top and Bottom Installation:If installing a Corner Trim at the bottom, it is recommended to also install one at the top to prevent water from becoming trapped in the channels. 2. Measuring & Cutting:Measure the required area and cut the Corner Trim to size. 3. Fixing the Trim:Pre-drill the Corner Trim to prevent cracking. Secure it in place every 300mm along the length using appropriate screws. 4. Joining Trims:When connecting two trim sections, leave a minimum 2mm expansion gap between them.
6. Vertical Installation
7. Horizontal Installation
Step 1: Battens
For optimal support when installing Slatted Cladding Panels, it is recommended to use either 30mm x 50mm Composite Battens or 50mm x 25mm timber battens as a sub-structure. Composite Battens enhance the long-term durability of your cladding, while timber battens provide a suitable alternative, following the same installation method.
Before securing the battens, pre-drill both the battens and the underlying surface using a 6mm drill bit. Ensure that the battens are fixed at least 50mm deep into the surface below. Use screws and fixings appropriate for the material you are securing into, ensuring the screws are at least 80mm long to accommodate both the batten width and the required 50mm drilling depth.
Battens should be installed vertically on a stable, flat surface, with a minimum spacing of 500mm between each batten. They must extend across the entire length of the cladding area. Additional battens may be required at panel joints to provide adequate support, maintaining a 5mm expansion gap between battens. Each cladding panel must be supported by a batten where it meets another panel. Ensure battens are installed at a 90-degree angle to the direction of the cladding panels.
To create a clean finish and prevent gaps between the panels and the wall, it is recommended to frame the perimeter with battens. This also helps block debris, insects, and small animals from entering beneath the cladding.
8. Horizontal Installation
Step 2: Fixing the First Board
Before installing the Slatted Cladding Panels, the Single Start Profile Trims must be securely fixed alongside the battens using 20mm screws. These trims should be installed before any panels are attached. Ensure a 5mm expansion gap is maintained between the Slatted Panels and the Internal/External Corner or Double End Profile Trim to allow for natural movement.
For accuracy and consistency, it is recommended to measure and install each section individually rather than attempting to fit multiple sections at once.
Note: The Single Start Profile Trims can only be installed on one end of the wall due to the design of the tongue-and-groove system.
9. Horizontal Installation
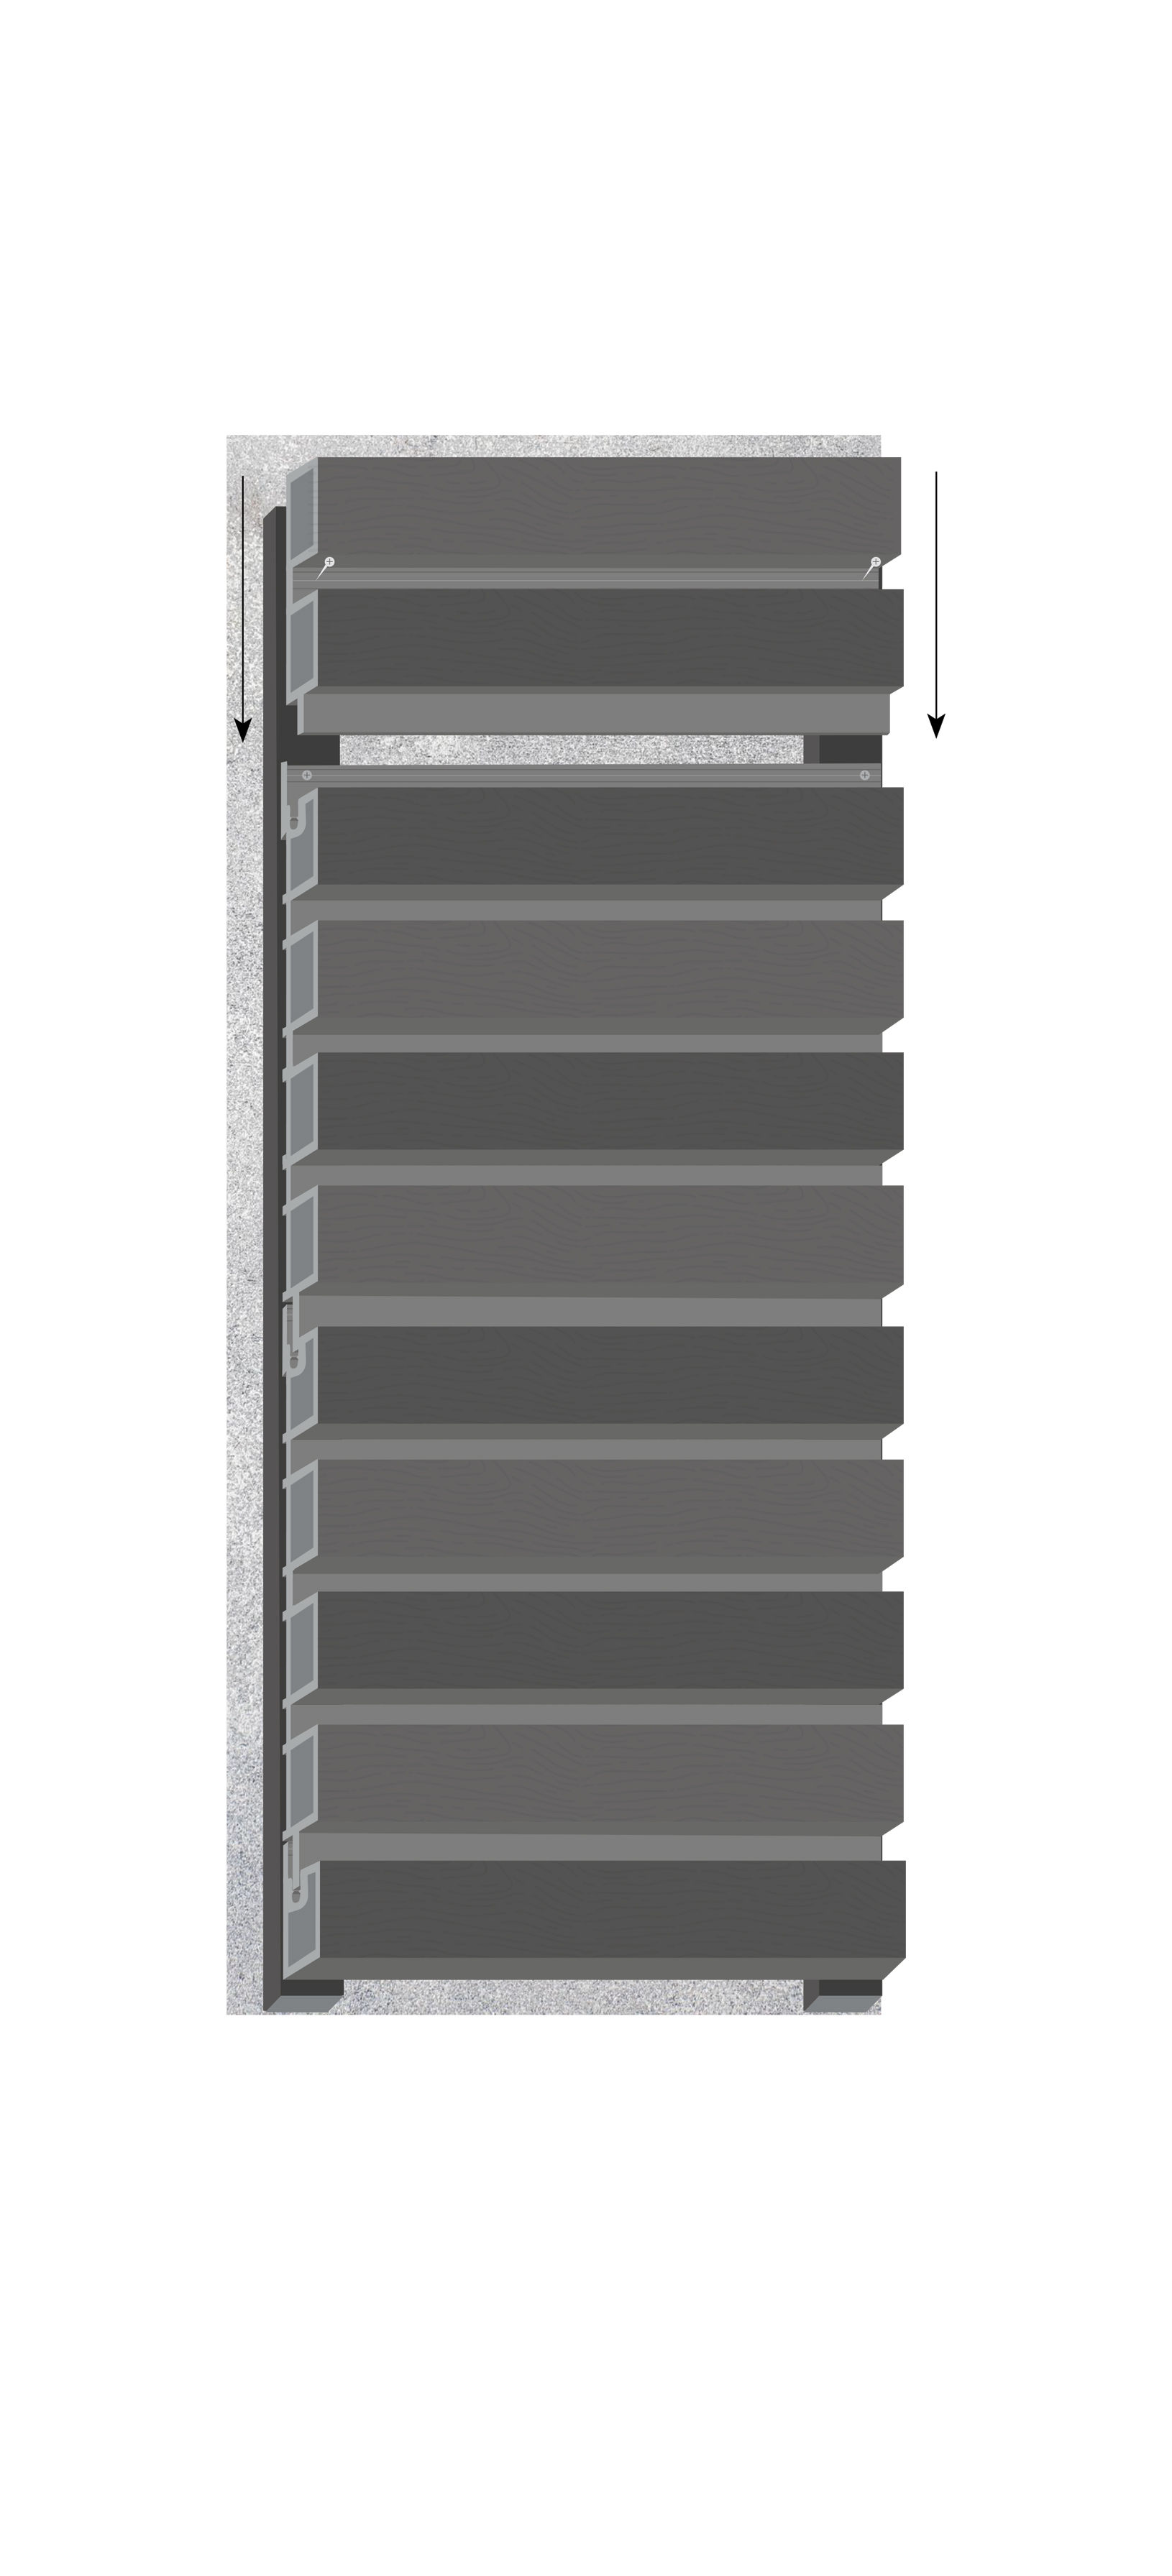
Step 3: Fixing from Bottom to Top
Start by placing the first Slatted Cladding Panel horizontally and securing it to the trim using 20mm screws.
Next, slot the second panel on top of the first using the tongue-and-groove method. The non-grooved lip of the second panel will conceal the screws from the first panel, while being secured on the top grooved lip. Continue this process with each panel until the desired height and coverage are achieved, ensuring that each panel is firmly fixed to the battens beneath.
When installing a panel above a Double End Profile Trim, leave a 5mm expansion gap between the panel and the trim face.
When installing a panel above an Internal or External Corner Trim, maintain a 5-7mm expansion gap between the panel and the trim corner.
This allows the panels to sit flush against the trims without disrupting the profile.
10. Horizontal Installation
Step 4: Installing the Corner Trim
To achieve a clean, seamless finish for your Slatted Cladding, consider using a Corner Trim to conceal any exposed edges and hollow ends.
1. Measure the area where the Corner Trim will be installed and cut it to the required size. 2. Pre-drill the trim to prevent splitting. 3. Secure the trim every 300mm along its length using appropriate screws for a firm hold. 4. If joining two trim pieces, ensure a minimum 2mm gap between the ends to allow for natural expansion.
This will help maintain a professional and polished appearance while ensuring durability.
11. Horizontal Installation
12. Maintenance
Cleaning and Maintenance
To keep your Slatted Cladding Panels in top condition, regularly remove dirt and debris by cleaning them with lukewarm or cold water. For tougher stains, such as bird droppings, use a mild household dish soap to help lift the residue.
For long-term maintenance, inspect the panels annually to check for dirt, pollution buildup, or other stains. A quick clean when needed will help preserve their appearance and longevity.
Important: Avoid using high-pressure cleaning systems, as they can damage the paint and finish of the panels.
13. Troubleshooting
WHAT DO I DO IF THERE ARE MISSING PARTS FROM MY ORDER?
If there appears to be any part missing from your order, contact our friendly and helpful Customer Support Team within 7 days of receipt.
FOR ALL OTHER ISSUES, PLEASE CONTACT OUR CUSTOMER SUPPORT TEAM.