
Monster Manuals
Brand

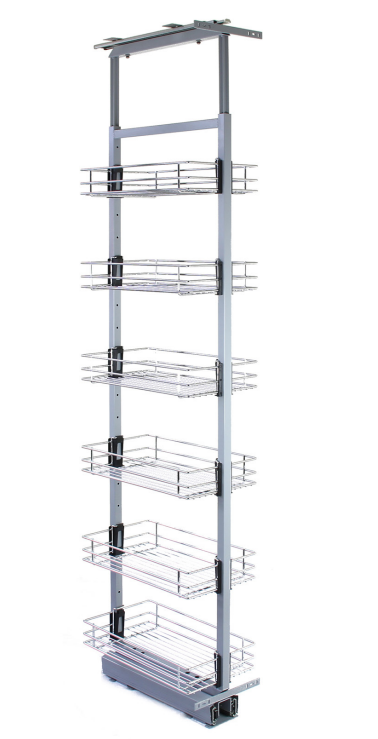
Kukoo Soft Close Pull Out Larder
This guide details how to assemble and use your Kukoo Soft Close Pull Out Larder
instructions.monstershop.co.uk
Kukoo Soft Close Pull Out Larder
This guide details how to assemble and use your Kukoo Soft Close Pull Out Larder
Product Information
Struggling to get to those items at the back of your cupboard? Well we’ve got a solution. Our pull-out kitchen larder will help you to reach everything with ease. The centre mounted larder units allow full access to either side of the baskets, so you can store a range of items. A great way of using narrow kitchen space, making sure that no space goes to waste.
| SKU | 24355 | 24358 |
|---|---|---|
| Dimensions of Frame | 450mm D x 240mm W x 1700 - 1950mm H | 500mm D x 350mm W x 1900 - 2200mm H |
| Dimensions of Baskets | 415mm D x 252mm W x 75mm H | |
| Shelving Capacity | 15kg - 20kg (spread across all shelves) | |
Kukoo Soft Close Pull Out Larder
EN
Safety Information
Safety Advice
Please read through the safe working practice to ensure prevention of injury or damage to the device.
- Check that all the pieces are in the box. Please do not begin assembly if any of the parts are missing or damaged.
- Take care when using tools such as a drill. Personal Protective Equipment such as eye protection and safety gloves should be worn.
- Ensure the runners are secure before continuing the assembly.
- Be careful not to trap fingers when placing the baskets and using the runners.
- The product should only be used indoors, as it could lead to damage if left outside and unprotected.
- Check the screws regularly for tightness, and tighten if necessary.
- Do not over exceed the shelving capacity, detailed on the Specification page.
- CAUTION: The capacity is based on the weight distributed across the whole shelf.
- Always keep the weight evenly distributed to avoid any damage, and to prevent the baskets from leaning.
- Be sure that each basket is properly clipped into place before you begin storing items in the baskets.
GPSR Information
UK GPSR Information
Manufacturer
Monster Group UK Limited
Monster House 19-23 Alan Farnaby Way
Industrial Estate Sheriff Hutton
York YO60 6PG
England
+441347878880
Monster House 19-23 Alan Farnaby Way
Industrial Estate Sheriff Hutton
York YO60 6PG
England
+441347878880
Representative
Rana Harvey
Monster House 19-23 Alan Farnaby Way
Industrial Estate Sheriff Hutton
York YO60 6PG
England
+441347878880
Monster House 19-23 Alan Farnaby Way
Industrial Estate Sheriff Hutton
York YO60 6PG
England
+441347878880
EU GPSR Information
Manufacturer
Monster Group BV
Van Heemskerckweg 28A & B
-
Venlo 5928LL
Netherlands
+441347878880
Van Heemskerckweg 28A & B
-
Venlo 5928LL
Netherlands
+441347878880
Representative
Rana Harvey
Van Heemskerckweg 28A & B
-
Venlo 5928LL
Netherlands
+441347878880
Van Heemskerckweg 28A & B
-
Venlo 5928LL
Netherlands
+441347878880
Included Parts
1x
Part A - Frame
1x
Part B - Top Runner
1x
Part C - Bottom Runner
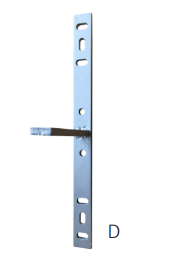
2x
Part D - Door Plate
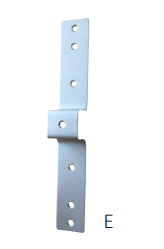
2x
Part E - Door Connector
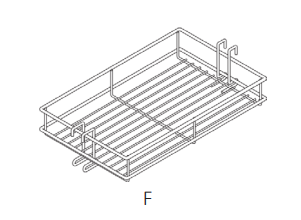
6x
Part F - Wire Basket
12x
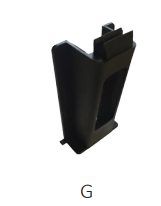
Part G - Basket Clip
2x
Part H - Allen Key

34x
Part I - Round Head Screws (ST4)
6x
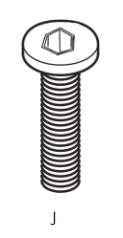
Part J - M6 Allen Head Bolts
Monster Manual
Assembly
1. Prepare Screws
Screw Allocation:
Bottom Runner: 8 x screws
Top Runner: 8 x screws
Door Connector: 10 x screws (5 x for each connector)
Door Plate: 8 screws (4 x for each plate)
2.
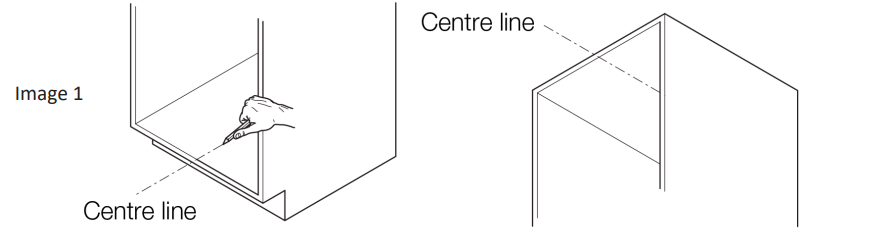
- Draw a centre line on the bottom and top panel of the cabinet you are installing the pull-out larder in. See Image 1.
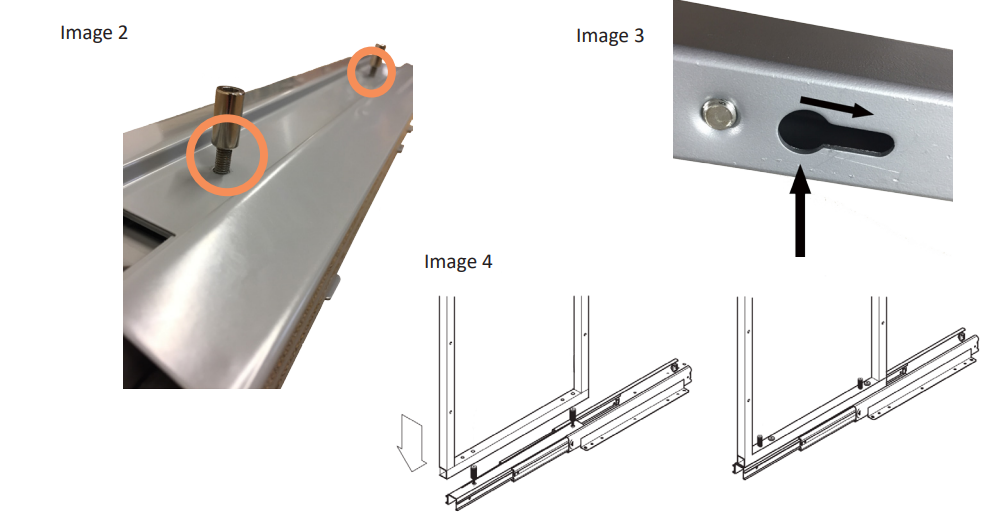
- Loosen the two bolts on the bottom runner as in Image 2.
- Place the frame onto the bottom runner and slide along using the lock mechanism shown in Image 3. Tighten the bolts. The two remaining bolts are for vertical/tilt adjustment and can be left alone for now. See Image 4.
3.
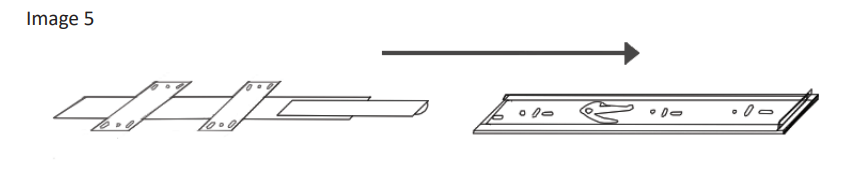
- Connect the top runner to the frame by sliding the two pieces together, as in Image 5.
- Place the Bottom Runner on the bottom panel of the cabinet on the centre line. The end of the runner should be lined with the carcase of the cabinet. The first hole should be roughly 4.5cm from the carcase. Use 8 x Round Head Screws to attach the Bottom Runner to the bottom panel.
4.
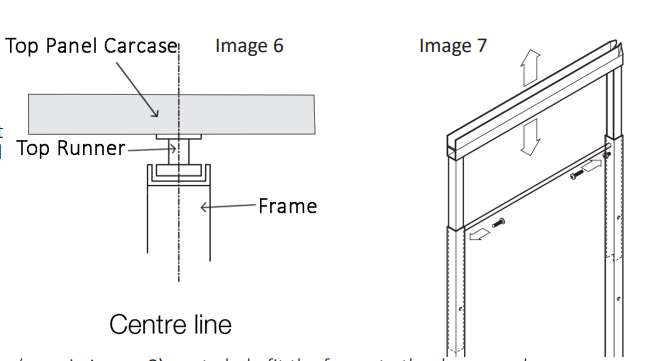
- Fit the top runner to the top panel of the cabinet. Align with the centre line and adjust the frame’s height using the pre-fitted screws until it is flush against the carcase. Use 8 x Round Head Screws to attach. See Image 6 and Image 7.
NOTE: You may need to adjust which screw holes you use and where you use them to ensure the frame and runners are in line with the carcase.
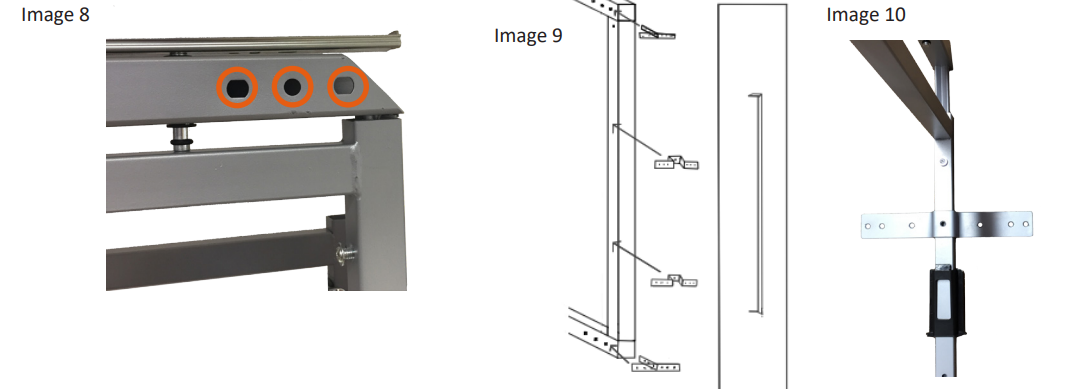
- The 6 x bolt holes on the frame (seen in Image 8) are to help fit the frame to the door panel.
- Whilst one person holds the door in place, fit 2 x Door Plates (D). Use 3 x M6 Bolts on each. Fit 2 x Door Connectors (E) using 1 x screw on each. Fit proportionally. You may find it useful to clip on the Basket Clips (G) to ensure there is adequate spacing. It is recommended you place the connectors directly behind the handle(s) of the cabinet. See Image 9 and Image 10.
5.
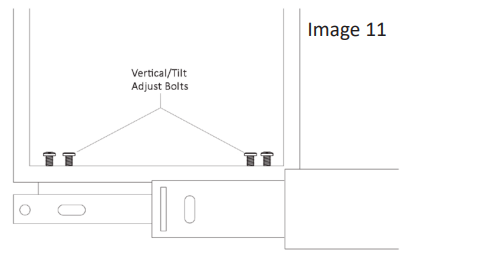
- Test the opening and closing of the larder. If it does not open/close cleanly, you can amend the vertical/tilt adjustments. To do this, tighten/loosen the bolts on the bottom runner. See Image 11.
- If the larder is still stiff or the door is not aligned properly, check and/or adjust all screws/bolts until the larder pulls out smoothly.
- Now attach the remaining Basket Clips (G) and place the baskets inside.
Troubleshooting
Please read through the guide below if you have any issues or faults with your device. The information covers and resolves the majority of frequently asked questions.
Q: There are parts missing from my order.
A: If there appears to be any part missing from your order, contact our friendly and helpful Customer Support Team within 7 days of receipt.
Q: What tools do I need to assembly my Kitchen Larder Unit?
A: A drill will be needed for making pilot holes. A cross-head screwdriver will be needed to tighten screws. Allen keys are provided. You may find it useful to use a bradawl when tightening screws. A spirit level, tape measure and pencil will be needed to accurately measure the insides of the cabinet and when placing the fixings.
Q: How do I clean and/or maintain my Kitchen Larder Unit?
A: A damp cloth can be used to clean the baskets. Do not use oil or harsh abrasives when cleaning, as this could damage the metal.
Q: My Kitchen Larder Unit is wobbly/does not feel level.
A: Check that you measured the centre lines accurately. Check that both the bottom and top runners are fitted into place and all screws are tight. Tighten the frame using the vertical/tilt adjust screws if necessary.
Q: My Kitchen Larder Unit is not flush against the cabinet.
A: The measurements quoted are estimates only. Every cabinet and fitting is different based on the levels of your house/room. If necessary, reposition the runners and measure BEFORE screwing into place. Using the vertical/tilt adjust screws can be beneficial in this process.
For all other issues please contact our Customer Support department via the details on the Contact page.