1. Product Features

A. Base plate
B. Frame
C. Wire baskets
D. Handle
E. Base plate cover
 Instructions by monstershop Magic Corner BasketMaximise storage in your blind corner cabinet with these stainless steel pull-out baskets. With soft-close runners, 4 spacious trays (15–20kg each), and left/right options, they’re perfect for tight kitchens. Easy to install and ideal for 800–900mm units. Product InformationMagic Corner BasketStruggling to get to those items at the back of your cupboard? Well we've got a solution. Our magic kitchen corner system provides a practical solution to maximising storage space in a blind corner base unit. The corner kitchen storage baskets will maximise your space and enhance your kitchen's look and style. A great way of using narrow kitchen space, making sure that no space goes to waste. It is suggested that you use 270° hinges on your cabinet doors when installing the magic corner kitchen baskets, however this depends on your kitchen layout. View product (opens in new tab)
Cabinet Requirements Min. Height: 664 mm Min. Depth: 500 mm Min. Width: 700 mm Min. Cabinet Opening: 390 mm ToolsDrill Cross head screwdriver Bradawl Spirit level Tape measure Pencil MaterialsBase plate Frame Large wire baskets Small wire baskets Base plate cover Handle ST4*16 Round head screws M6*20 screws M4*8 screws Washers 1. Product FeaturesA. Base plate B. Frame C. Wire baskets D. Handle E. Base plate cover 2. Checking PartsEnsure you have each part needed to assemble the Magic Corner Basket. 3. Deciding Installation Side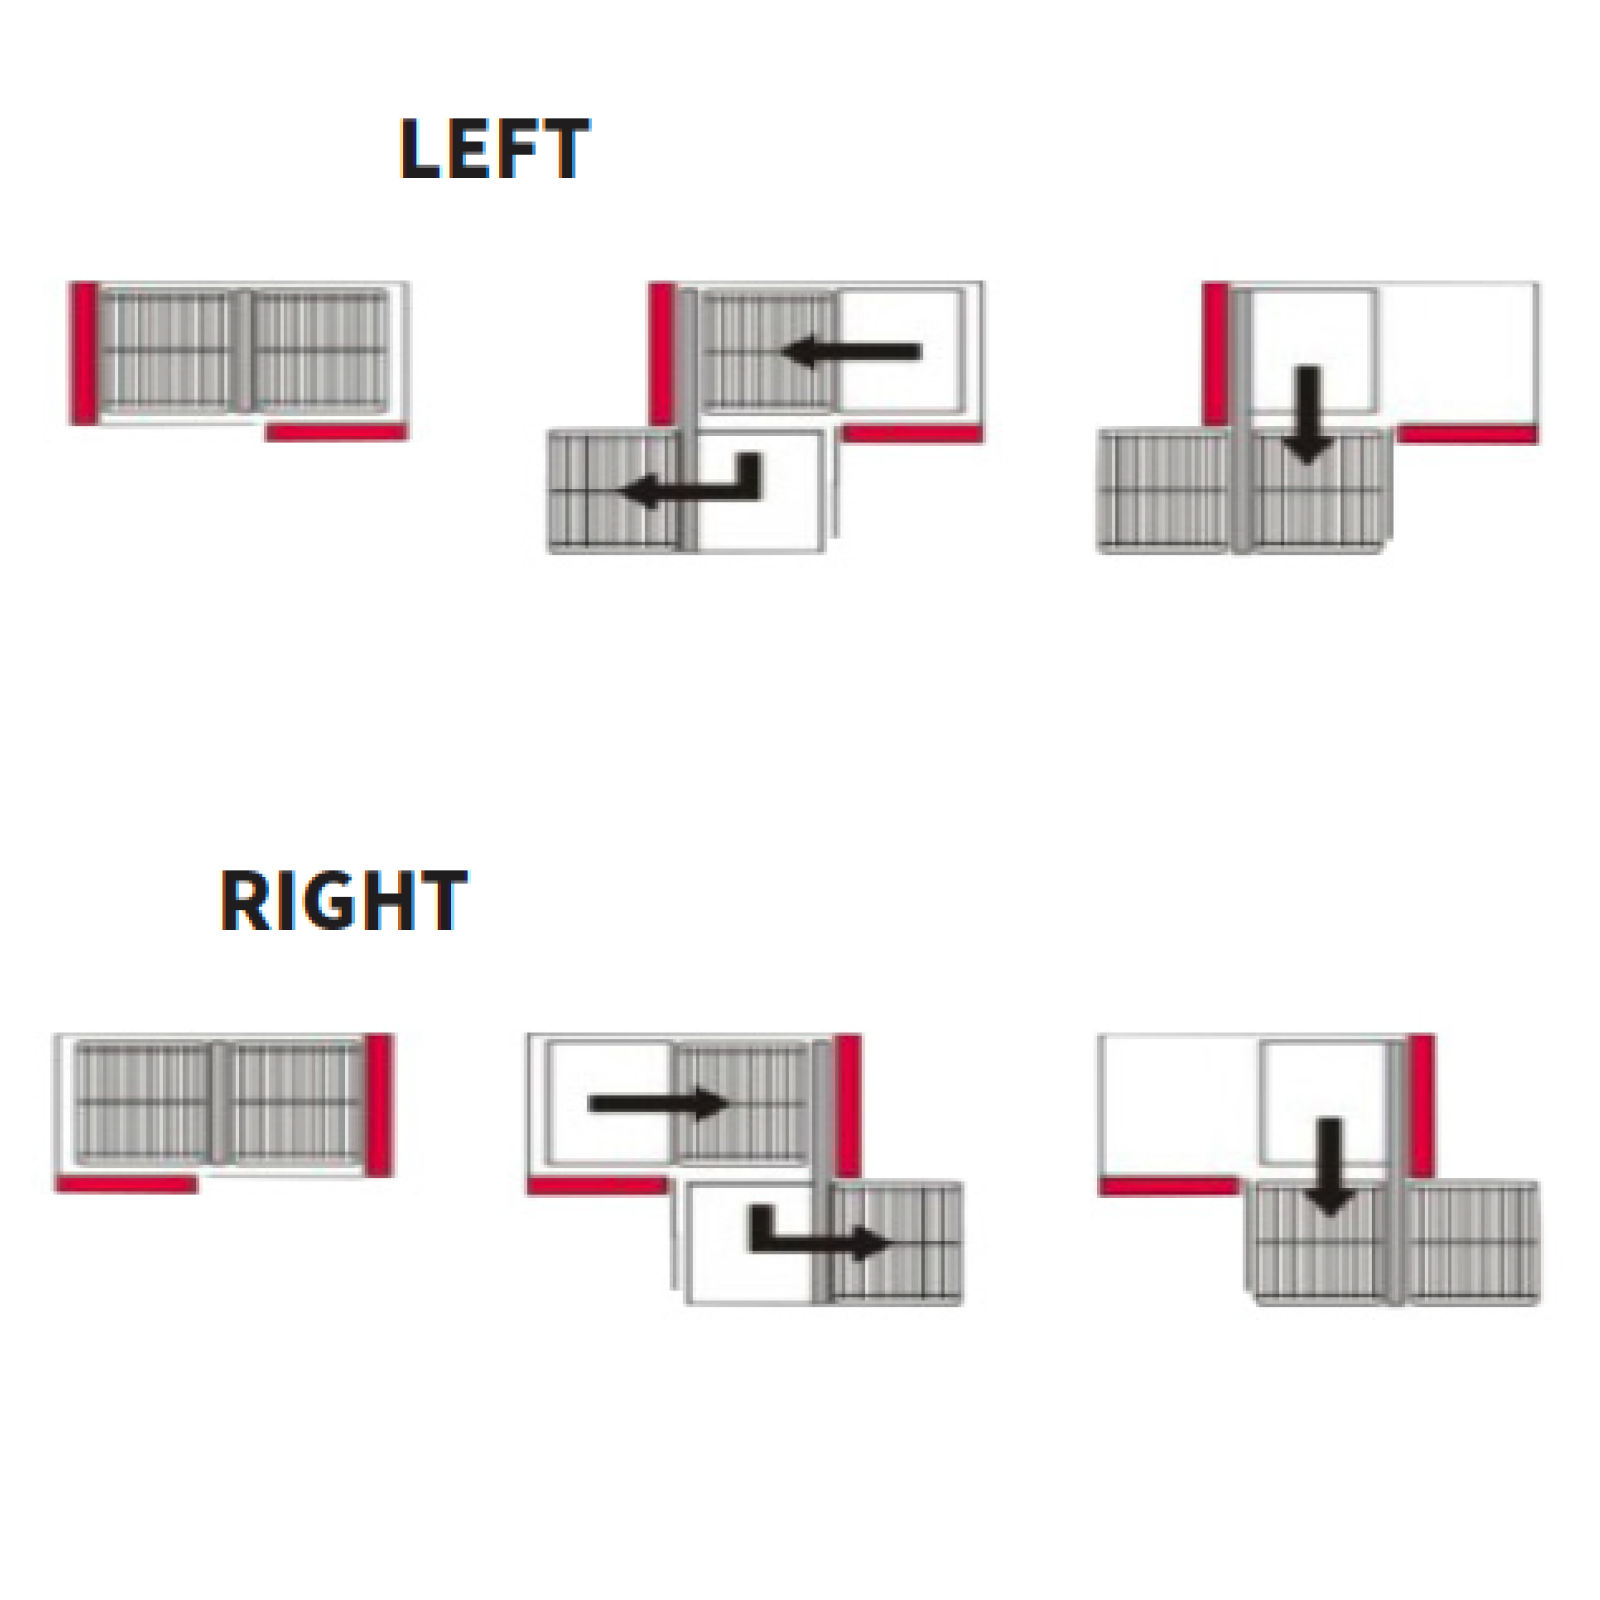 Decide if your magic corner basket will be installed on the left-hand side or the right-hand side. For these instructions, a right-hand side cabinet installation is depicted. 4. Drilling Holes for Base Plate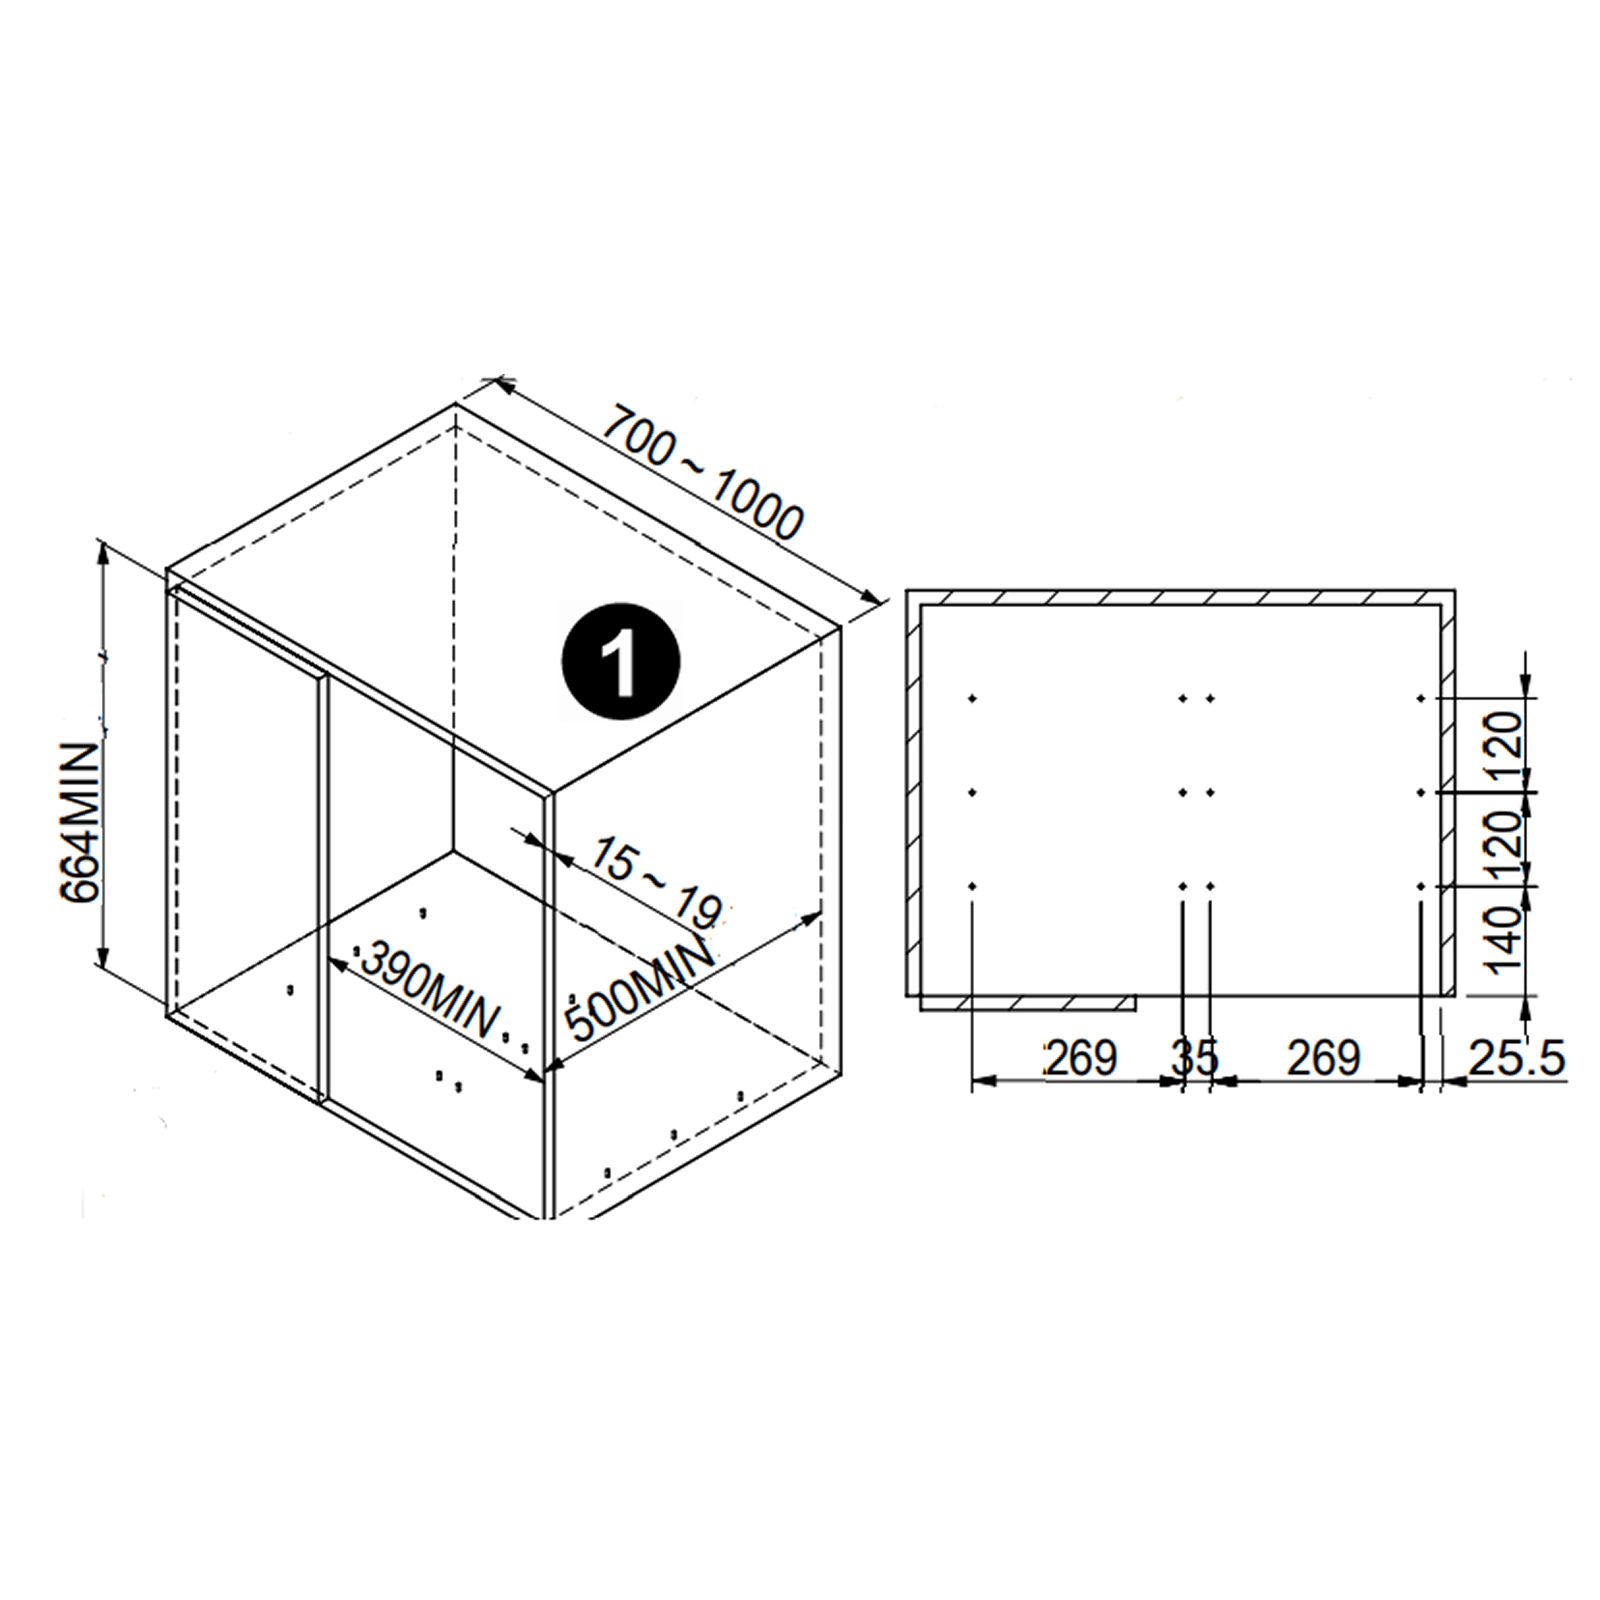 In your cabinet of choice, drill the holes for the Base Plate (A). If you are having trouble, place the base plate inside the cabinet and mark out the 12 pilot holes using the holes already made within the base plate. 5. Mounting the Base Plate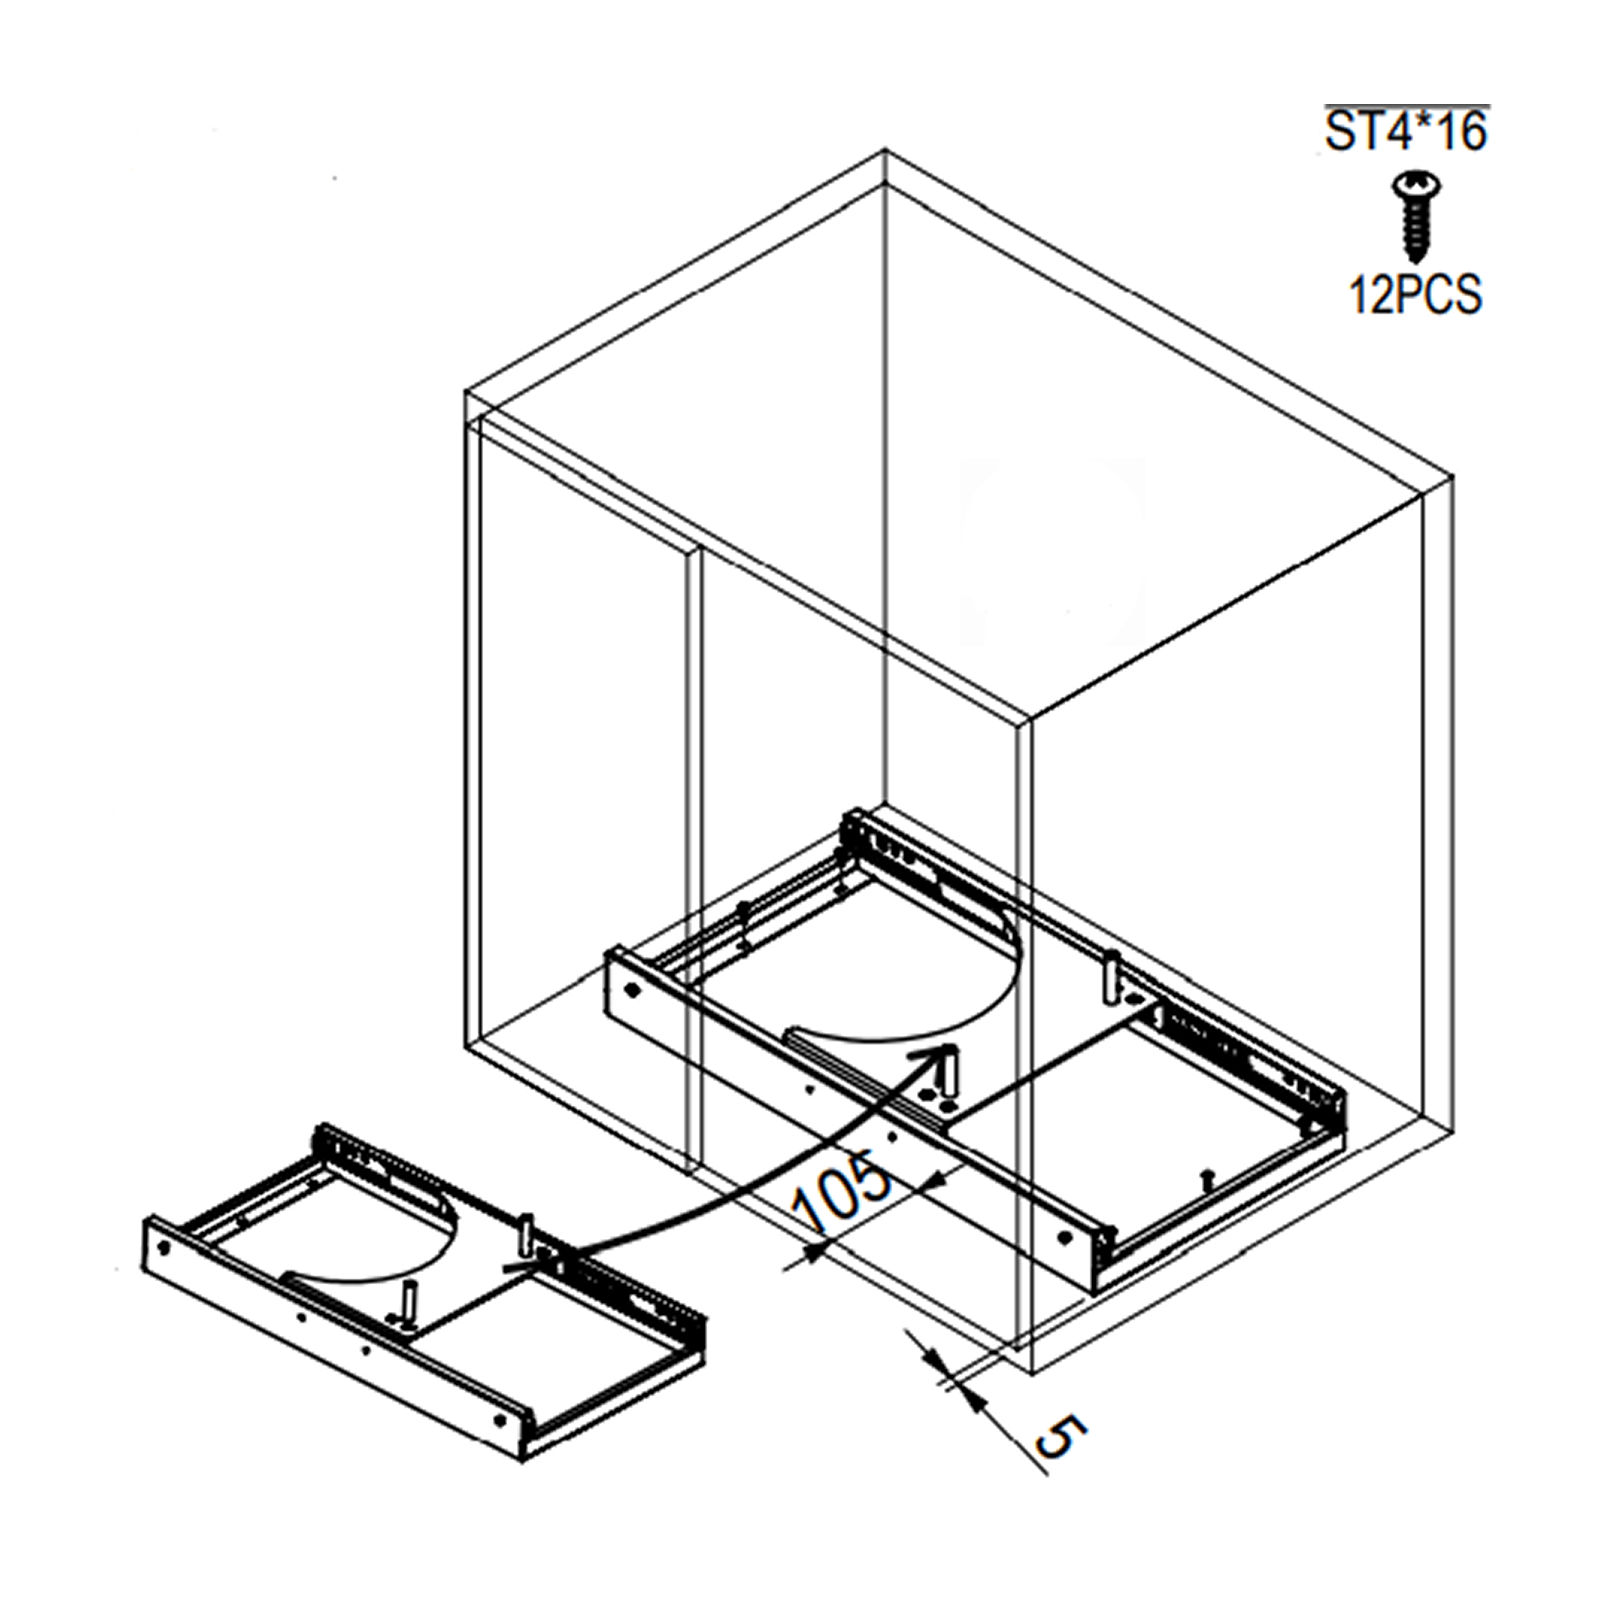 Mount the Base Plate (A) using the 12 x ST4\*16 screws to install it in place. Ensure the crescent shape of the Base Plate is facing the inside of the cabinet. 6. Placing Base Plate Covers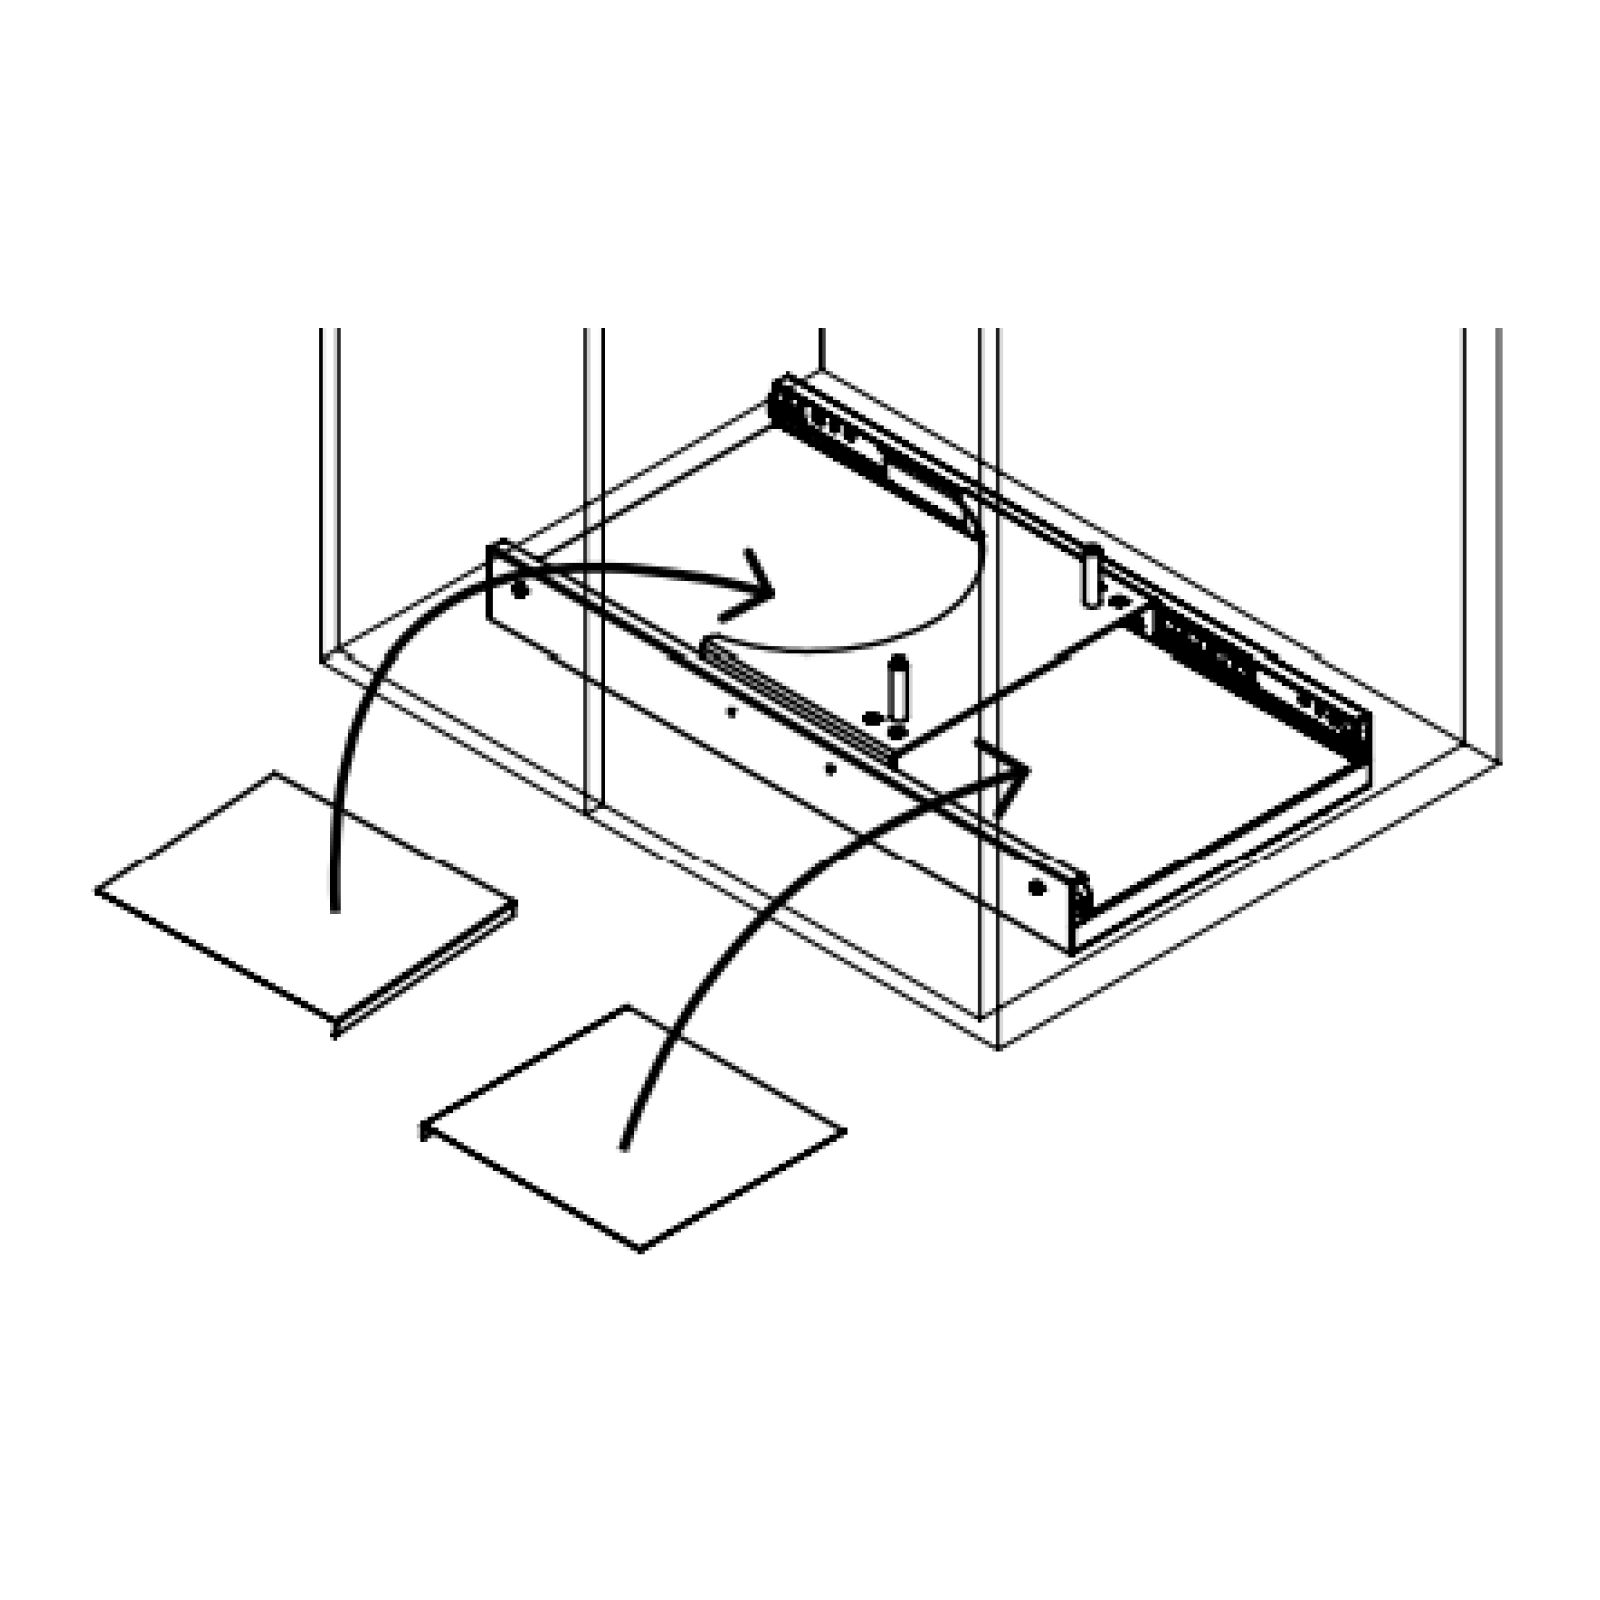 Place the Base Plate Covers (E) inside the Base Plate (A) on either side of the crescent-shaped stand in the middle. 7. Installing the Frame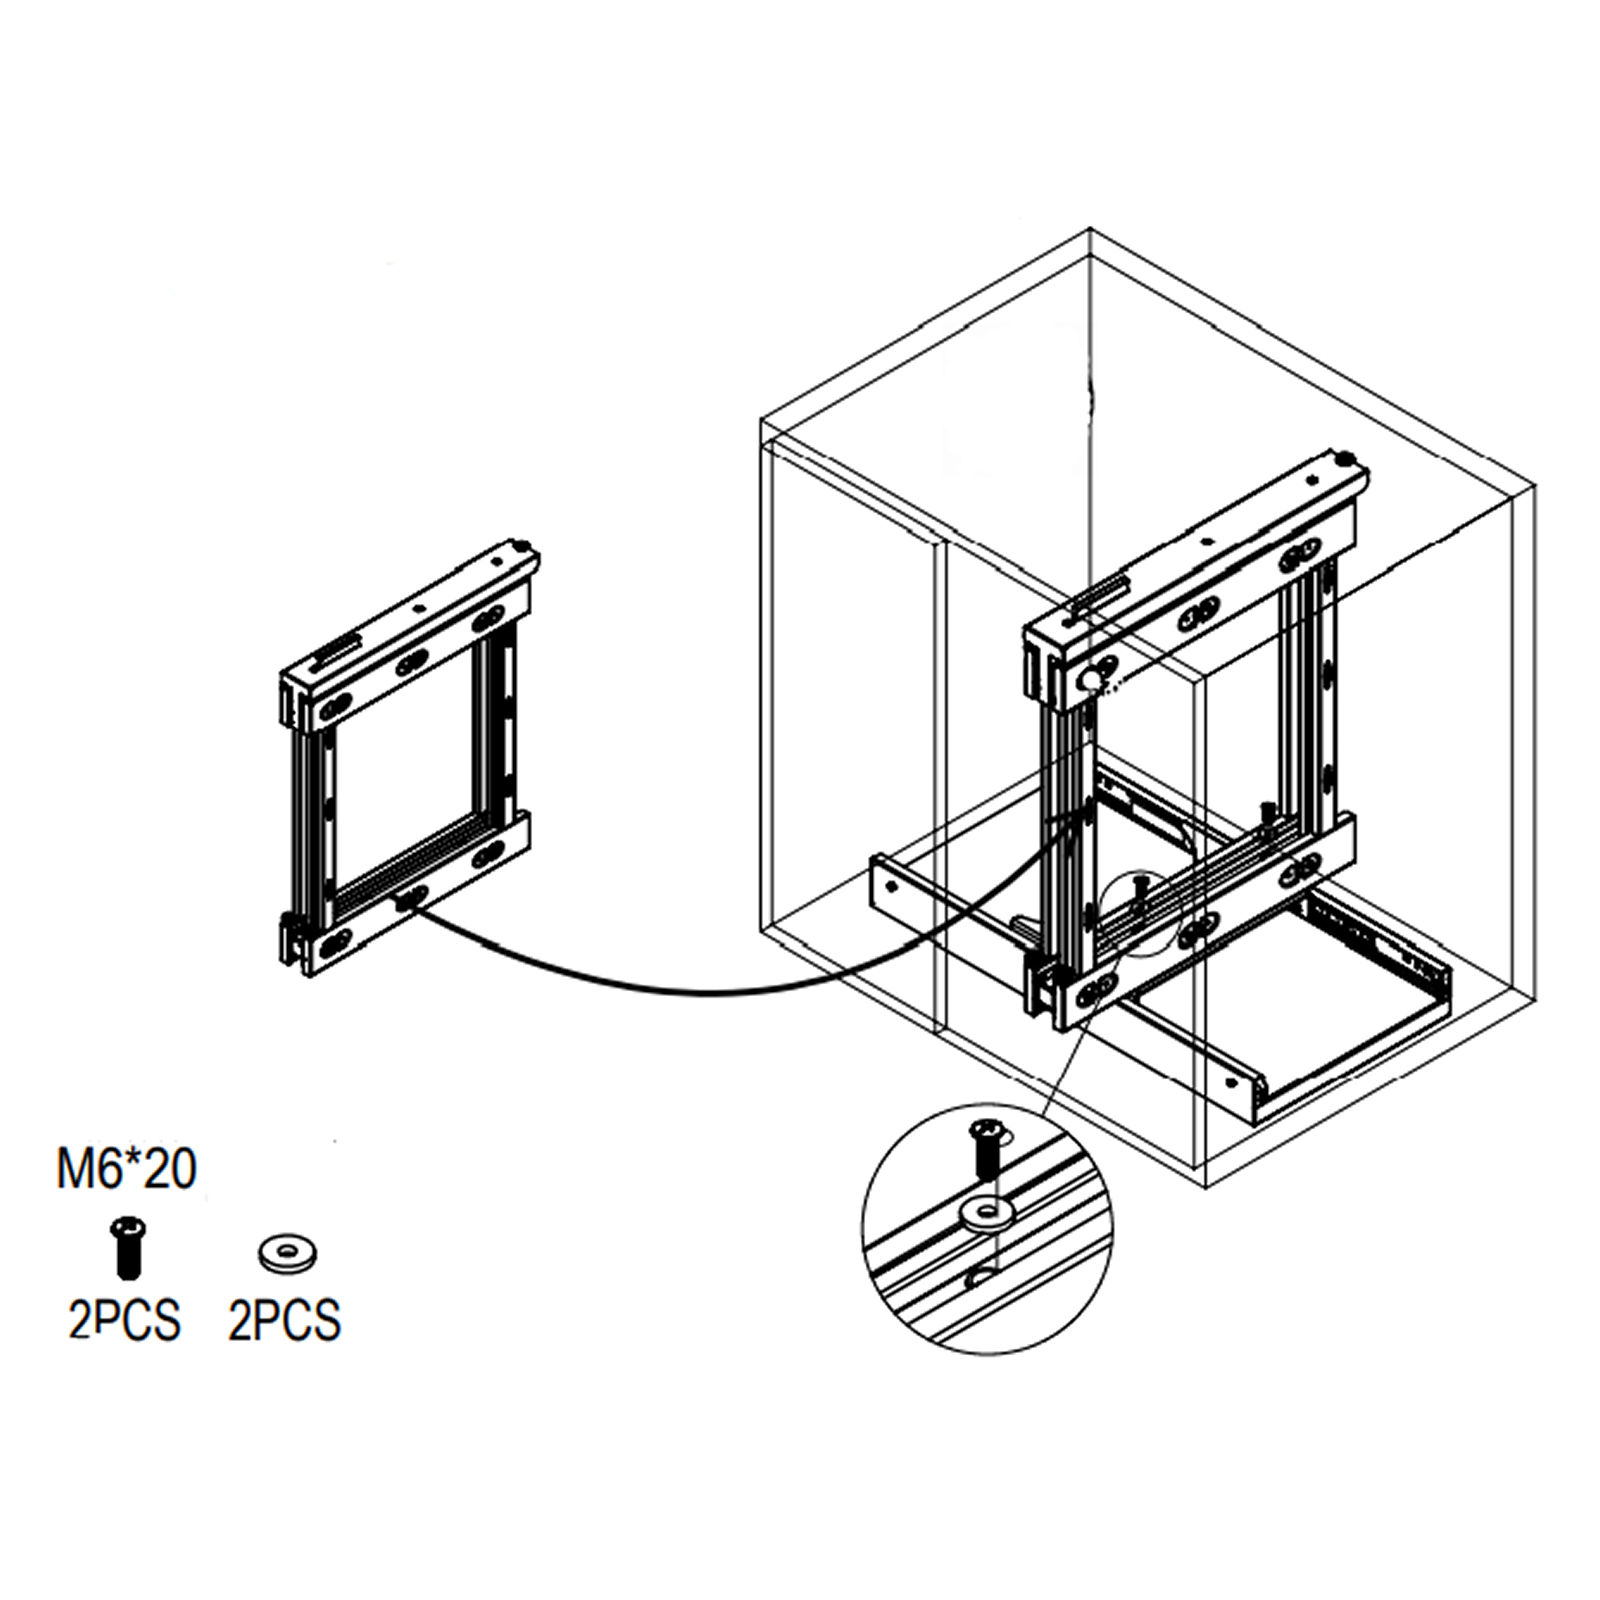 Install the Frame (B) by placing it on top of the crescent-shaped stand in the middle of the Base Plate (A) and screw it in place using the 2 x Washers and 2 x M6\*20 screws. 8. Attaching Handles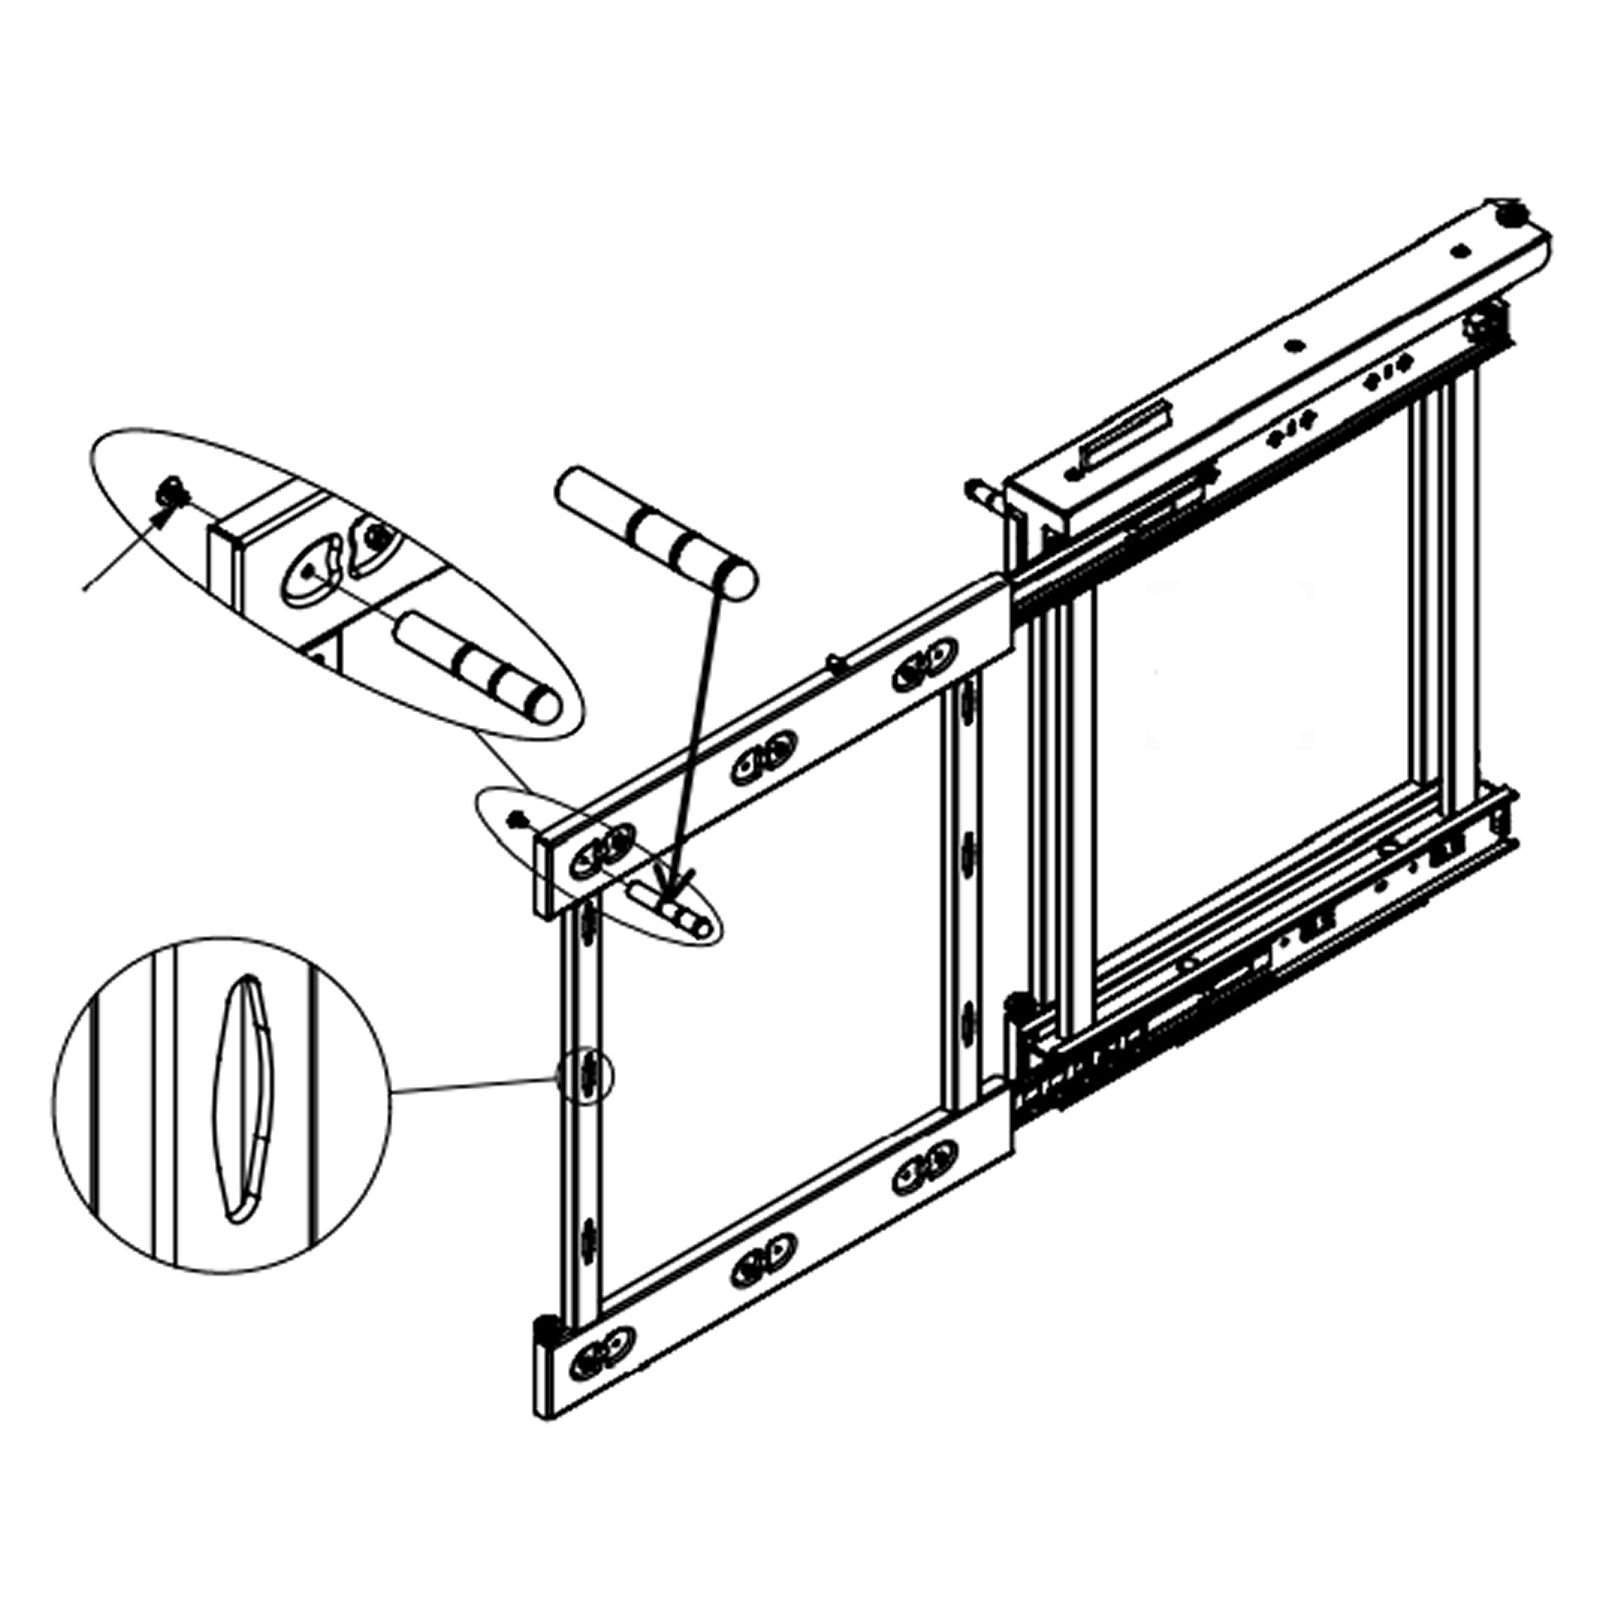 Fix the Handles (D) on either side of the Frame (B) using the 2 x M4\*8 screws. 9. Installing Small Baskets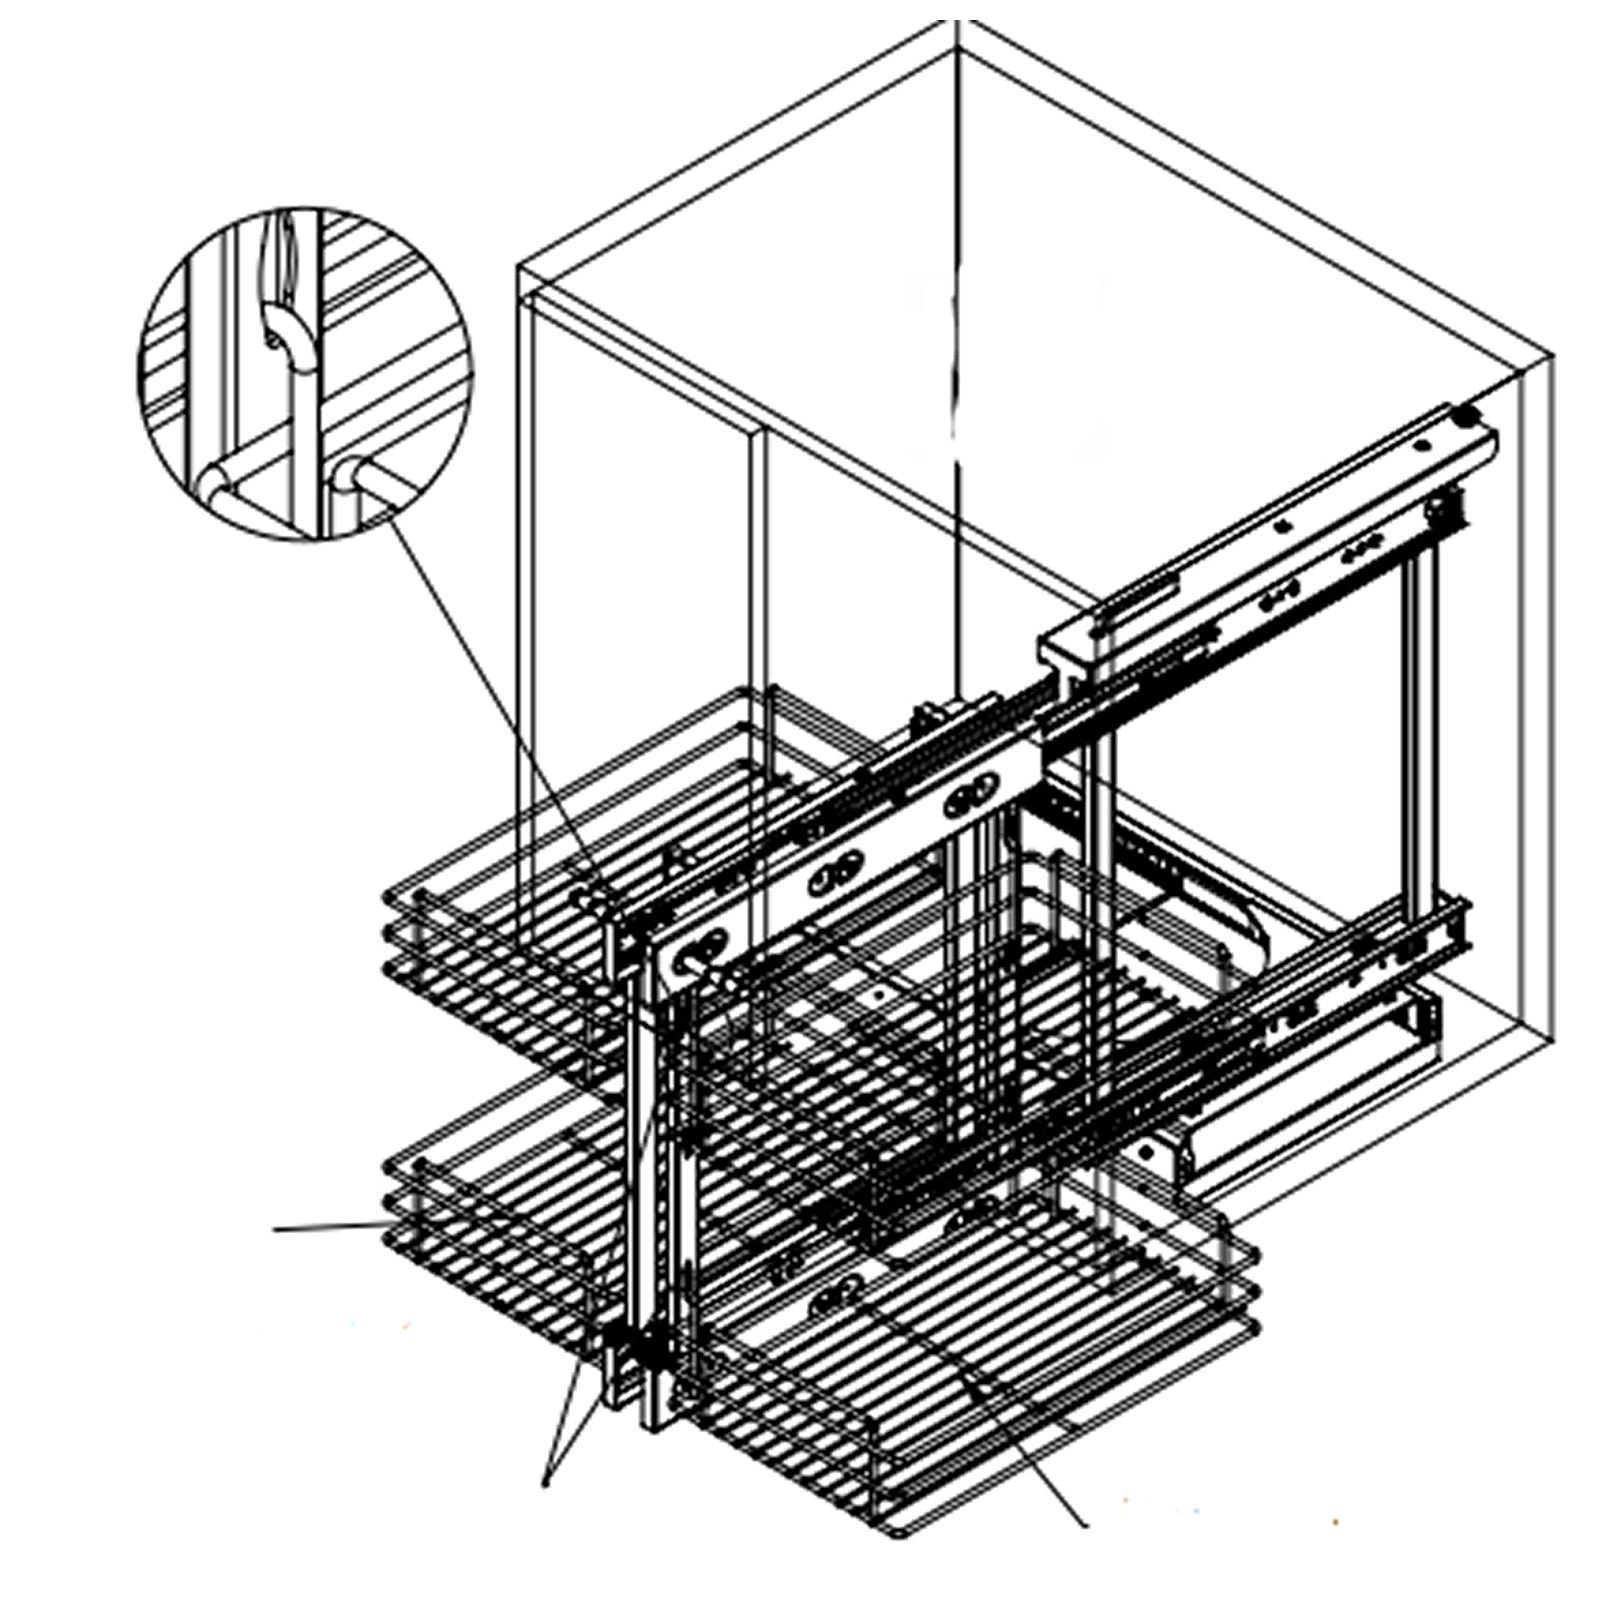 Pull out the Frame (B) sides using the Handles (D). Install the Small Baskets (C) so they go inside the inner side of the cabinet. Choose the placement of the baskets and hang them onto the frame through the designated holes. 10. Installing Large BasketsRepeat the same process for the Large Baskets (C). 11. Testing Soft-Closing System Once the baskets are installed, test the soft-closing system to ensure that the baskets have been installed correctly. Start by pushing the small baskets in first, then move the whole frame towards the inner, hidden side of the cabinet. Lastly, push the large baskets in and ensure the cabinet door is closing properly. 12. Resolution Guide
If there appears to be any part missing from your order, contact our friendly and helpful Customer Support Team within 7 days of receipt.
A drill will be needed for making pilot holes in the base of the cabinet. A cross head screwdriver will be needed to tighten screws. You might want a bradawl to help with the insertion of the screws. A spirit level, tape measure and pencil will help when measuring the insides of the cabinet when placing the fixings.
A damp cloth can be used to clean the baskets. Do not use oil or harsh abrasives when cleaning, as this could damage the metal. FOR ALL OTHER ISSUES, PLEASE CONTACT OUR CUSTOMER SUPPORT TEAM. |