This document provides comprehensive instructions for assembling, installing, and using the PixMax Vinyl Cutter. It includes detailed steps for setting up the machine, connecting it to a computer, and operating it effectively for cutting vinyl. Safety advice, troubleshooting tips, and recommendations for optimal performance are also covered.
Product Information
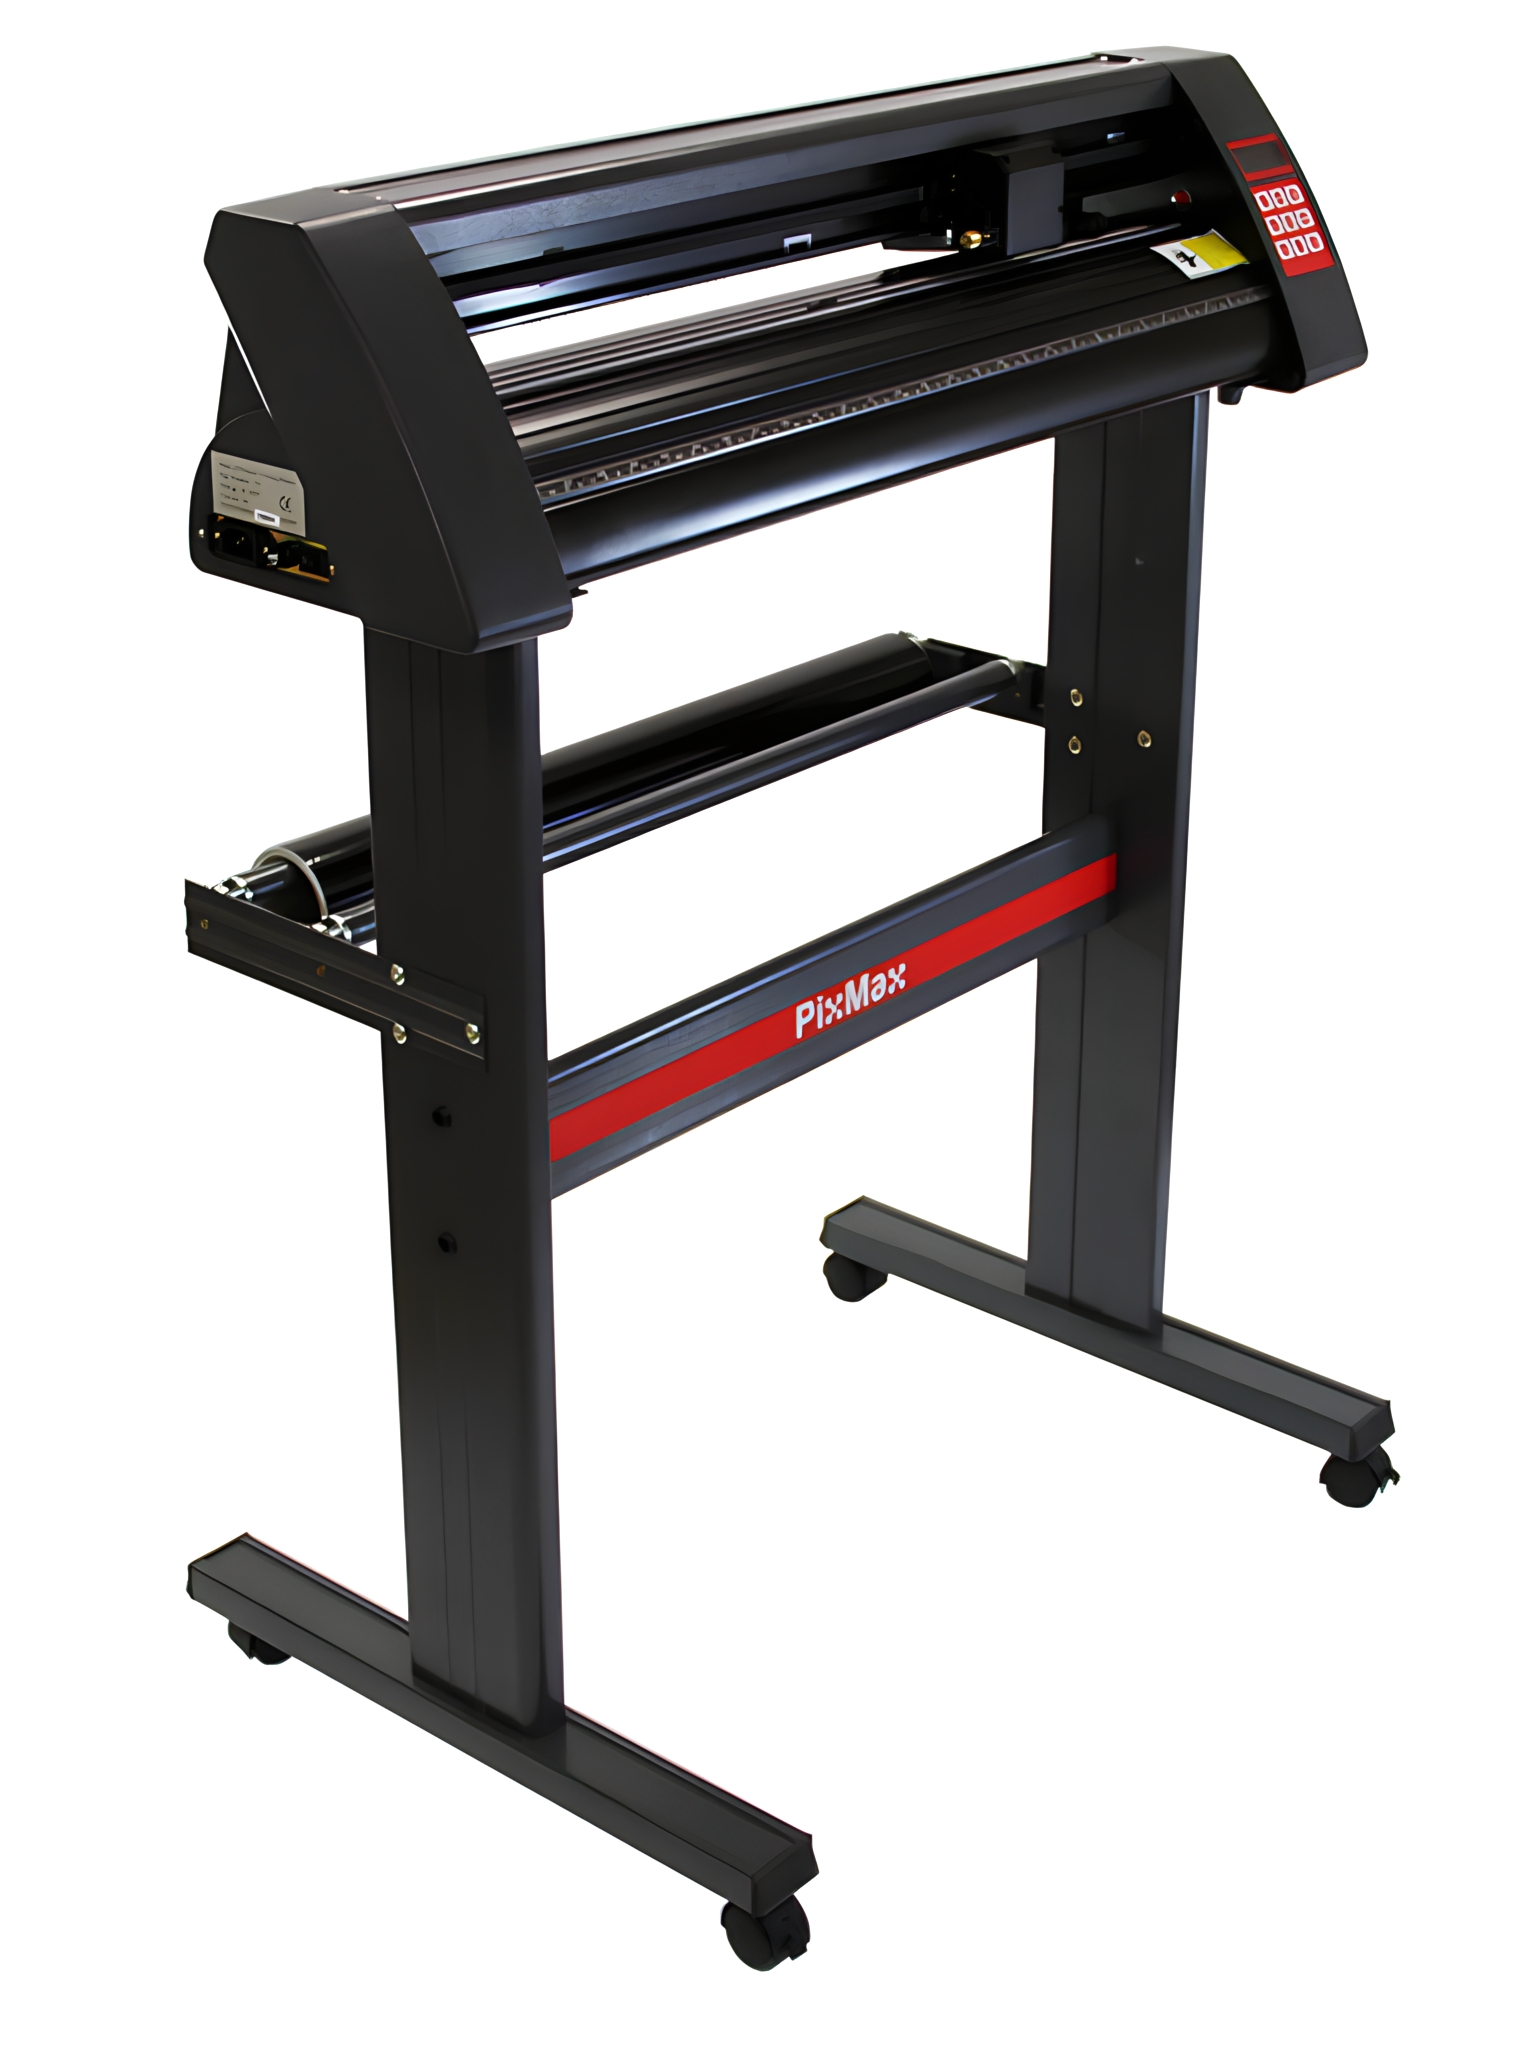
PixMax Vinyl Cutter
The PixMax Vinyl Cutter has a cutting width of 28 inches, allowing you to cut a variety of sign vinyl and t-shirt flex vinyl. The built-in optical eye with laser guiding allows for precision cutting at a minimum of 10mm, using different speed and force settings which can be adjusted through the control panel.
If you wish to return a product in perfect working order, we provide a 14 day returns policy as long as the item is unopened and in a resalable condition. A 12 month warranty applies to all of our electrical products; we will cover labour, parts and delivery charges. Our policy is to try and fix the item before arranging an exchange or refund. If for any reason a part is missing please get in touch with us within 7 days on receipt of your order. You can call or email our friendly and helpful Customer Support Team. For full terms and conditions contact our Support Department via the details on the Contact Us page.
Tools
Allen Key
Phillips Screwdriver
Materials
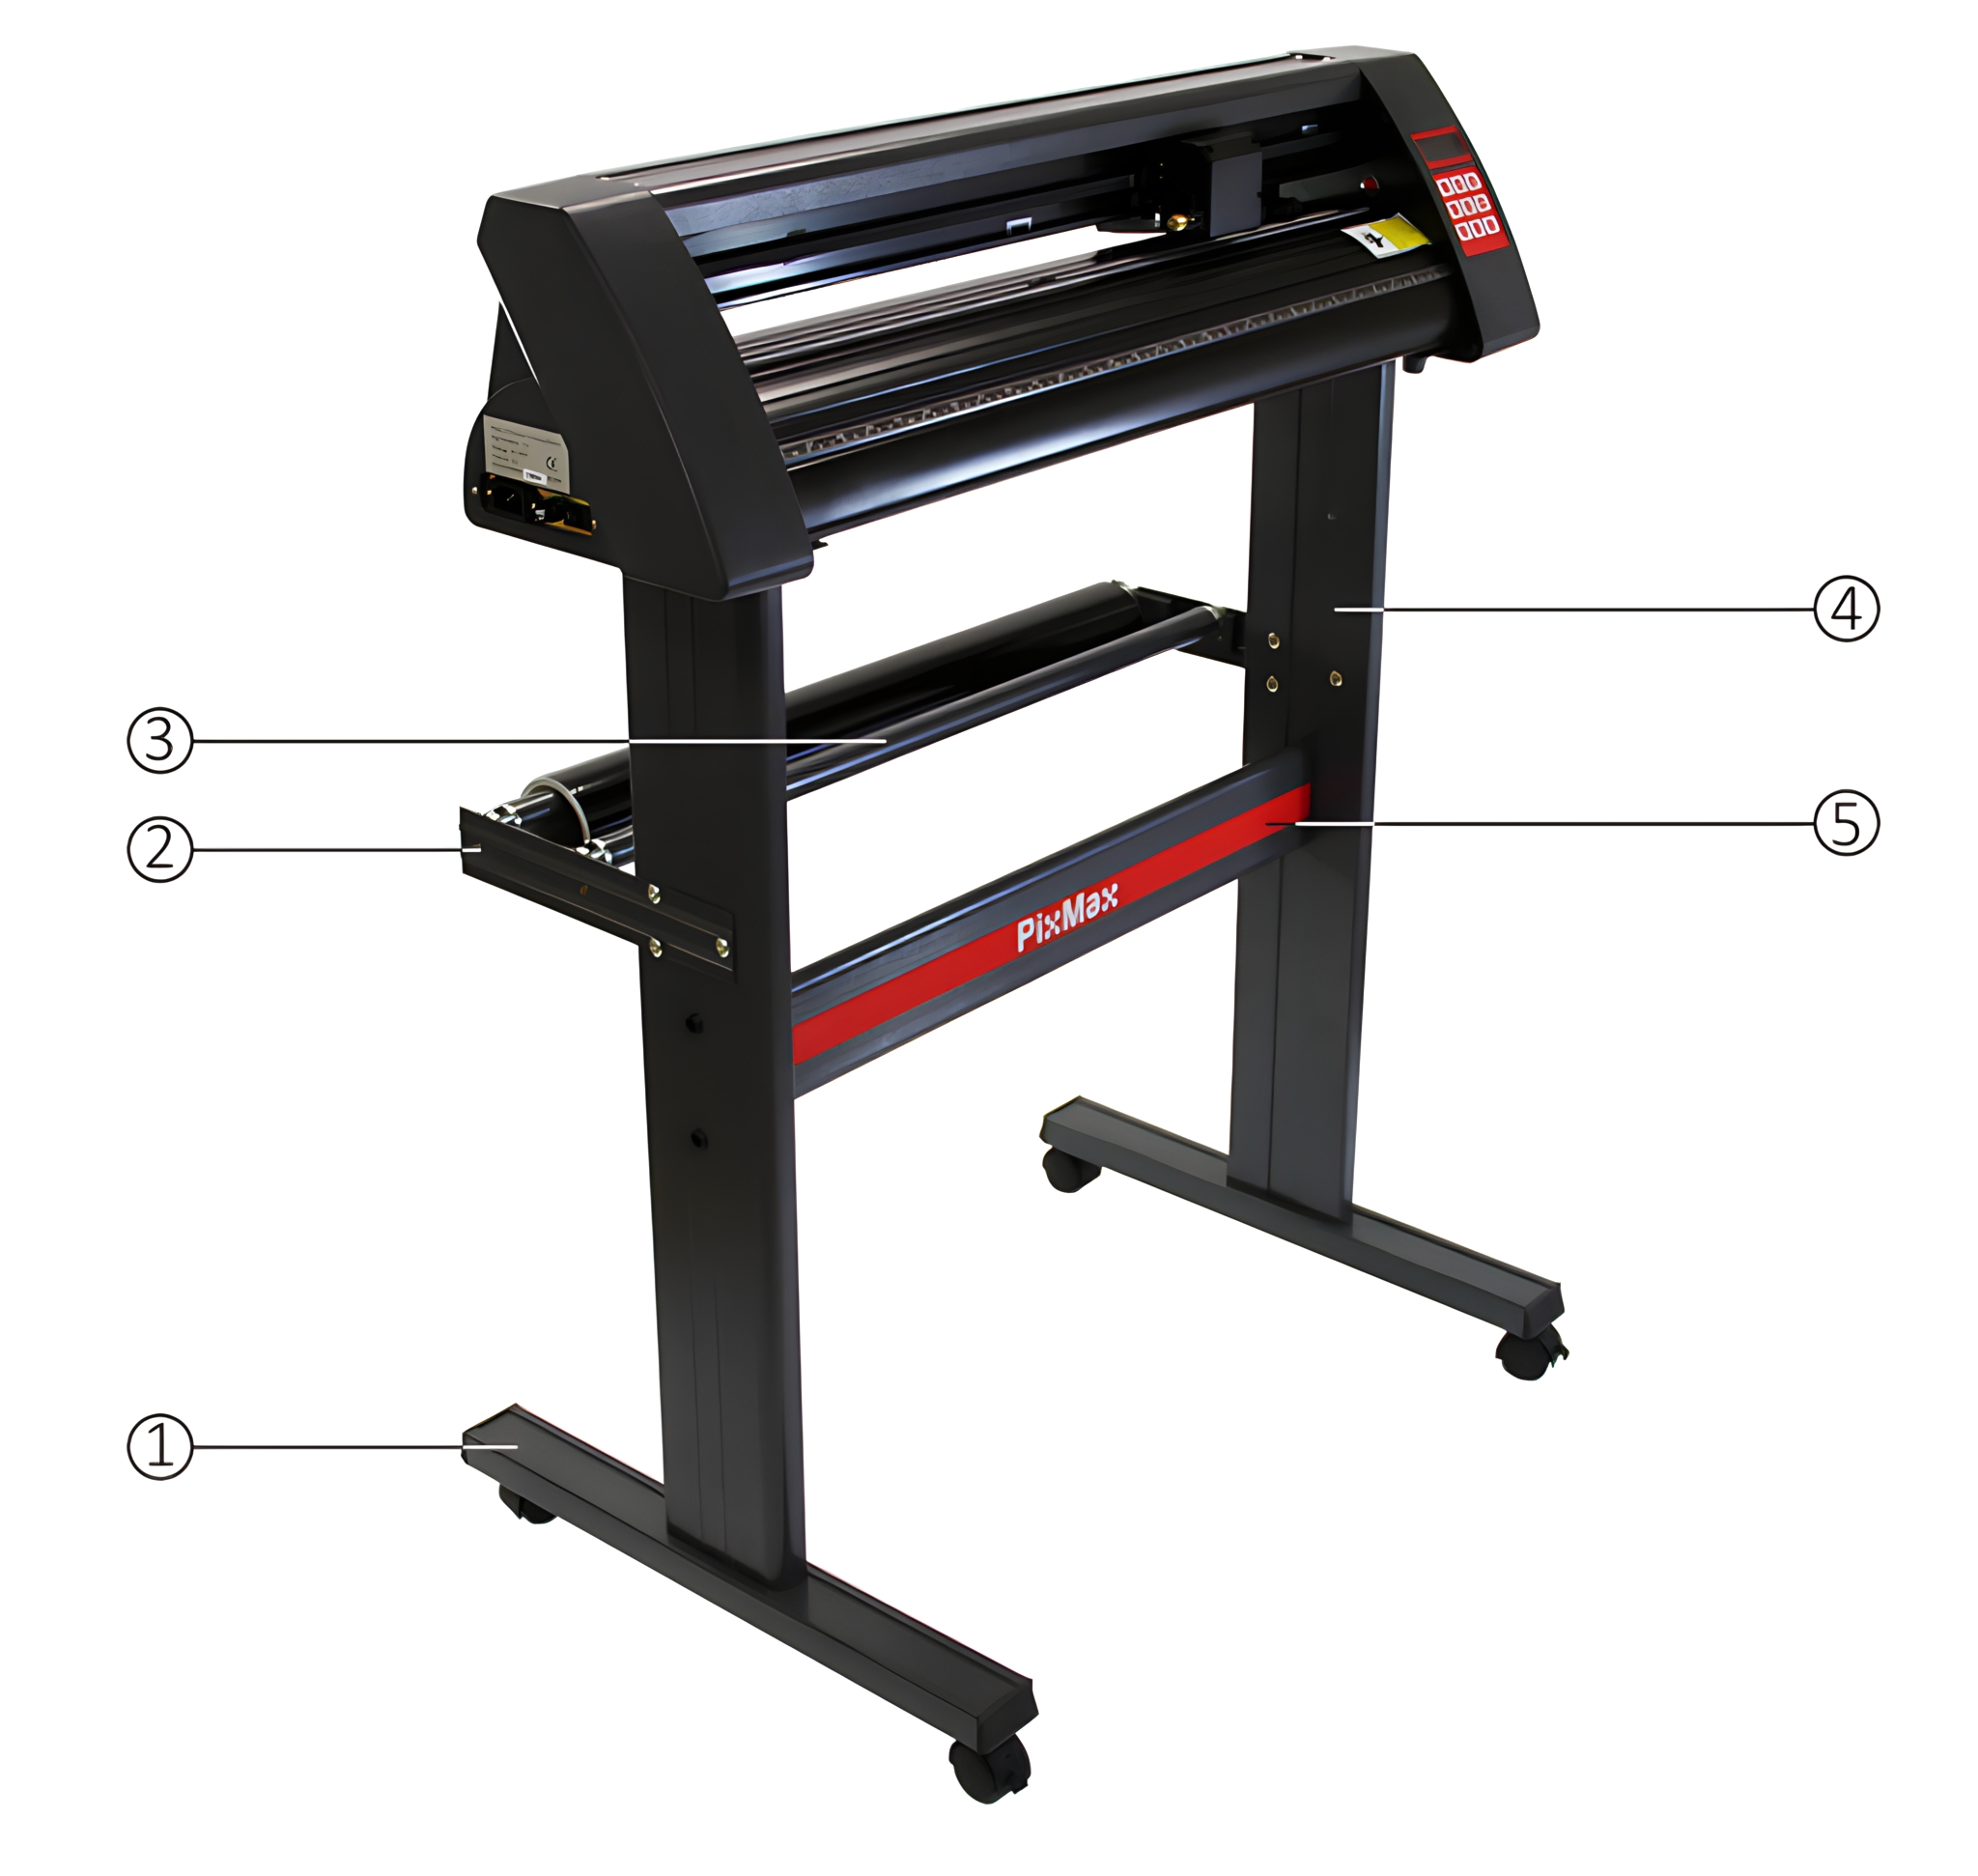
1Base Plates with Wheels
2Roller Supports
3Vinyl Roller Bars
4Side Stands
5PixMax Support Plate
6Small Screws
7Black Plastic Screw Cases
8Bolts with Threaded Bolt Caps
9Large Screws
10Black Plastic Screw Caps
1. Product Features
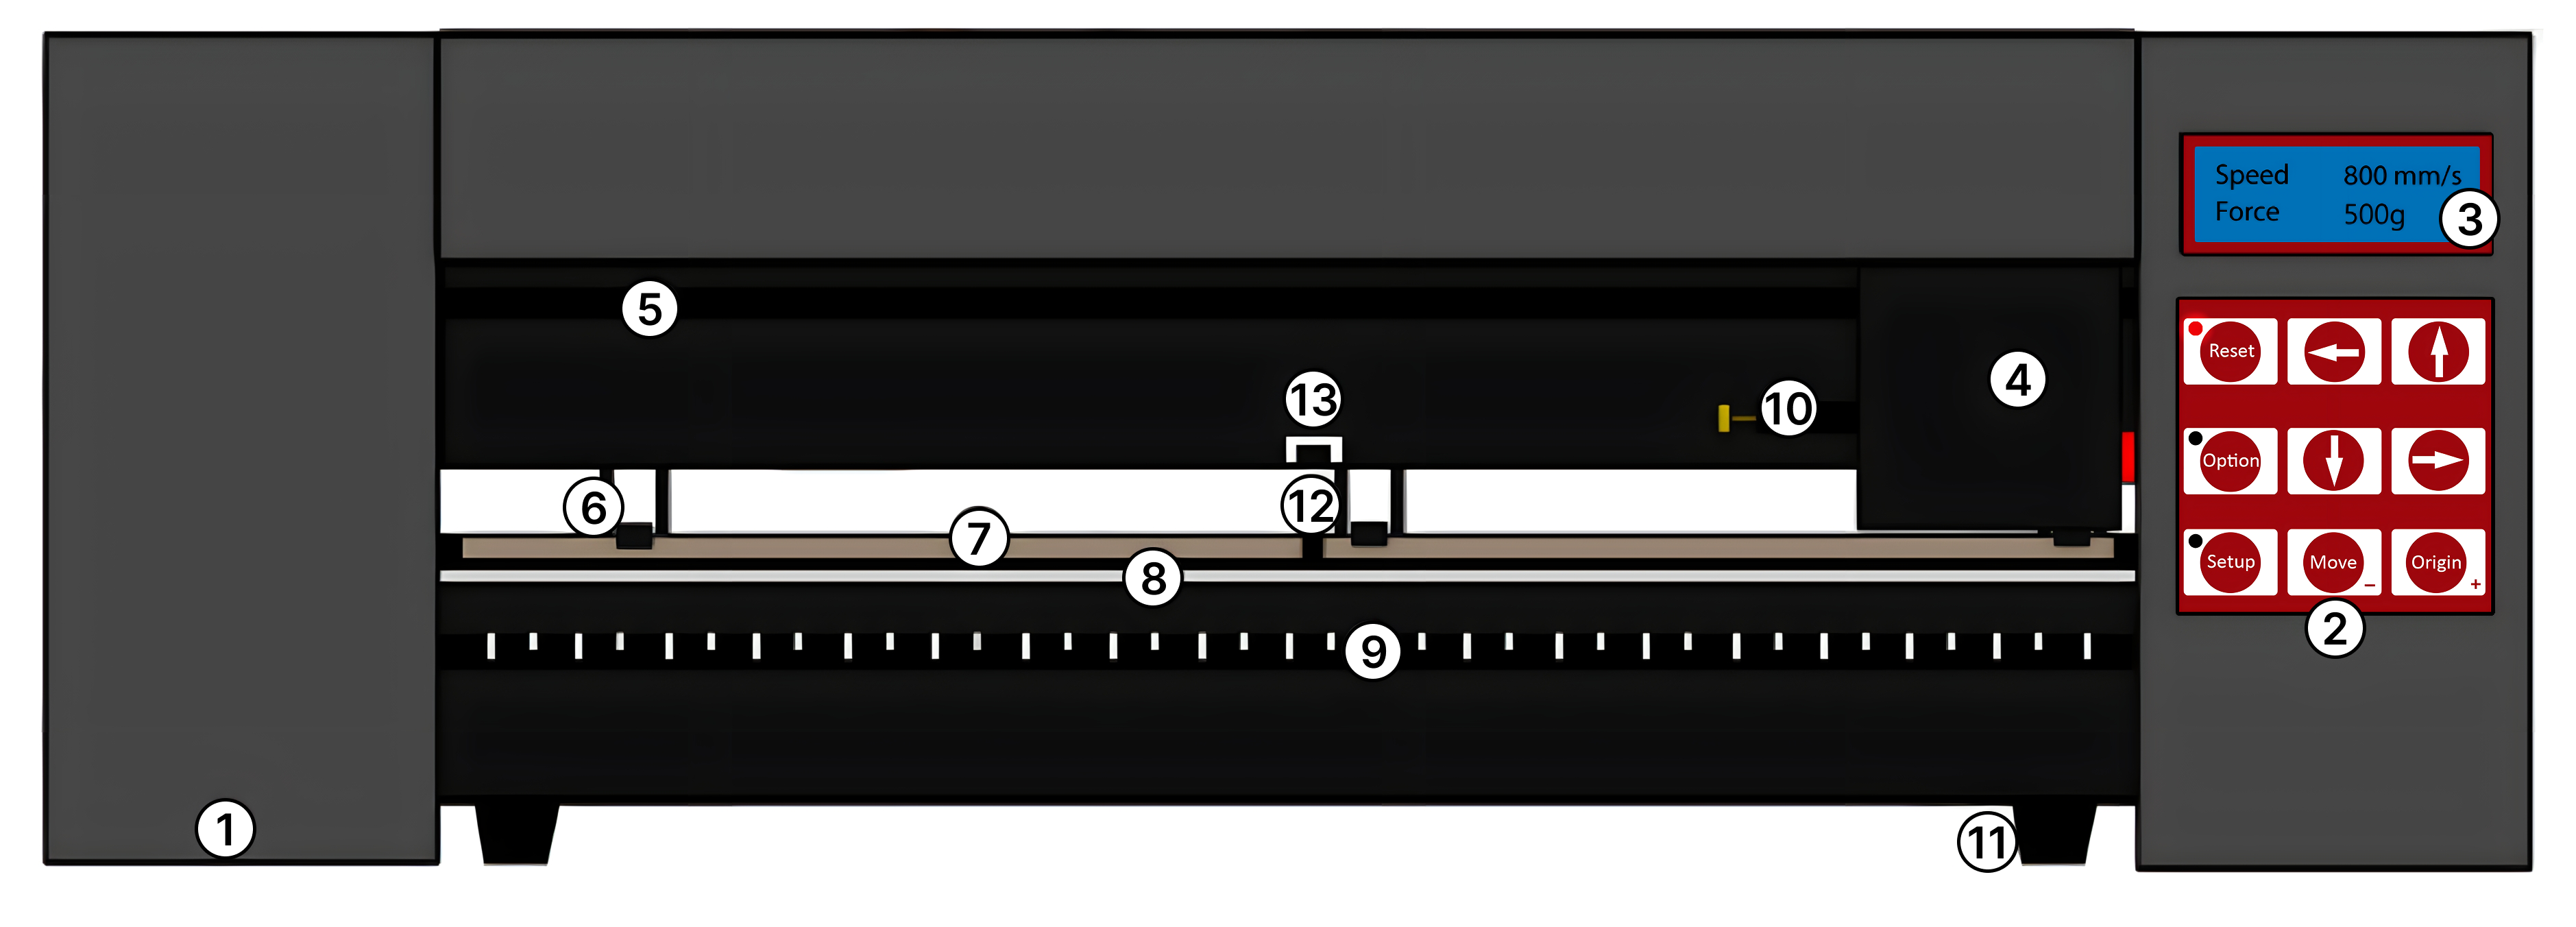
1. Side Pod: On/Off switch is positioned on left hand side 2. Control Panel: Adjust the settings including speed, pressure & blade position 3. LED Screen: Displays the parameter settings 4. Blade Carriage: Holds the blade and moves across the vinyl when cutting 5. Carriage Belt: The carriage moves back and forward across the belt 6. Pinch Rollers: Hold the vinyl in place and move the vinyl during cutting 7. Grip Roller: Helps to move the vinyl during cutting 8. Cutting Strip: Keeps the vinyl level during cutting 9. Ruler Guide: Helps to align the vinyl 10. Blade Grip: Holds the blade holder 11. Feet: Rest on your work surface or slot onto the included stand 12. Bearings: Allow the grip roller to move 13. Pinch Roller Placement Guide: Shows where centre bearing is positioned, the pinch rollers should not be situated on the bearings or underneath this guide.
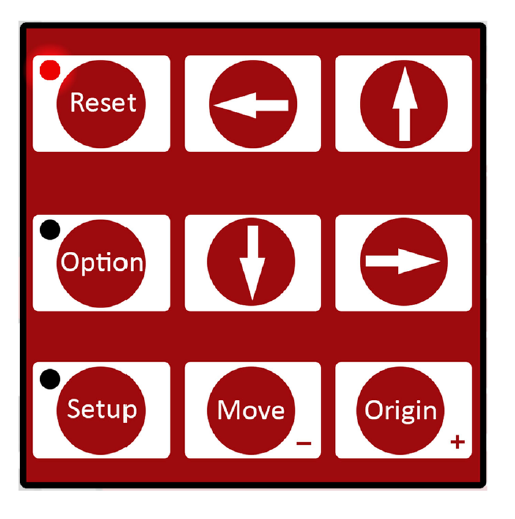
2. Control Panel
Reset: Return the carriage to the default position.
Option: Allows the blade to be moved into the required starting position.
Setup: Opens the Setup menu for adjusting Baud and eSpeed.
Move: Performs a test cut.
Origin: Sets the blade starting position.
Arrow keys operate different parameter settings dependent upon which menu the vinyl cutter is in.
1. Assembling the Stand
Attach the PixMax support plate to the side stands using 4 small screws, 4 plastic screw cases, and 4 plastic screw caps. Ensure the flat sides of the stands face inward and the top plate is at the top.
Align the PixMax logo on the support plate away from the two inline holes at the back of the stand.
Insert the small screws into the black plastic screw cases and attach the support plate. Cover the screw cases with plastic caps.
2. Attaching the Base Plates
Attach the base plates with wheels using 8 large screws. Ensure the wheels face away from the stand.
Line up the four holes in the base plate with the rubber runners inside the bottom of the side stand. Tighten the screws securely.
3. Installing Roller Supports
Attach the roller supports using 6 bolts with threaded bolt caps. Align the roller supports with the triangle-shaped holes on the side stand.
Position the roller holders facing upwards and inwards. Thread the bolts through the support and side stand, then tighten with a screwdriver.
Position the roller bars in the holders.
4. Connecting the Vinyl Cutter to the Stand
Slot the feet on the bottom of the vinyl cutter into the top of the stand.
5. Blade Installation
1. Insert the blade with the tapered end up into the blade holder. 2. Loosen the brass nut so that the blade height can be adjusted. Using the silver nut, adjust the height of the blade until it protrudes approximately 2mm from the bottom of the blade holder or until the 45 degree angle of the blade is showing. If the blade is sticking out too much from the holder then this can cut straight through the vinyl and damage the cutting strip, but if the blade is not sticking out enough then it will only lightly scratch the vinyl and you won’t be able to weed your design. 3. Locate the blade carriage on the vinyl cutter – you will see a plastic clasp that can be locked and opened via a grip, consisting of a brass nut and thread. Open the clasp so that the blade holder can be placed inside. 4. Place the blade holder into the blade carriage so that the lip of the blade holder is raised around 2-3mm from the top of the blade carriage. If the lip of the blade holder is placed flat against the top of the blade carriage it will be too low and can score unwanted lines across the vinyl. 5. Tighten the grip and close the clasp so that it is tightly locked in place.
6. Blade Replacement
After periodical use the blade may become blunt, especially when continually cutting thick vinyl, follow these instructions to replace the blade.
1. Turn the machine off at the power supply and unplug the power cable, then remove any vinyl from the rollers. 2. Locate the blade carriage on the vinyl cutter and open the clasp that keeps the blade holder in place. 3. Press the blade release, on top of the blade holder, to free the blade that is currently in use. 4. Remove the safety cap from the new blade and insert the blade with the tapered end up into the blade holder. 5. Loosen the brass nut so that the blade height can be adjusted. Using the silver nut, adjust the height of the blade until it protrudes approximately 1mm from the bottom of the blade holder or until the 45 degree angle of the blade is fully showing. 6. Replace the blade holder into the blade carriage so that the lip of the blade holder is raised around 2-3mm from the top of the blade carriage. If the lip of the blade holder is placed flat against the top of the blade carriage it will be too low and can score unwanted lines across the vinyl. 7. Tighten the grip and close the clasp so that it is tightly locked in place. You may need to perform another test cut to check that the blade is set in the correct place; see “Blade Installation”.
7. Setting Up Cutting Software
Open the SignCut Pro software and configure the cutter settings. Ensure the manufacturer and cutter number match the vinyl cutter.
Set the output device/port to the correct COM number noted during driver installation.
8. Loading Vinyl
Load your vinyl into the cutter, ensuring it is aligned correctly. Use the pinch rollers to secure the vinyl in place.
Use the "Option" button to access the position menu and adjust the vinyl alignment using the arrow keys.
9. Adjusting Force and Speed Settings
Adjust the speed and force settings on the control panel according to the thickness of the vinyl.
Perform test cuts to ensure the blade cuts through the vinyl without damaging the backing paper.
10. Setting Position and Origin
Use the "Option" button to access the position menu and adjust the blade position using the arrow keys.
Confirm the new origin by pressing the "Origin" button.
11. Performing a Test Cut
Press the "Move" button to perform a test cut. Check the cut depth and adjust the force settings if necessary.
Ensure the blade only cuts through the vinyl and not the backing paper.
12. Cutting Your Design
Open your design in SignCut and set it to cut. Follow the software's instructions for optimal cutting.