1. Step 1 - Fit the Valve Connectors
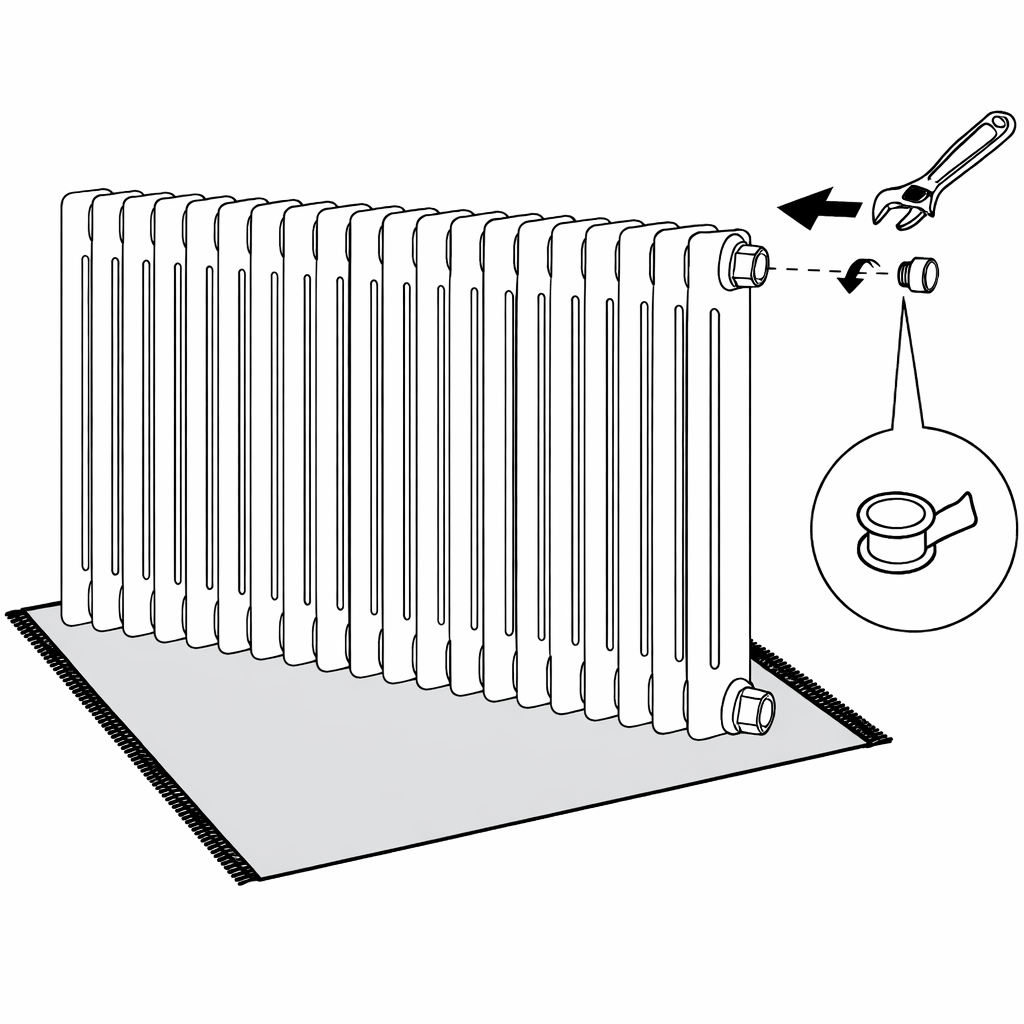
- Lay the radiator flat on the floor.
- Fit the valve connectors into the ends of the radiator..
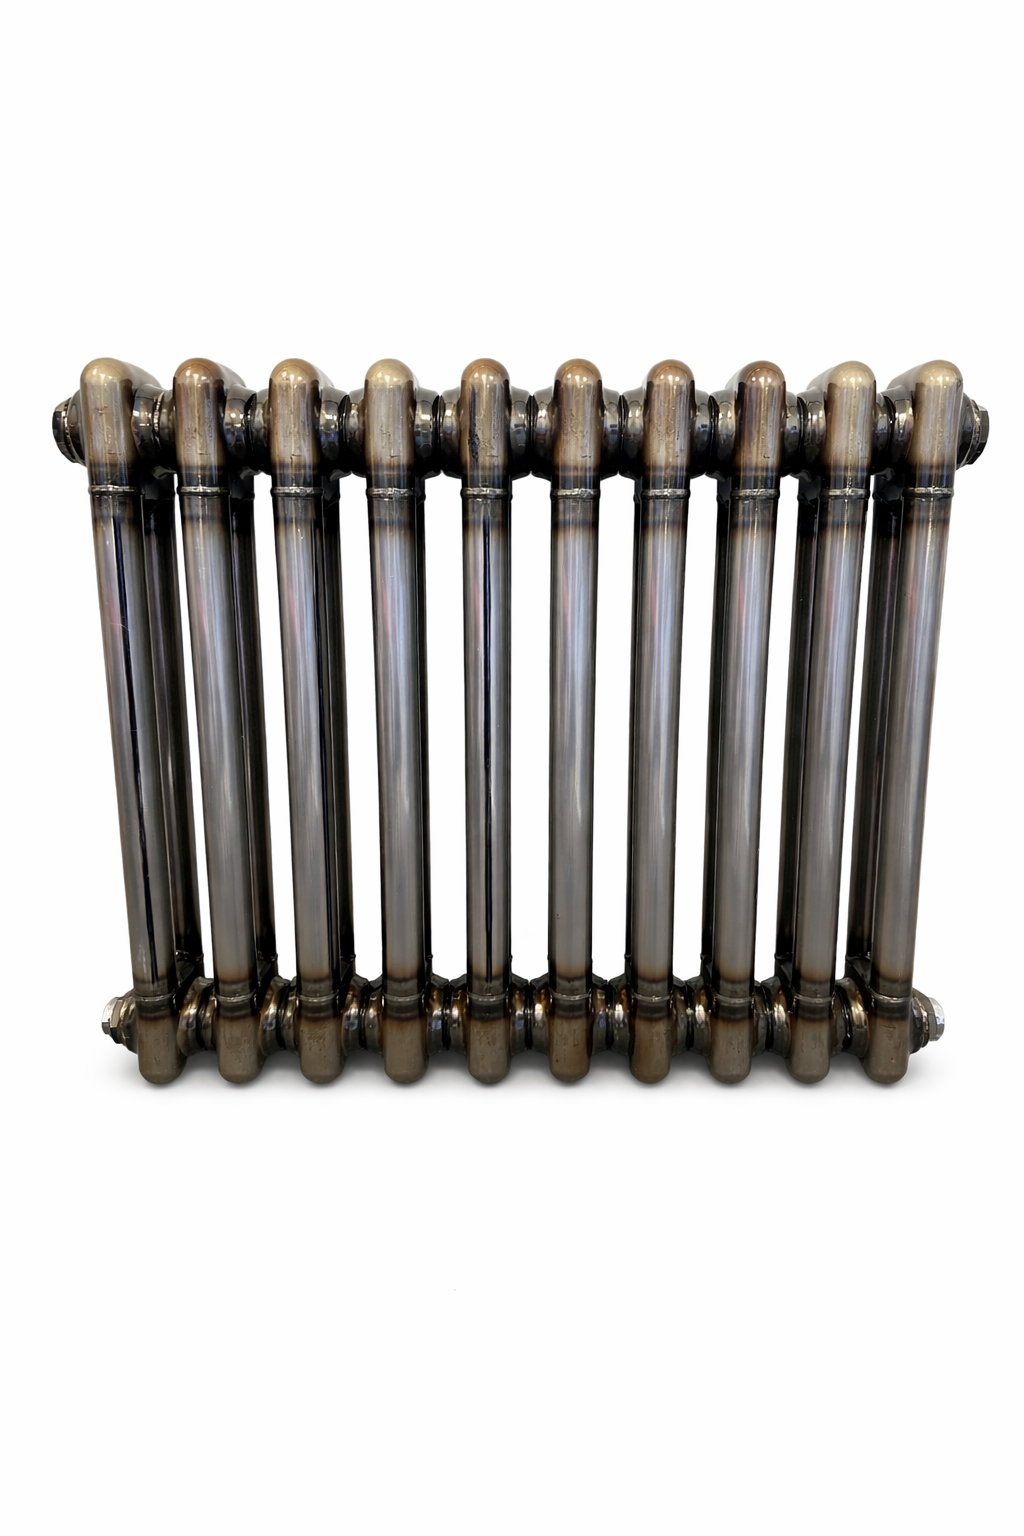 Instructions by monstershop Raw Metal RadiatorsThis guide provides step-by-step instructions for assembling, operating, and maintaining your Raw Metal Radiators. Product InformationRaw Metal RadiatorsOur Raw Metal Radiators come in a range of sizes to ensure the perfect fit for your space. Crafted from high-grade steel with a raw, industrial finish, they add a bold, modern edge to any room. Combining striking design with efficient performance, they deliver all the warmth and style your home deserves.
GPSR InformationUK
Monster Group UK Limited, Monster House 19-23 Alan Farnaby Way, Industrial Estate Sheriff Hutton, York YO60 6PG
Rana Harvey, Monster Group UK Limited, Monster House 19-23 Alan Farnaby Way, Industrial Estate Sheriff Hutton, York YO60 6PG, England, +441347878880 EU
Monster Group BV, Van Heemskerckweg 28A & B, Venlo 5928LL Netherlands +441347878880
Rana Harvey, Monster Group BV, Van Heemskerckweg 28A & B, Venlo 5928LL, Netherlands, +44134787888 Parts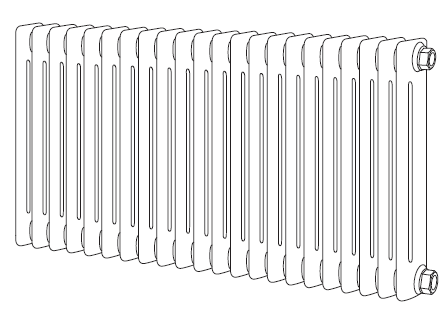 Body Brackets Screws Wall Plugs Valve Connectors 1. Step 1 - Fit the Valve Connectors
2. Step 2 - Mark the Wall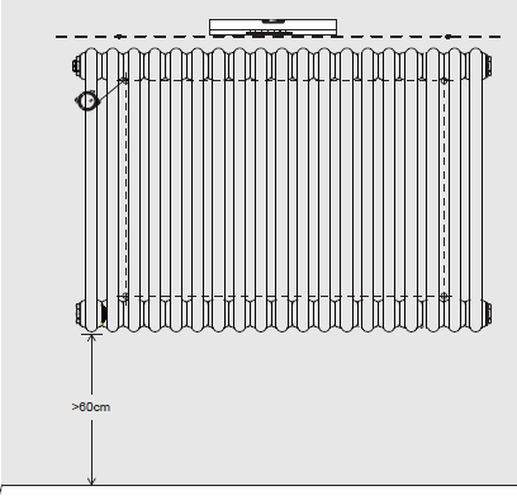
* The bottom is approximately 100–150 mm (10–15 cm) above the floor * There is at least 50–100 mm clearance above the radiator (e.g. below a windowsill) * There is sufficient clearance from the wall as per bracket design 3. Step 3 - Drill and Fit the Wall Plugs and Brackets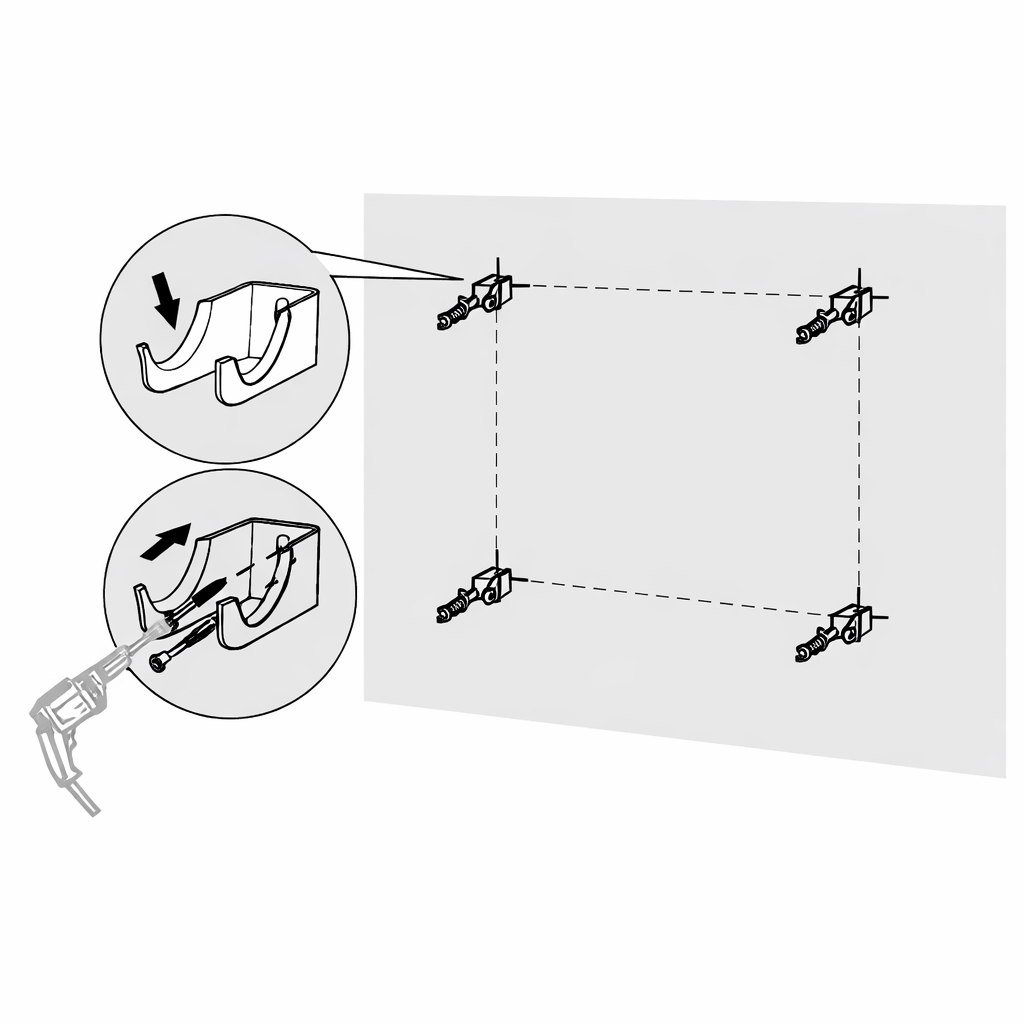 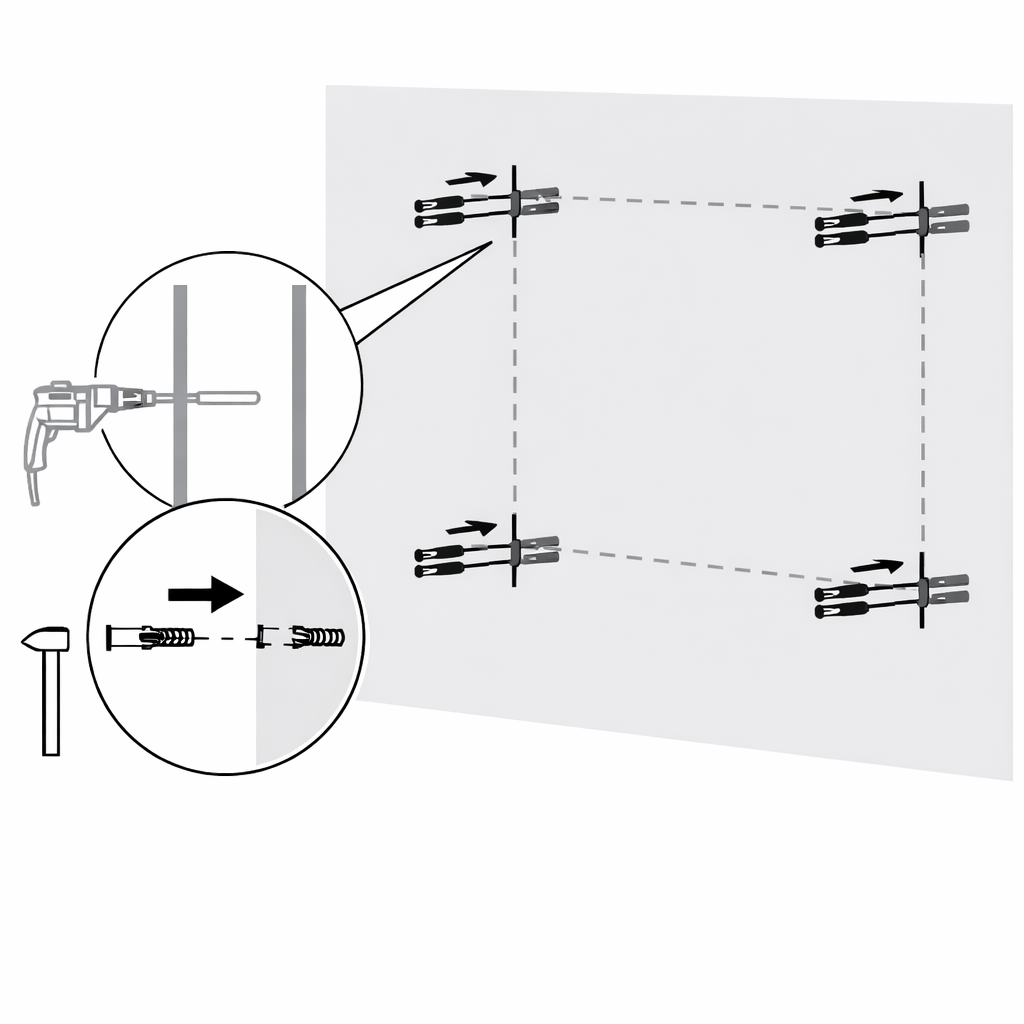
4. Step 4 - Fit the Radiator to the Brackets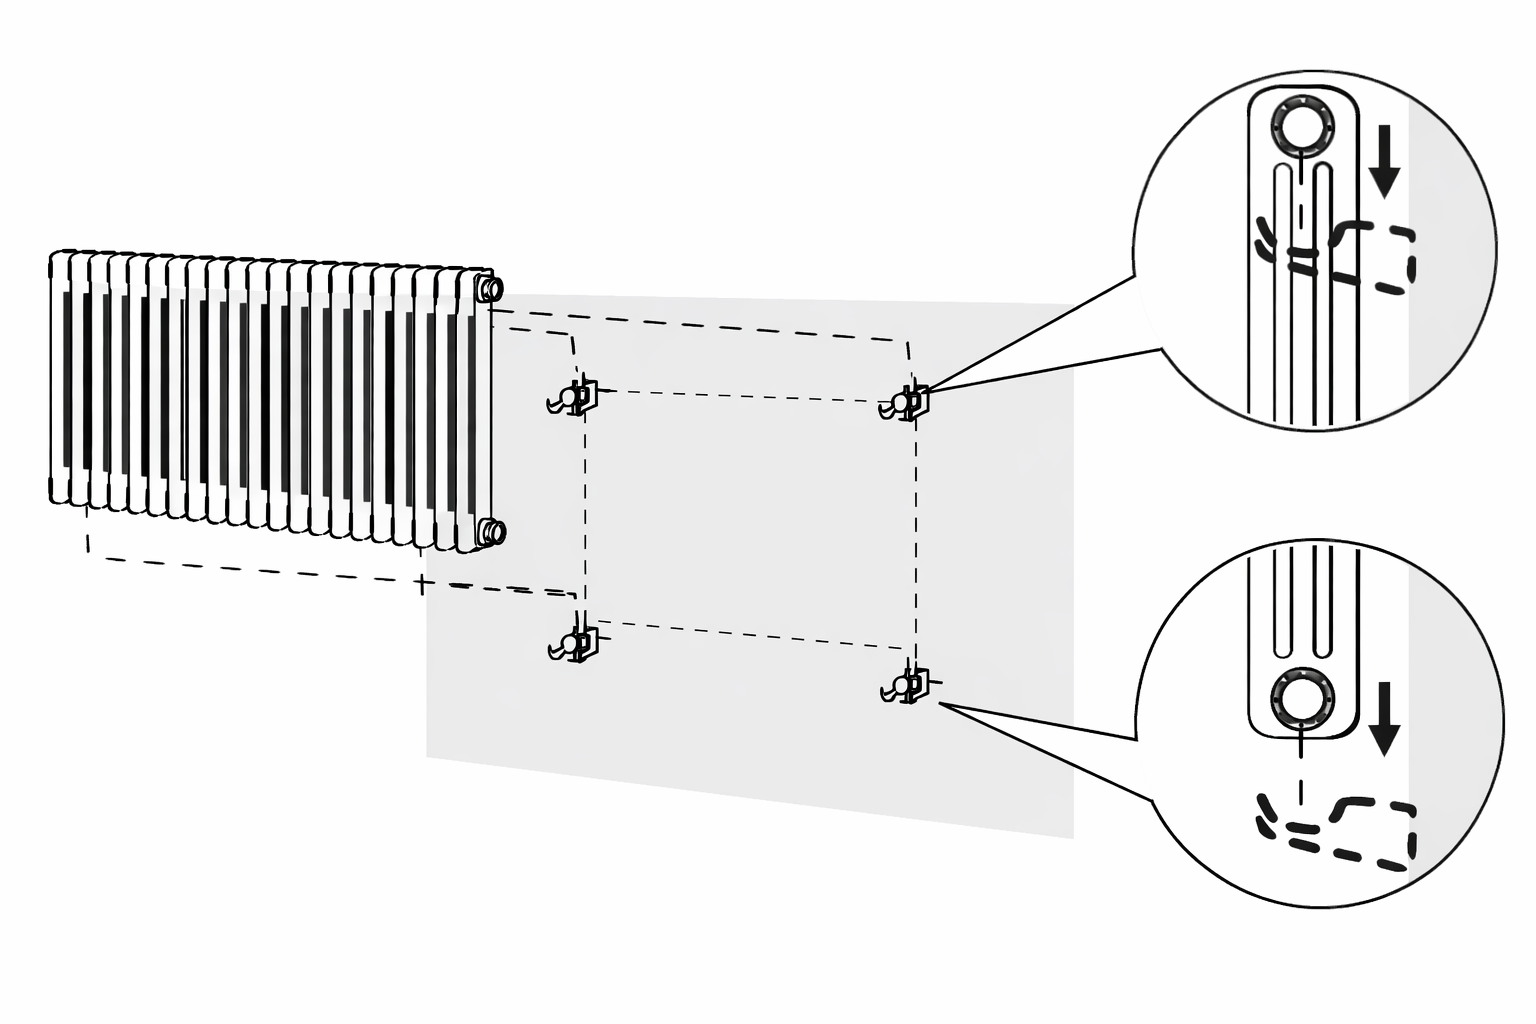
5. Step 5 - Attach the Radiator to the Water Pipes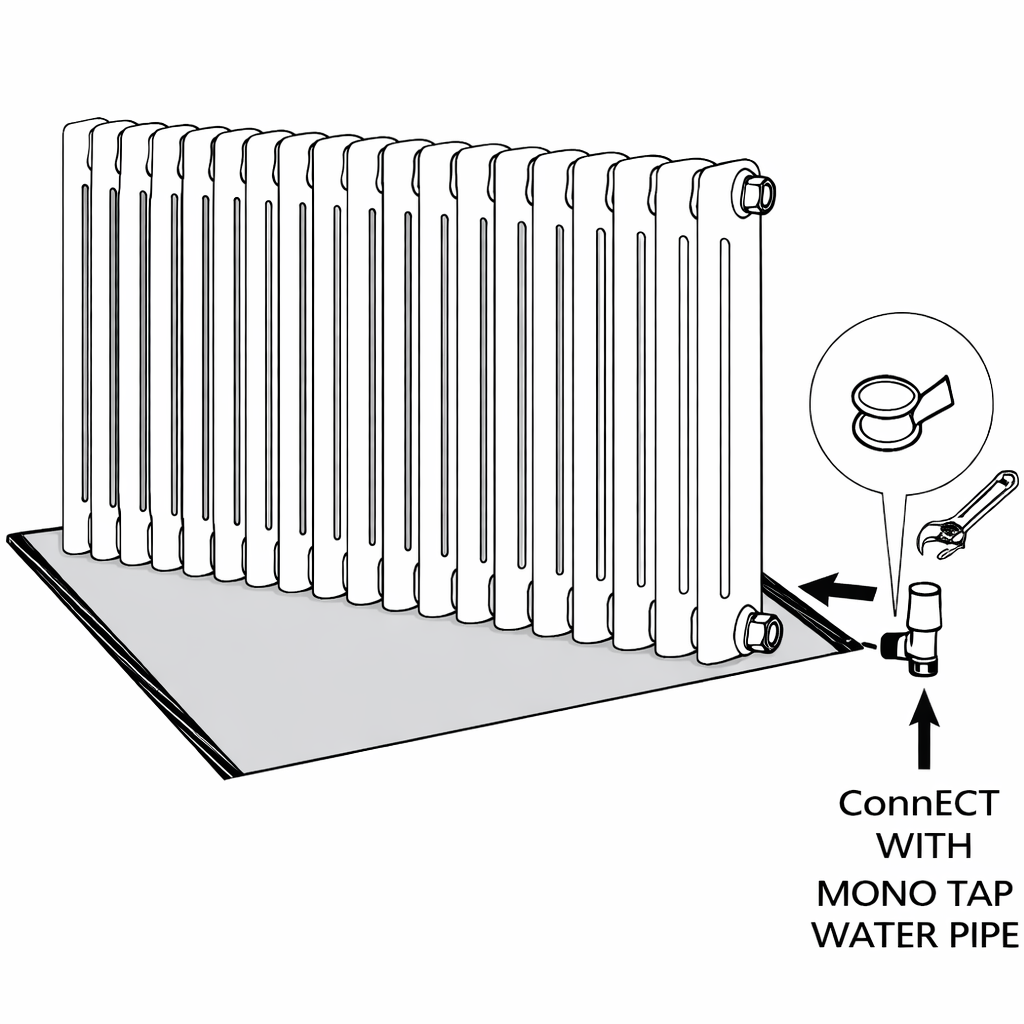
6. Maintenance• Regularly inspect the radiator, pipework, and valves for any signs of leaks, corrosion, or damage. Any issues should be addressed by a qualified professional. • Ensure the system pressure is maintained within the range specified by the boiler manufacturer. • Do not use chemical cleaners or descalers that are not explicitly approved for use with aluminium radiators, as incompatible substances may cause internal damage or corrosion. • If the radiator will not be used for an extended period, ensure the heating system is properly maintained to prevent corrosion and system failures. • This product can only be used at PN 1MPa (10g/cm2 , 10 Bar). It should only be filled with water, and at a temperature below 100°C (212°F). • If the temperature exceeds 48°C (or 120°F), please provide a warning sign near the product to avoid accidental burning. To ensure you can enjoy your radiator for as long as possible, it is essential you first flush your heating system with a central heating cleanser, this will clear any waste from the system. Following the cleansing of the system you must protect the system with a central heating inhibitor. These two simple steps will greatly increase the efficiency and lifespan of your central heating system. Failure to complete these steps increases the chances of pinhole leaks, and will also invalidate the guarantee on your radiator. 7. TroubleshootingPlease read through the guide below if you have any issues or faults with your device. The information covers and resolves the majority of frequently asked questions. Q: There are parts missing from my order. A: If there appears to be any part missing from your package contact our Customer Support team via the details on the Contact Us page within 7 days of receipt. For all other issues please contact our Customer Support department via the details on the Contact page. |