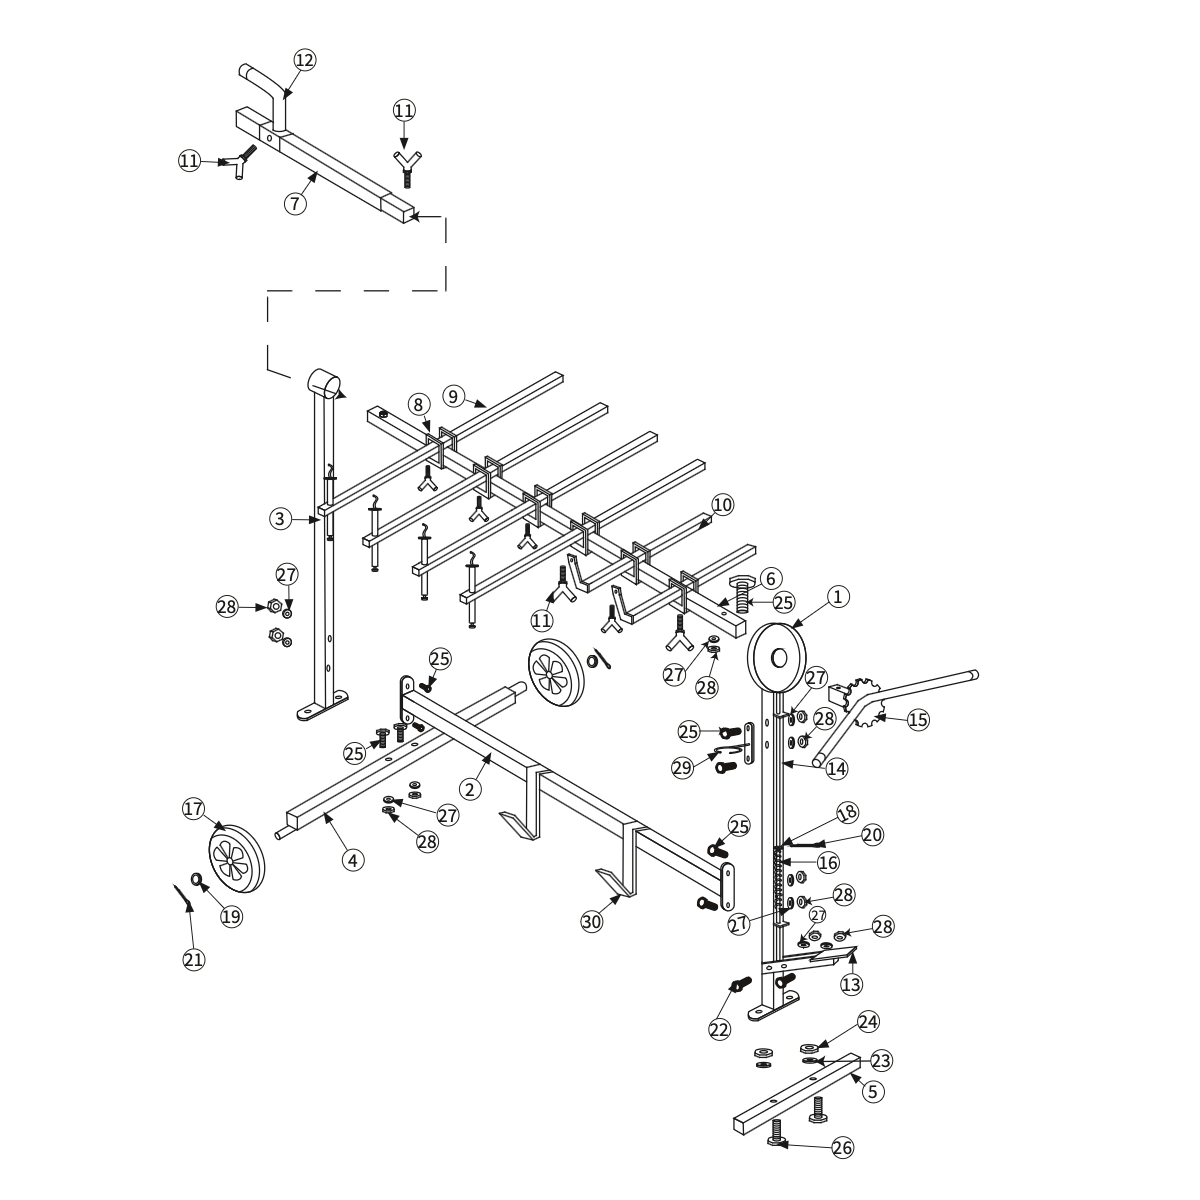
1. Attaching Rear and Wheel Struts
- Take the rear strut (part 3) and the wheel strut (part 4).
- Use one screw M8 x 45 mm (part 25), two washers 8 mm (part 27), and two washers M8 (part 28) to connect the two parts together.
- Secure the connection by tightening the screws or fasteners.