Refresh your artificial grass with the T-Mech garden vacuum. With a 3500RPM brush, 5 height settings, 50L bag, and 1800W suction, it removes debris and lifts fibres with ease. Self-propelled, lightweight, and perfect for lawns, paths, and driveways.
Product Information
T-Mech Artificial Grass Vacuum
Thank you for purchasing the T-Mech Artificial Grass Vacuum. This lightweight but powerful vacuum is great for maintaining your artificial grass. It will lift the pile while removing twigs, leaves, and weeds. Five height settings allow the vacuum to be adjusted for all styles of artificial grass.
For maximum convenience, this vacuum comes with an extra-long 12-meter power cable and a 50 litre collection basket.
So, what are you waiting for? Improve the lifespan of your artificial grass and ensure it looks its very best at all times.
Manufacturer:
Monster Group UK Limited, Monster House
19-23 Alan Farnaby Way,
Industrial Estate Sheriff Hutton,
York
YO60 6PG
Person Responsible:
Rana Harvey, Monster Group UK Limited,
Monster House
19-23 Alan Farnaby Way,
Industrial Estate Sheriff Hutton,
York
YO60 6PG,
England,
+441347878880
EU
Manufacturer:
Monster Group BV,
Van Heemskerckweg 28A & B,
Venlo 5928LL
Netherlands
+441347878880
Person Responsible:
Rana Harvey,
Monster Group BV,
Van Heemskerckweg 28A & B,
Venlo 5928LL,
Netherlands,
+44134787888
Tools
RCD (Residual Current Device)
Ear protectors
Gloves
Materials
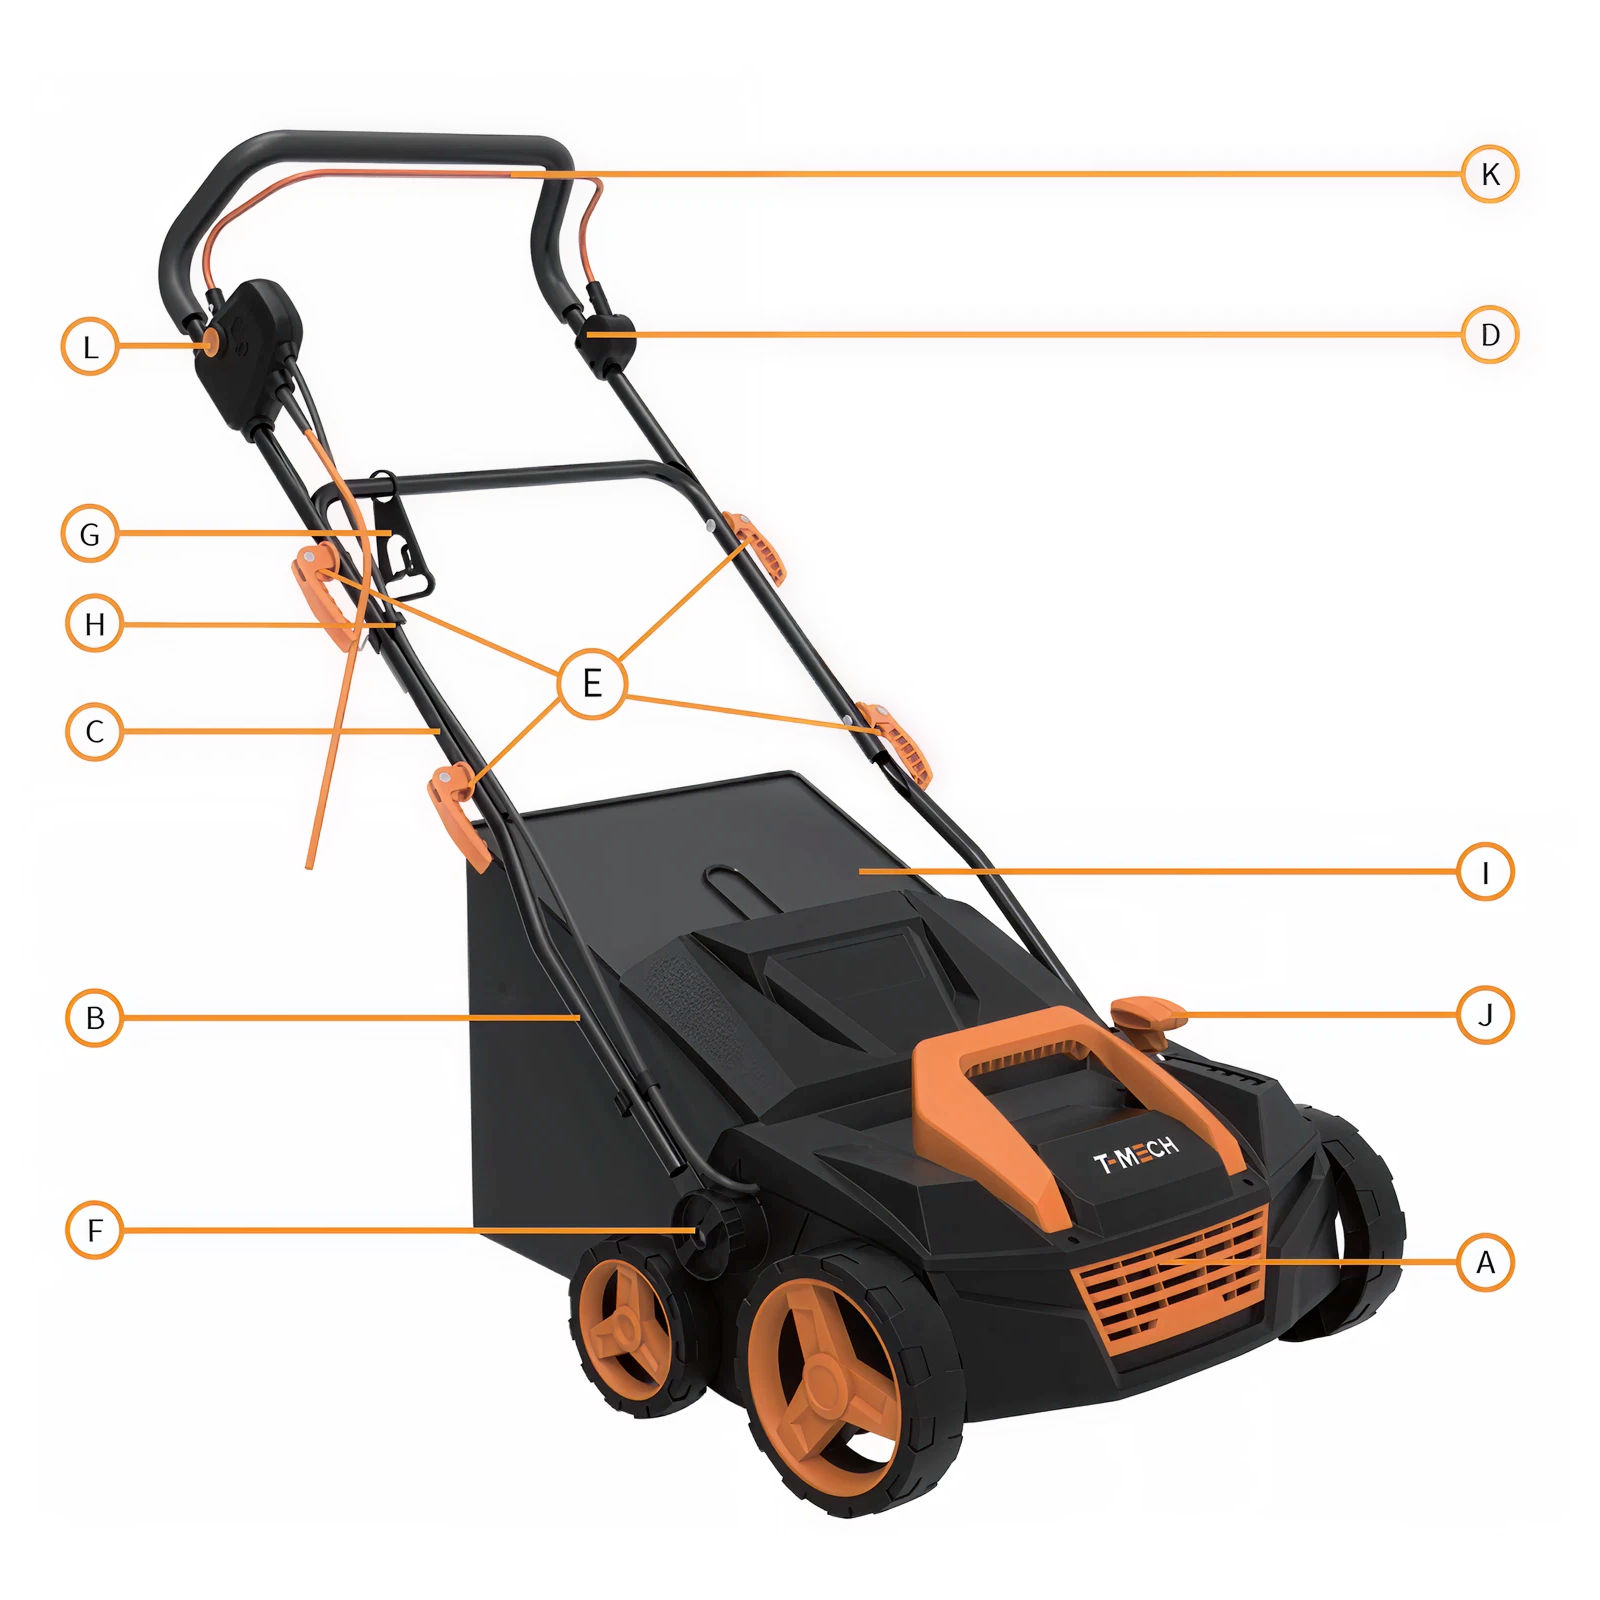
A - Vacuum Body
B - Handle Bottom Section
C - Handle Middle Section
D - Handle Top Section
E - Quick Release Levers
F - Handle Screws
G - Power Cable Retainer Bracket
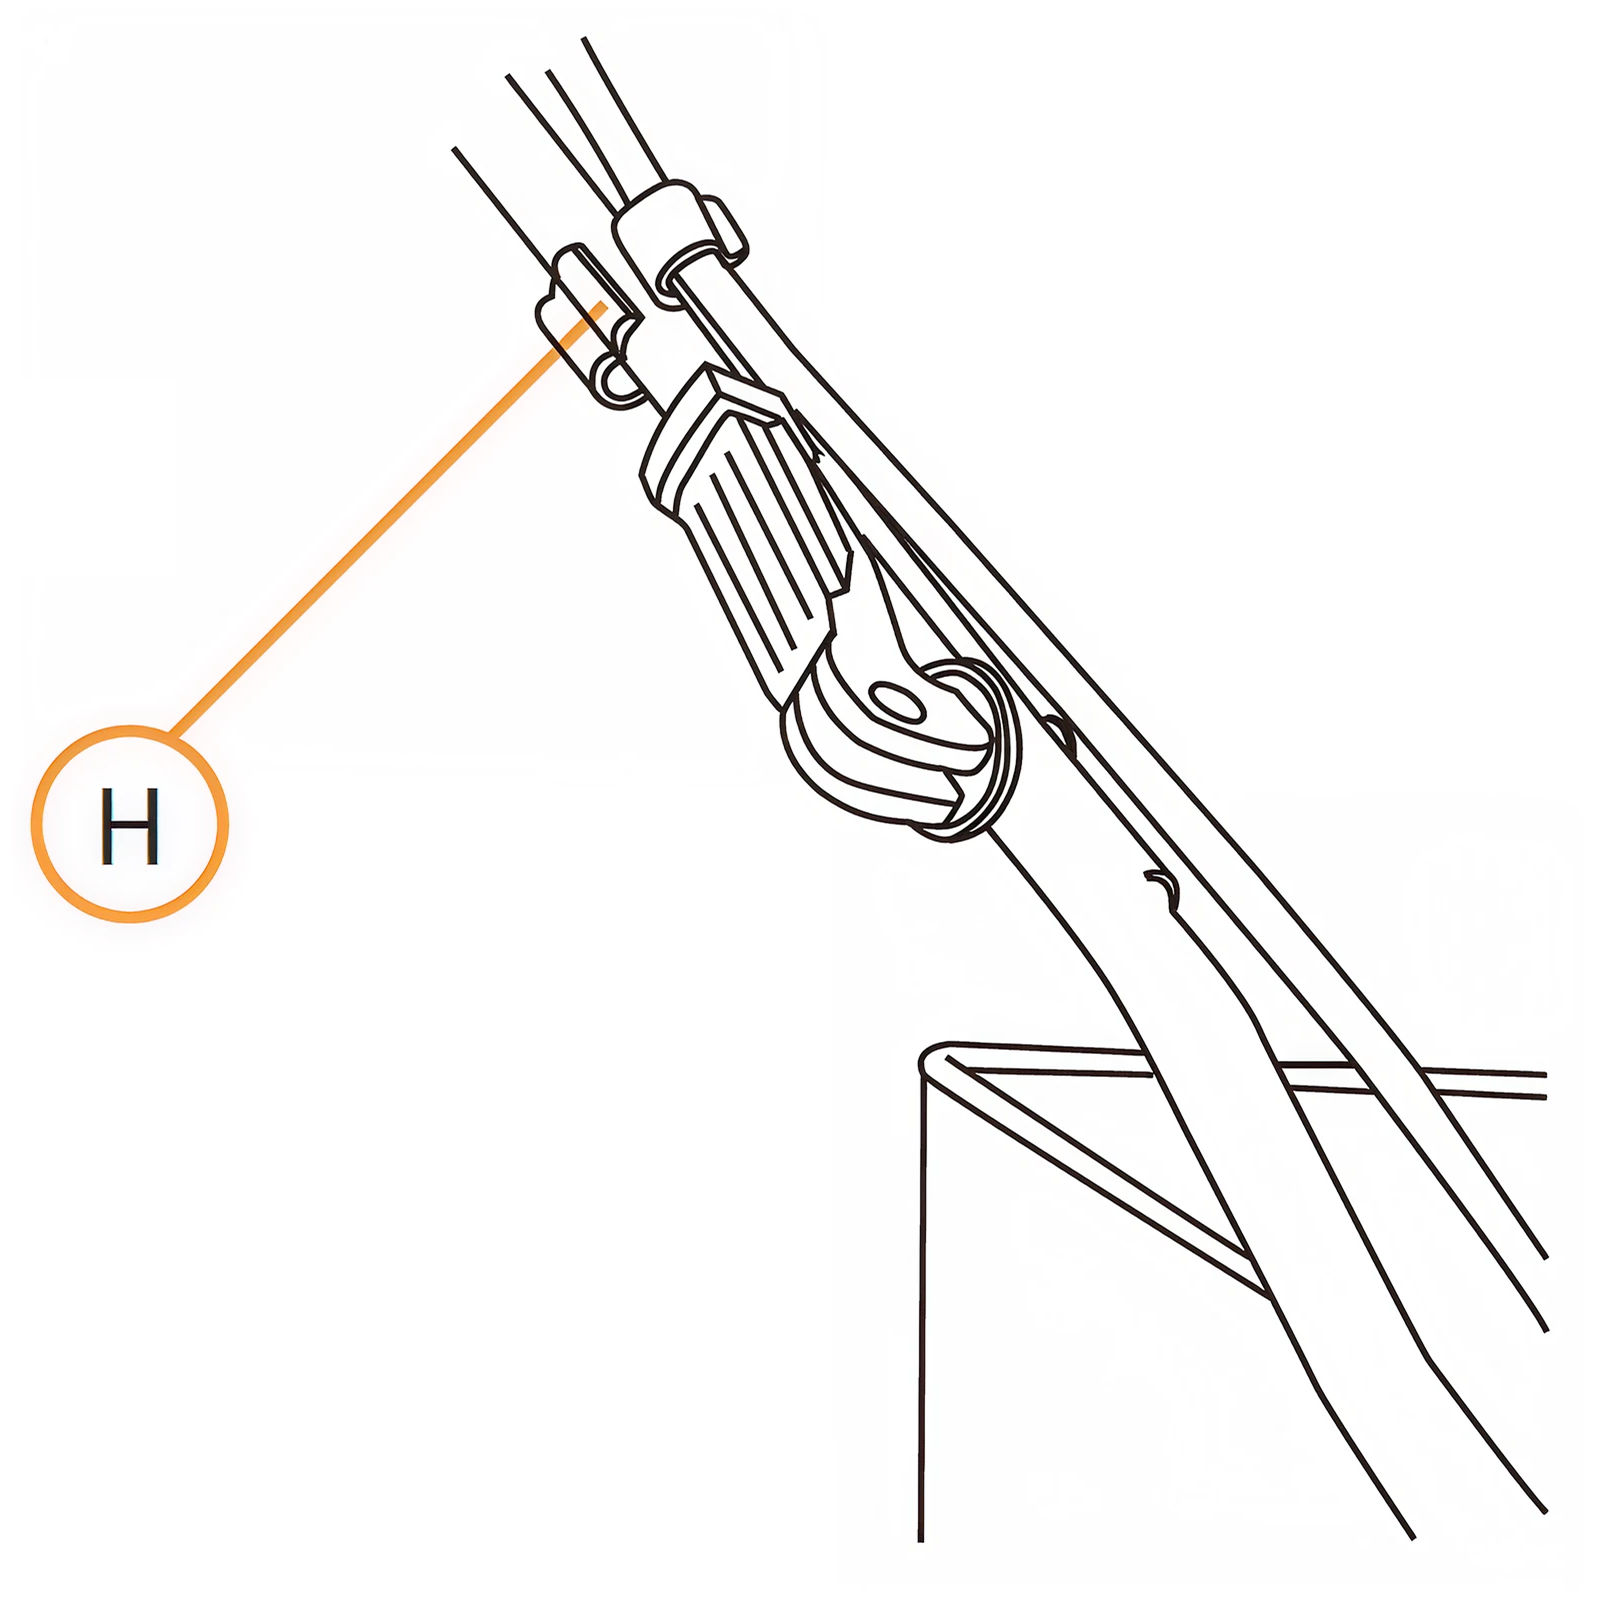
H - Power Cable Clip
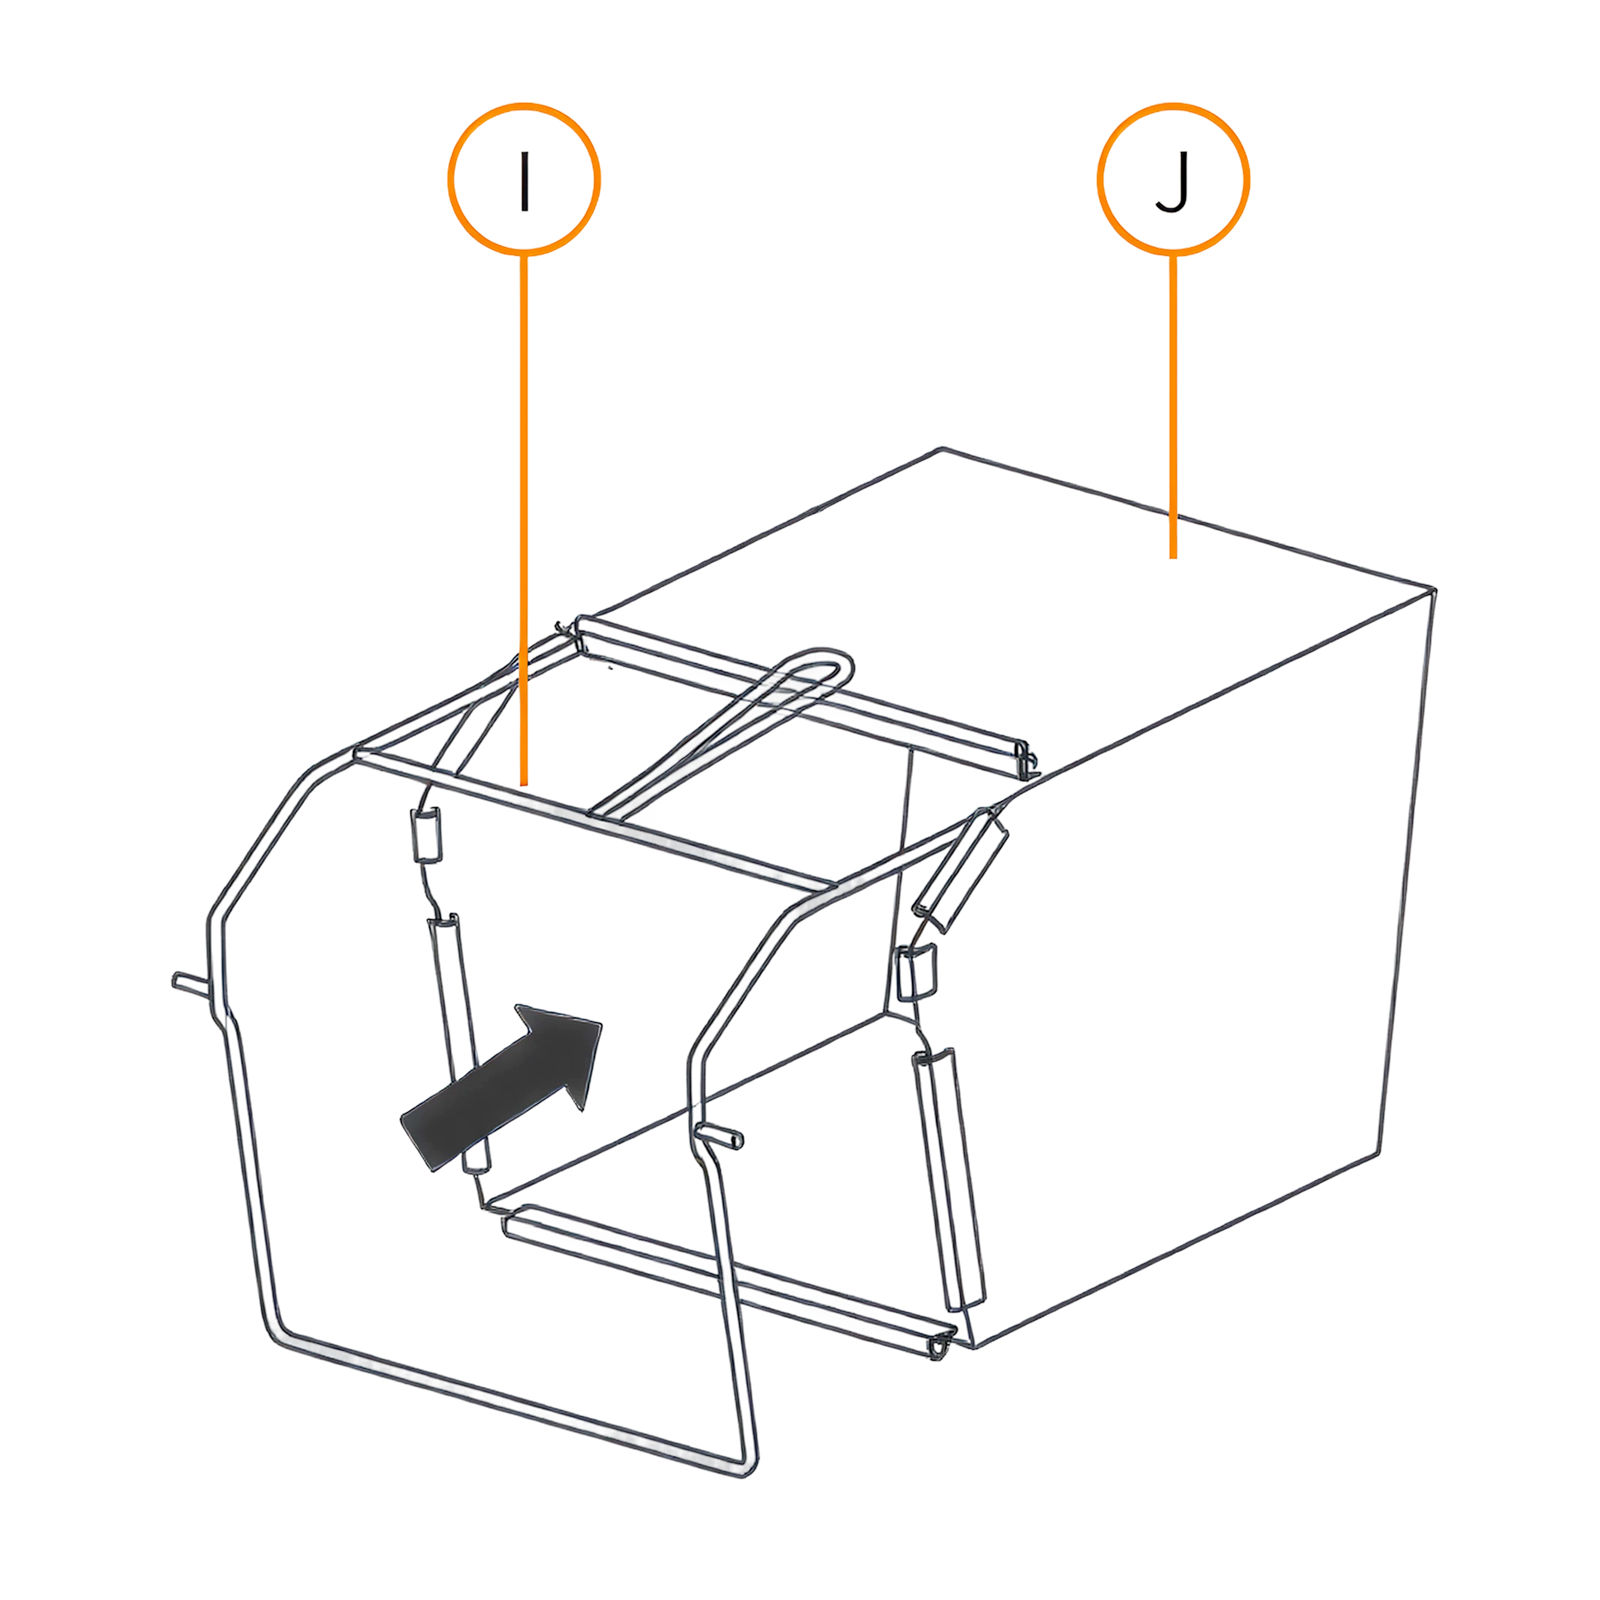
I - Collection Basket Frame
J - Textile Collection Basket
K - Spline Connector
1. Product Features
A. Vacuum
B. Handle Bottom Section
C. Handle Middle Section
D. Handle Top Section
E. Quick Release Levers
F. Handle Screws
G. Power Cable Retaining Bracket
H. Power Cable Clip
I. Collection Basket
J. Brush Height Adjustment Lever
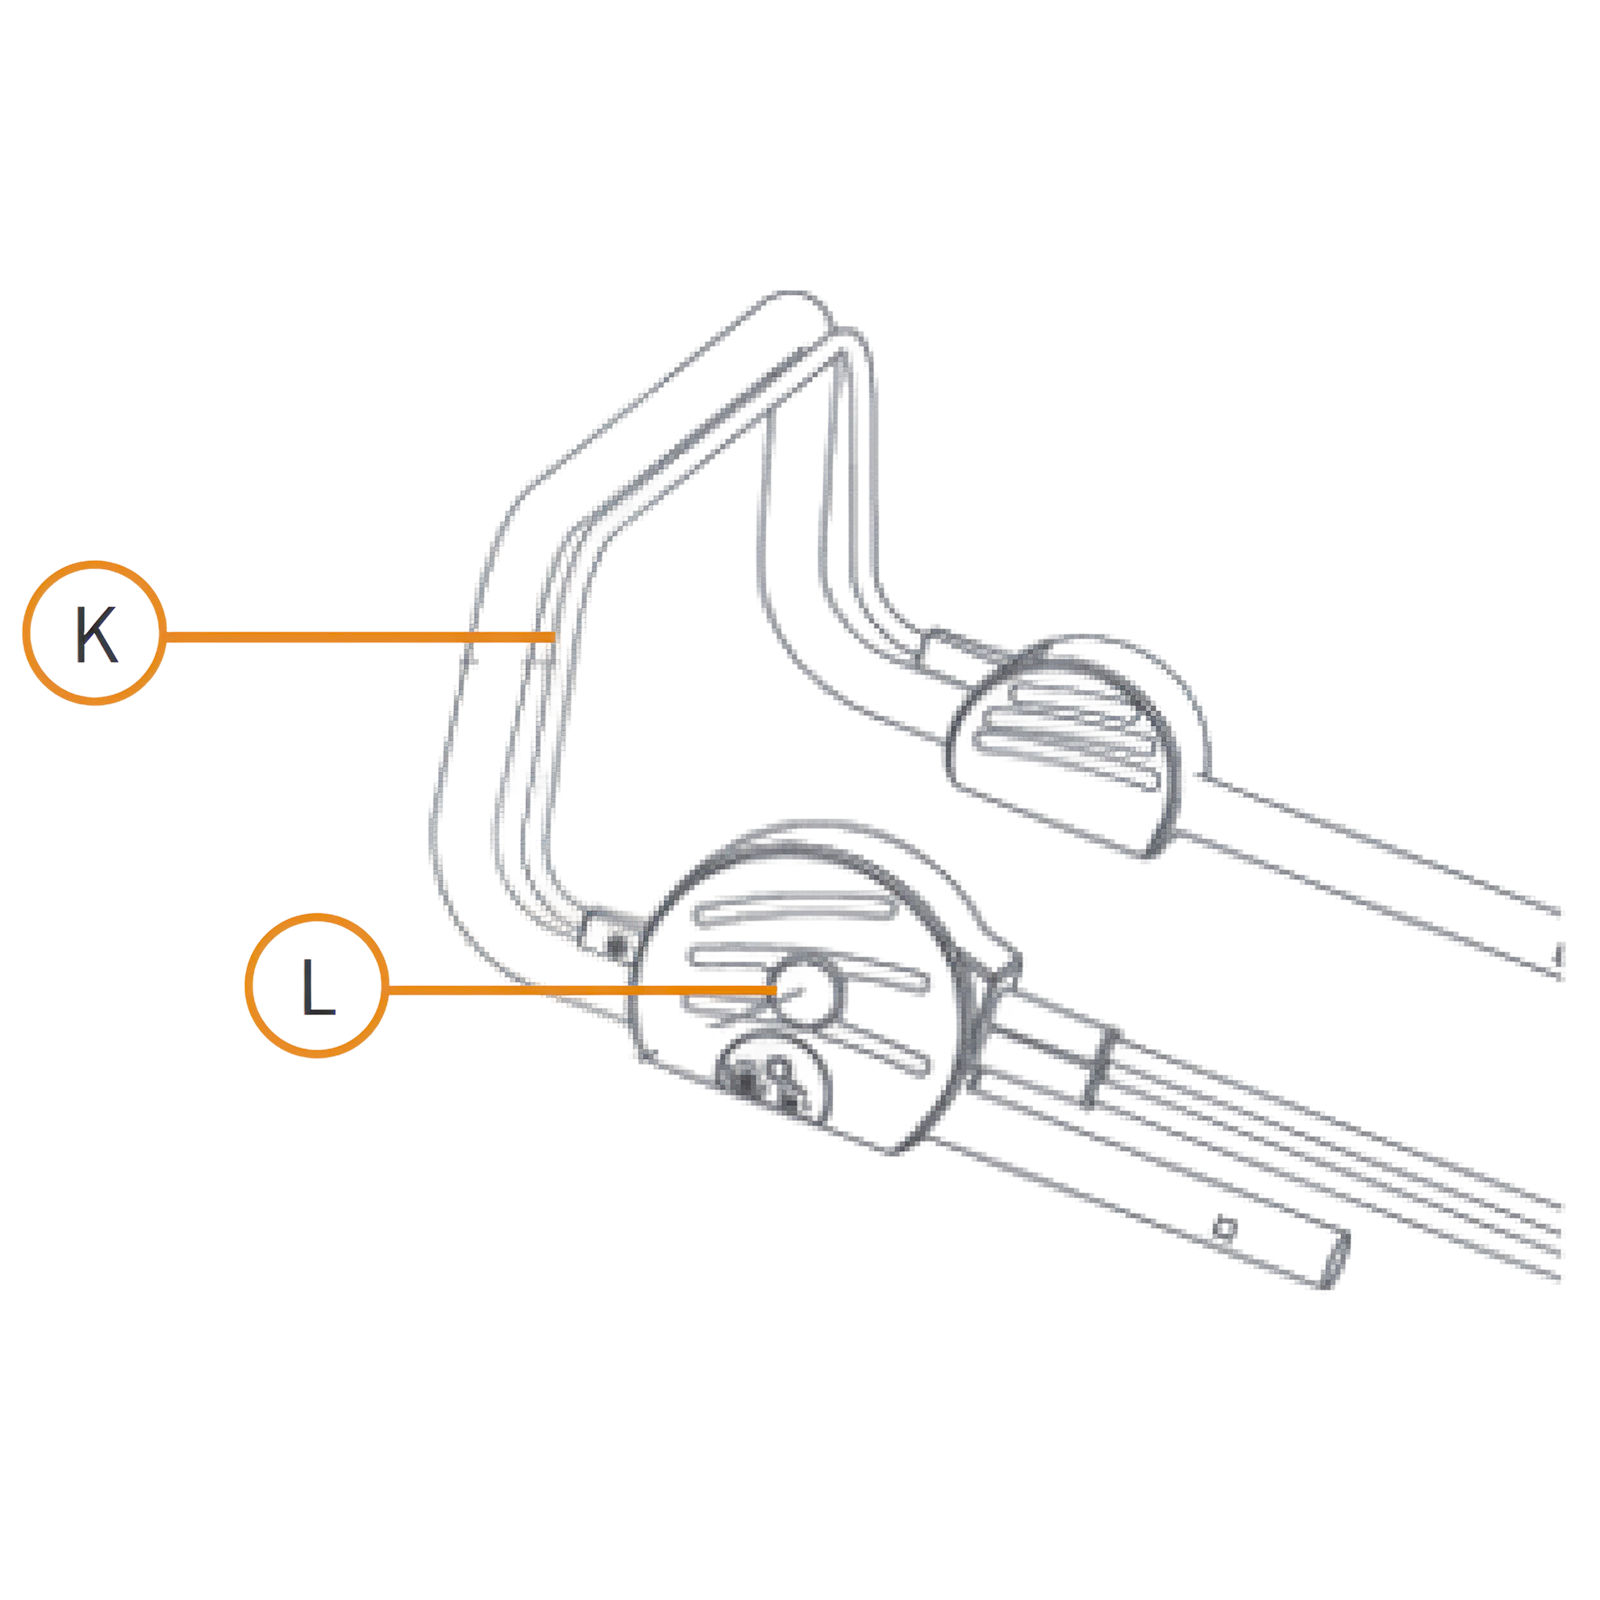
K. Starting Lever
L. Safety Button
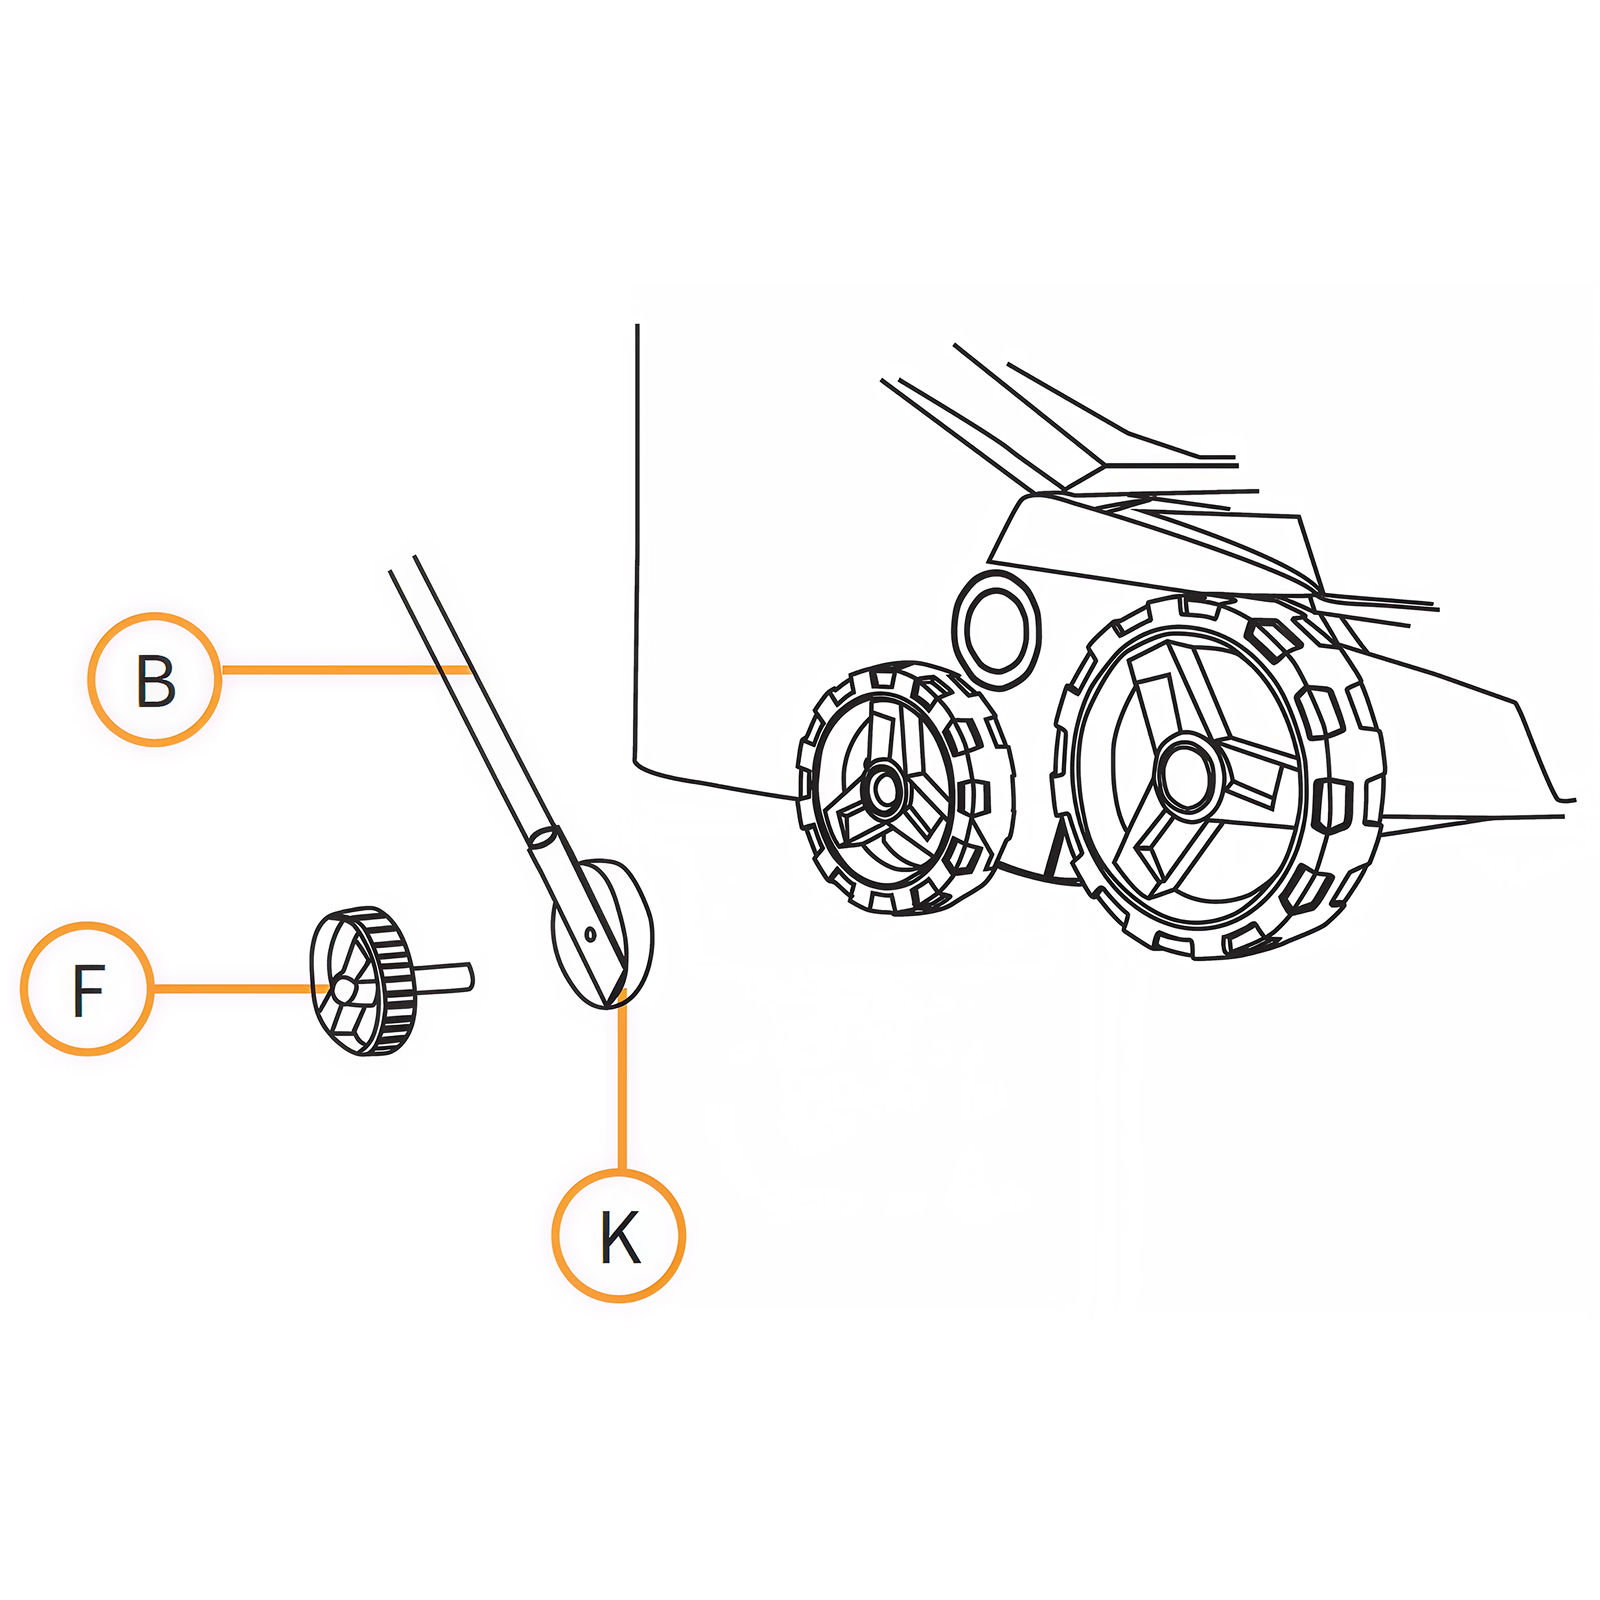
2. Attaching the Lower Handle Section
Attach the lower section of the handle (B) using the two handle screws (F) on both sides. Adjust the handle angle to your preference using the spline connector (K).
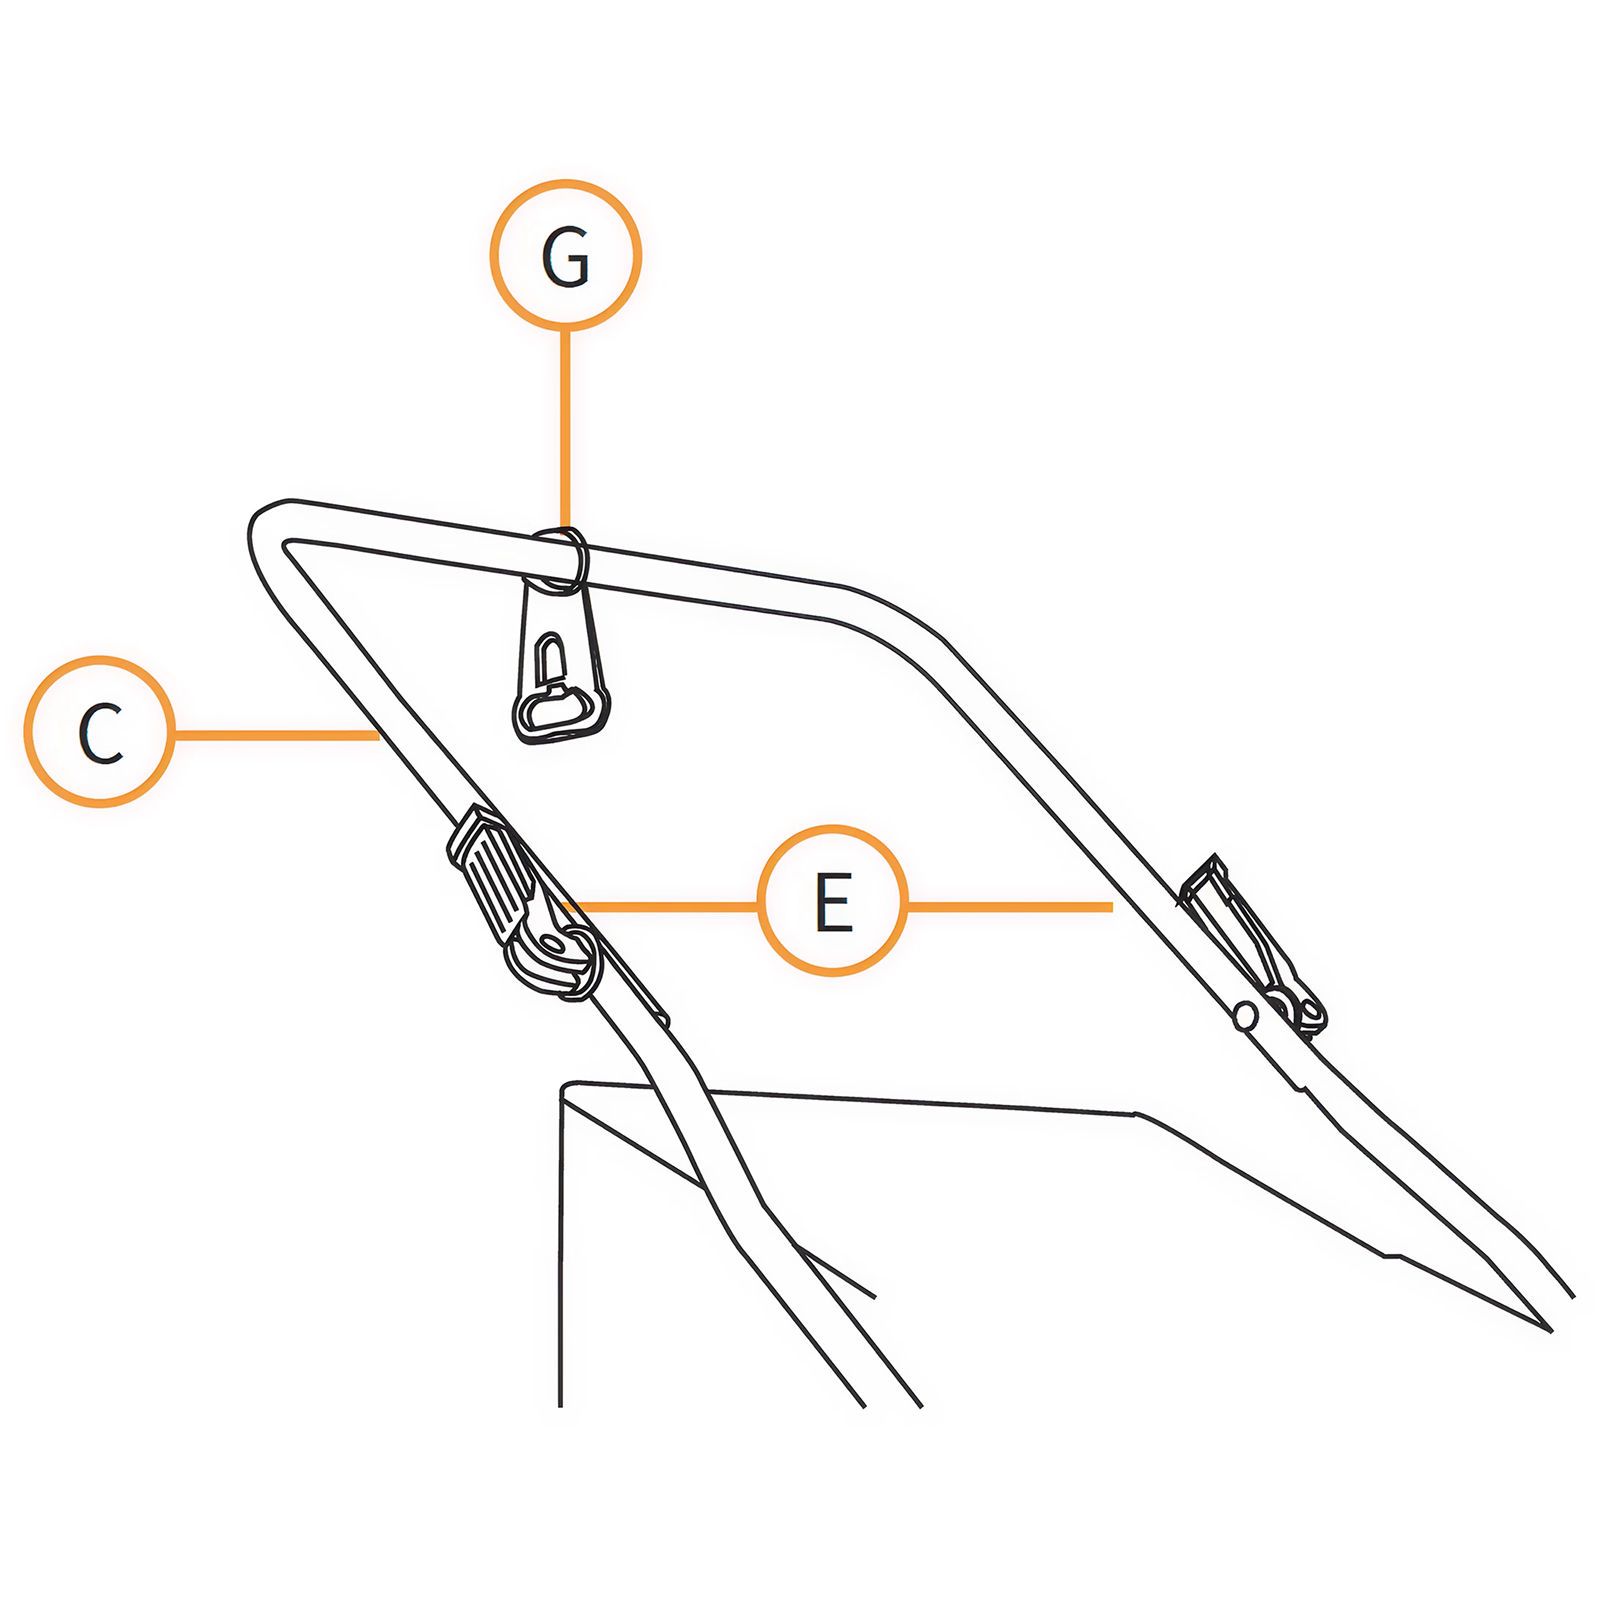
3. Assembling the Handle Middle Section
Slide the Power Cable Retaining Bracket (G) over the Handle Middle Section (C). Then attach the Handle Middle Section to the Handle Bottom Section using two quick release levers (E).
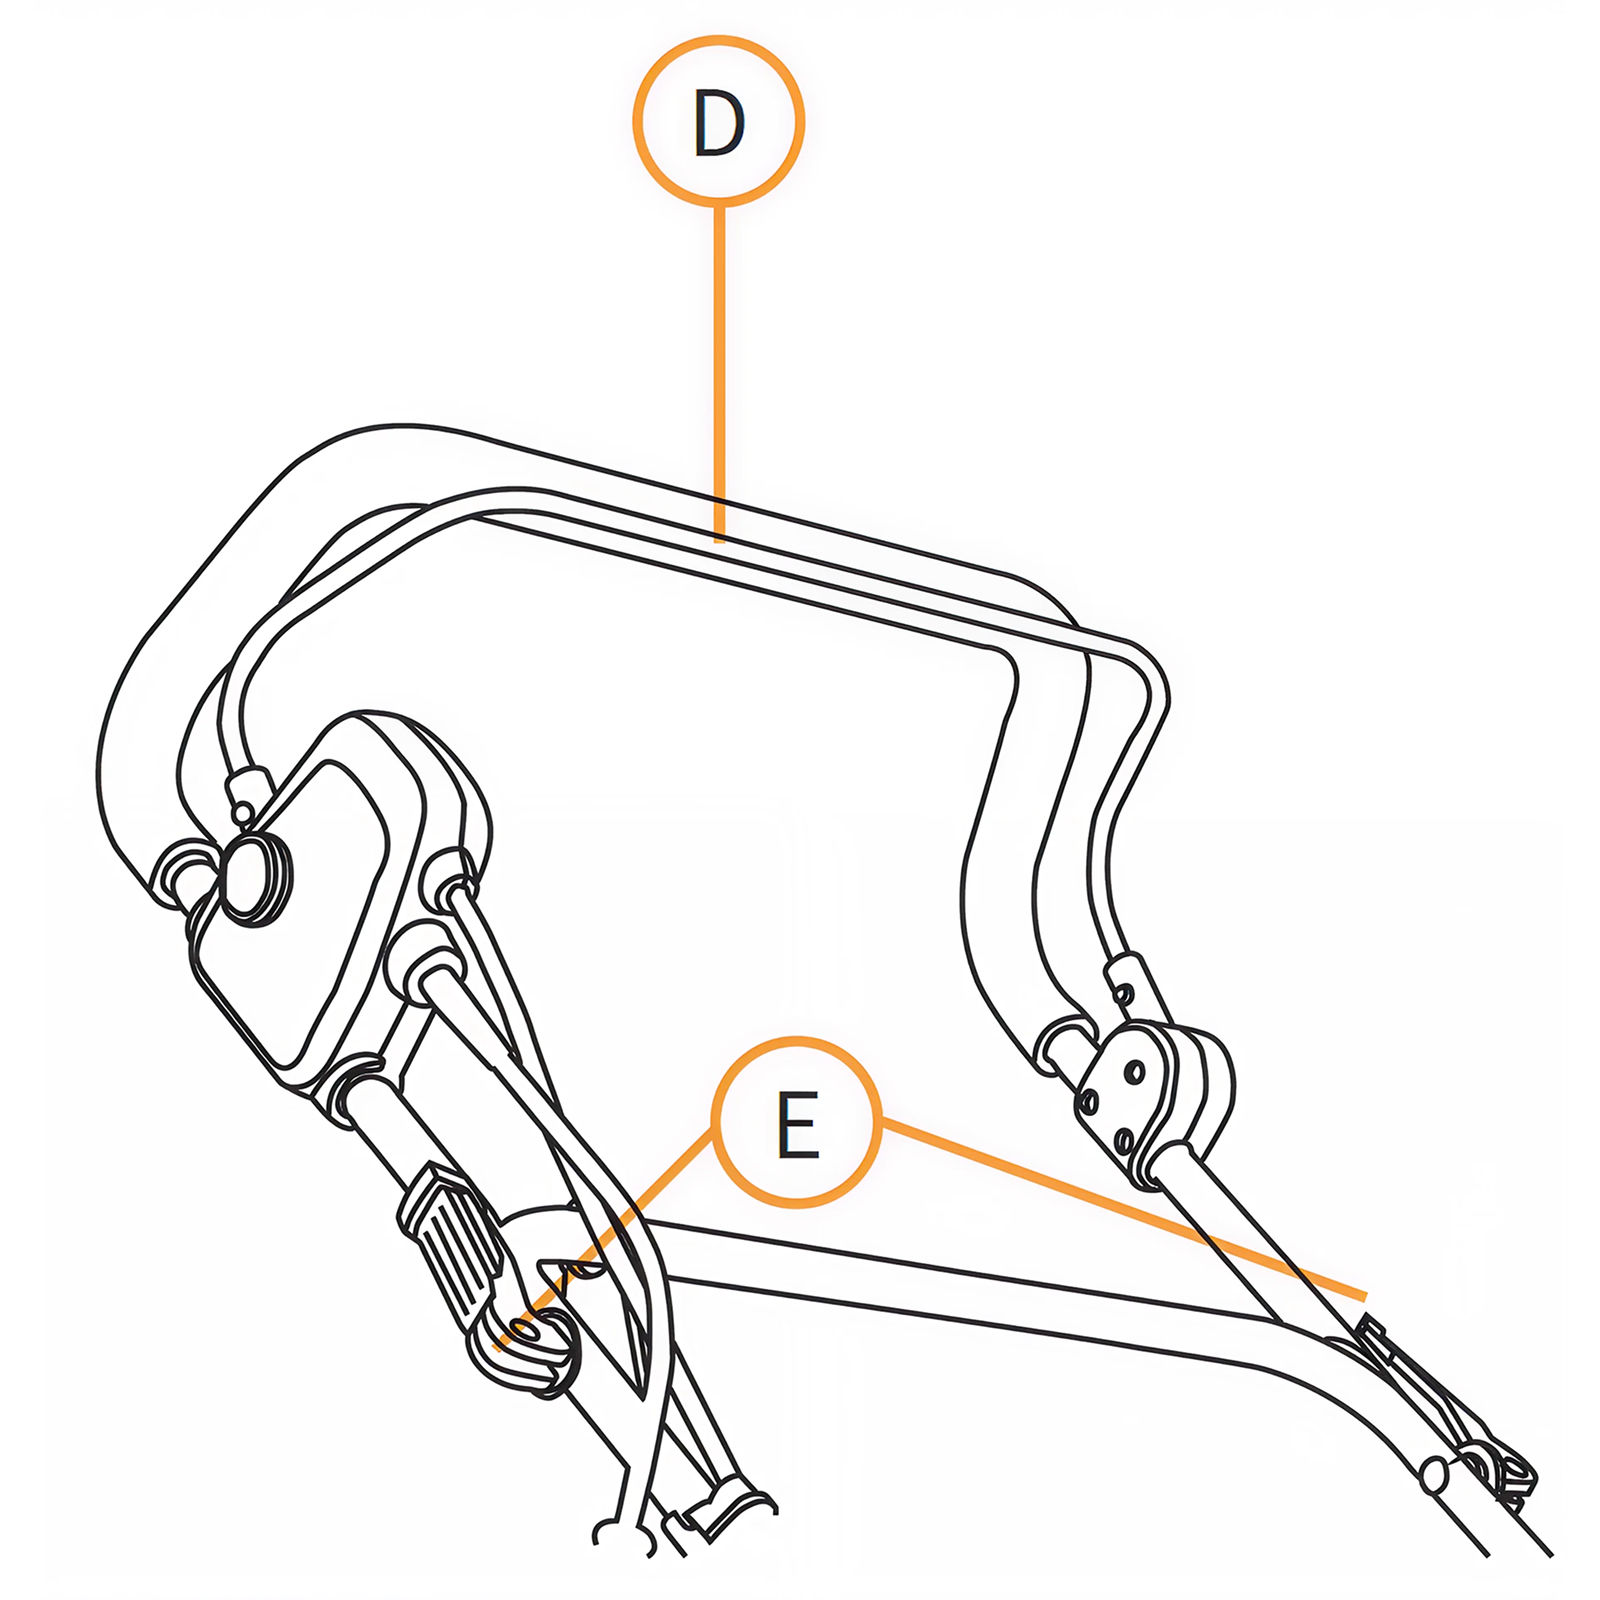
4. Attaching the Handle Top Section
Attach the Handle Top Section (D) to the Handle Middle Section using two Quick Release Levers (E).
5. Securing the Power Cable
Attach the power cable to the handle using the Power Cable Clip (H).
6. Assembling the Collection Basket
Place the Collection Basket Frame (I) into the Textile Collection Basket (J) and attach all fasteners to the left, right, and rear poles of the frame. Make sure that all fasteners are secured correctly.
7. Attaching the Collection Basket to the Vacuum
1. Lift up protective cover. 2. Make sure that the ejection chute is clear and free of debris. 3. Place the fully assembled collection basket onto the fastening points in the rear part of the chassis. 4. Place the protective cover on top of the collection basket and check it is seated correctly.
8. Starting the Vacuum
1. Press and hold the Safety Button (L). 2. Pull the Starting Lever (K) towards the handle. 3. Release the Safety Button.
9. Stopping the Vacuum
Release the Starting Lever.
10. Adjusting the Brush Head Height
Level 1: +6 mm Brush Height
Level 2: -3 mm Brush Height
Level 3: -6 mm Brush Height
Level 4: -9 mm Brush Height
Level 5: -12 mm Brush Height
11. Safety Cut-Out Reset
This vacuum is protected by a safety mechanism which is activated if the motor is overloaded, or the brush head is caught and cannot freely rotate. The safety mechanism will shut off the vacuum until the safety mechanism is reset.
To reset the mechanism:
Release the starting handle and unplug the vacuum.
Check the vacuum for any obstructions and remove if required.
Wait a few minutes and you can then restart the vacuum.
Do not press the starting handle while waiting as this will extend the safety mechanism reset time.
12. Maintenance
Always unplug the vacuum from the power supply before undertaking any maintenance.
The vacuum should be cleaned after every use.
Do not clean this vacuum under running water and do not use a pressure washer.
Do not use hard or pointed items for cleaning the vacuum.
Regularly remove accumulated debris from the wheels, brush head and cover.
Regularly check the vacuum for damage. If any damage is found, do not use the vacuum, and arrange for repair.
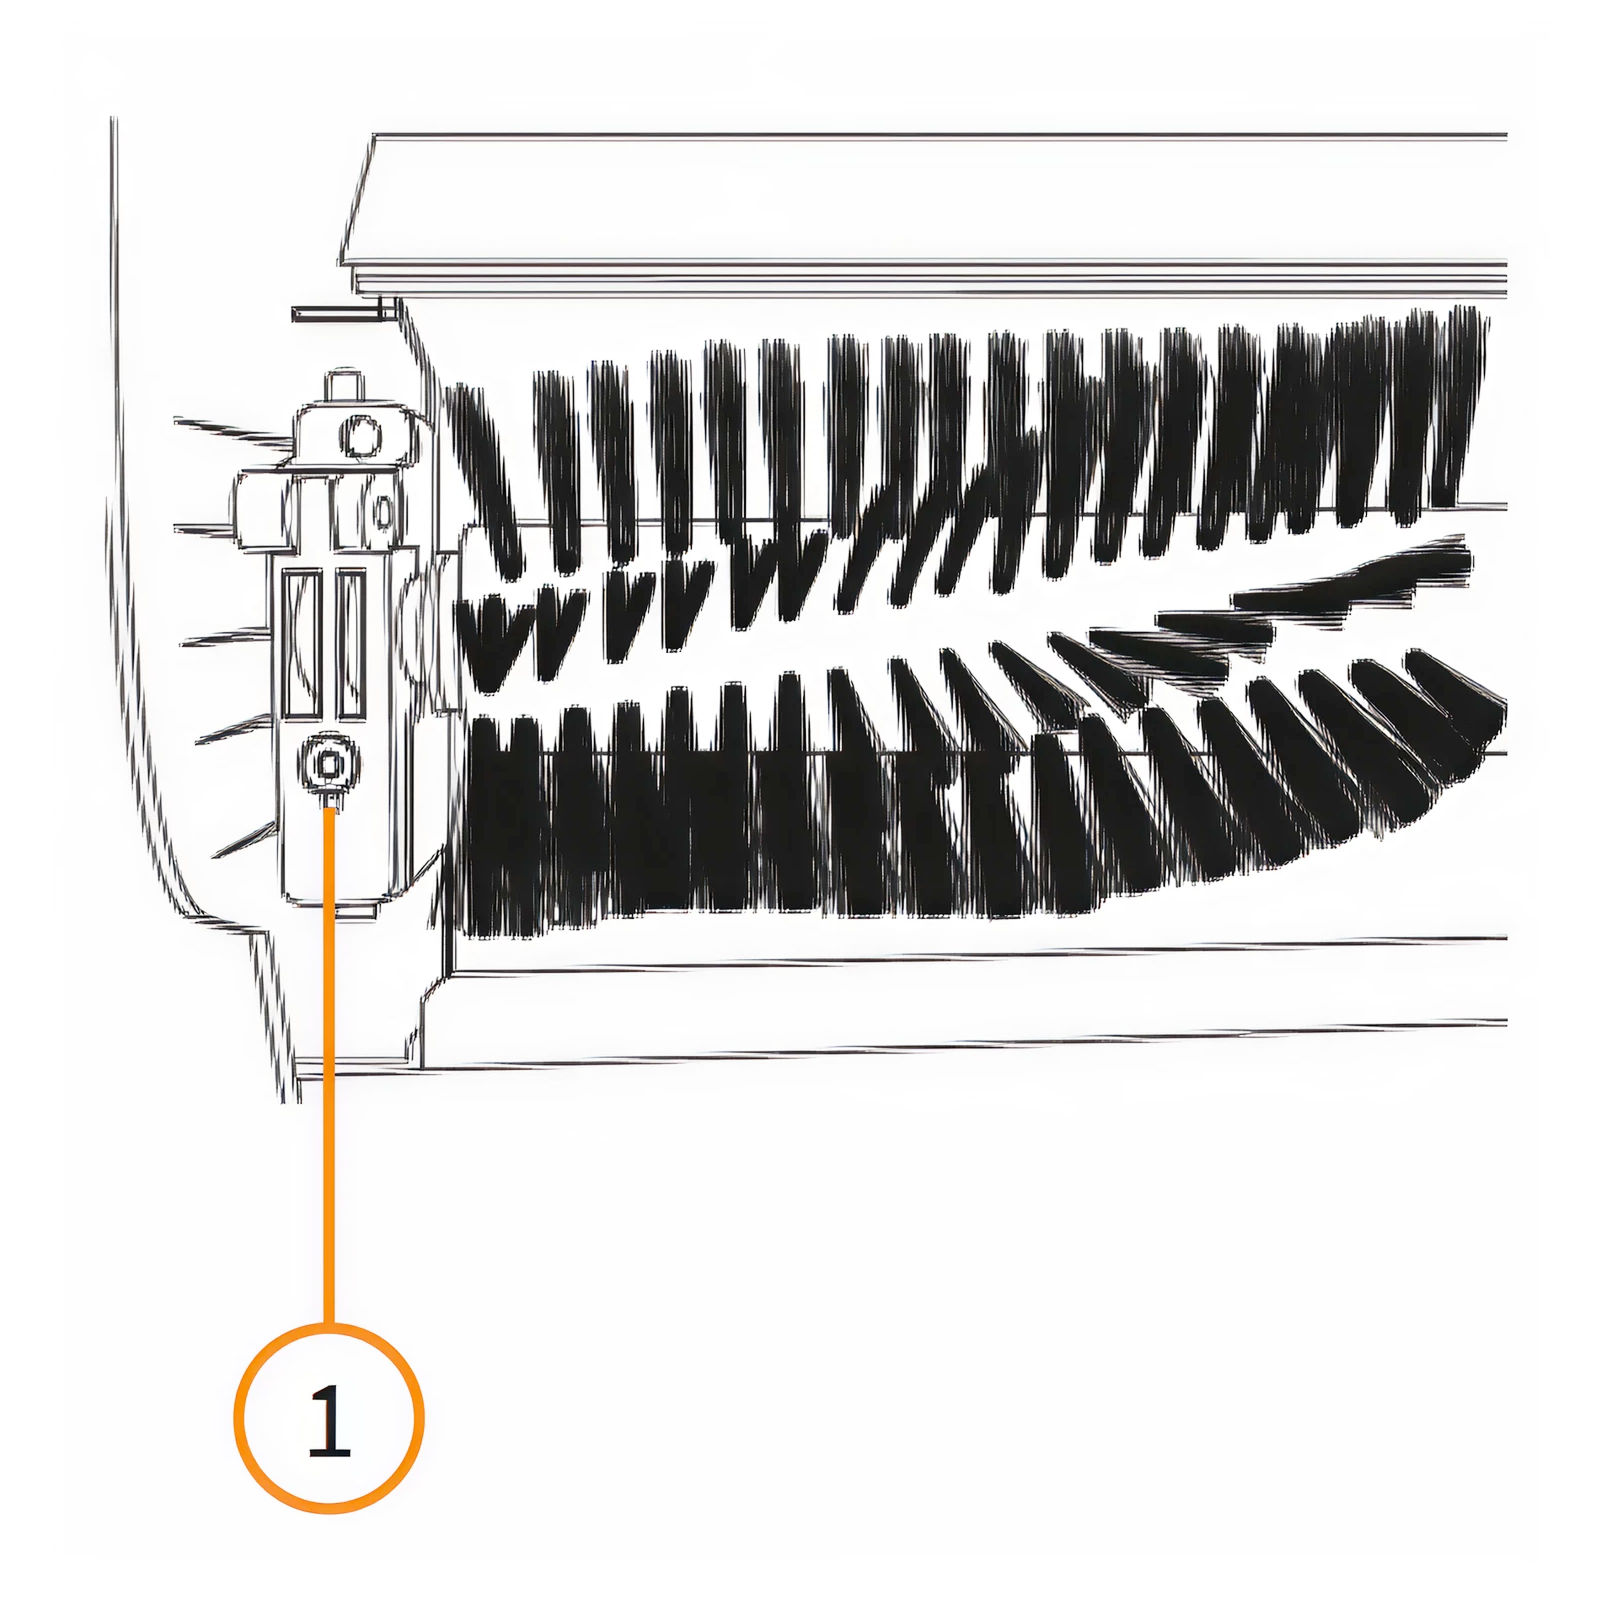
13. Replacing the Brush Head
Note: We recommend wearing gloves when replacing the brush head.
1. Disconnect the vacuum from the power supply. 2. Unscrew the brush head securing bolt (1) on the underside of the chassis. 3. Lift the brush at an angle and pull out. 4. Slide the replacement brush on to the drive shaft so that the guide pin on the brush head lines up with the corresponding part of the drive shaft. 5. Retighten the securing bolt (1) to secure the brush head.
14. Resolution Guide
WHAT DO I DO IF THERE ARE MISSING PARTS FROM MY ORDER?
If there appears to be any part missing from your order, contact our friendly and helpful Customer Support Team within 7 days of receipt.
WHAT DO I DO IF THE VACUUM WON’T TURN ON?
First, check the vacuum is plugged into the power supply and there is no damage to the power cable or fuses. Also, ensure you are pressing the safety button before you pull the starting lever. If this doesn’t resolve the problem, please call the Customer Support Team. Details on the Contact Us page.
WHY IS THE VACUUM NOT PICKING UP DEBRIS?
Try lowering the brush head closer to the surface. If this does not resolve the issue, then check that the collection basket is not full and empty if required. Also, check that there is not excessive debris entangled in the brush head and clean if required.
FOR ALL OTHER ISSUES, PLEASE CONTACT OUR CUSTOMER SUPPORT TEAM.