The T-Mech Dent Puller is a versatile and efficient solution for repairing dents of various sizes. Designed with advanced spot-welding technology, it offers multiple welding modes to tackle both small and large dents with precision and ease. Whether you're a professional auto body technician or a DIY enthusiast, this tool ensures reliable performance, making dent removal faster and more effective.
* Product Size: 24.5cm (H) x 20.3cm (W) x 29.8cm (D)
* Product Weight: 21.2kg
* Voltage: 220V
* Power: 3KW
* Welding Thickness: 0.6mm to 1.6mm
* 7 Welding Modes
Manufacturer: Monster Group UK Limited, Monster House 19-23 Alan Farnaby Way, Industrial Estate Sheriff Hutton, York YO60 6PG
Person Responsible: Rana Harvey, Monster Group UK Limited, Monster House 19-23 Alan Farnaby Way, Industrial Estate Sheriff Hutton, York YO60 6PG, England, +441347878880
EU
Manufacturer: Monster Group BV, Van Heemskerckweg 28A & B, Venlo 5928LL Netherlands +441347878880
Person Responsible: Rana Harvey, Monster Group BV, Van Heemskerckweg 28A & B, Venlo 5928LL, Netherlands, +44134787888
Parts
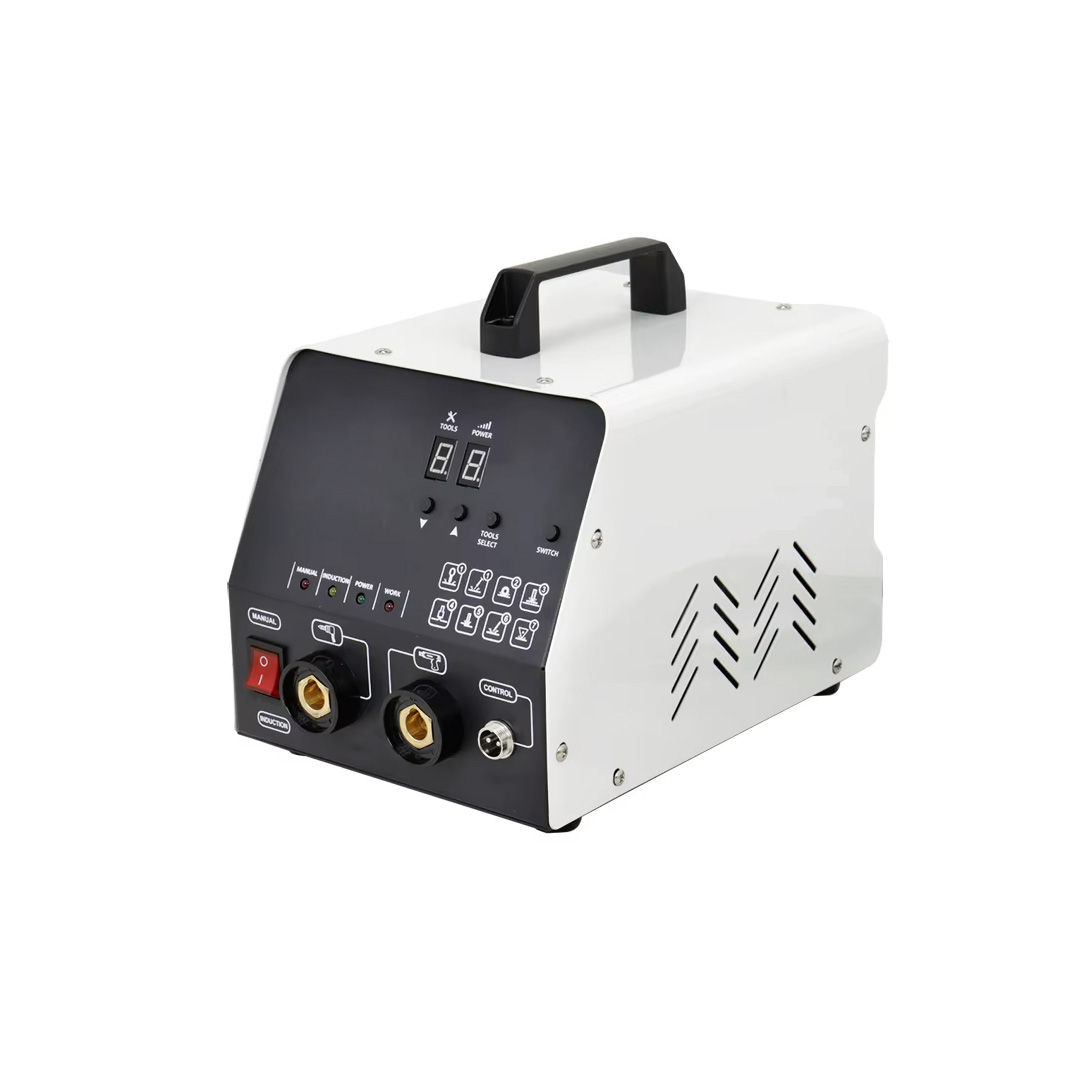
Dent Puller Machine
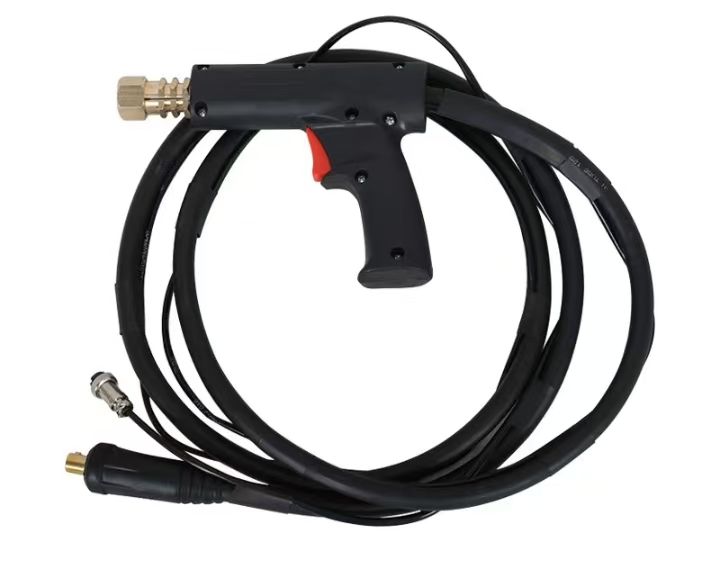
Welding Gun + Cable
Negative Wire
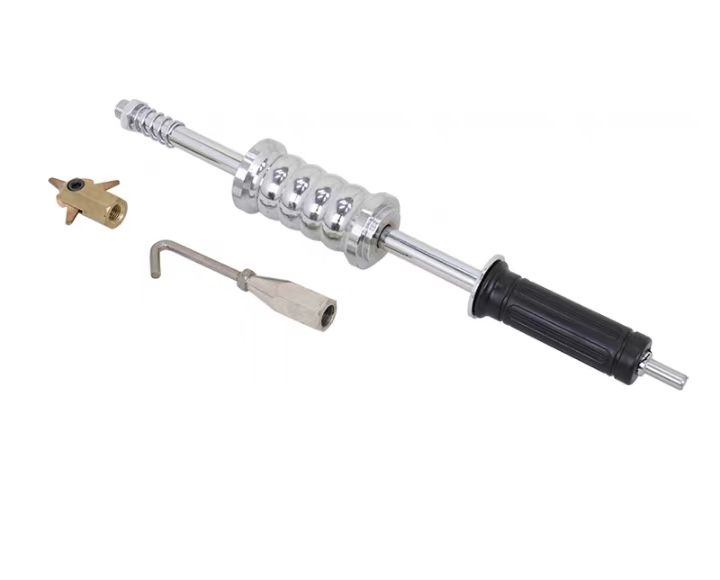
Dual-usage Pulling Hammer
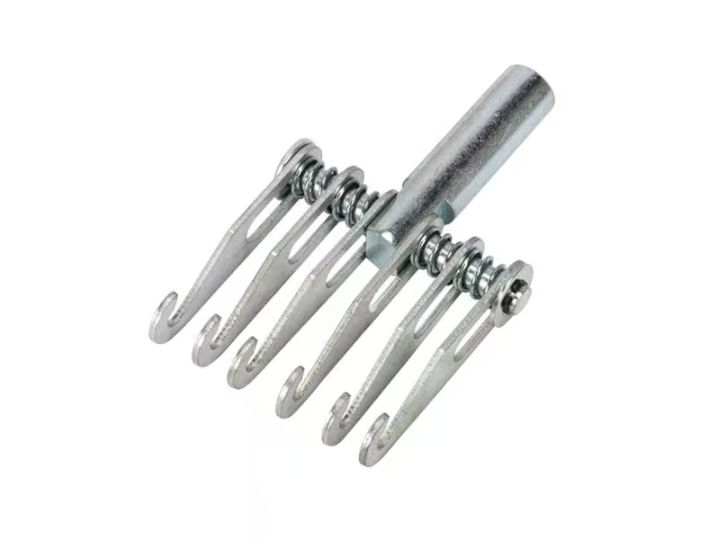
Multi-Claw Pulling Hook
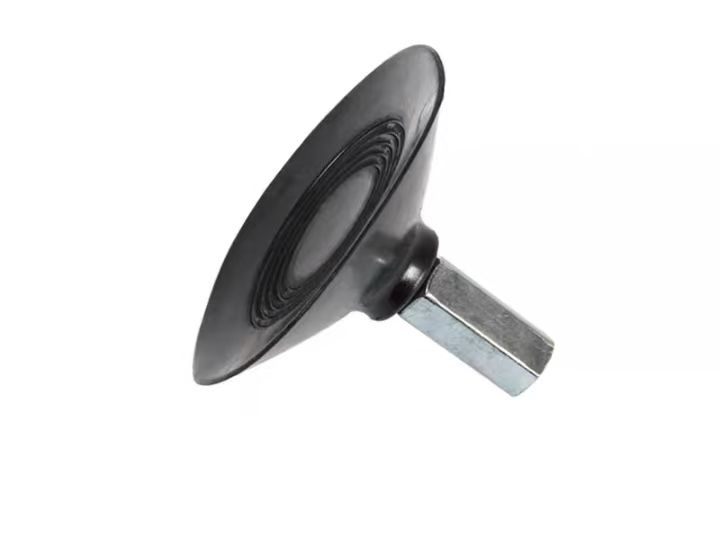
Sucker
Triangle Connector
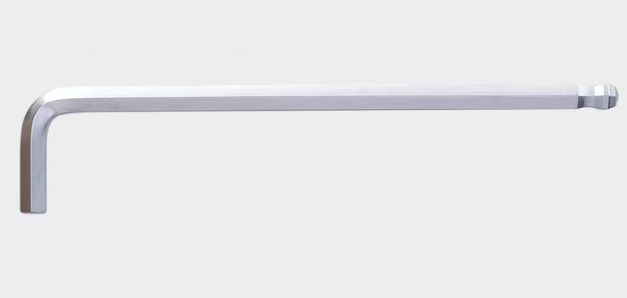
T-rod
Circular Welding Pieces
Corrugated Line
Dual-Usage Spot Welding Head
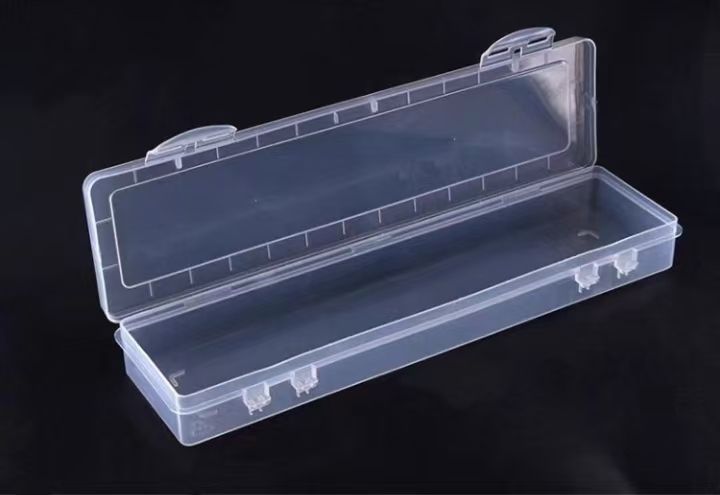
Accessories Box
1. Precautions for Power-On
Ensure the product is properly connected to the grounding wire, and verify that the grounding wire is in good condition. Any screw on the machine casing can serve as a grounding point.
Ensure the workbench is properly connected to the grounding device. Any screw on the machine casing can serve as a grounding point.
Prevent the operator from coming into contact with metal parts to be welded if no protective measures are in place or when wearing wet clothing.
Avoid direct contact with the welding area.
Do not perform spot welding in excessively humid environments or on wet floors.
Do not use cables that are frayed, cut, or damaged. Inspect cables for insulation defects, exposed copper wires, loose connections, leaks, or any other unsafe conditions before use.
Turn off the machine before replacing the electrode wire.
Always turn off the machine and unplug it from the power supply before performing any inspections or maintenance.
Ensure the power supply meets the machine's standard requirements.
Use a copper-core power cord with a national standard of at least 4 square millimetres in cross-sectional area and a maximum length of 20 metres.
Use an air switch or leakage protector rated at 60A or above.
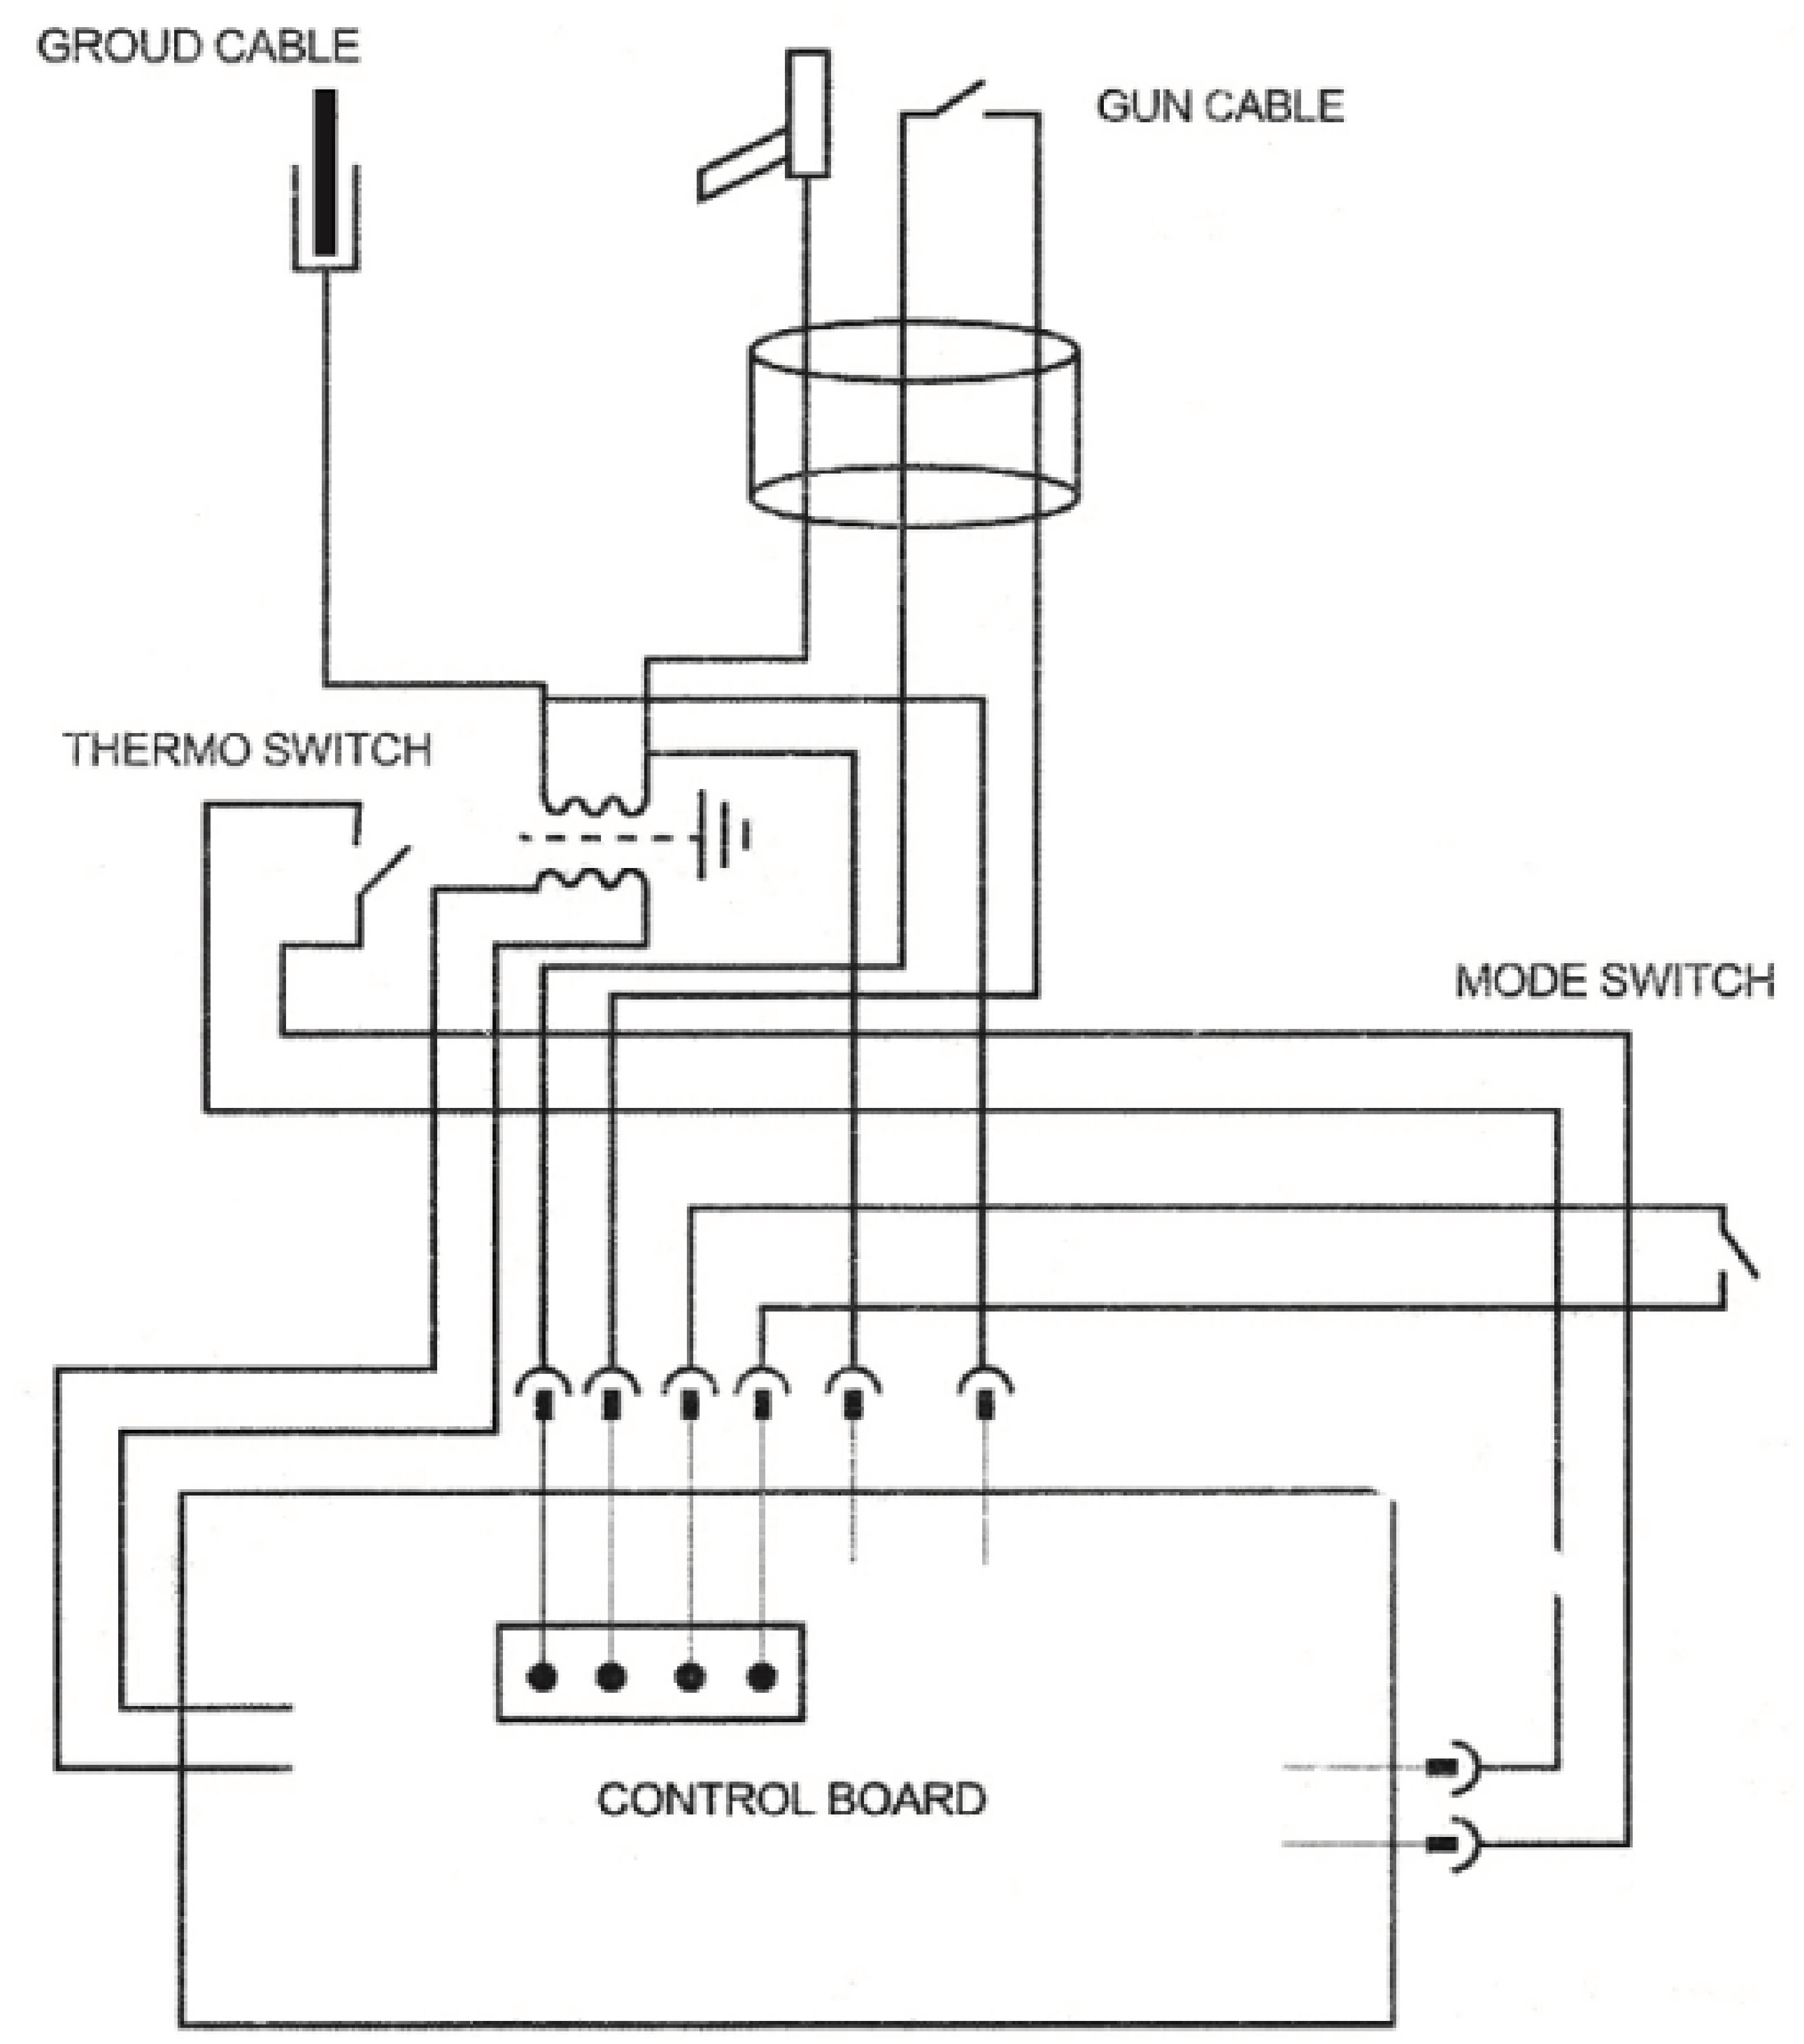
2. Circuit Schematic
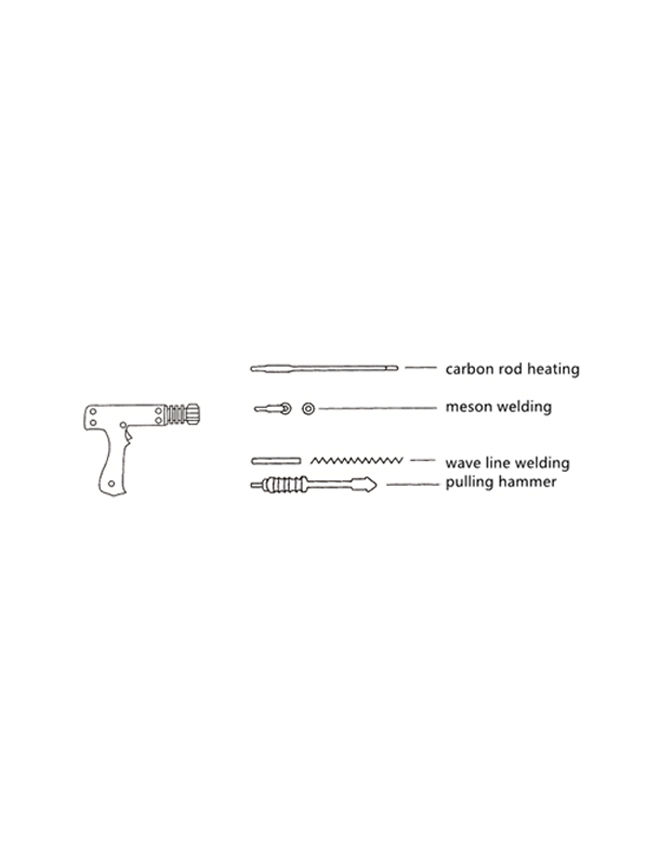
3. Function of Each Part
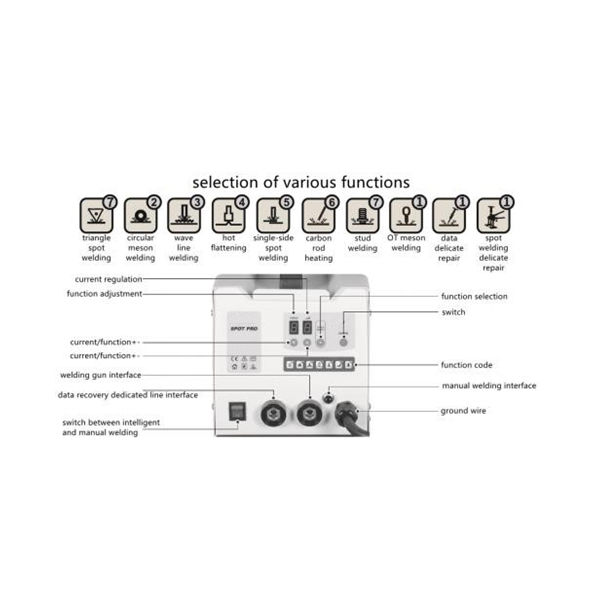
4. Panel Operation
1\. Connect the product to a suitable power source, and then press the switch to display: function (left) power (right)
2\. To adjust the power intensity (current size), press the + or - button
3\. To change the function, press the function selection key. At this time, you can use the + and - buttons to select the function number.
4\. Manual welding and intelligent welding:
When using manual control, connect the torch switch connector and switch the switch to manual mode.
When using smart mode, there is no need to disconnect the torch switch connector and switch the switch to smart mode.
5. Grounding Operation
1\. Put the grounding wire in the position that needs to be repaired.
2\. Put the welding torch near the ground wire for welding.
3\. Tighten the nut of the grounding head.
It is strictly forbidden to replace other styles of grounding devices - The original grounding device is the most suitable one among all the current grounding devices. The tip of the grounding device is only used for fixing, and the copper nut plays the role of conduction. Be sure to screw the nut tightly and firmly.
6. Welding Operation
The machine can be welded manually/automatically, and the host automatically detects the short-circuit condition of the welding gun, and a welding spot is generated within 1 second. Disconnect the welding gun and the welding part for 0.5 seconds, then the next point can be welded, and others can be welded in sequence. When switches to manual mode, use the gun switch to control welding.
Welding technique - The welding can be very firm with a light touch. Excessive force is not necessary.
7. Host Overheating Protection System
The product is equipped with an automatic overheating protection system, which can automatically stop the machine for a few minutes in the case of excessive use. In this case, the buzzer will continue to sound.
8. Automatic Pulse System
The product is equipped with an automatic pulse system (function 4 and 6). Contact the welding gun fully with the steel plate, and the host automatically detects the short circuit of the welding gun, and starts to work in 1 second, reducing the degree of carbonisation of the body and improving work efficiency.
9. Maintenance
Safety Precautions
Always disconnect the machine from the power source before performing any maintenance.
Wear appropriate personal protective equipment (PPE) such as gloves and eye protection during maintenance.
Ensure the machine is cool to the touch before beginning any work to avoid burns.
Routine Inspection Schedule
Daily:
Check the accessories for wear and tear. Replace if necessary.
Inspect all visible cables and connectors for damage or loose connections.
Weekly:
Verify the integrity of all moving parts and mechanisms. Lubricate as required.
Check the seals and gaskets on the machine's vacuum system and replace if they show signs of deterioration.
Monthly:
Conduct a comprehensive test of the machine’s safety features, such as emergency stops.
Review the entire machine for any signs of unusual wear or potential failures.
Cleaning Procedures
1. Exterior Cleaning:
Wipe down the machine with a damp cloth.
Avoid using abrasive cleaners that can damage the paint or finishes.
1. Component Cleaning:
Clean the accessories and any exposed or moving parts using a mild detergent solution.
Dry all parts thoroughly before reassembling and restarting the machine.
Lubrication Guidelines
Lubricate all moving parts monthly with a silicone-based lubricant to ensure smooth operation.
Do not over-lubricate, as excess lubricant can attract dirt and debris, which may impair function.
FOR ALL OTHER ISSUES, PLEASE CONTACT OUR CUSTOMER SUPPORT TEAM.
10. Troubleshooting
WHAT DO I DO IF THERE ARE MISSING PARTS FROM MY ORDER?
If there appears to be any part missing from your order, contact our friendly and helpful Customer Support Team within 7 days of receipt.
FOR ALL OTHER ISSUES, PLEASE CONTACT OUR CUSTOMER SUPPORT TEAM.