This guide provides step-by-step instructions for assembling, operating, and maintaining your Towel Rails.
Product Information
Towel Rails
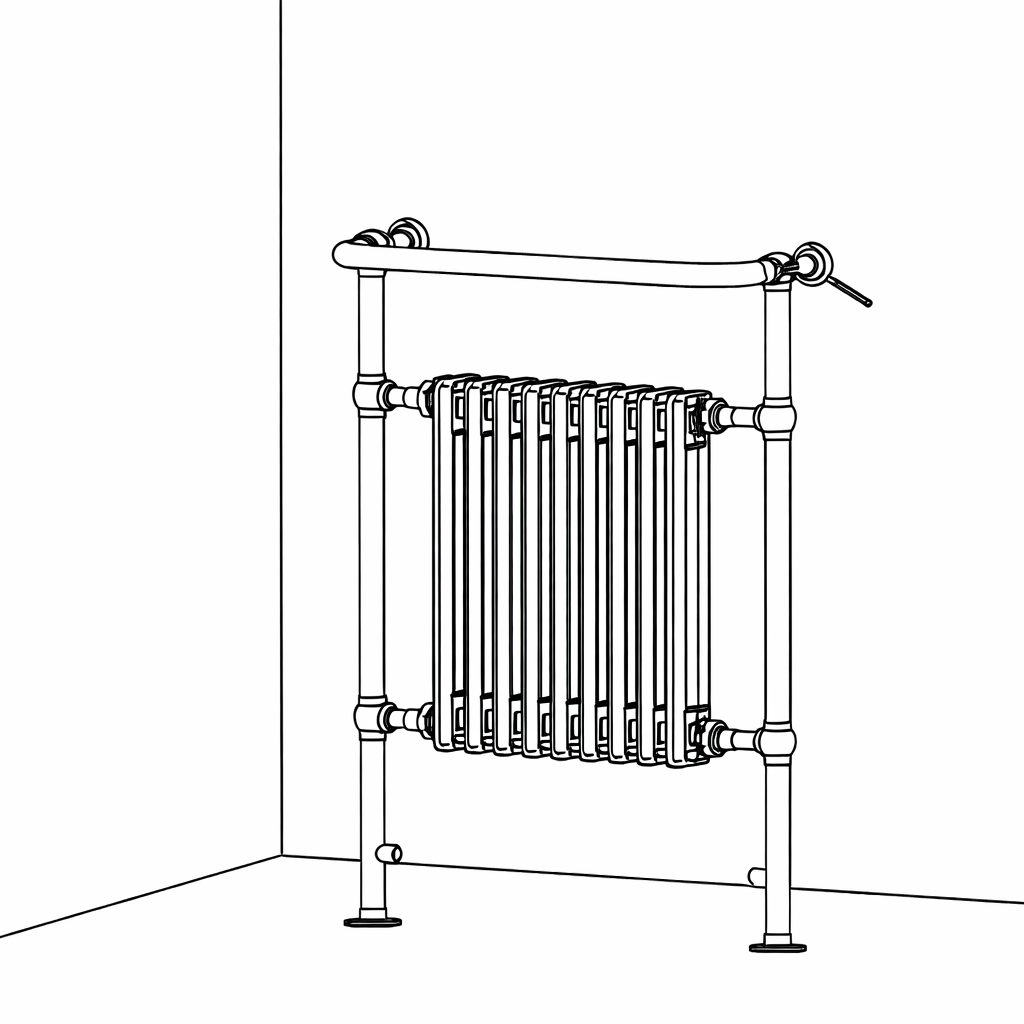
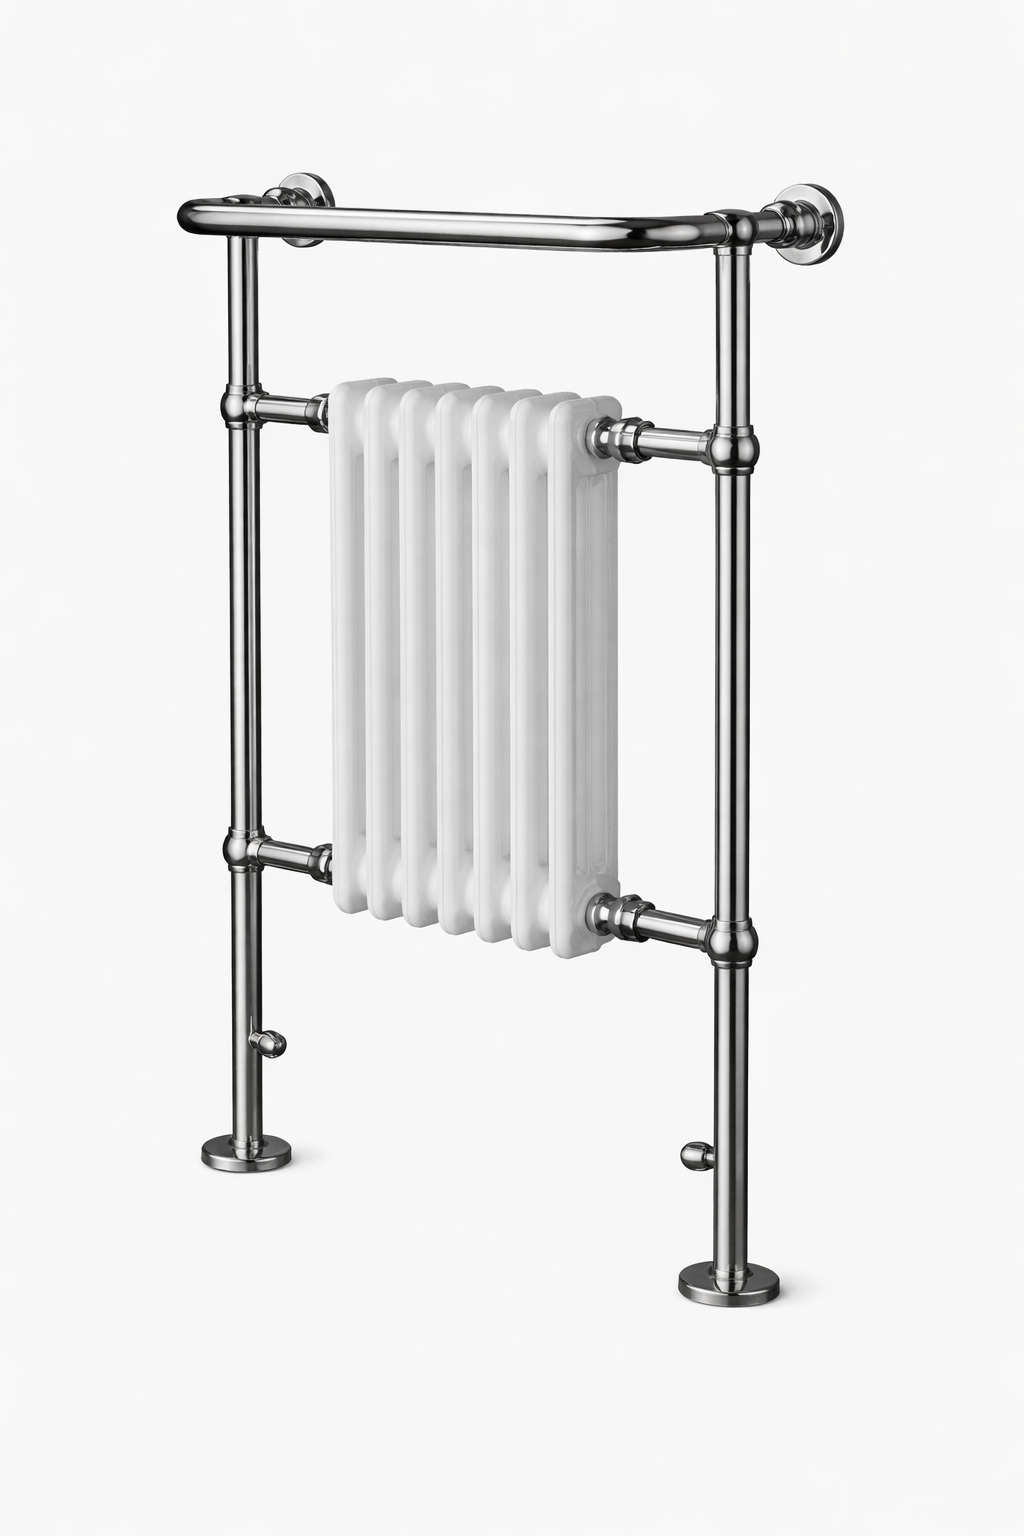
Our Heated Towel Rails combine timeless elegance with practical warmth, making them the perfect addition to any bathroom or cloakroom. Crafted from durable materials with a polished finish, they provide efficient heat output while keeping your towels dry and comfortably warm. Designed for connection to closed central heating systems, these towel rails must be installed by a qualified professional to ensure safe and reliable operation.
SKU
40908,40909,40910,40911,40912,40913
Materials
Steel with Chrome Plating & Powder Coating
Sku's
40908 / 40911
Dimensions
952 x 479 x 183 mm
Weight
11.2kg
GPSR Information
UK
Manufacturer:
Monster Group UK Limited, Monster House
19-23 Alan Farnaby Way,
Industrial Estate Sheriff Hutton,
York
YO60 6PG
Person Responsible:
Rana Harvey, Monster Group UK Limited,
Monster House
19-23 Alan Farnaby Way,
Industrial Estate Sheriff Hutton,
York
YO60 6PG,
England,
+441347878880
EU
Manufacturer:
Monster Group BV,
Van Heemskerckweg 28A & B,
Venlo 5928LL
Netherlands
+441347878880
Person Responsible:
Rana Harvey,
Monster Group BV,
Van Heemskerckweg 28A & B,
Venlo 5928LL,
Netherlands,
+44134787888
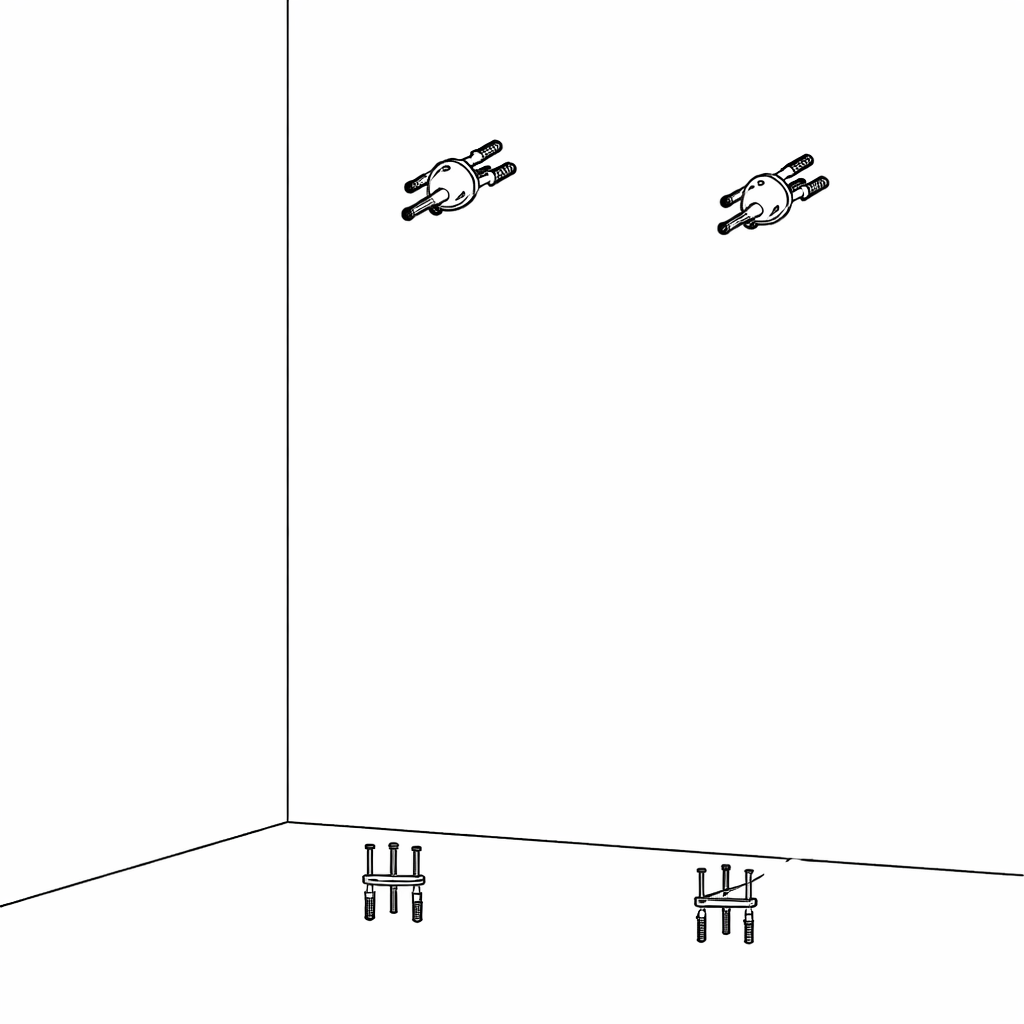
Parts
Body
Brackets
Screws
Wall Plugs
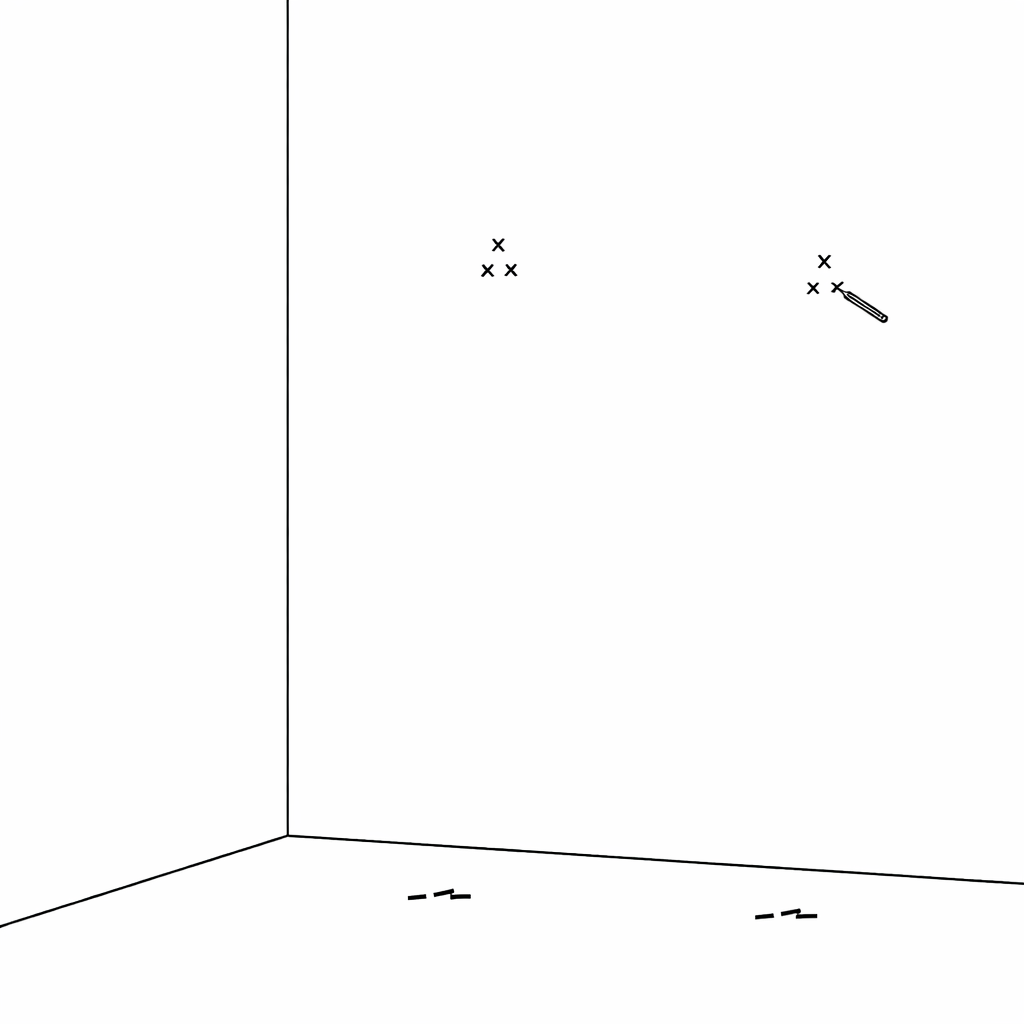
1. Step 1 - Position the Radiator
Place the radiator where you want it and hold it into position.
Mark the wall where the wall brackets will go.
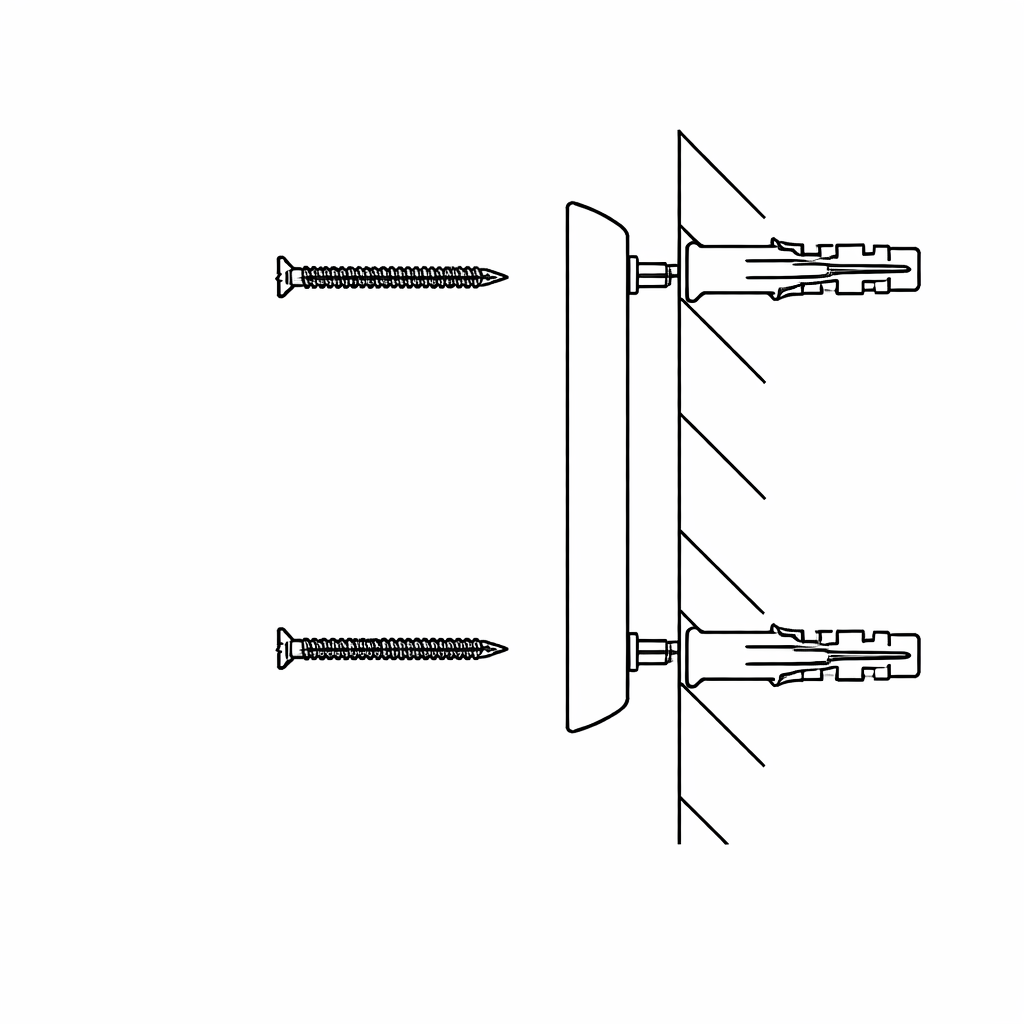
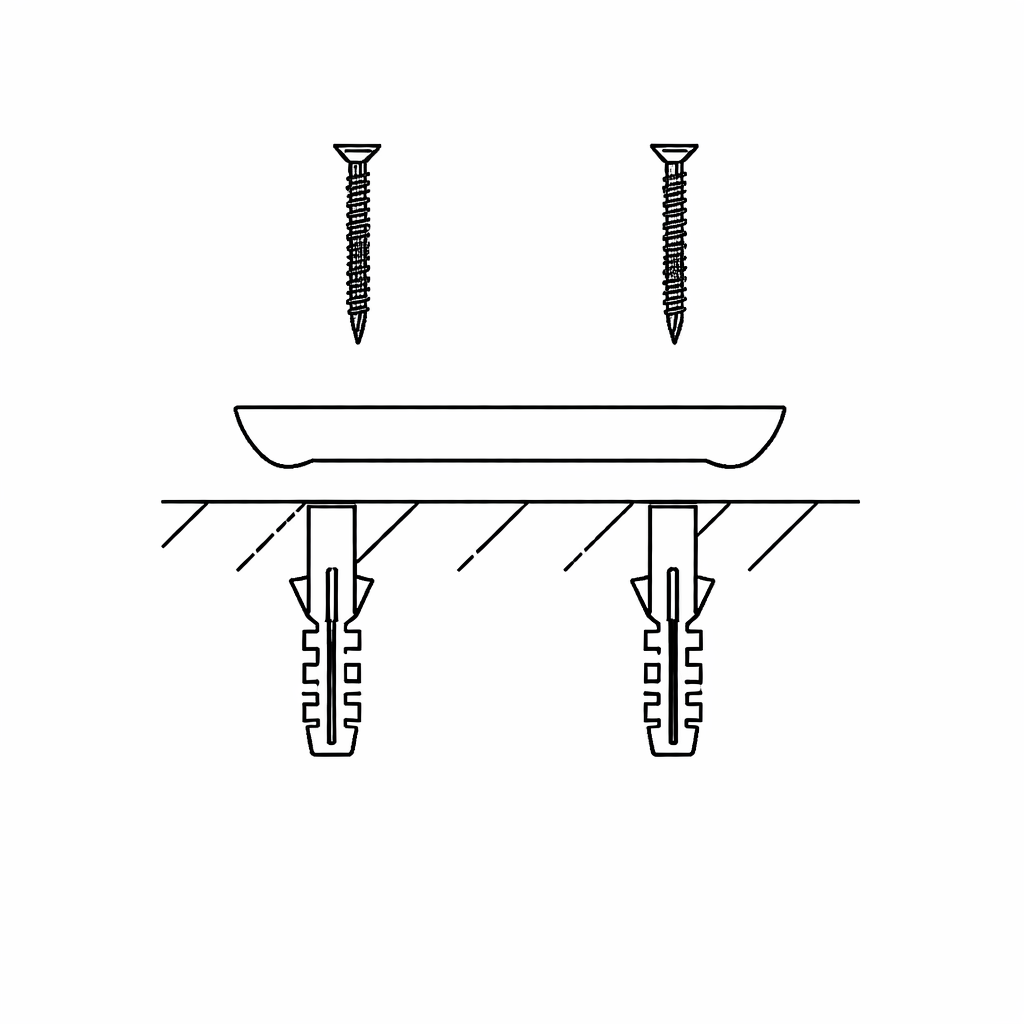
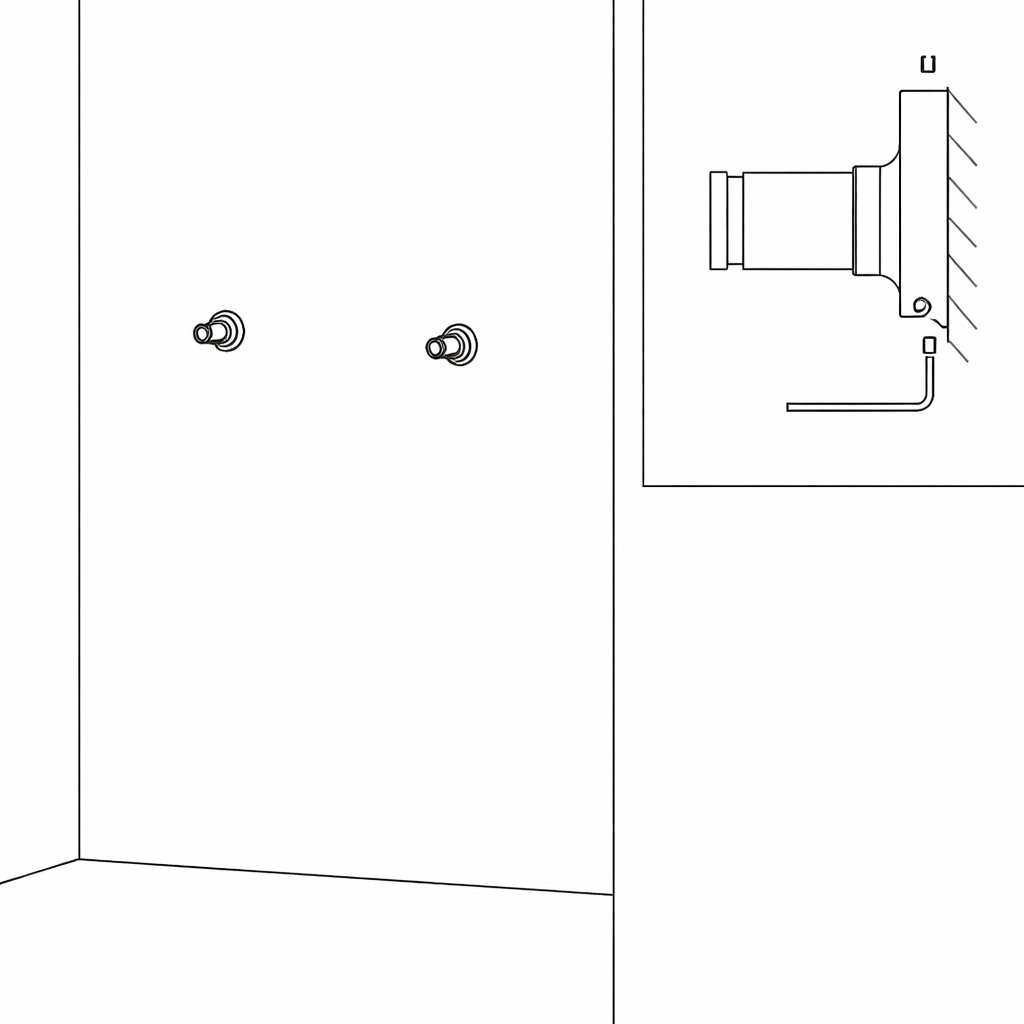
2. Step 2 - Insert the Wall Plugs and Brackets
Drill holes in to the marked spots.
Insert the wall plugs into the drilled holes.
Screw the brackets securely into the wall.
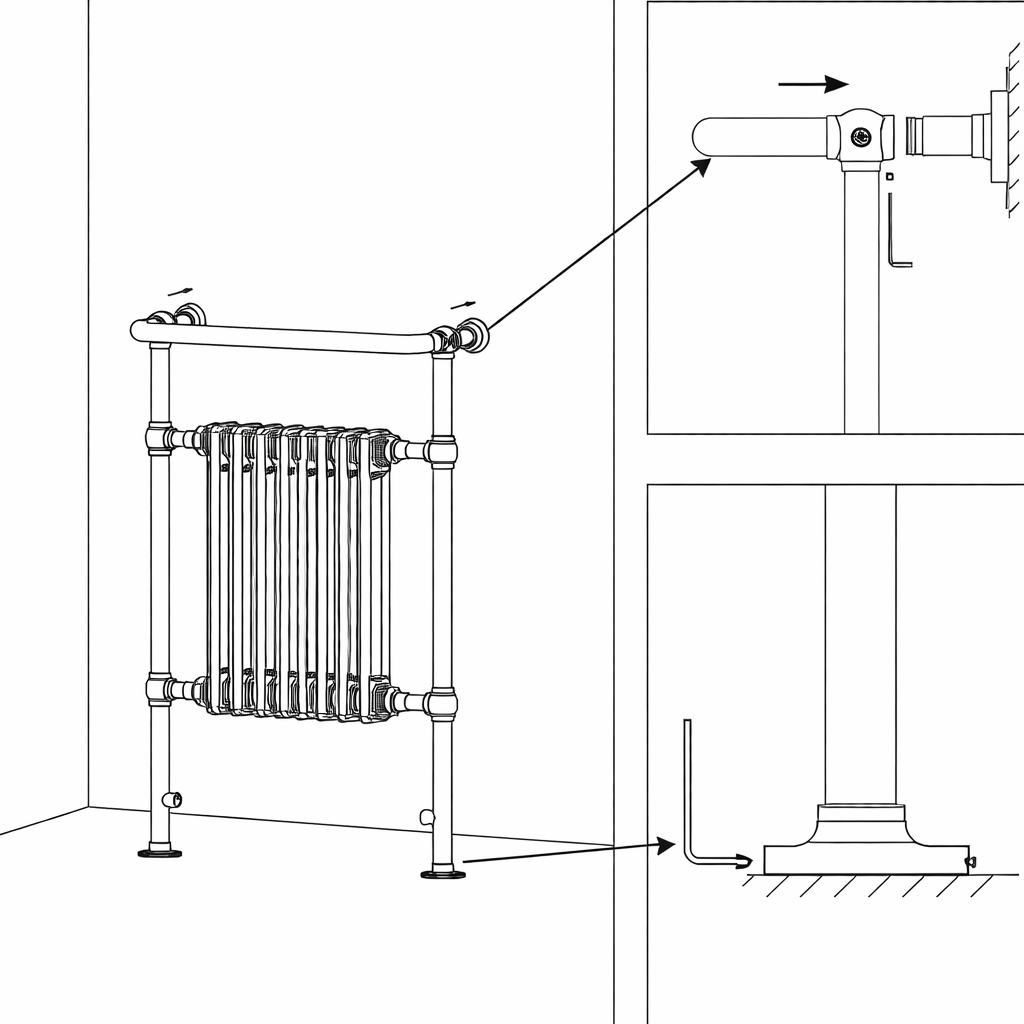
3. Step 3 - Attaching the Radiator
Attach the radiator to the brackets.
Tighten all of the screws and fittings.
Connect the radiator to your heating system.
Make sure the radiator is straight and firmly fixed.
4. Maintenance
Regularly inspect the radiator, pipework, and valves for any signs of leaks, corrosion, or damage. Any issues should be addressed by a qualified professional.
Ensure the system pressure is maintained within the range specified by the boiler manufacturer.
Do not use chemical cleaners or de-scalers that are not explicitly approved for use with aluminium radiators, as incompatible substances may cause internal damage or corrosion.
If the radiator will not be used for an extended period, ensure the heating system is properly maintained to prevent corrosion and system failures.
This product can only be used at PN 1MPa (10g/cm2 , 10 Bar). It should only be filled with water, and at a temperature below 100°C (212°F).
If the temperature exceeds 48°C (or 120°F), please provide a warning sign near the product to avoid accidental burning.
To ensure you can enjoy your radiator for as long as possible, it is essential you first flush your heating system with a central heating cleanser, this will clear any waste from the system. Following the cleansing of the system you must protect the system with a central heating inhibitor. These two simple steps will greatly increase the efficiency and lifespan of your central heating system. Failure to complete these steps increases the chances of pinhole leaks, and will also invalidate the guarantee on your radiator.
5. Troubleshooting
Please read through the guide below if you have any issues or faults with your device. The information covers and resolves the majority of frequently asked questions.
Q: There are parts missing from my order. A: If there appears to be any part missing from your package contact our Customer Support team via the details on the Contact Us page within 7 days of receipt.
For all other issues please contact our Customer Support department via the details on the Contact page.